Many laptops nowadays come with a keyboard lock feature which can be enabled or disabled through a combination of keys. This feature is essential to prevent accidental keypresses while performing specific tasks.
Several factors, from switching the device to tablet mode, driver issues, or third-party keyboard software, may lock your Dell laptop’s keyboard.
To fix this, press the required key combination to disable the lock or change the device to laptop mode. If changing these settings does not work, you can perform the following fixes to make your Dell Laptop’s keyboard responsive again.
Check for Fn Key Lock
If only the Function row isn’t working, the Fn key lock might be causing this problem. The Fn key, combined with another key, can cause the Function row to become locked.
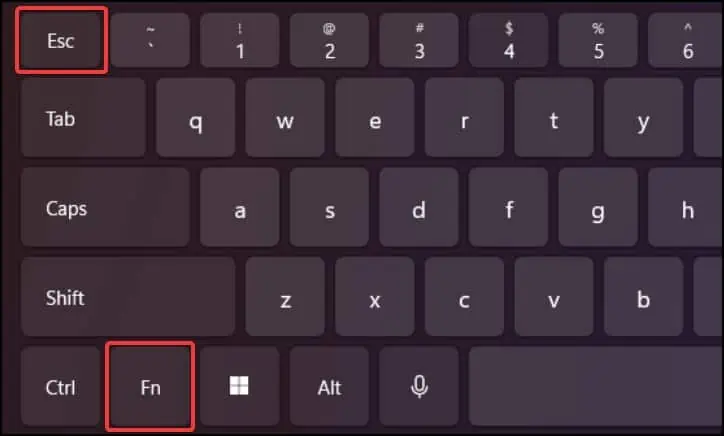
To fix this, press the (Fn + Esc) keys to disable the Fn key lock. The unlocking combination may differ depending on your device model. You can check your device’s support page or the instruction manual to get detailed information on the key combination.
Run Dell SupportAssist
Another general fix is to run the Dell SupportAssist application. This software can diagnose any hardware or software-related issue of your Dell laptop. By running this, you can check and resolve any problems related to the keyboard.
- Open the Dell SupportAssist application
- Click on the Troubleshooting tab
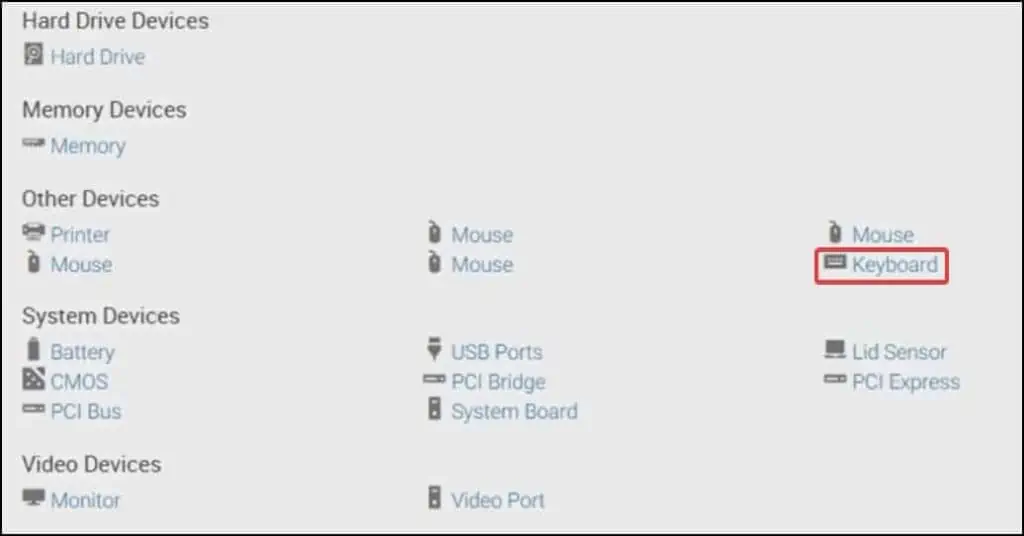
- Select “I want to check a specific piece of hardware”

- Scroll down and select the Keyboard from the list

- On the new window, perform the tasks as displayed on the screen
- If you find an issue, you can try and address it manually or contact Dell for further assistance
Change Device to Laptop Mode
If you use your Dell laptop in tablet mode, that may cause the keyboard to stop responding or become locked. To fix this, you will need to switch your device back to laptop mode from tablet mode.
For devices running Windows 10,
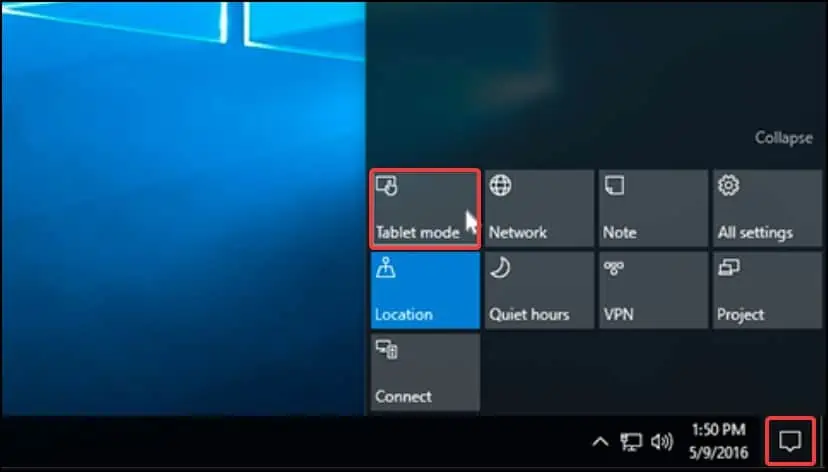
- Click on the Action Centre from the taskbar
- Click on Tablet mode to disable the function

- Check if you restore the keyboard functionality
For devices running Windows 11, you can restore the keyboard functionality by simply reposing the device back to laptop mode.
Unlock using Num Lock
If only the number pad isn’t working, check if the Num lock key is disabled. If that is the case, the keys will perform their alternate function instead of typing numbers.
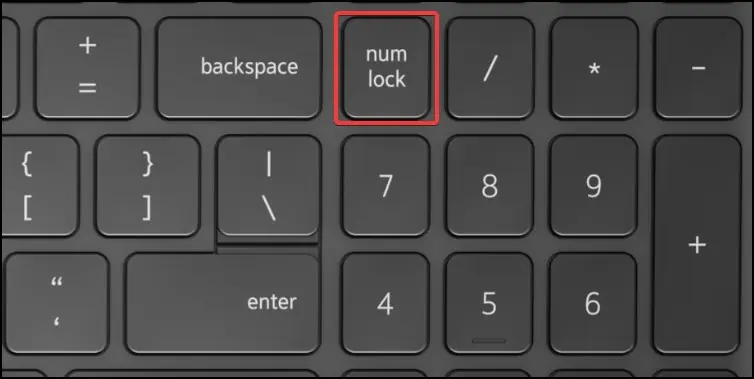
To fix this, press the key and see if the Num Lock light turns on. If the light is on, press the number keys again to check if they work.
Disable Filter Keys
Your Dell laptop’s keyboard might respond slowly or not register any keys pressed if you have enabled the Filter keys setting. Disabling this function can restore the responsiveness of the keyboard.
Depending on the type of filter keys enabled, you may need to press them for a long time or press them after a certain period to register them.
- From the lock screen, click on the Accessibility option
- Toggle Filter keys to Off from the menu

- Log in normally and check if the solution worked
Reinstall Drivers
The issue may also arise if drivers are corrupt or malfunctioning. To fix this, you will need to reinstall the keyboard drivers and then restart your device to restore the keyboard functionality.
- Press the Windows key + R to open Run
- Type
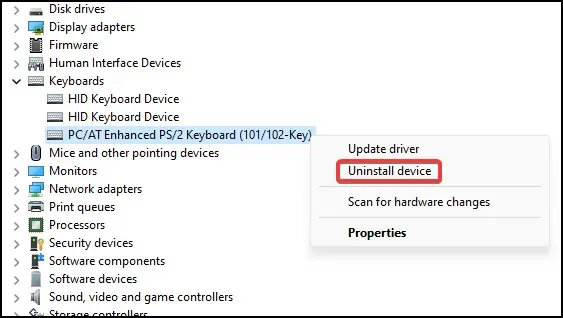
devmgmt.mscto open the Device manager - Expand the Keyboard label by double clicking on it
- Right click on the affected device and select Uninstall device

- On the confirmation window, select Uninstall again to begin the uninstallation
After uninstalling, restart your device normally. The generic keyboard drivers will be installed automatically during the booting process. After the device boots successfully, check and see if the keyboard works properly.
Uninstall Third Party Applications
If you have third-party programs installed on your device, they may cause issues like keys freezing, keys being bound to nothing, or problems with the device drivers. If you have an app you do not recognize or have installed recently; it may be causing your Dell laptop’s keyboard to become unresponsive.
Uninstalling such applications can help solve the issue.
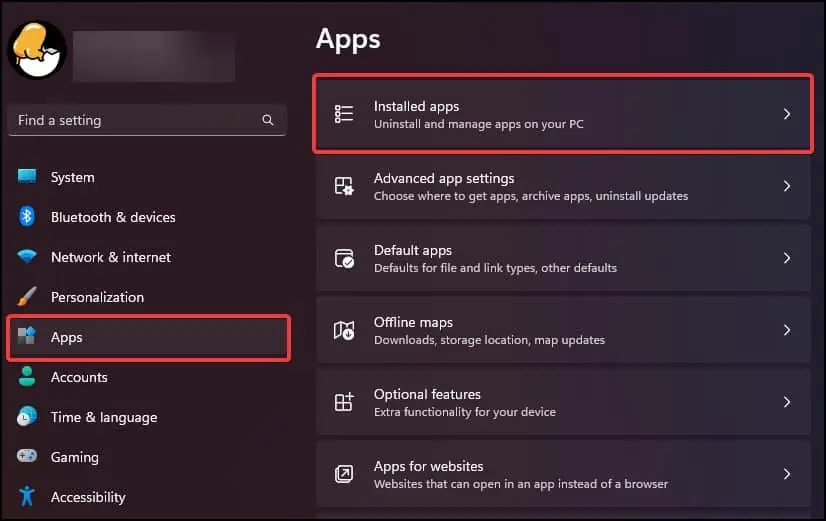
- Open the Settings app.
- On the Apps tab, click on Installed apps

- From the list, select the application
- Click on the dotted button and select Uninstall

- Again, click on Uninstall to begin the process
Enable Keyboard From Command Prompt
Note: This solution only works for users who have disabled or removed the PS/2 keyboard drivers from their system.
If you have recently used the command prompt to disable your laptop’s keyboard, this can cause it to stop functioning. To re-enable the keyboard, first, log into your device using the on-screen keyboard.
- Press the Windows key + R to open Run
- Type
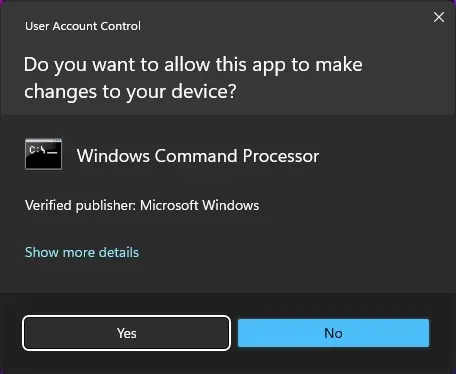
cmdand press the Ctrl + Shift + Enter to open command prompt with elevated access
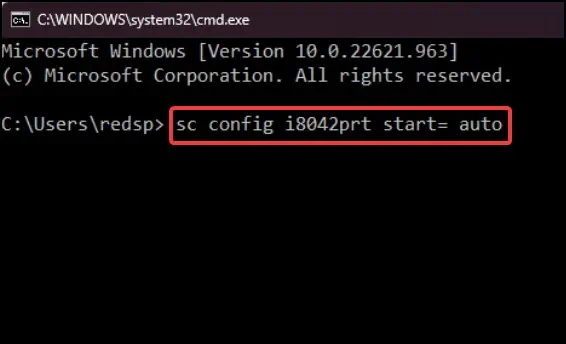
- On the command console, type
sc config i8042prt start= auto
- Reboot your device and check if the keyboard functions normally
Load BIOS Defaults
Another way to restore the keyboard function is to load the BIOS to default configuration. Sometimes due to the BIOS settings, the keyboard can malfunction or stop working altogether.
- Restart your device and repeatedly press the BIOS key
- From the BIOS menu, search for labels like ‘Load optimized defaults’, ‘Reset settings’ or ‘Load defaults’
- Confirm the selection by pressing the appropriate key and exiting the BIOS
- Boot your device normally and check if the keyboard is working

