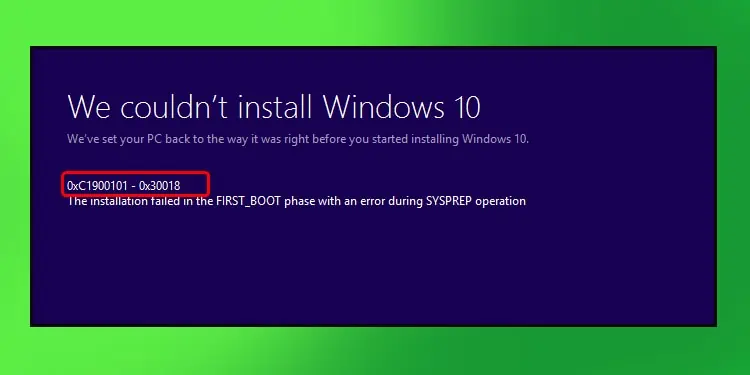
0xc1900101 is a Windows Update Error typically caused by the presence of an incompatible driver. It’s best to resolve this issue quickly as this incompatible driver can lead to a lot of problems down the road such as blue screen of deaths (BSODs), random crashes, file corruption, and so on.
The way to fix the 0xc1900101 error is by updating your drivers and removing any unnecessary devices/drivers. In more specific cases, updating your BIOS and adjusting some settings can also be of help.
But before that, it’s best to get the minor things out of the way first. Restart your PC, ensure your internet connection isn’t interfering with the update, and check for updates multiple times.
Delete Update Download Cache
Deleting the update download cache will force Windows to download the update files again, replacing any corrupt or missing files in the process. We have a comprehensive article with both GUI/CLI approaches, but here are the main steps:
- Press Windows+ R to launch Run.
- Type cmd and press CTRL + Shift + Enter to launch Elevated Command Prompt.
- Copy the following commands and press Enter after each one to execute them:
net stop wuauserv
net stop bits
net stop cryptsvc
net stop trustedinstaller
del %systemroot%\softwaredistribution
del %systemroot%\system32\catroot2
net start wuauserv
net start bits
net start cryptsvc
net start trustedinstaller
- Restart your PC and check for updates.
Uninstall Antivirus Applications
Third-Party antiviruses can sometimes interfere with normal Windows functionality such as Windows Update, mostly due to false alerts. In such cases, it’s best to uninstall, or at least temporarily disable such programs. The steps to do so are listed below:
- Press Windows + R to launch Run.
- Type appwiz.cpl and press Enter
- Select the antivirus program from the list and press Uninstall.

- Follow the on-screen instructions.
- Once it’s uninstalled, test if you can update now.
You can always reinstall your antivirus later, but if you’d really rather not remove it, temporarily disabling it is also an option. Here are the steps to do so:
- Right-click the antivirus from your taskbar and select the Turn off protection option.
- Alternatively, launch the Antivirus program and select the disable Real-time protection or similar option from the program window.

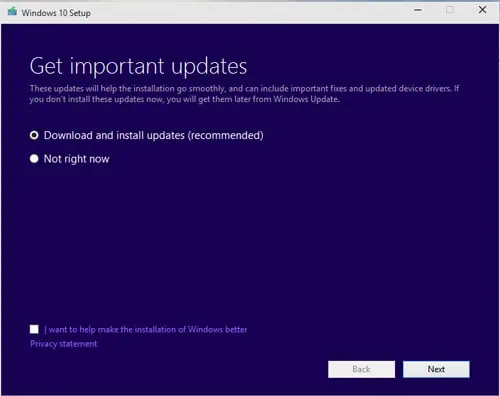
Ensure that Download and Install Updates (Recommended) is Accepted
When starting the upgrade process, you can choose to download and install updates immediately or get them later via Windows Update. Microsoft recommends selecting the Download and install updates (recommended) option.
Disconnect All Peripheral Devices
Aside from your mouse, keyboard, and monitor, disconnect all other peripheral devices that are connected to the system (speakers, webcams, external storage drives, etc.). Try updating once that’s done and check if you still receive the 0xc1900101 error.
Remove All Unused SATA Devices
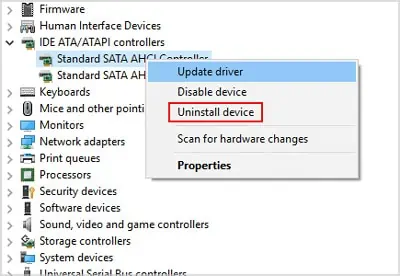
In this case, you should disconnect all unnecessary SATA devices (hard drives, optical drives, SSDs). But in addition to this, you should also uninstall them via the Device Manager. You can do so with the following steps:
- Press Windows + R to launch Run.
- Type devmgmt.msc and press Enter.
- In the Device Manager, right-click the SATA device and press Uninstall Device.

- Follow the on-screen instructions.
- After they’re uninstalled, check if the update issue persists.
Remove All Unused Devices and Drivers
You may have connected an external webcam once, installed drivers for it, and then never used it again. Or your PC might still have the drivers for your gaming mouse that stopped working 2 years ago. These are just a couple of common scenarios, but in cases like this, you should remove all unused devices and drivers with the following steps:
- Launch Device Manager using the same steps as the solution above.
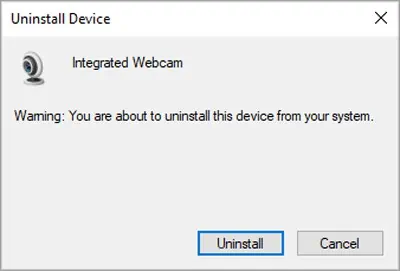
- Right-click the device you’re trying to remove and select Uninstall device.
- Accept the confirmation prompt and follow the on-screen instructions.

- Once it’s done, try updating again.
Update Drivers and BIOS
We have detailed articles on how to update BIOS and motherboard drivers for your further reading. The steps to update drivers via Device Manager are listed below:
- Press Windows + R to launch Run.
- Type devmgmt.msc and press Enter.
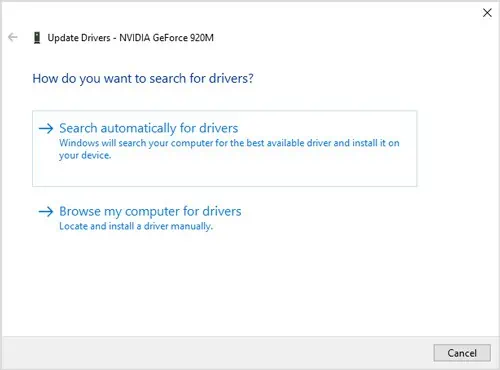
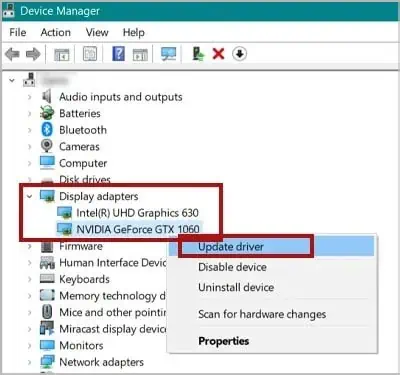
- Right-click the device you’re trying to update and select Update Driver.
- Select Search Automatically for drivers and follow the onscreen instructions.

- After completing all necessary updates, try updating.
Update or Uninstall the Display Driver
Problems with the display driver can cause the 0xC1900101 – 0x3000D error. This is why updating or uninstalling the driver is likely to resolve this particular error.
You can download the latest drivers for your GPU directly from the manufacturer’s official website (NVIDIA, AMD). To update or uninstall them via Device Manager, follow the steps below:
- Launch Device Manager using the same steps as the solution above.
- Under Display Adapters, right-click your GPU and select Update Driver or Uninstall device as appropriate.

- Repeat the steps for any additional GPUs.
- Once they’re updated or uninstalled, check if the error persists.
Try Changing Video Adapters
Using a different video adapter (GPU) and trying the next two solutions may help resolve the 0xC1900101 – 0x4000D error.
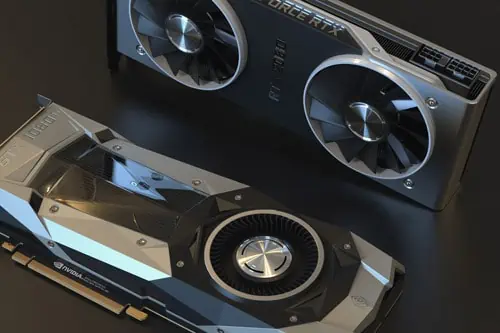
If your CPU has integrated graphics, you can just disconnect your external GPU, boot with integrated graphics alone, and try to update.
Make Sure You Have Enough Disk Space
On a 32-bit OS, Microsoft recommends having at least 16 GBs of free space on the system drive when trying to update to the latest version of Windows. For a 64-bit OS, you’ll need 20 GBs instead.
If these requirements are not met, you’re likely to face update issues such as the 0xc1900101 error.
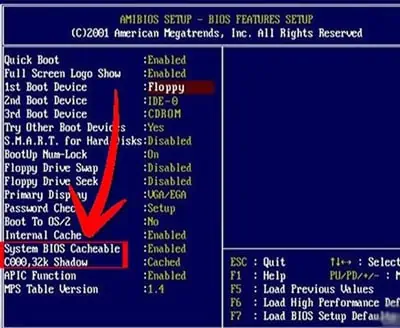
Disable BIOS Memory Options (Caching or Shadowing)
When booting, press the BIOS key shown on the screen to access the BIOS setup. This is usually F2/F8/F10/F11/F12/Del depending on your chipset manufacturer.
- Navigate to Advanced Settings in BIOS.
- Select the Caching or Shadowing option and turn it off.

- Restart your PC and try updating now.
Run Windows Update Troubleshooter
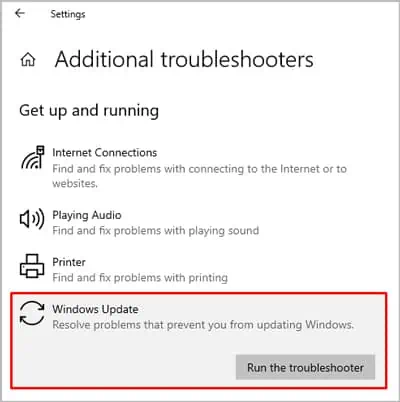
As the name implies, Windows has a dedicated troubleshooter for update-related issues. You can run it with the following steps:
- Press Windows + I to launch Settings.
- Navigate to Update and Security > Troubleshoot > Additional Troubleshooters.
- Click on Windows Update and press Run the troubleshooter.

- Follow the on-screen instructions to fix any issues detected.
Try Updating In Clean Boot
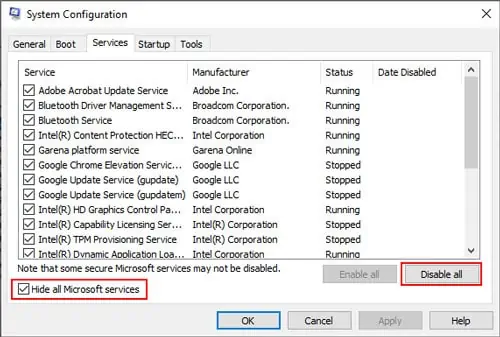
Clean Boot starts your system with only the minimal drivers and programs. Since the 0xc1900101 Error is mainly caused by driver issues, a clean boot is very likely to be helpful. To perform it:
- Press Windows + R to launch Run.
- Type msconfig and press Enter to open the System Configuration window.
- In the Services tab, enable the Hide all Microsoft services option.

- Press the Disable all button.
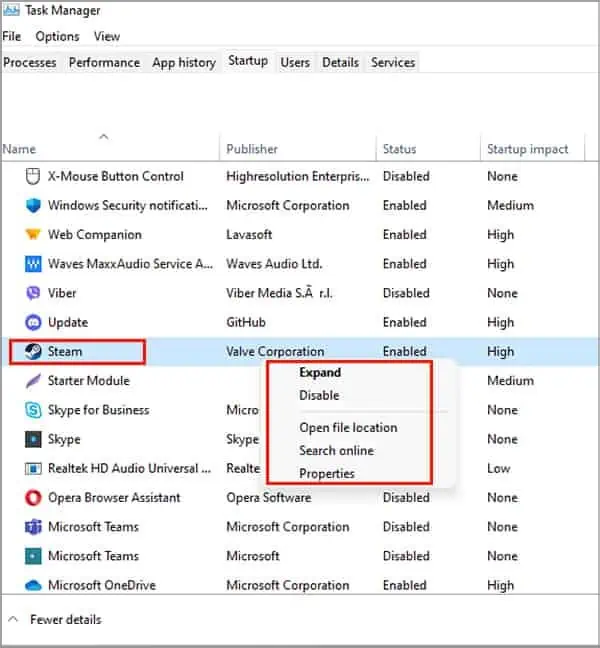
- In the Startup tab, click on Open Task Manager.
- Select all unnecessary startup programs and press Disable.

- Restart your PC and check for updates now.
Update using Media Creation Tool
You can use the Media Creation Tool as an alternative way to upgrade Windows if you’re unable to do so via Windows Update. You can do it with the steps listed below:
- On the Microsoft Software Download page, click on Download tool now.
- Launch the .exe file you just downloaded.
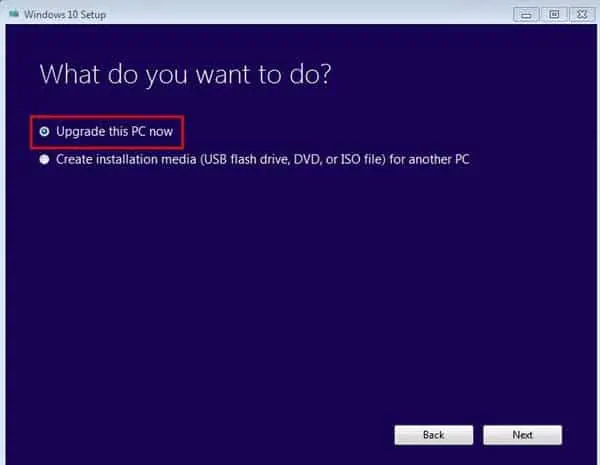
- Accept the License terms, select Upgrade this PC now and click Next.

- Follow the on-screen instructions.
Repair Hard Drive Errors and System Corruption
CHKDSK, DISM, and SFC are built-in system repair tools in Windows commonly used to scan and repair file system issues and system corruption. To use these:
- Press Windows + R to launch Run.
- Type cmd and press Enter to launch Elevated Command Prompt.
- Copy the following commands and press Enter after each to execute them. With chkdsk, replace c: with your system drive if different:
chkdsk c: /x /rdism /online /cleanup-image /restorehealth
sfc /scan now
Restore / Reset PC
If you have a system restore point from before the update issue started, you can perform a system restore to reset your system to that state. If you don’t have one, and none of the other solutions worked, resetting your PC is likely the final option.
System Restore
- Press Windows + R to launch Run.
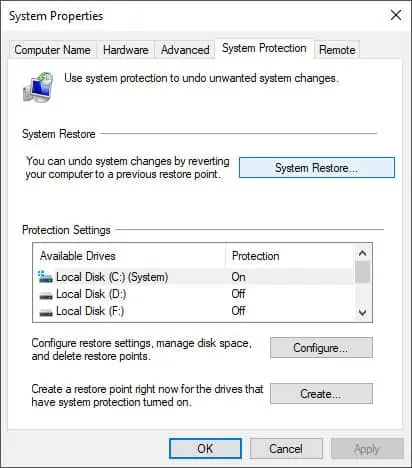
- Type systempropertiesprotection and press Enter.
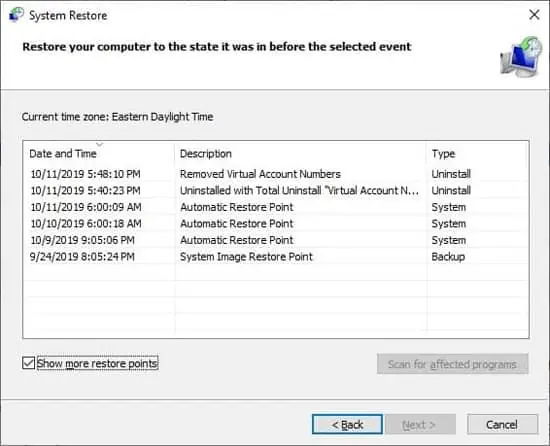
- Click on System Restore and press Next.

- Select the appropriate restore point and press Next.

- Follow the on-screen instructions.
Reset PC
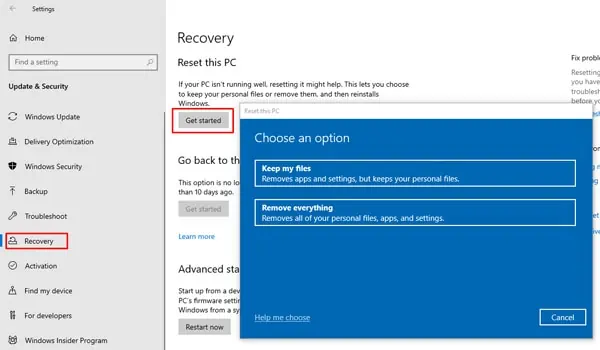
- Press Windows + I to launch Settings.
- Go to Update and Security > Recovery.
- Under Reset this PC, press Get Started.

- Select Keep my files to keep your personal files.
- Follow the on-screen instructions.

