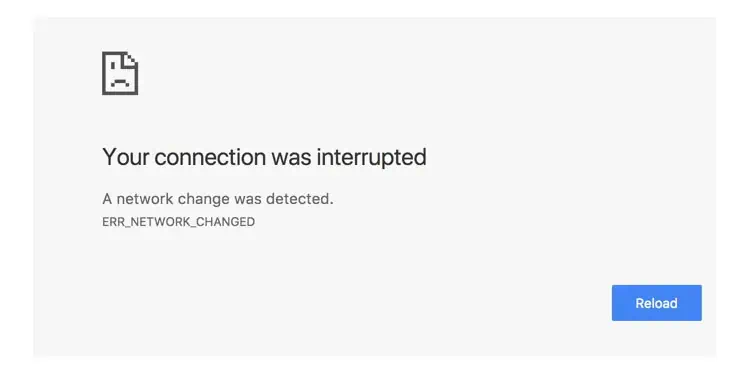
You can usually fix the ERR_NETWORK_CHANGED error by refreshing the page. Yes, it’s that simple. Restarting your browser and PC, clearing the browser cache, and disabling problematic extensions can also be required sometimes.
Before diving into the details of how to fix this error, you should use a different browser and check if you can load the page now. With this, you can figure out whether the root of the issue is a faulty browser or your network.
Refresh the Page
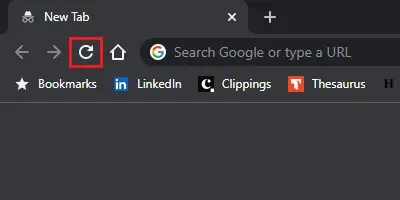
Press F5 or CTRL + R to refresh the tab you’re on. Alternatively, you can also click on the Reload button at the top left of your screen. In doing so, your browser reloads the page by establishing a new connection, hence solving the error. If the error is recurring, proceed to the next steps.
Restart and Repair Your Browser
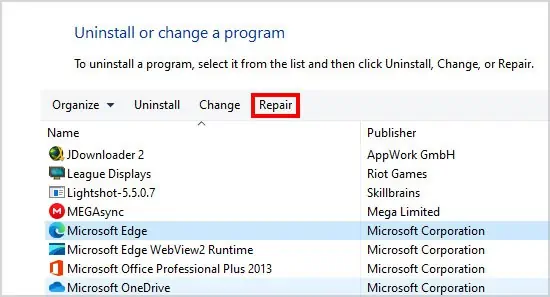
Close and reopen your browser and check if you can load the page now. If it doesn’t, your browser may be bugged. In this case, it’s best to repair your browser. To do so,
- Press Windows + R to launch Run.
- Type control and press Enter to open the Control Panel.
- Open Programs and Features > Uninstall a Program. Select your browser from the list and click Repair.

- Follow the instructions on the screen to complete the Repairing process.
Clear Browser Cache
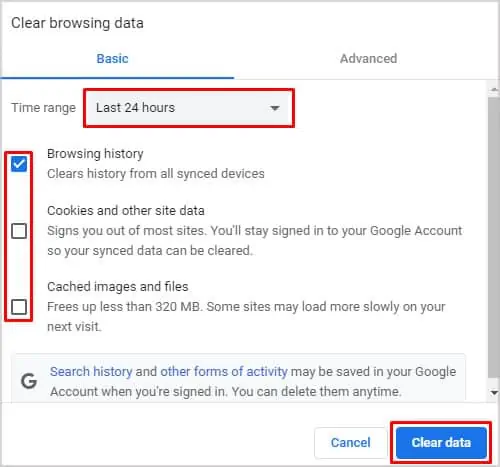
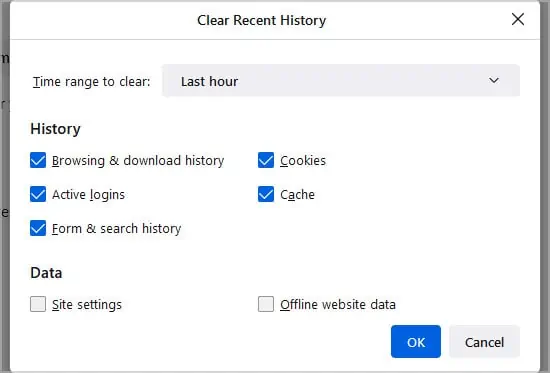
Your browsing and download history, cookies, and cached images/files are stored as part of the browser cache. You should select the earliest time range to clear all of your history/cache for best results. Follow the steps to clear your cache according to your browser.
For Chrome,
- Type
chrome://settings/clearBrowserDatainto the URL bar and press Enter. - Press Clear Data.

For Firefox,
- Type
about:preferences#privacyinto the URL bar and press Enter. - Switch to the Privacy and Security tab.
- Scroll down to the History section and press Clear History.
- Pick the time range and what data you wish to clear and press OK.

Disable Browser Extensions/Add-ons/Plugins
Extensions and add-ons are great for adding features new to your browser. But some faulty ones can also interfere with the browser’s functionality and cause errors like ERR_NETWORK_CHANGED. Disabling or removing problematic extensions can fix this error.
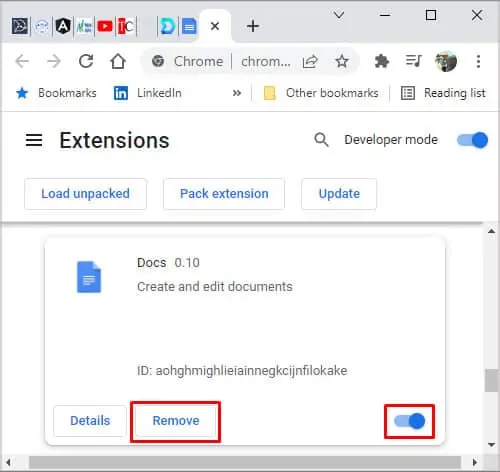
For Chrome users,
- Type
chrome://extensionsinto the URL bar and press Enter. - Click on the button to disable or press Remove to uninstall any extension.

For Firefox users,
- Type
about:addonsinto the URL bar and press Enter. - Check your list of extensions and disable or remove any suspicious ones.

- Switch to the Plugins tab on the left and repeat the same steps here.
Restart your PC and Router
Since the browser fixes didn’t work, the issue is probably with your network. But before getting into that, first, turn off your Router and PC. Wait a minute, then turn them back on. Sure, turn it off and on has been memed to death, but hey, it works.
Fix Physical Disconnection from Network
If you’re using your Wi-Fi at max range, the signal strength between your router and device is likely very weak. In such cases, there can be so much packet (data) loss that you can’t load a website even though your device shows that you’re connected to the internet. To fix this, simply move closer or use an Ethernet cable to get a better signal.
Forget Unnecessary Networks
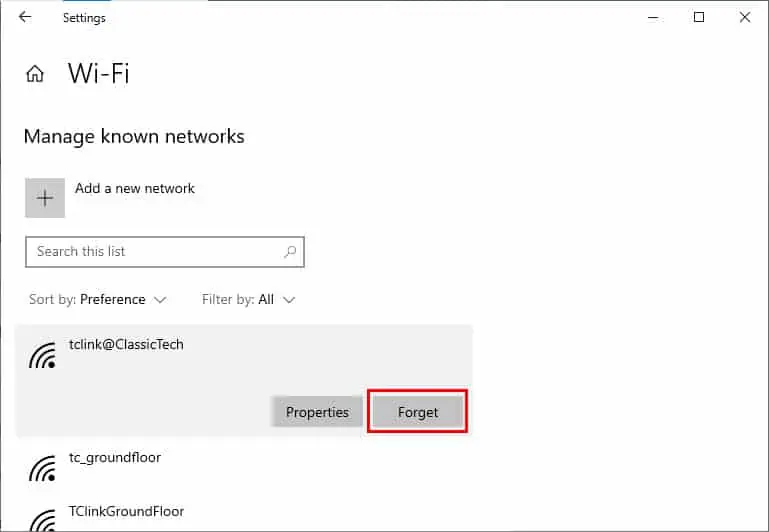
If you carry your laptop around for work or travel, chances are, it’s connected to a lot of different networks before. If there are multiple networks in the vicinity, your laptop could be trying to connect to all of them at once. You can fix this by forgetting any unwanted networks. To do so on Windows,
- Press Windows + I to launch Settings.
- Open Network and Internet.
- Click on Wi-Fi from the left menu.
- Open Manage Known Networks.
- Click on any unnecessary network and press Forget.

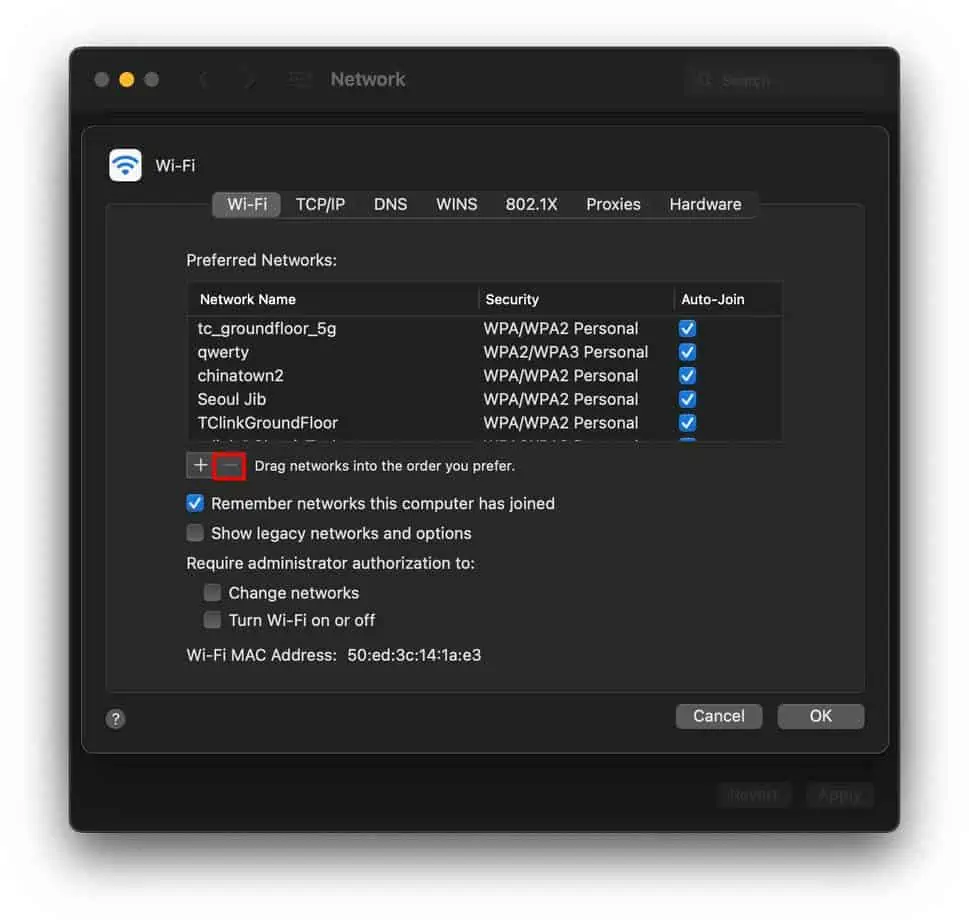
For Mac users, we also have a detailed guide on how to forget Wi-Fi networks but here are the quick steps.
- Press the Apple Icon at the top left and open System Preferences.
- Open Network Options and click on the lock-pad icon. Enter your admin password if prompted.
- Go to the Advanced section under connected Wi-Fi network.
- Select the Wi-Fi network you want to forget and click on the minus (-) button.

Change your DNS Server
Your computer obtains the DNS (Domain Name System) automatically by default. But sometimes, that DNS can be faulty and cause problems like Network Change error. In such cases, you can use a custom DNS. Some great free options include the ones provided by Google, Cloudflare, and OpenDNS.
- Preferred DNS: 8.8.8.8
- Alternate DNS: 8.8.4.4
Cloudflare
- Preferred DNS: 1.1.1.1
- Alternate DNS: 1.0.0.1
OpenDNS
- Preferred DNS: 208.67.222.222
- Alternate DNS: 208.67.220.220
To use a custom DNS,
- Press Windows + R to launch Run.
- Type control and press Enter to launch the Control Panel.
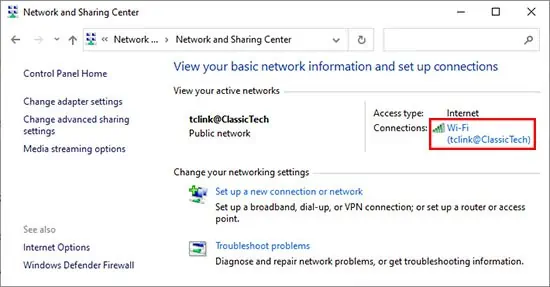
- Navigate to Network and Internet > Network and Sharing Center.
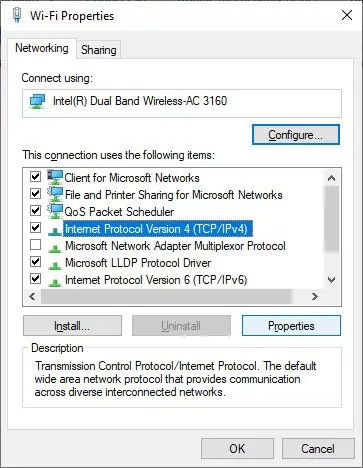
- Click on your active Wi-Fi/Ethernet connection.

- Press the Properties button.
- Select Internet Protocol Version 4 (TCP/IPv4) and press the Properties button.

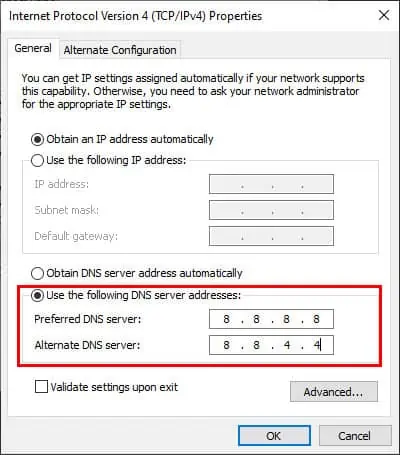
- Go to Use the following DNS server addresses.

- Enter 8.8.8.8 in the Preferred DNS server box.
- Enter 8.8.4.4 in the Alternate DNS server box.
- Click OK to apply the new settings.
Reset your Network Settings
For a proper network reset, you should clear your DNS cache, renew your IP Address, reset Winsock and reset your TCP/IP as well. Windows users should take the following steps.
- Press Windows + R to launch Run.
- Type cmd and press CTRL + Shift + Enter to launch Elevated Command Prompt.
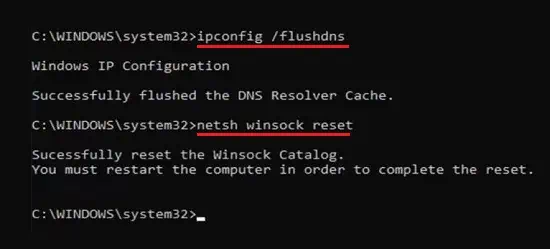
- Type the following commands and press Enter after each one.
ipconfig /release
  ipconfig /flushdns
  ipconfig /renew
  netsh int ip reset
  netsh winsock reset
- Restart your PC and check if the network change error is resolved.
To flush DNS and reset IP Address in Mac,
- Press Command + Spacebar to launch the Spotlight search box.
- Type Terminal and press Enter to launch the Terminal app.
- Type the command
sudo dscacheutil -flushcache; sudo killall -HUP mDNSResponderand hit enter to flush DNS. Enter your admin password if prompted. - Next, click on the Apple logo on the top left and open System Preferences.
- Go to Network Options and choose your active Wi-Fi connection.
- Press the padlock and enter your admin credentials if prompted.
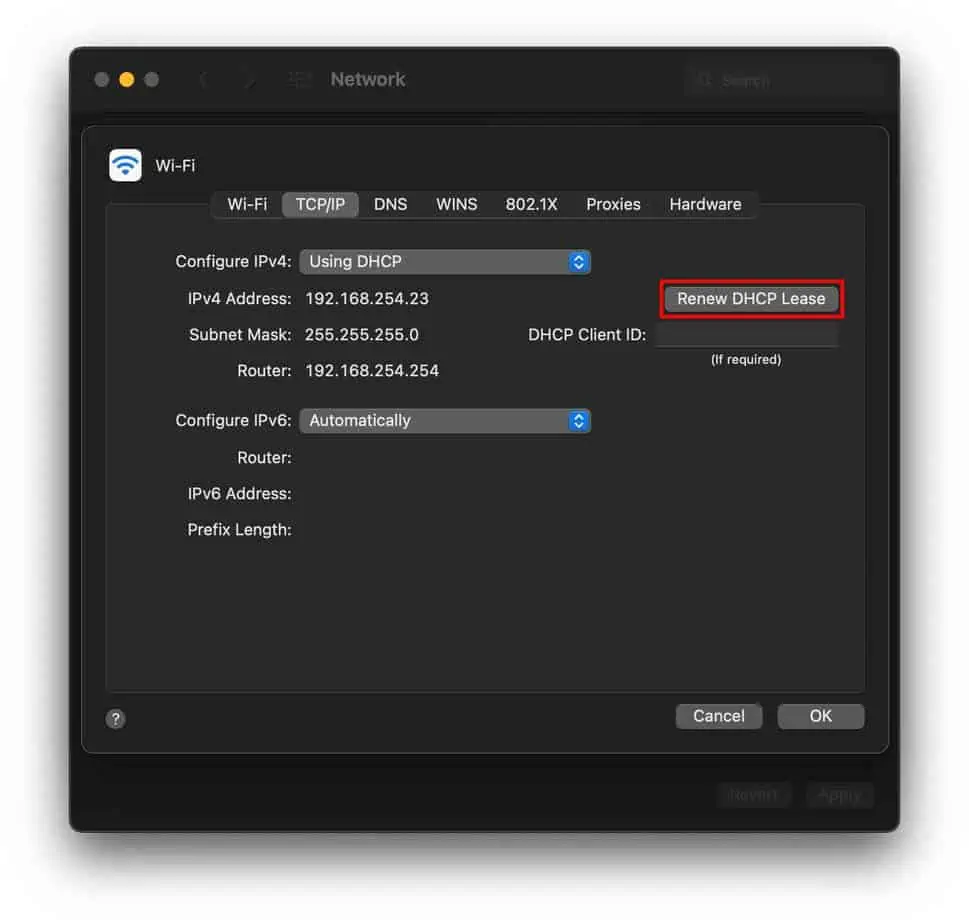
- Go to Advanced > TCP/IP.
- Click on Renew DHCP Lease to reset your IP Address.

Disable Proxy and VPN
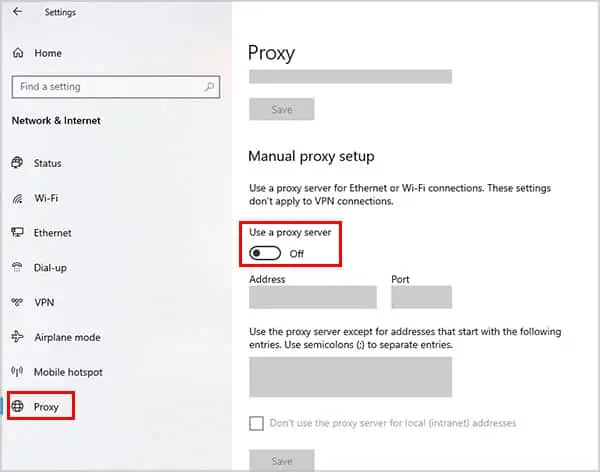
You can disable your VPN by right-clicking the icon from the taskbar and selecting Turn off/Stop service. To disable the proxy, you can either do it from the Control Panel or via Windows Settings. You can follow the same steps to re-enable either one later.
- Press Windows + I to launch Settings.
- Open Network and Internet.
- Switch to the VPN tab from the left menu.
- Select your VPN connection and press Disconnect.
- Switch to the Proxy tab at the bottom left.

- Press the button to turn off Use a Proxy.
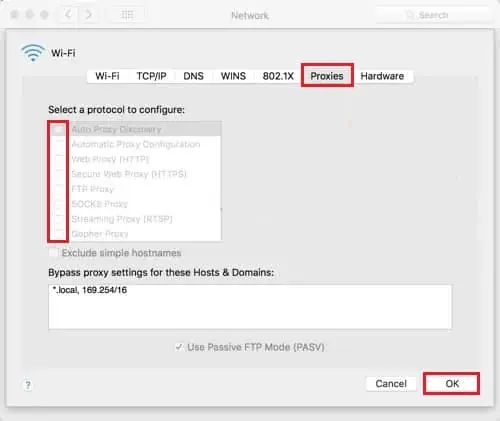
On Mac,
- Press the Apple icon on the top left and open System Preferences.
- Go to Network Options and choose your active Wi-Fi connection.
- Press the padlock and enter your admin credentials if prompted.
- Go to Advanced > Proxies.

- In the proxies tab, disable all proxies and press OK.
Update Network Driver and System
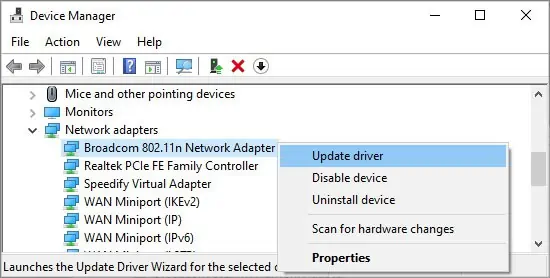
To update your network driver in Windows,
- Press Windows + R to launch Run.
- Type
devmgmt.mscand press Enter to open the Device Manager. - Expand the Network Adapters section by clicking the arrow on the left.

- Right-click your network driver and press Update Driver.
- Click Search automatically for drivers when prompted and follow the on-screen instructions to update the driver.
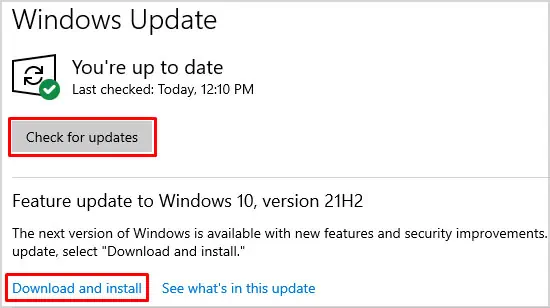
To perform a system update in Windows,
- Press Windows + I to launch Settings.
- Open Update & Security and click on Check for updates.

- Download and install any available updates.
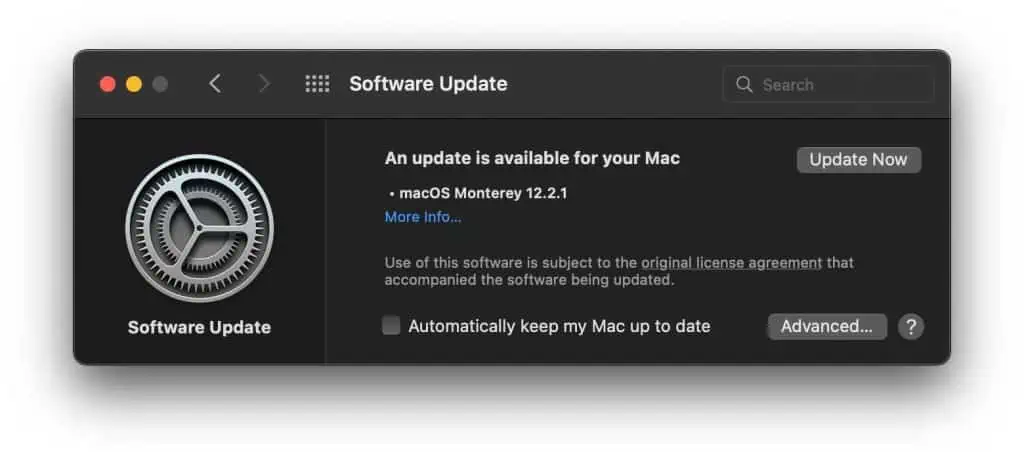
To perform a software update on Mac,
- Click the Apple logo from the top left to open the Apple menu.
- Open System Preferences > Software Update.

- Press Update Now and follow the instructions on-screen and install any updates available.
User Reported Fixes
One user found that his dual-band Wi-Fi router was causing this problem by automatically switching between 2.4GHz and 5GHz. He fixed this by changing the network ID names and only connecting to 2.4GHz.
An Opera user reported that he fixed the network change detected error by turning off Predict network actions to improve page load performance. This can be found under Privacy & Security settings.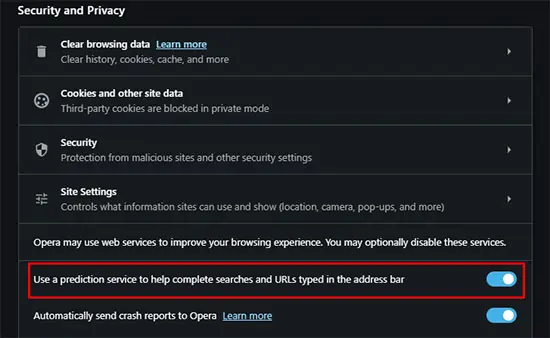
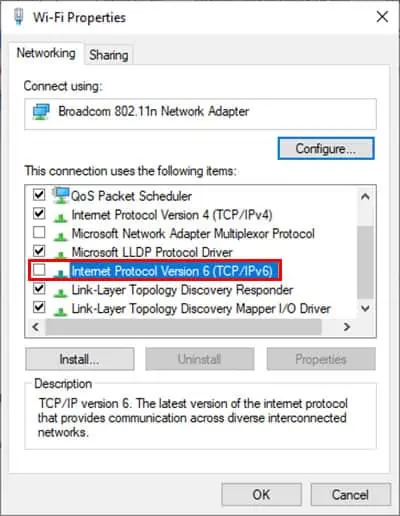
Another user reported that disabling IPv6 fixed the issue for him. To do so,
- Press Windows + R to launch Run.
- Type
ncpa.cpland press Enter open Network Connections. - Right-click your active connection and select Properties.
- Uncheck the box next to Internet Protocol Version 6 (TCP/IPv6) and press OK to apply changes.


