The administrator account has full access to all of the features and settings in Windows. This account is typically used by people who need to make changes to the system or who need to access features that are not available to standard users.
However, it is necessary to add users to the administrator group so they can manage the system and perform administrative tasks. To add users to the administrative group, you must be a member of the Administrators group.
In this article, we have mentioned performing such. Without further ado, let’s jump right onto the detailed procedure on how to add a user to the administrator group.
How to Add User to the Administrator Group
Using CMD
If you need to add a user to the administrator group on Windows 10 using the Command Prompt, you can use the net localgroup command. This will list all the current administrators. This command will also add the specified user to the administrator group.
This process is rather easy to follow. These are the steps.
- Press the Windows and the R keys simultaneously to open Run.
- Type in
cmdand hit the Enter key. - In the command prompt, run the command.
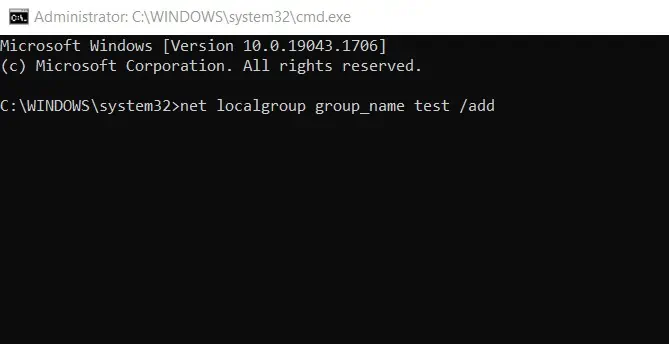
net localgroup group_name (UserLoginName) /add - In place of (UserLoginName) type in the name of the user you want to make an admin. For this instance, let’s assume that the user is test. The command line should look something like this.

Using Windows Computer Management
There is an alternative way to add a user to the administrator group. This procedure does not include using the command prompt at all. To add a user to the administrator group using Windows Computer Management, follow these steps.
- Right-click on This PC.
- Click on the Manage option.
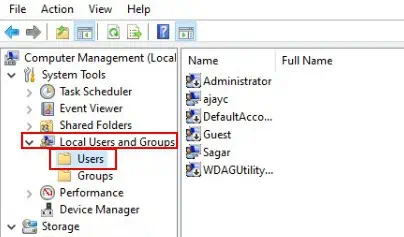
- Click on the Local Users and Group tab on the left-hand side.
- Click on the Users tab. A list of users will be displayed.

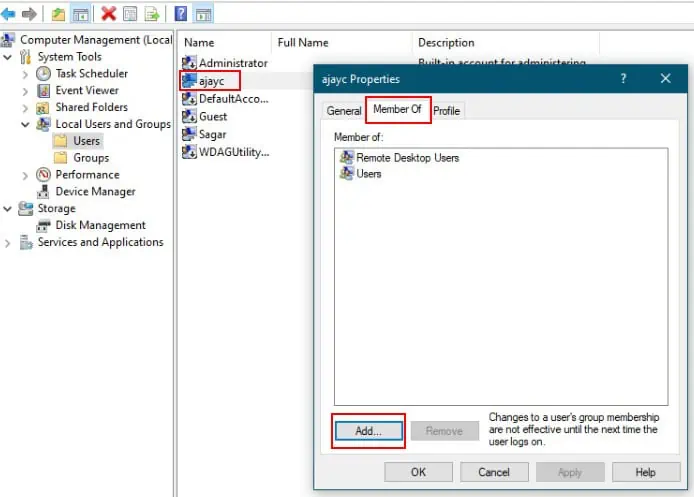
- Right-click on the user you want to add as an admin.
- Go to properties -> Member Of tabs.
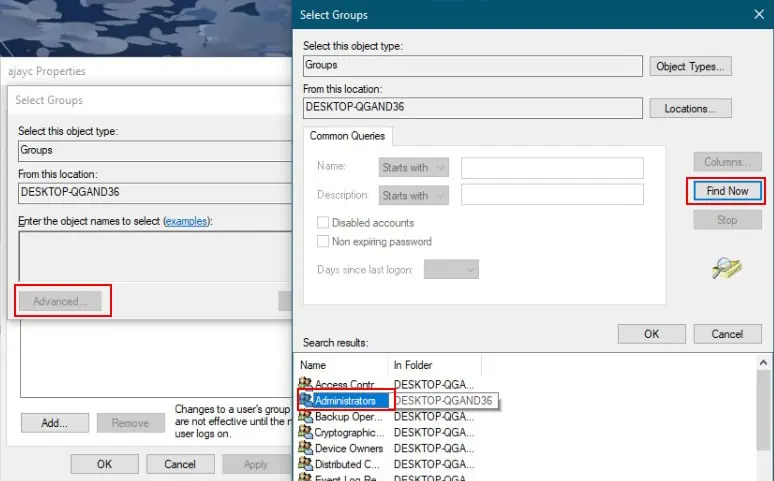
- Select the Add button.

- Go to Advanced.
- Click on the Find now option.
- Select Administrators.

- Click Ok.
Using Settings
If you need to give a user administrator privileges on a Windows device, you can do so by adding them to the administrator group from Control Panel. Here’s how:
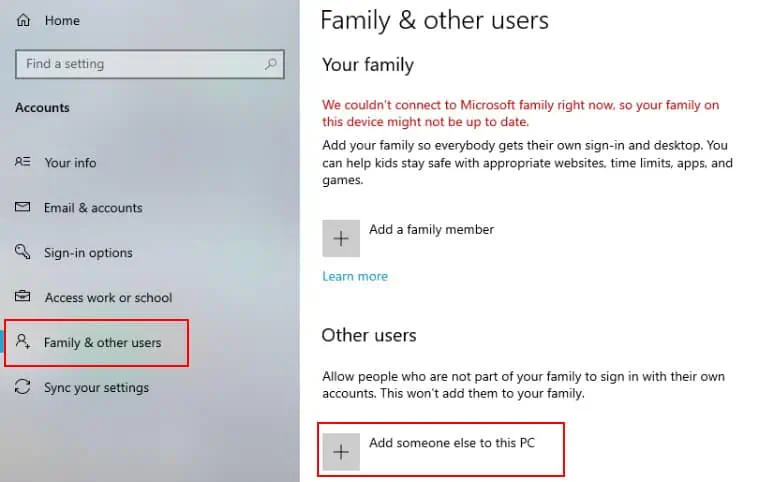
- Go to settings.
- Click on Accounts.
- Click on Family and other users.
- Under Other Users, click on the add icon.

- Type in the Gmail or the phone number of the user.
- Click on the user account.
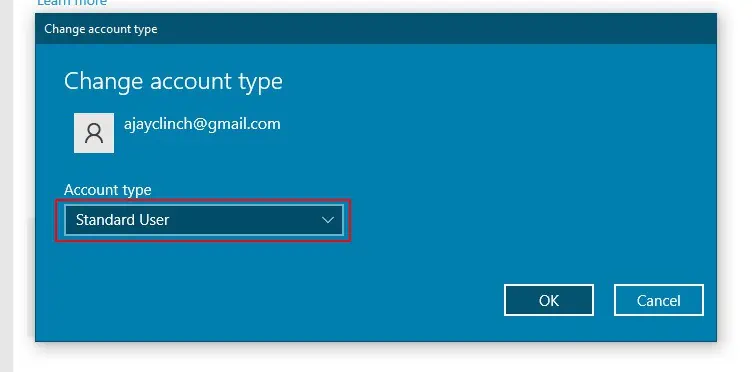
- Click on Change account type.

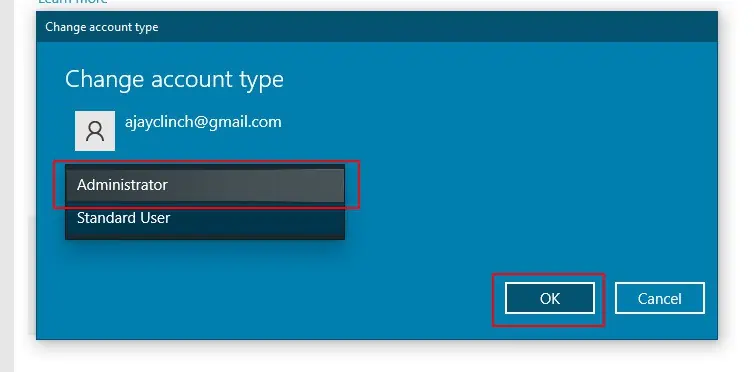
- Under Account type, select Administrator.

- Click Ok.
Using Control Panel
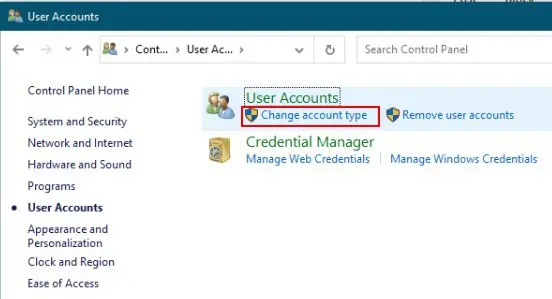
Alternatively, you can also add a user to the administrator group from the control panel. To do so:
- Press the Win and R keys simultaneously.
- Type control and hit the Enter key.
- Go to User accounts.
- Click on Change Account Type.

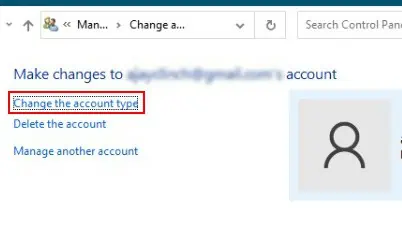
- Click on the user you want to add as an admin.
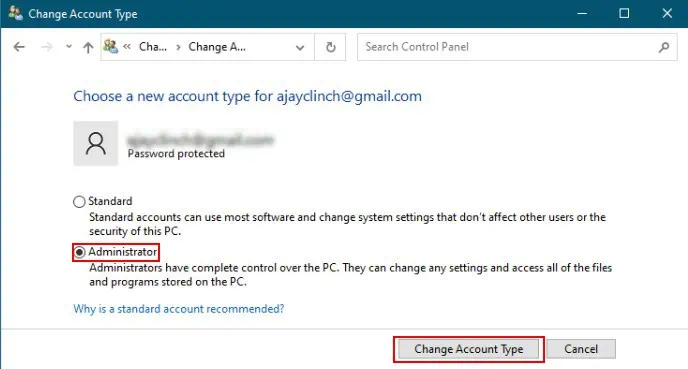
- Click on Change Account Type.

- Select Administrator.
- Click on Change Account Type again.

How to Check Local Administrators Group Windows
This is a rather simple process. Just follow these easy steps to check the local administrator’s group in windows 10.
- Right-click on This PC.
- Click on the Manage option.
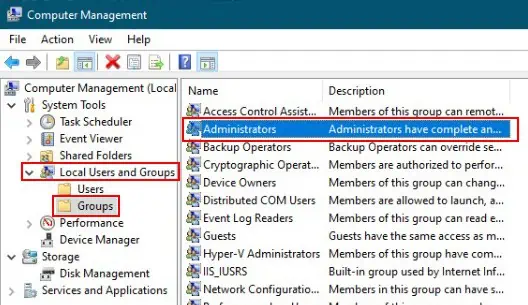
- Click on the Local Users and Group tab on the left-hand side.
- Click on the Groups tab. A list of features will be displayed.
- Click on Administrators. The list of admins will be displayed.

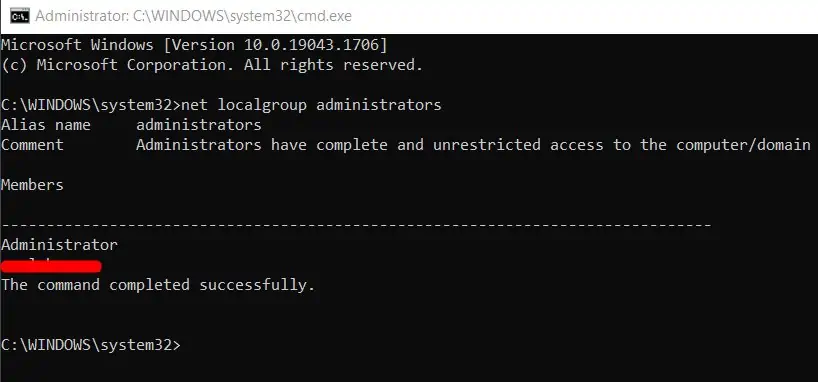
You can also use the Command Prompt to check Local Administrators Group in Windows 10, to do so, follow these steps.
- Press the Windows and the R keys simultaneously.
- Type in
cmdand hit the Enter key. - In the command prompt, run the
net localgroup administratorscommand. - A list of all the admins will be displayed.

