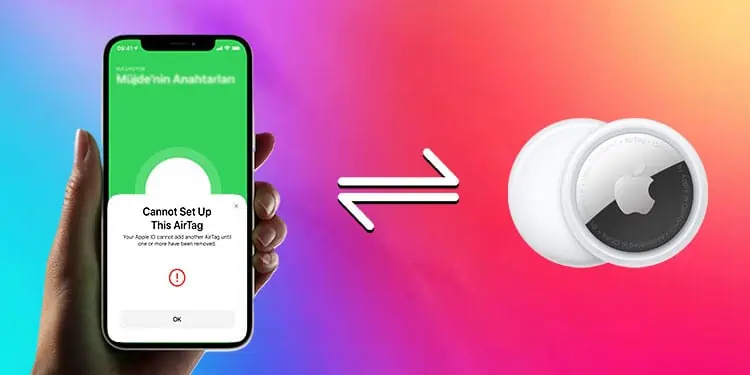
AirTag is one of the latest products in Apple’s portfolio. This tiny gadget can be a lifesaver as we often lose items like wallets, keys, etc., which users can now easily track once it is attached.
However, Connecting your AirTag with an iPhone for the first time can be tedious. Also, you must be very careful as you are required to enable different features on your iPhone before you can connect.
For instance, If you don’t enable the feature like Find My, Two-Factor Authentication, it won’t simply connect.
Whatever the reasons might be, in this article, we will guide you with 10 fixes you should try to fix your AirTag not connecting in no time so that you can again track your essential items.
Why Your AirTag Is Not Connecting
There can be various reasons behind your AirTag not connecting with your Apple products. Here, we have mentioned a few key reasons behind this issue.
- You may haven’t enabled the Bluetooth settings.
- Your device’s Two-Factor Authentication is turned off.
- Your AirTag ran out of battery.
- You won’t be able to connect with AirTag if your iOS version is below 14.
- AirTag might have some physical damage.
How to Fix AirTag Not Connecting With Your iPhone
You can easily reconnect your AirTag with your iPhone if it is not physically damaged. Here, in this part, we will show several ways to fix if your AirTag is not connecting or working for your iPhone.
Toggle On Location Services and Bluetooth
AirTag needs Bluetooth and depends upon Location service to connect with your AirTag. If you haven’t turned on the Bluetooth or location service, it won’t connect. Therefore, you first need to observe whether your Bluetooth and location are turned on. Try toggling off and wait for a few seconds, then turning it back can fix and reconnect AirTag with your device.
Follow these steps to toggle Off and On the Bluetooth:
- Open the control center by swiping from top to bottom.
- Turn off Bluetooth. Wait for a few seconds and turn it on.
Alternatively, you can follow the below steps as well to toggle it:
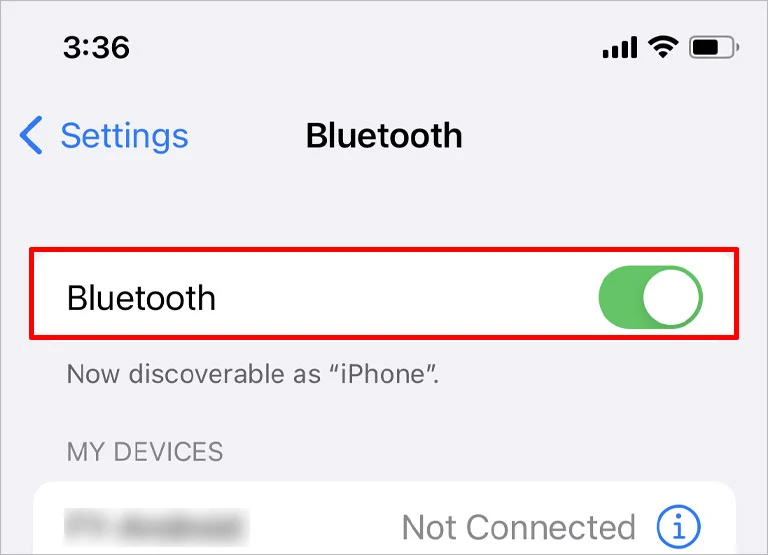
- Open Settings.
- Tap on Bluetooth. Toggle it off and on.

To toggle Off and On Location service:
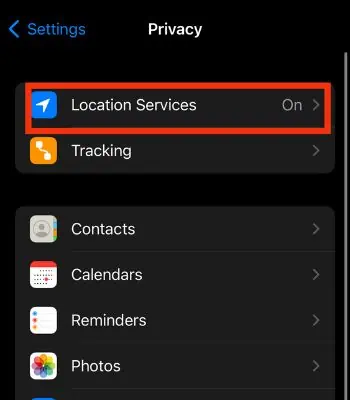
- Open Settings.
- Click on Privacy.

- Toggle the location service off and on.

Enable Find My
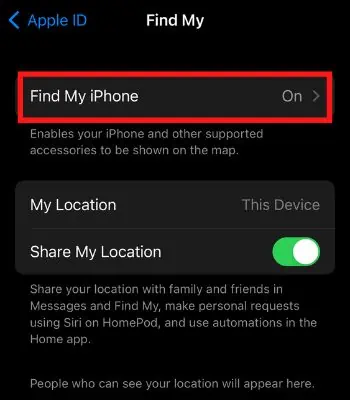
Another important feature you need to keep your eye on is checking to Find My feature. Although this feature is enabled by default, you need to check again. If it is turned off mistakenly, you should toggle it on. Once you do it, you can reconnect AirTag.
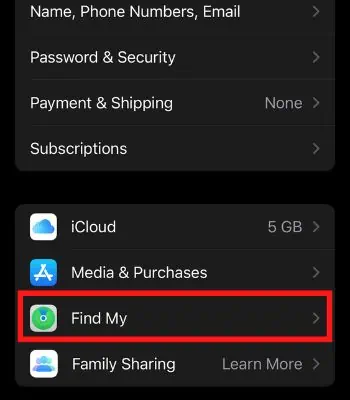
- Open Settings.
- Tap on your name.
- Go to Find My.

- Toggle on Find My iPhone.

Reboot Your Device
Sometimes your device’s glitch can also create trouble connecting to other gadgets like AirTag. If that’s the issue, you can resolve it by rebooting your device. It’s the most used method to cure many minor glitches that can happen occasionally.
Once you reboot your device, bring your AirTag closer to your iPhone. Wait for a few seconds, and the AirTag will appear, ready to connect again.
To Turn Off Your Device:
- Press and hold the Volume Up or Volume Down and Side Button simultaneously until the power menu option appears on the screen.
- Slide to the right to power off.
To Turn On Your Device, press and hold the side button until the Apple logo appears on the screen.
Make Use of Find My
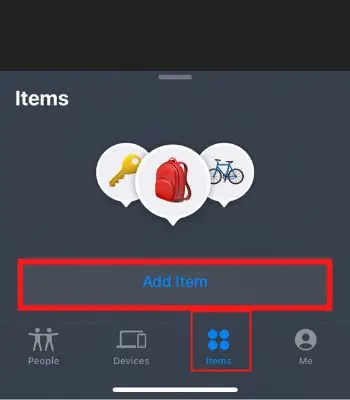
If you cannot connect and see your AirTag windows appear, when the AirTag is closer to your device, you should use the Find My app and search for your AirTag to connect. This will help to reconnect in such a situation.
- Open Find My app.
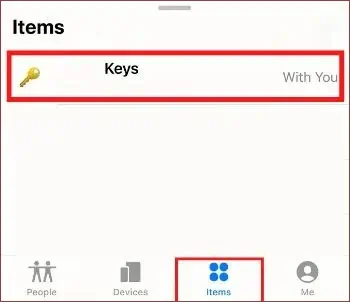
- Go to Items located at the bottom of the screen.
- Tap on Add Item.

- Tap Add AirTag.

- Bring your AirTag closer to the iPhone and wait for a few seconds to search and connect once it finds your AirTag.
Enable Two-factor Authentication
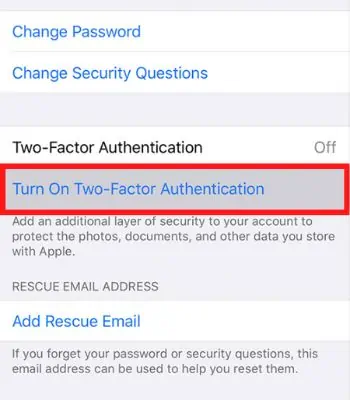
You may still be unable to connect AirTag with your device because you haven’t enabled Two-Factor Authentication (2FA). Apple has made it compulsory to enable 2FA before you connect to AirTag. Therefore, try enabling 2FA and see if your AirTag might connect again.
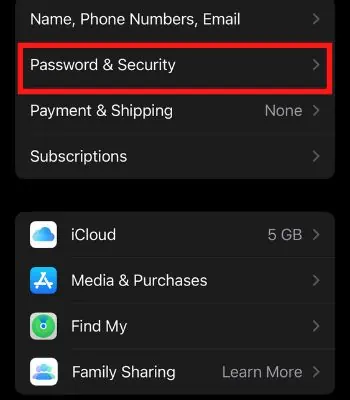
- Open Settings.
- Tap on your Profile Name.
- Tap on Password and Security.

- Click on Turn on Two-Factor Authentication.

- Click on the Continue button.
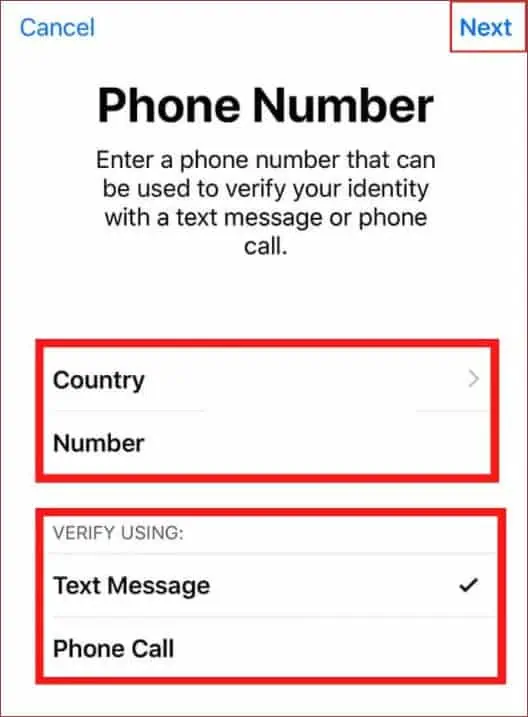
- Select your country and add your phone number.
- Select the mode of verification.
- Tap on Next, and you will receive a text or call depending upon your selected mode.

- Enter the six-digit verification code.
- Now enter your password and tap sign-in.
- Wait a few seconds to verify, and then your 2FA will be enabled.
Replace AirTag’s Battery
You can’t connect to AirTag if it doesn’t have enough power to run. Your AirTag battery life span is less than 12 months. Therefore, you need to replace it with a new one. Once you replace your old battery, your AirTag can connect and work back to normal. You can also see your AirTag battery status with the help of your device’s Find my app.
To See the Battery Health:
- Open Find My app.
- Go to Items.
- Click on your AirTag Name.

- Now you can see the AirTag battery level below your AirTag name.

To Remove the Battery:
- Press the back of your battery cover and rotate it counterclockwise until it stops.
- Release your fingers, and the battery cover will come out.
- Remove the battery and replace it with a new one.
To Add a New Battery:
- Insert a new battery with the positive facing towards you.
- Put the battery back. Your AirTag will play a sound representing the battery is connected.
- Then, Put the battery cover back. Press down and rotate the battery cover clockwise until it stops.
Reset Network Settings
This is another method you can consider to resolve your AirTag not connecting issue. As mentioned above, you must enable location service and Bluetooth to connect with AirTag. There’s a chance that some interference in your connection can stop your AirTag from connecting with your device.
If there’s a fault in your device’s networks, it will clear out all the previously and currently connected networks, which can help to fix such an issue.
Here’re the steps to reset network settings on iPhone:
- Open Settings.
- Click on General.
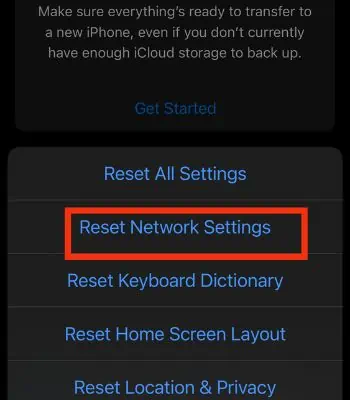
- Scroll down and Go to Transfer or Reset.
- Tap on Reset.
- Click on Reset Network Settings.

- Enter your Passcode if prompted.
- Hit Reset Network Settings to confirm.
Update Your device
If you want to connect AirTag with your device. Your iOS version must be 14.5 or later to use it. For that, you need to update your device to the latest version. Apple generally provides new software updates for five years. Even though you have a four-five years old iPhone, you can easily download it to the latest version. Updating can also fix the bugs and help to optimize your device.
- Open Settings.
- Tap on General.
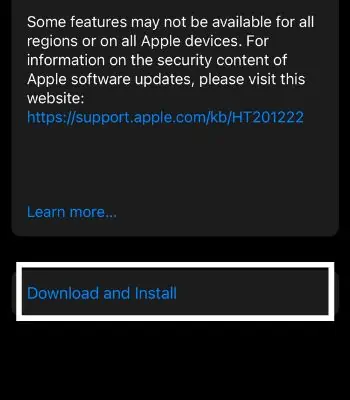
- Click on Software Update.
- Click on Download and Install.

- Enter your Passcode if prompted.
- Updating may take a while. So, have patience. Ensure you have a stable internet connection.
Reset Your AirTag
The last thing you can do on your own is to reset your AirTag. If you have changed any settings before and your AirTag stops connecting after, resetting will be a good choice as it will set it to factory default settings. To reset, you need to take off the battery. You can follow the above part in Replace AirTag’s battery to remove it.
To Reset AirTag:
- Take off the battery and put it back. You will hear a sound. Repeat this process five times.
- Then, Put the battery cover back. Press down and rotate the battery cover clockwise until it stops.
To Reconnect AirTag:
- Open the Find My app, and your AirTag will appear on the screen.
- Tap Connect and you have to set up AirTag like new.
- Now, follow the other steps shown on your device’s screen.
Contact Apple Support
If you bought the AirTag recently, but it’s not working or connecting. You need to take it to the authorized service center right away. They will inspect it and will give you a suitable suggestion if it has some hardware damage and is under warranty. They might be replaced with a new one. So, if you cannot solve these issues, this is the best.

