The mail app is in-built into all of your Mac and iOS devices. It is a powerful tool that allows you to manage and add all your email accounts on one platform. However, like any other tool, this app can also be prone to errors such as the mail not working or failing to respond.
Such errors can be due to incorrect account credentials, corrupted data files, or more.
So, in this article, let us explore more of the causes and the troubleshooting methods you can apply to help resolve this issue.
Why is My Apple Mail Not Working?
Here are some of the reasons your Apple mail app might fail to work or stop responding on your Mac and iOS devices:
- Email or Apple server outages
- Outdated mail app
- Unstable Internet Connection
- Incorrect settings configuration
- Corrupted data files
- Wrong login credentials
- Outdated operating software
- Not enough storage space on your account
How to Fix Apple Mail not Working?
Before you begin with the technical fixes, we suggest restarting your device. In many instances, rebooting helps with minor issues occurring in the app as it refreshes and removes all your temporarily stored data.
Check Internet Connection
One of the main reasons your Mail app might not work is because of an unstable internet connection. So, first, check to see the connectivity in other applications and devices. If you recognize that the issue is with the internet connection, then you can apply these quick troubleshooting methods.
- Turn off and turn on the internet router.
- Connect to mobile cellular data or use a personal hotspot
- Switch to a stable internet connection
If you still face further issues with your internet connection, we advise you to contact your Internet Service Providers for further assistance regarding this matter.
Check Cellular Connection
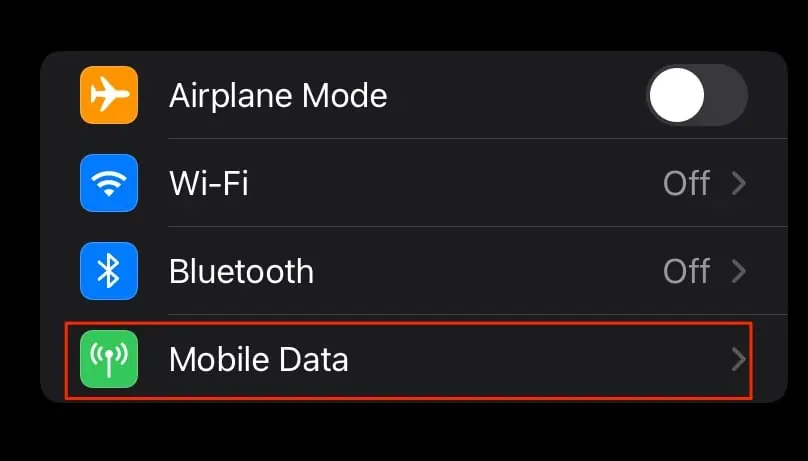
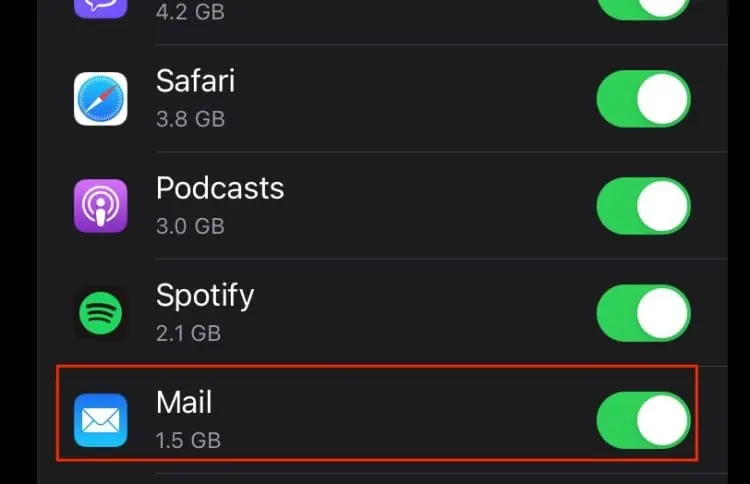
While you’re on a mobile cellular data connection, ensure you have enabled access to your Mail app. In some instances, this might be disabled. Here is a step-by-step guide on how to enable it.
- Open up the Settings app.
- Select the Mobile data option.

- Scroll down and locate the Mail app.
- Now, turn on the toggle for Data Roaming.

For mac devices, you can also ensure the connection by doing a quick check on your Mail settings. Here is how you can do it.
- Open the Mail app.
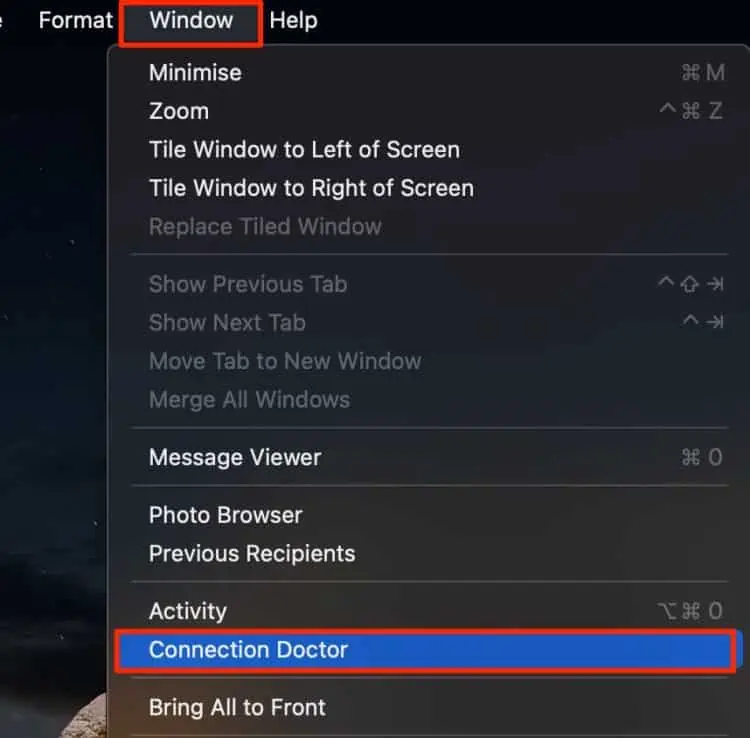
- Head over to the menu bar and click on Window.
- Select the Connection Doctor option.

- Please ensure you have a stable connection on your email servers.
If connectivity was not the issue, then move on to the below method to reset the account settings on your Mail app.
Log Out and Log in to your Account
In some instances, there might be a technical glitch or a system error while you’re signed to your account. Also, you might have recently changed your password to your email account. As a result, this might have resulted in the app not working on your device. So, we suggest that you log out and log in to your device.
Here is how you can do it.
On iPhone
- Launch the Settings app.
- Scroll down and tap on Mail.

- Now, tap on Accounts.
- Click on the email account that you’re having trouble with.
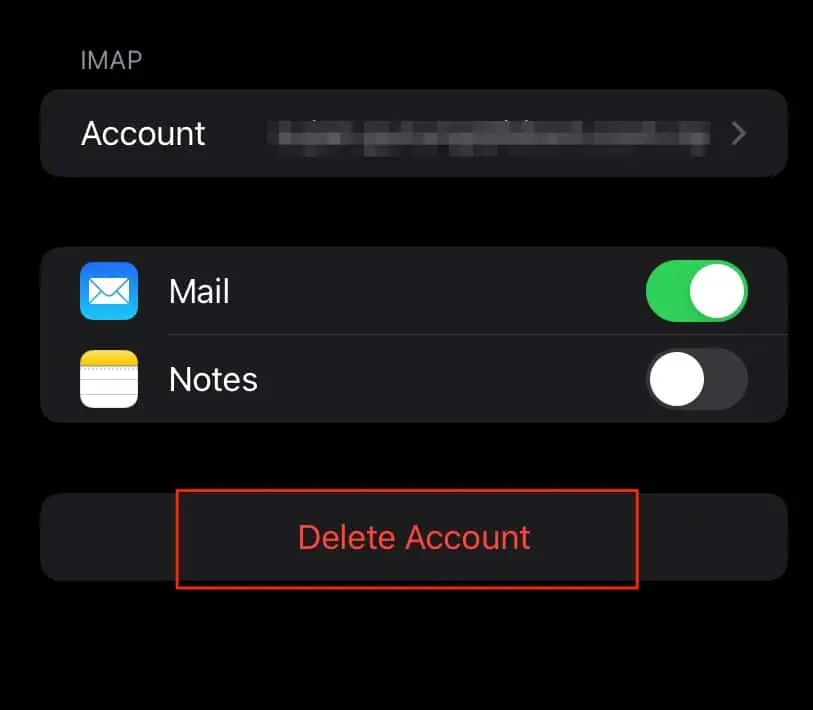
- Tap on the Delete Account button.

- Finally, tap on the Delete from my iPhone to confirm your action.
- Log back into your device and see if this fixes the issue for you.
On Mac
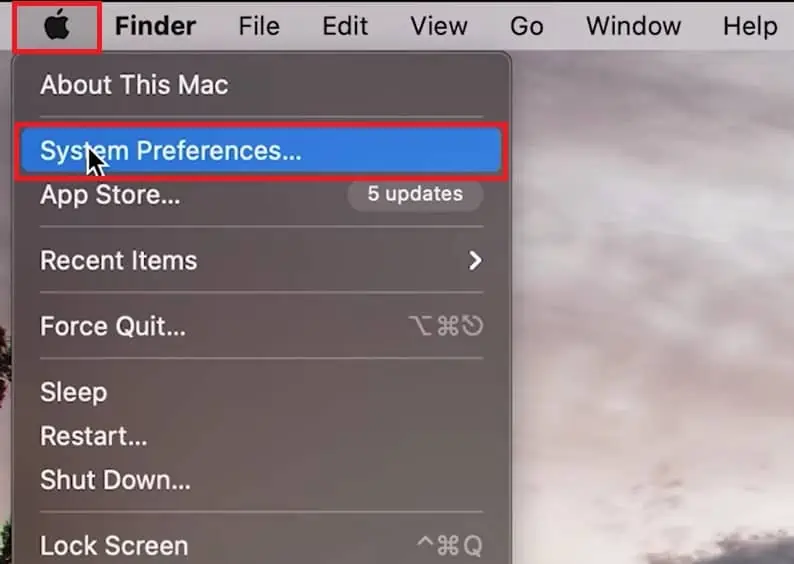
- Navigate to the menu bar and click on the Apple logo.
- Select the System Preferences option.

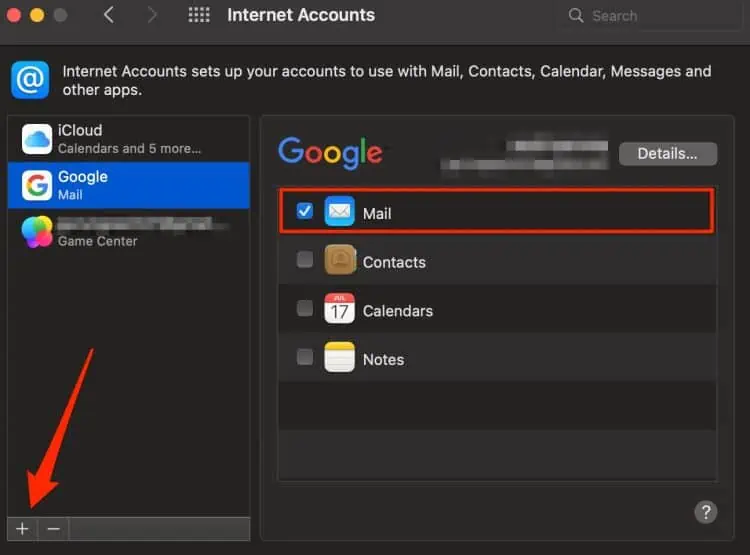
- Double-click on the Internet Accounts icon.
- From the left panel, select your mailboxes and uncheck the box for Mail.
- If you’re still facing issues with your Mail app not working on Mac, an effective fix is to delete your email account by clicking on the ‘-’ symbol.

- Now, sign back with your login credentials and ensure you tick the box for Mail.
Launch App From Finder
If you’re experiencing issues with launching the Mail app on your Mac after a software update, there are high chances that the app location has changed from its previous location. So, we suggest that you run the Mail app through the application folder on your Finder.
Here is how you can do it.
- Launch the Finder utility.
- From the left panel, click on Applications.
- Search or locate the Mail app from the list of options.

- Double-click on Mail to launch the app.
Rebuild your Mailbox
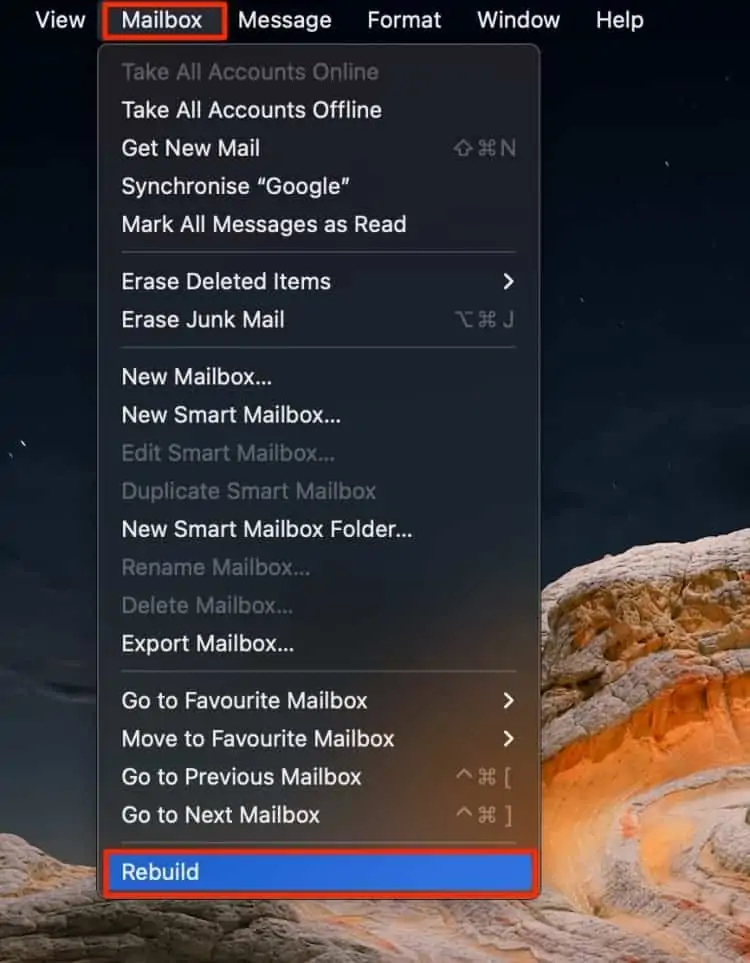
If you still suspect that your Mail app is not functioning as smoothly or is missing large amounts of messages on your Mac, we suggest you rebuild your Mailbox. Although it may seem like it could be a tedious process, it is relatively simple.
Here is how you can do it.
- Launch the Mail app.
- Navigate to the menu bar and click on Mailbox.
- Select the Rebuild option.

- Exit out of the app and reopen it again.
Remove Envelope Files
The reindex envelope files on your Mail app help to filter and sort through your messages. However, in some instances, it might fail to work and cause issues with the overall functioning of the app.
Here is a step-by-step guide on how you remove these files.
- Open up your Finder app.
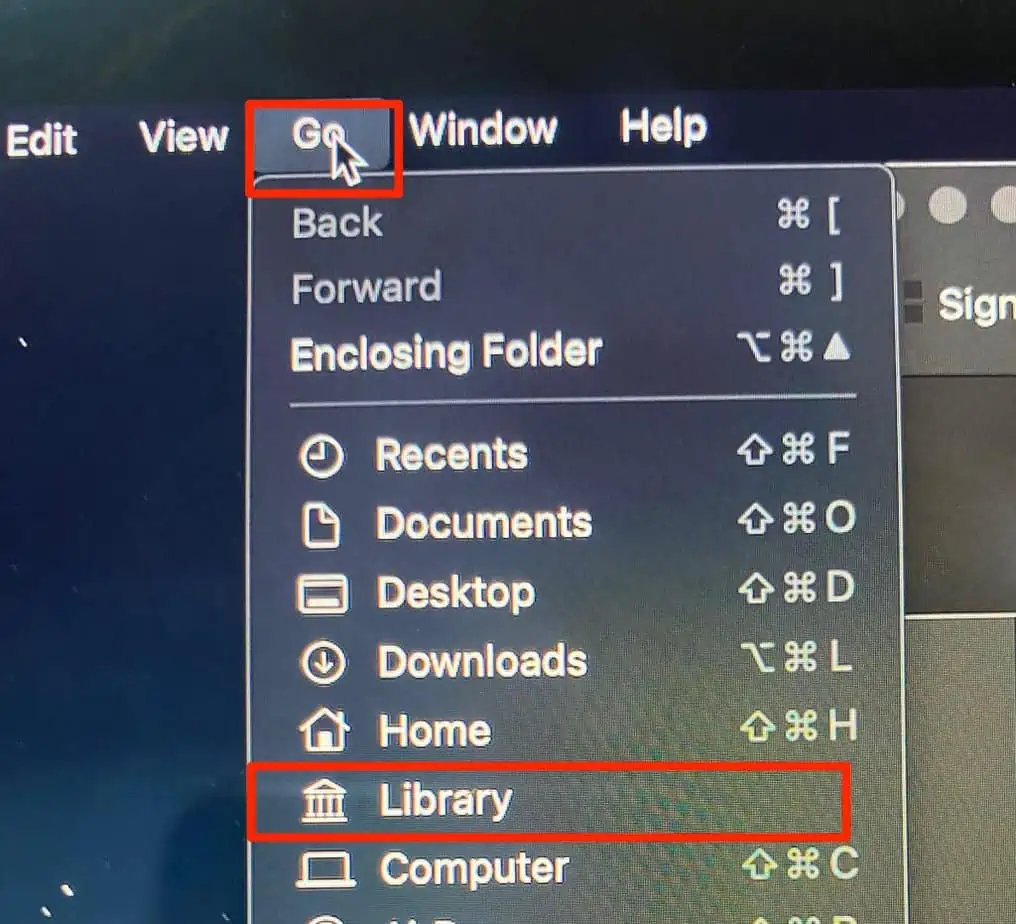
- Head over to the top and click on the Go menu.
- Press the Option key and select Library.

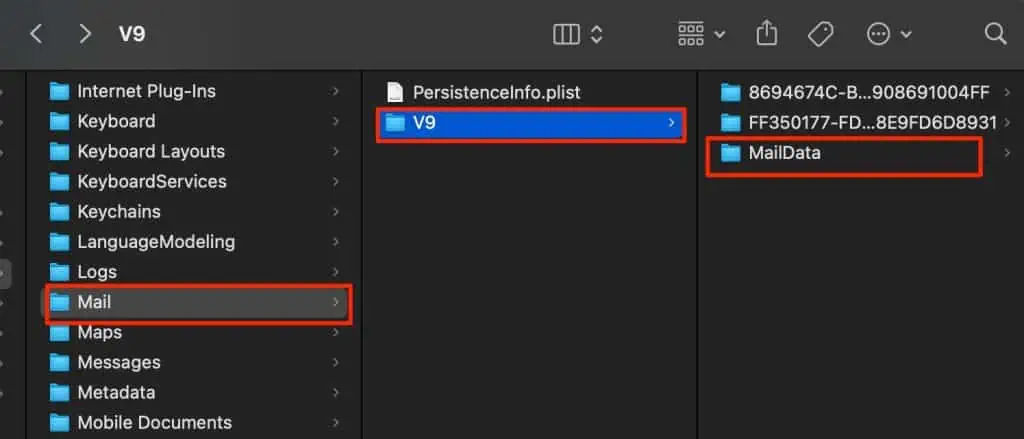
- Locate and double-click on the Mail folder.
- Now, click on the V9 folder. (The folder might vary depending on your OS version)
- Select the MailData folder and locate the following files.
 V9 > Mail Data”>
 - Copy and paste these files to your desktop and delete the files from the Mail Data Folder.
- Envelope Index-shm
- Envelope Index-wal
- Envelope Index
Now, see if the Mail app is working smoothly. If yes, then delete the files on your desktop as well.
Mail Fetch Settings
Depending upon your email service provider, the mail fetch settings are configured to their default settings on your iPhone devices. As a result, if the push option is not enabled in your mail settings, it might cause problems with receiving emails.
Here are some steps you can follow to adjust the settings.
- Navigate to the Settings app.
- Scroll down and tap on Mail > Accounts.
- Now, tap on the Fetch New Data option.
- Enable the toggle for Push.
- Finally, under the Fetch section, select the Automatically option.

Clear Out Storage Space
One of the other reasons your app might run into lagging issues is when you have lower internal storage space. We always suggest you have at least 15- 20% of storage available on your devices. Firstly, we suggest you remove all unnecessary emails from your inbox.
Your spam and deleted folder might also hog up free space so we suggest you clear out all these folders as well.
You can also resort to deleting all unnecessary installed apps on your device.
Uninstall and Reinstall App
In most cases, there might be issues within the app itself. So, a quick and easy fix you can apply is to uninstall and reinstall the app on your iPhone devices. This method allows you to clear out corrupted caches files and revert to the app’s default settings. To reinstall the app back into your device, head over to the App Store, search for the mail app and click on the install button.
Update Operating Software
Apple mail is a default app on both your iPhone and Mac devices. As a result, you won’t be able to update it through the App Store. To make app updates and resolve bugs fixes, you will have to update your device’s operating system.
Here is a step-by-step guide on how you can do it.
On iPhone
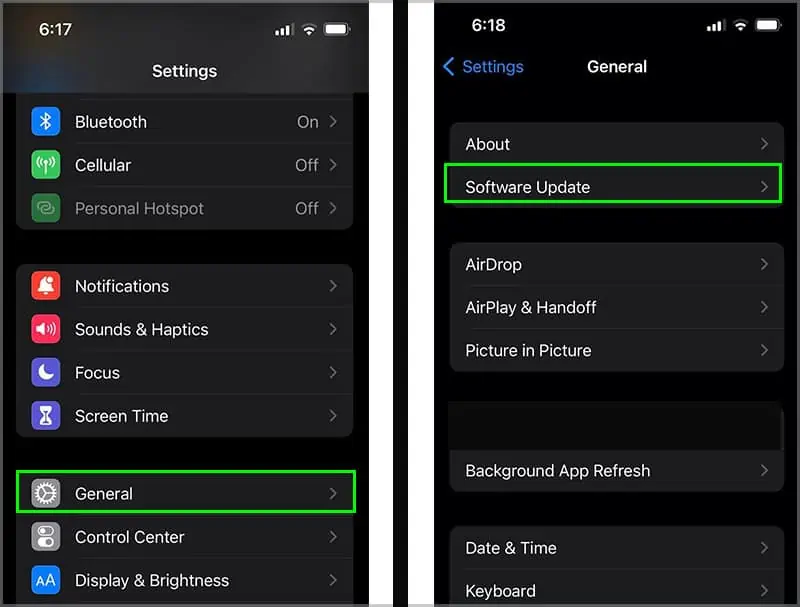
- Open up the Settings app.
- Scroll down and tap on General.
- Tap on the Software Update option.

- Select the Download and Install button if any updates are available.
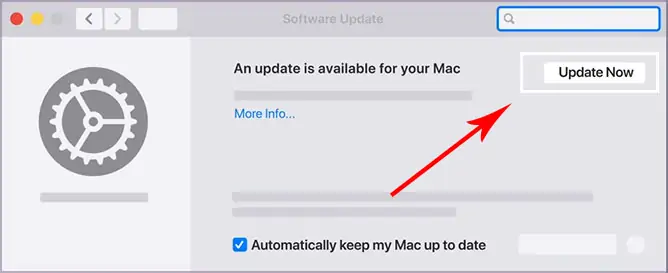
On Mac
- Navigate to the top menu bar and click on the Apple logo.
- Select the System Preferences option.

- Click on the Software Update icon.
- Click on the Update Now button if any updates are available.

Reset Network Settings
If you’re still facing issues with connecting or loading up your Apple Mail app, we suggest resetting your network settings. This method allows you to revert the default settings and gives your device a fresh new start.
Here is how you can do it.
On iPhone
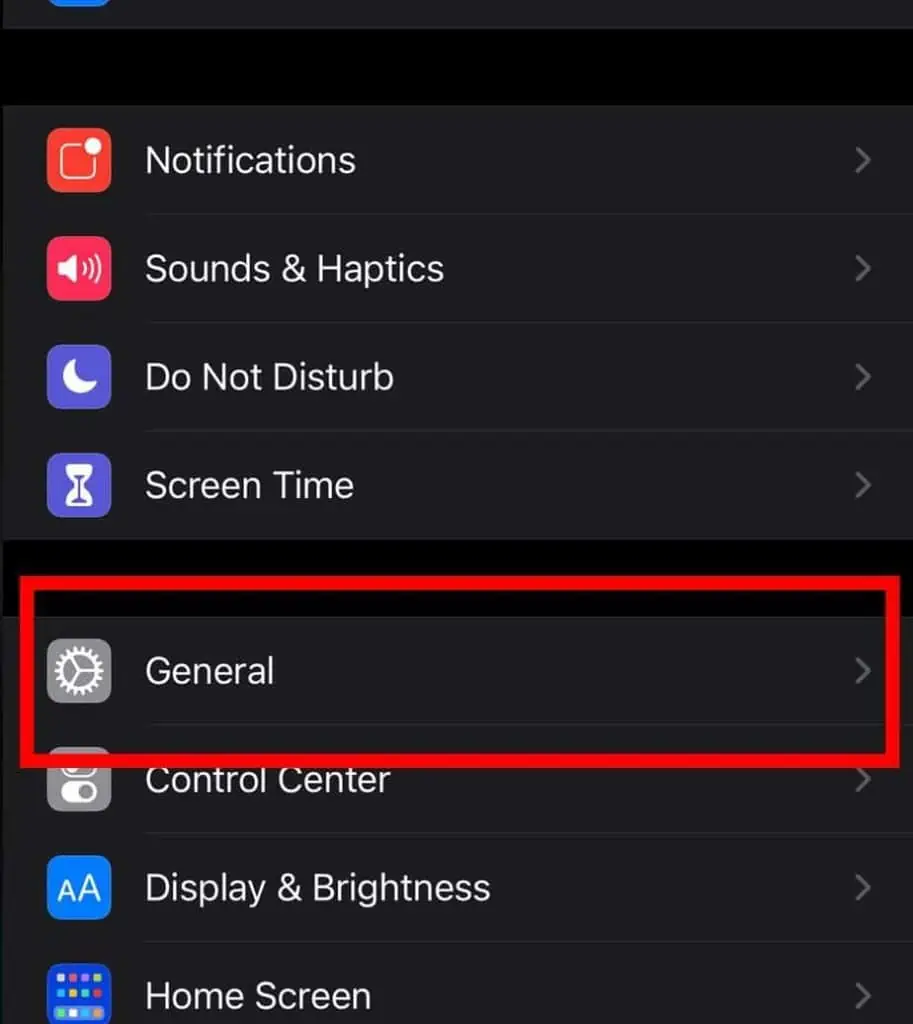
- Navigate and open the Settings app.
- Tap on the General option.

- Now, head over to the bottom section and tap on Reset.
- Select the Reset Network Settings from the list of options.
- Enter your iPhone passcode to allow access.
- Finally, tap on the Reset Network Settings to confirm your action.

- Head back to your network settings and add back your connection.
On Mac
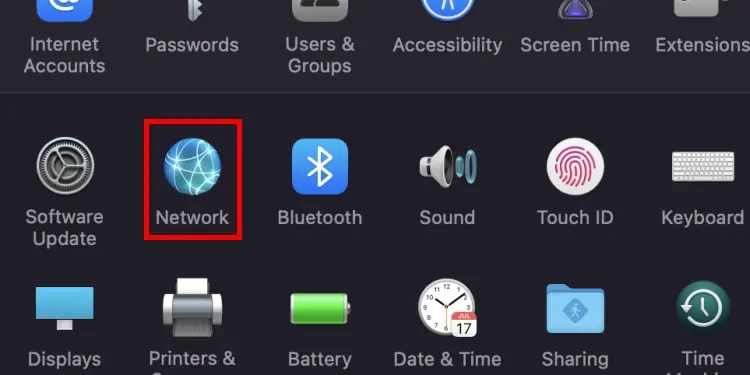
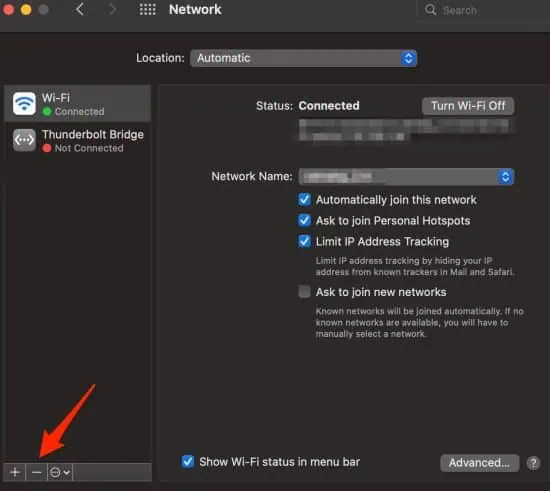
- Head over to the Apple logo and click on System Preferences.
- Select and double-click on the Network icon.

- From the left panel, select your Wi-Fi network.
- Click on the ‘-’ icon to delete your connection.

- Hit the Apply button to confirm your action.
- Now, re-add the connection back to your settings.
Check for Server Outages
Although it is rare, your email providers might undergo maintenance. As a result of this server outage, your mail app might not function.
To check, you can do a quick Google search on your browser. Alternatively, you can navigate to Down Detector to monitor the outages of your specific email provider. Results are given in real-time accurately.
More Tips
- Ensure the date and time are correctly configured ;
- Disable low power mode on iPhone devices
- Ensure you have a stable internet connection
- Disable Low Power Mode
- Switch to a browser and sign in to your account to see if the issue is with the app
- Install Third-Party App launcher
Conclusion
If all the above methods fail to resolve your issue, it is most likely a technical issue. In this case, we advise that you contact your email service provider.
Most email service providers have a designated help section or a support website. If they’re still unable to pinpoint the issue, we suggest you directly contact Apple customer support or take your device to the nearest Apple Store to inspect any faults.



 V9 > Mail Data”>
