The BIOS/UEFI is your system’s firmware. It’s a low-level software interface that facilitates communication between the hardware and OS.
If your system isn’t detecting some hardware components or a recently released BIOS update has added some new functionality, then you may want to update the BIOS version.
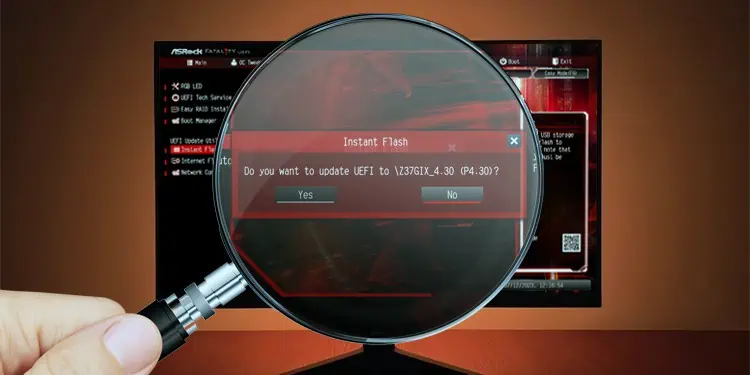
ASRock provides two ways to install such updates – the Instant Flash utility and UpdateCapsules to update from Windows.
Before You Begin
Before updating the BIOS, it’s important to confirm that the update is actually required. Some valid reasons include:
- Hardware incompatibility (e.g., new CPU doesn’t work due to old BIOS version)
- BSODs and boot errors
- Update introduces security patches, new features, or performance upgrades
If your system is running fine and there’s no real reason to update, then you should stick with your current BIOS version for now. There’s no point in risking potential issues that the new version might cause.
But if you do have valid reasons to update, keep a few things in mind before proceeding:
- Make sure the BIOS update isn’t interrupted as that could brick your motherboard. A power-backup source like a UPS can help with this.
- Download the update files from the official source and use the official methods to update the BIOS as we’ve done in this article. There’s no guarantee that third-party flashing tools are safe.
- It’s also important to make sure the file was downloaded completely without interruption as a corrupt file can lead to a failed update, or even a bricked motherboard in the worst case.
Check Motherboard Model & BIOS Version
You’ll need your motherboard model name to search for the available BIOS updates. It’s also a good idea to note the current BIOS version for comparison.
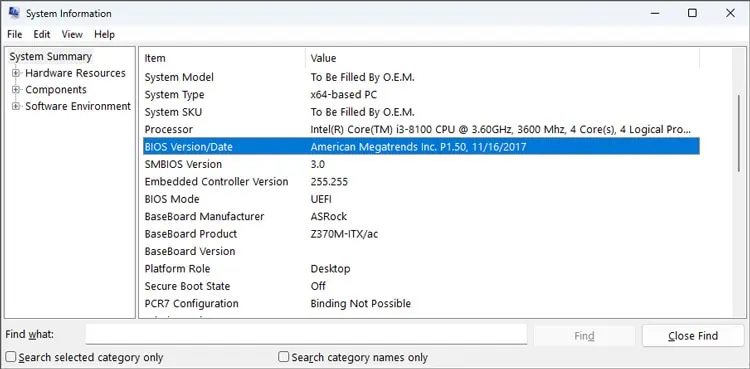
- Press Win + R, type
msinfo32, and press Enter. - In the System Summary page, check the BIOS Version/Date and BaseBoard Product entries.

As you can see, I’m using a Z370M-ITX/ac board. The firmware version is P1.50, installed on 11/16/2017.
Check Available BIOS Versions Online
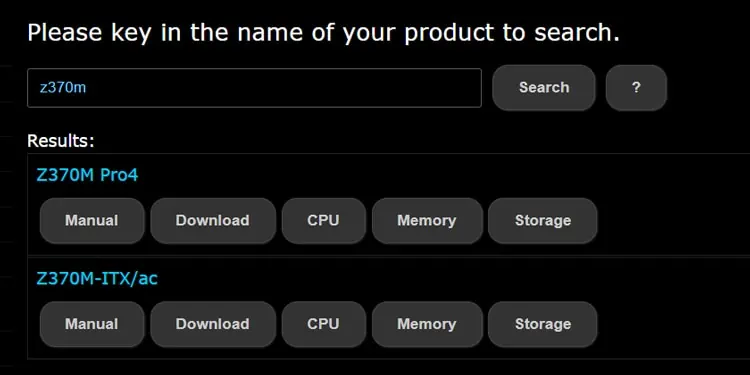
Go to the ASRock Support page and search for your motherboard model. Multiple versions of the model (gaming, pro, mini, etc.) may be listed there, so make sure you find the exact match.
On the motherboard’s product page, expand Support > BIOS.
The available BIOS updates for your motherboard will be listed here, sorted by version. If you’re unsure which update to install, read their description. The main changes like added features or compatibility upgrades should be listed there.
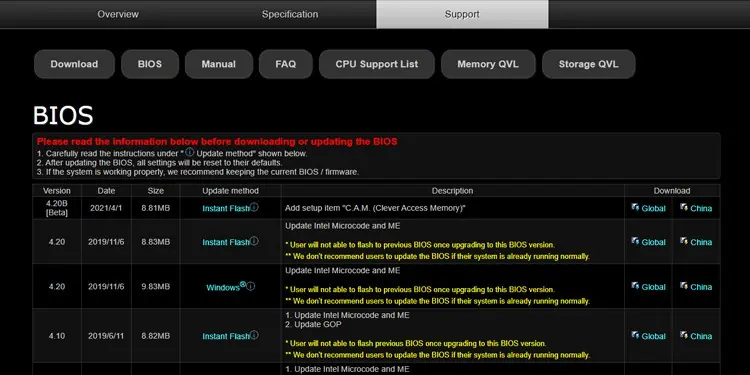
Some updates are non-revertible, meaning you won’t be able to flash older BIOS versions after updating. Others may require specific OS versions (e.g., Windows 10 RS3 or older). Such warnings and instructions will be mentioned in the description section, so it’s important to read everything carefully.
Once you pick the update to install, I recommend using Instant Flash to update the BIOS. UpdateCapsules are a viable alternative if you want to update directly from Windows.
In either case, if you click on the method hyperlink, you’ll find step-by-step instructions for your chosen method. If you find the steps there confusing, you can follow along with our guide instead.
Download the file from the Global hyperlink and continue the steps from the appropriate section below.
Method 1: Instant Flash
Instant Flash is ASRock’s proprietary BIOS flashing utility. You’ll have to move the update files to a USB and select this USB with Instant Flash to update the BIOS.
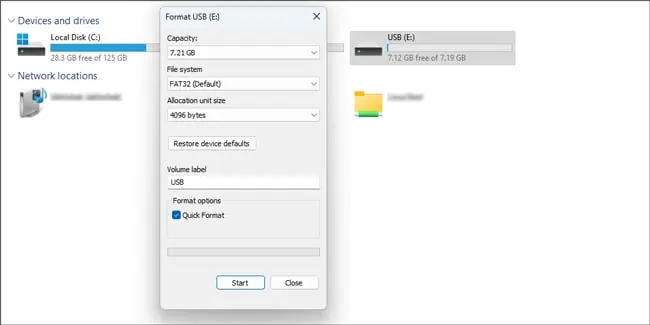
- Connect a USB drive to your PC and format it as FAT32.

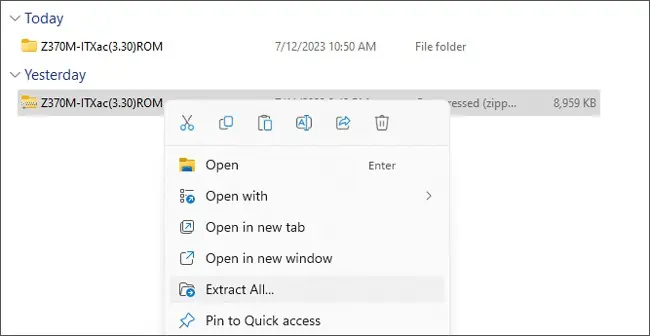
- Right-click the downloaded zip file and select Extract all. Move the extracted ROM file(s) to the USB.

- Reboot your PC and press F2 or Del as indicated on-screen to enter BIOS Setup. With some motherboards, you can also press F6 to directly access Instant Flash.
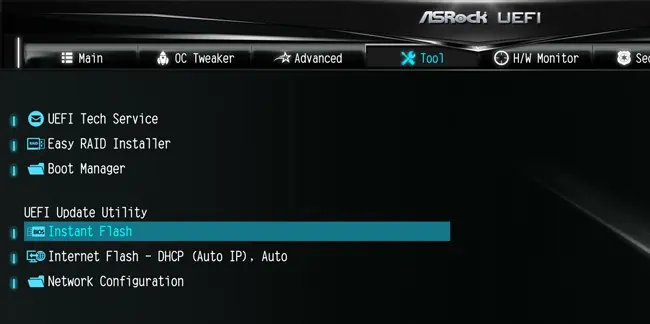
- Select Instant Flash from the Tools menu.

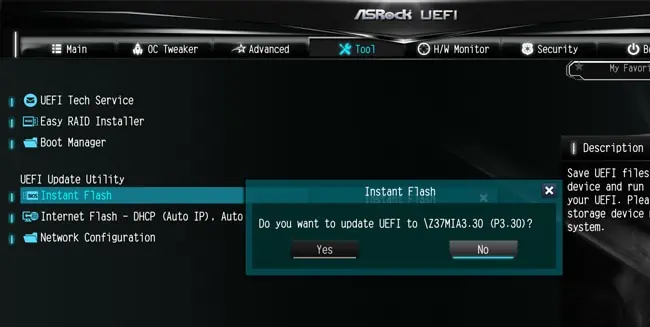
- Instant Flash will list all compatible BIOS versions. Select the BIOS version to flash and click on Yes.

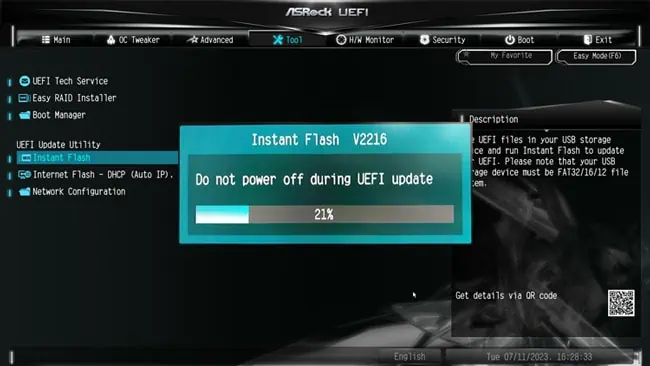
- The system will flash the BIOS now. Make sure the process isn’t interrupted. After it completes, press Ok to reboot the system.

- When rebooting, press F2/Del to enter BIOS Setup again.
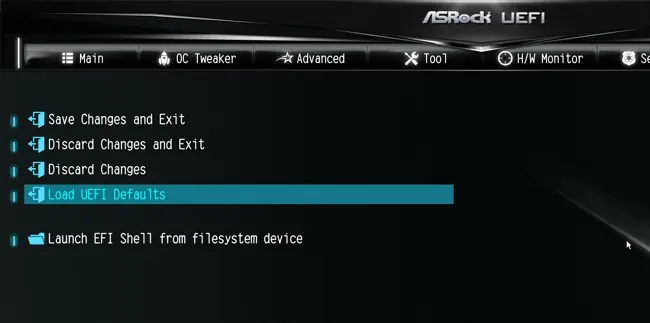
- Switch to the Exit menu and select Load UEFI Defaults, then Save Changes and Exit. You’ll boot with the new BIOS upon restarting.

Method 2: UpdateCapsule
Windows supports servicing firmware updates as a driver package using the UEFI UpdateCapsule function. The upside to this is that you can install the update directly from Windows, and the process is mostly automated.
The downside is that this method is only supported on certain boards and requires specific OS versions (Windows 10 Version 1709 or older in my case).
If your board and OS are supported, you can follow the steps listed below to update the BIOS with this method:
- Right-click the downloaded zip file and select Extract all > Extract.
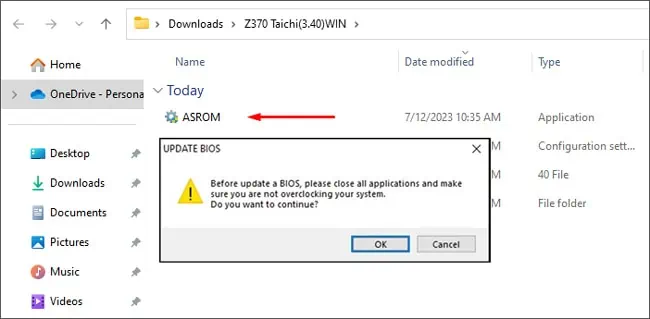
- Launch the extracted ASROM app and accept the prompt to continue.

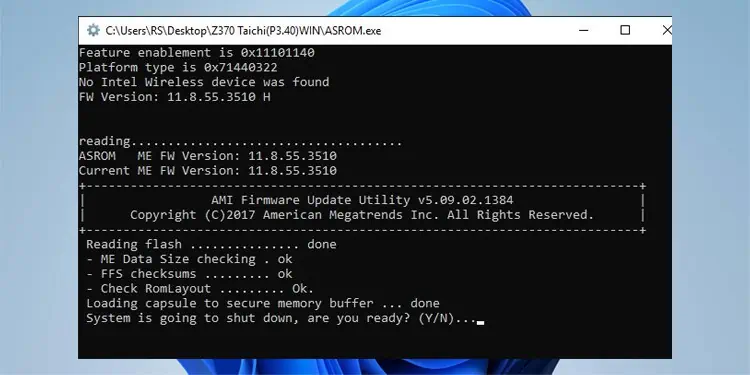
- The system will prompt you to reboot after loading the capsule to the secure memory buffer. Enter Y at this point.

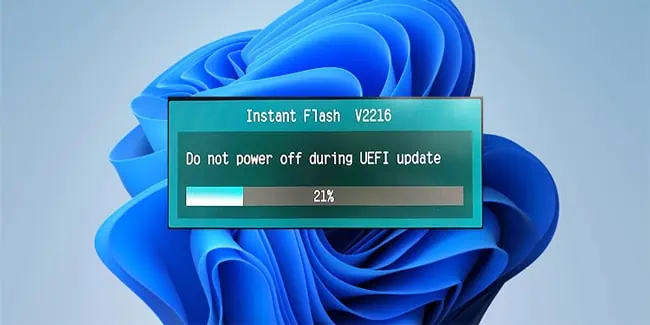
- After restarting, the BIOS update will start automatically.

- Once the update completes, the PC will restart again. Press F2/Del to enter BIOS Setup when this happens.
- Switch to the Exit menu and select Load UEFI Defaults, then Save Changes and Exit. You’ll boot with the updated BIOS upon restarting.


