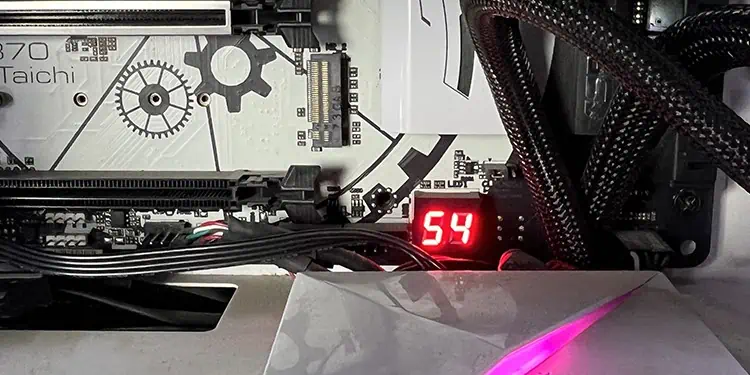
Some high-end ASRock motherboards use Dr. Debug codes instead of beeps or LED flickers to show POST errors or codes. When the computer starts up, you will normally see the motherboard going through several Dr. Debug codes.
However, if it gets stuck in the same code for a long time or cycles through a few unique codes, one or more of your hardware components on the PC are not working properly.
I had once encountered the 00 Dr. Debug code, which usually represents a CPU problem, on my ASRock x370 Taichi motherboard that was working fine the previous day. The CPU actually worked quite well in another computer.
After a bit of troubleshooting, I realized that the new graphics card I had just installed was drawing too much power from the PSU and the CPU was not getting enough voltage. I upgraded my PSU, which finally resolved the issue.
What Are the Dr. Debug Codes on ASRock?
Dr. Debug codes are the hexadecimal codes that you see on the 7-segment display on some ASRock motherboards.
Whenever the BIOS or UEFI firmware on ASRock performs the POST process, the Dr. Debug LEDs show various codes that correspond to the steps in the process. If the display gets stuck with a number or code, it indicates that the POST could not complete due to issues with a hardware component.
So the Dr. Debug code shows exactly which component is not working. After figuring out the components, you can perform the necessary troubleshooting measures to check and resolve their issues.
What Do Individual Dr. Debug Codes Mean?
Many of the Dr. Debug codes correspond to transition POST steps and you will not get them for any hardware issues. So here are some common Dr. Debug codes that you can actually encounter:
| 00 | Problem with the CPU |
| 0D | Problem with USB, PCIe (including Video Card) or RAM devices. |
| 01 – 55 5A – 60 | Problem with the memory (RAM) |
| 61 – 91 | Can’t initialize the chipset |
| 92 – 99 | Problem with PCIe devices (including Video Card) |
| 9A – 9D | Problem with USB devices |
| A0 – A7 | Problem related to IDE or SATA devices |
| B0, B7 | Problem with the memory (RAM) |
| B2 | Problem with the Video Card |
| B4 | Problem with USB devices |
| D0 – D3 | Problem with the CPU |
| D6 | Can’t recognize the Video Card |
| D7 | Can’t recognize or find keyboard and mouse |
| FF | Problem with the CPU |
If you see another Dr. Debug code that is not in this list, it’s better to check the user manual of your motherboard model. Also, sometimes the motherboard’s display flashes through the same bunch of codes in succession. It’s best to contact ASRock support personnel in both of these situations.
How to Troubleshoot the Dr. Debug Codes?
After determining the corresponding device, you can go to the relevant sections below to troubleshoot your issue.
Most of your hardware components are interdependent. So even if the BIOS detects an error on one device, its underlying cause may be in another device. If simply following the troubleshooting steps for one component doesn’t work, it’s better to check other devices as well.
Chipset Error
If the issue is with your motherboard chipset, then the only thing you can do is to clear the CMOS and reset the BIOS settings. If any improper BIOS settings were causing the issue, clearing the CMOS will resolve it.
You can remove the CMOS battery and then insert it again or short the CMOS jumpers on the motherboard to carry out this procedure.
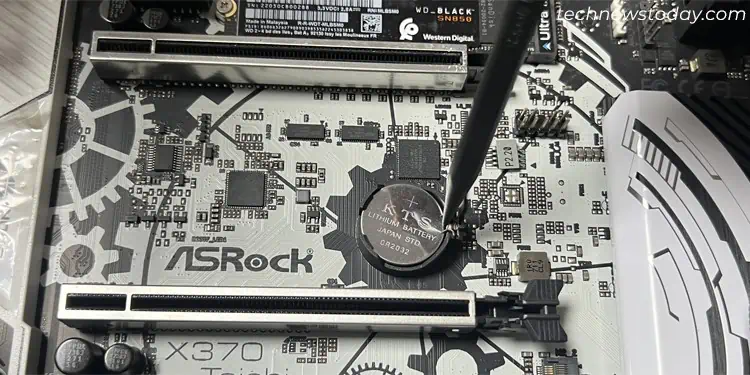
If clearing the CMOS doesn’t help, your chipset is likely damaged. You may need to replace your whole motherboard in such cases.
CPU Error
POST errors related to CPUs don’t automatically mean that the CPU has failed. You can encounter it if the pins on the CPU or the CPU socket are bent or the thermal paste has spilled inside the socket.
CPU-related Dr. Debug errors can also occur if the PSU does not provide enough power to the CPU and diverts most of the wattage to other components. This issue usually happens after building a PC or upgrading your GPU or coolers if the PSU doesn’t provide enough wattage to support all the installed components.
- Try clearing the CMOS to reset the BIOS settings. It will take care of any improper CPU voltage settings that may be causing the issue.
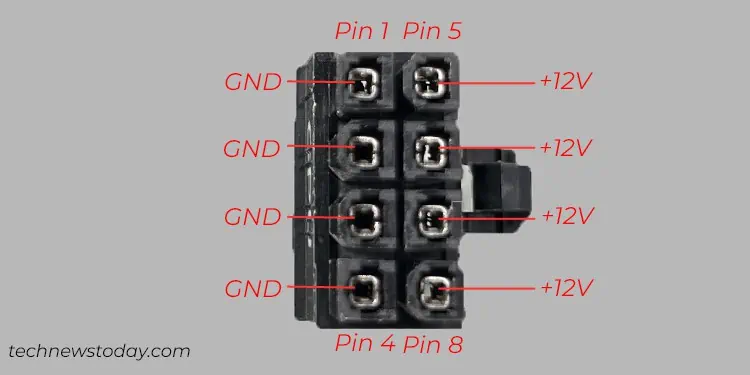
- You should also check if the CPU is receiving enough voltage by using a multimeter on the CPU’s power connector. You can check the image below to know what voltage to look out for in which pins.

- Check if your CPU is installed properly. You can also reinstall it while ensuring that no pins are bent. Also, make sure to properly clean the thermal paste and reapply it while reinstalling the CPU.
- If applicable, you can try using the CPU in another computer and see if it works.
- If the CPU doesn’t work anywhere, it is likely dead. You will need to replace it in such cases.
- If you have performed all the solutions above but are still getting the error even when the CPU works elsewhere, it indicates issues with your CPU socket or motherboard. If so, you may need to replace the motherboard.
RAM Error
Issues with RAM usually indicate that the RAM stick or slot is defective. However, CPUs also come with built-in memory controllers and the motherboard can mistakenly represent any issues with this component as a RAM error in the Dr. Debug code.
Other than these, improper RAM voltage or other settings on the BIOS can also stop it from working and may even damage the RAM sticks.
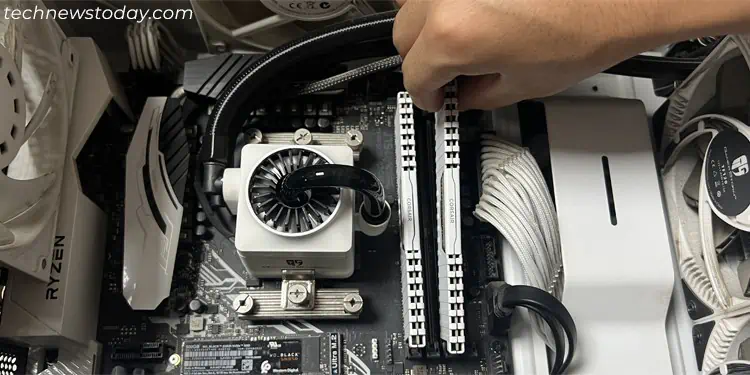
- You should first reseat the RAM properly. Try changing the RAM slots as well.

- If you are using more than one RAM stick, use only one at a time to check if one of them is faulty.
- It’s better to clear the CMOS to reset the RAM related BIOS settings as well.
- If applicable, you can also try inserting the RAM in another PC or use other-compatible RAMs in your PC to check if the RAMs are functional. You can also try running RAM diagnostic software on the other PC.
- If the RAM doesn’t work anywhere or the diagnostic reveals some errors, you may need to replace it.
- Try replacing your CPU if the RAM sticks and slots are working properly to account for issues with its memory controller.
Other Device (PCIe, Video Card, SATA/IDE, USB) Error
While the different categories of devices correspond to different Dr. Debug codes, the procedure to troubleshoot them is the same. So I have grouped all of them together. Depending on your issue and device, please carry out the troubleshooting measures accordingly.
Note: If you are adding additional PCIe devices on your PC, make sure that your motherboard has enough PCIe lanes to support them.
For instance, if your CPU + motherboard chipset support a total of 24 PCIe lanes (16+8), the lanes will be divided among all the devices. So if all of your PCIe devices like your graphics card, NVMe SSDs, WiFi card, and so on need a total of 32 lanes, one or more of the devices may not work.
- If the Dr. Debug code corresponds to a specific device, make sure you have actually connected the device to the computer.
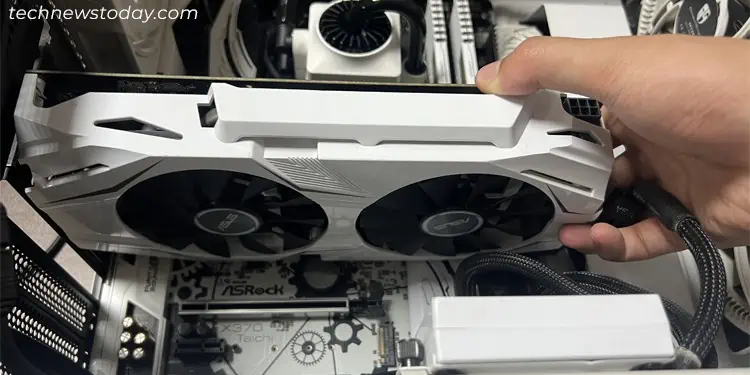
- Then, try removing the respective devices on the PC and reinstall/reinsert them again. You need to reinstall all the devices in the category (USB peripherals, PCIe devices, etc).

- You can also remove all the unnecessary devices in the category and check if you still get the same Dr. Debug code. If you don’t encounter the same issue, you can connect them one by one and check to narrow down which component is causing the issue.
- Try connecting the devices to another PC if applicable. On the same note, if you have additional devices, you can also use them on the PC instead. If the device is faulty, you will need to replace it.
- You should also clear the CMOS and reset your BIOS/UEFI settings.
- If you have just installed the PCIe or USB device on your PC and you don’t have the latest BIOS version, your BIOS may not support these devices. You can try updating the BIOS/UEFI and see if it resolves the compatibility issue.
If you still can’t resolve your issue, you should seek help from ASRock support personnel. If it is not covered by ASRock’s support, you can also go to local hardware professionals and have them look at the problem.
