The Secure Boot security feature on your ASRock motherboard prevents booting from any devices that do not contain valid digital signatures.
In essence, only signed system level drivers can run if this feature is enabled. If any drivers on the operating system or the bootable drives are unsigned or infected-with malware, the UEFI or BIOS firmware won’t choose it as a boot device.
You can enable or disable this setting from within the Security tab of the UEFI or BIOS interface on your ASRock motherboard.
How to Disable Secure Boot on ASRock Motherboard
While Secure Boot is a security feature that protects your computer from external threats and access, you may need to disable it in a few situations.
For instance, I have both Windows and Linux as dual boot options on my computer. If I change the hardware components or the Linux kernel, the drivers or kernel on my Linux system may not have the necessary digital signature. It is possible to re-sign the software components. But since it’s tiring to do on each change, I usually keep Secure Boot disabled.
However, I also adopt all the preventive measures to prevent any sorts of malware or other threats on my system. If you are not sure that you can do the same, it’s best to leave it on.
Regardless, here’s how you can disable this feature.
- Restart or power up your computer.
- As soon as you see the ASRock logo on the screen, press F2 or Del keys to get to the UEFI setup.

- If you are in the EZ mode interface, press F6 to get to Advanced Mode.

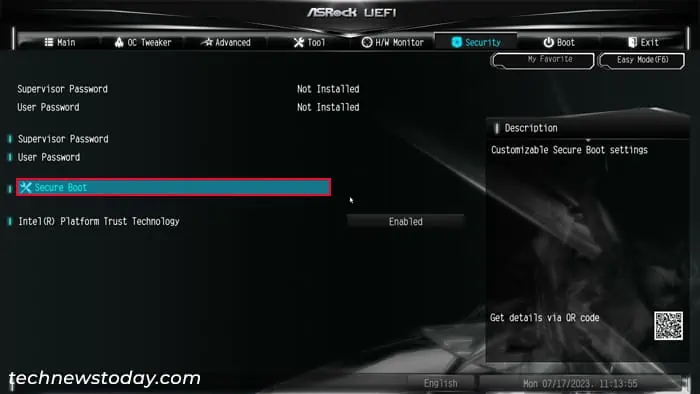
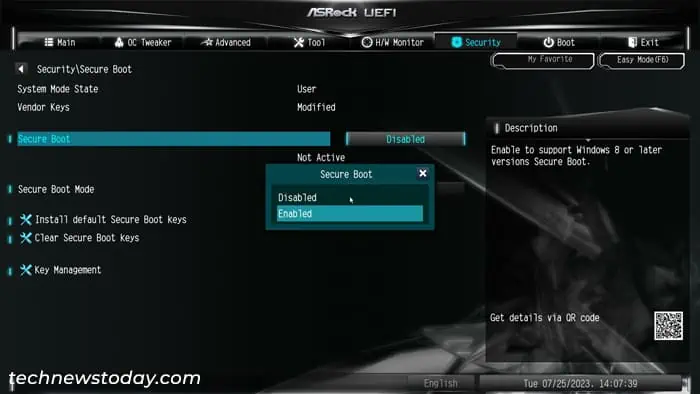
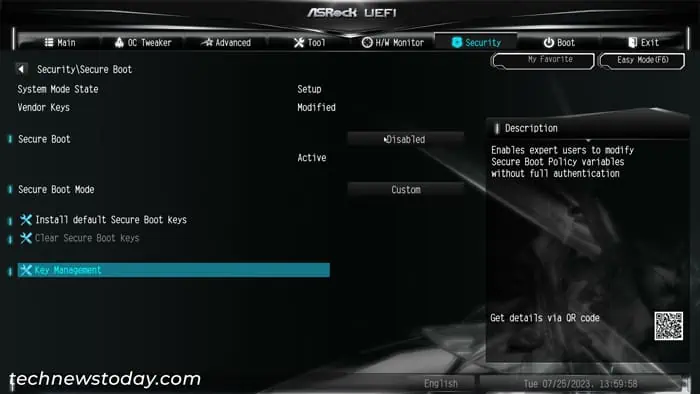
- Head over to the Security tab and select Secure Boot.

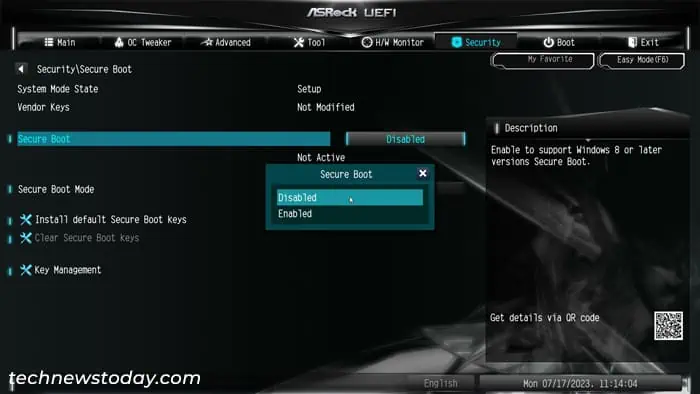
- Select Secure Boot, set it to Disabled and press Enter.

- Press F10 and click Yes to save the changes and exit the UEFI/BIOS.
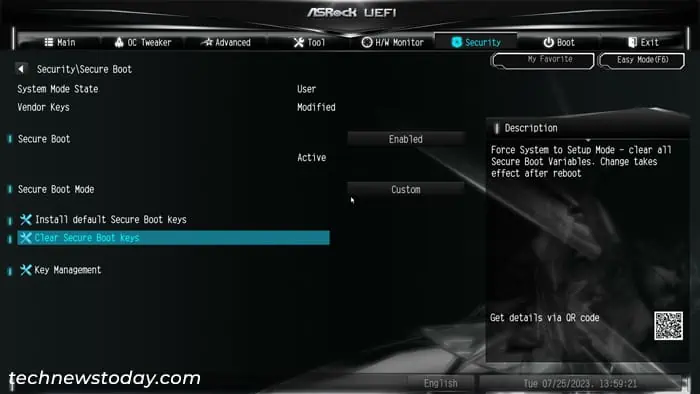
You can also remove the keys altogether to disable Secure Boot in a more destructive manner. I don’t recommend doing so especially if you are using custom generated Secure Boot keys and have their backup. Regardless, here’s how you can do it:
- Go to the Security tab in the UEFI Advanced Mode.
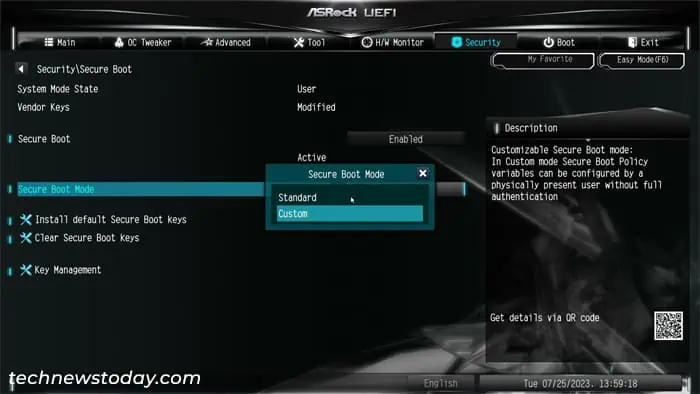
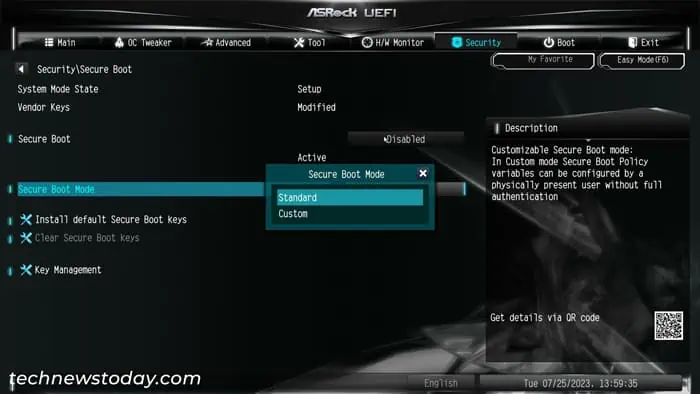
- Select Secure Boot and set Secure Boot Mode to Custom.

- Then click on Clear Secure Boot Keys.

- Choose Yes to confirm.
- Press F10 and click Yes to save the changes and exit the UEFI/BIOS.
How to Enable Secure Boot on ASRock Motherboard
The process to enable Secure Boot is similar to that of disabling this feature. However, you will need to perform additional steps if your UEFI no longer contains the Secure Boot Keys.
Note:
If you wish to enable secure boot in order to upgrade to or install Windows 11, your firmware also needs to be in UEFI mode.
So you have to disable CSM, which carries legacy support. Also, if you have an MBR partition disk instead of a GPT one, you will need to convert it to GPT so that you can enable UEFI mode.
Depending on your motherboard’s BIOS version, you may need to change these settings in other situations as well.
- Power up or restart your computer.
- Press F2 or Del on the startup when you see the manufacturer’s logo. If you have enabled fast boot, it’s better to press the key repeatedly to get the timing right.
- If you are in the EZ mode interface, press F6 to get to Advanced Mode.
- Navigate to the Security tab and go inside Secure Boot.
- Choose Secure Boot and set it to Enabled.

- If you don’t encounter any issues, press F10 and click Yes to save the changes and exit the BIOS/UEFI.
If you get the “Secure Boot can be enabled when System is in User Mode. Repeat operation after enrolling Platform Key(PK)” or a similar error, it means that your computer does not have the necessary Secure Boot keys.
Use one of the three methods below to generate the keys in this scenario.
- You set the Secure Boot Mode to Standard to be able to get the default Secure Boot keys.

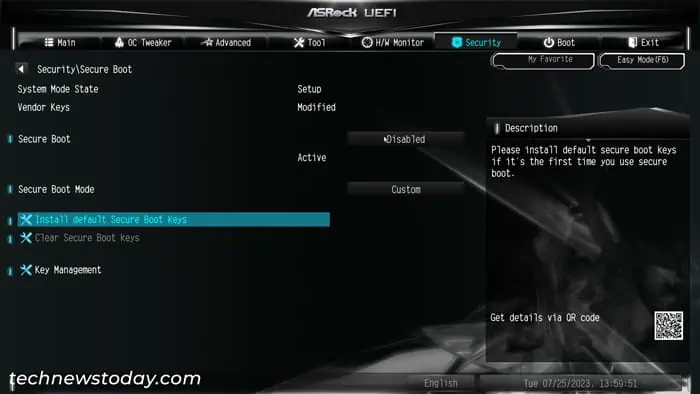
- You can also set the mode to Custom, choose Install Secure Boot keys and confirm with Yes for the same purpose.

- Or if you have an external USB media with separate Secure Boot keys, you can use the steps below to import them:
- Make sure to insert the USB drive with the keys into your computer. You can also have the keys in your Hard disk or SSD but it’s better to use a USB flash drive.
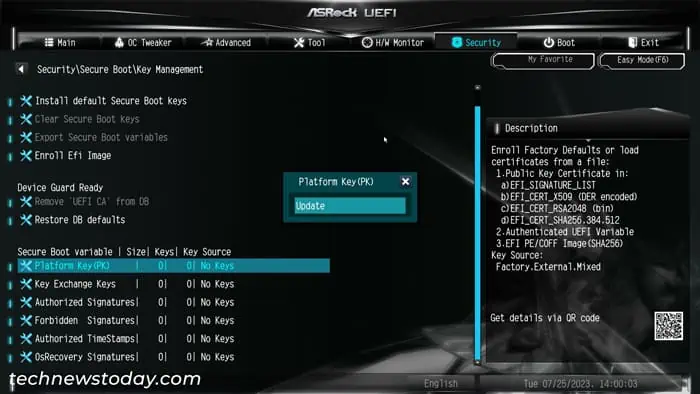
- Go to Key Management.

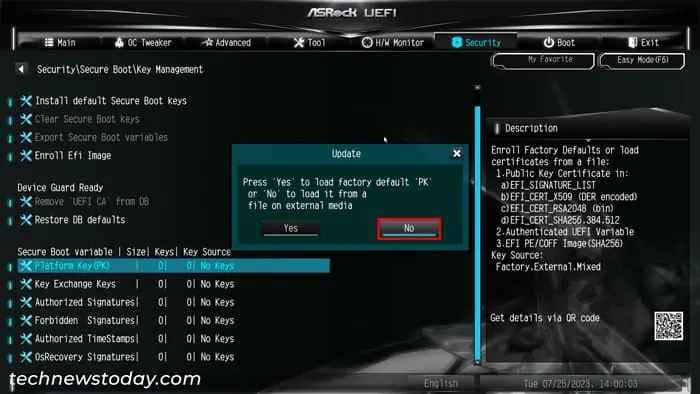
- Under the Secure Boot variable section, select each key and choose Update or Append.

- Click on No.

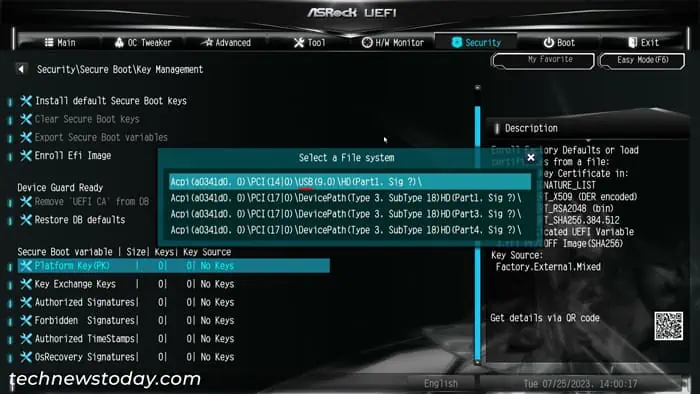
- Select the USB drive. It should show “USB” somewhere in the device path.

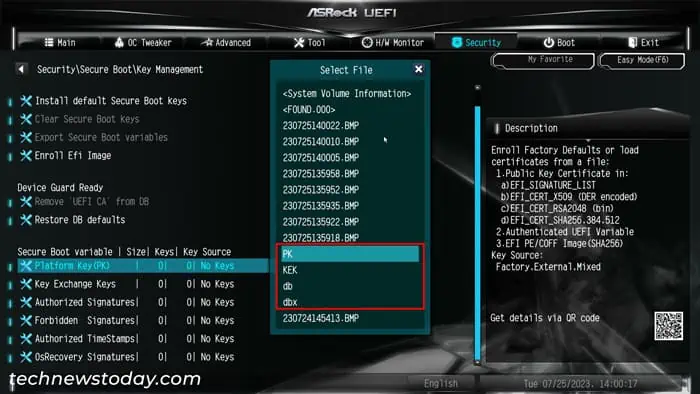
- Navigate to the location of the relevant keys and select them. The keys should usually be PK for Platform Key, KEK for Key Exchange Keys, db for Authorized Signatures and dbx for Forbidden Signatures.

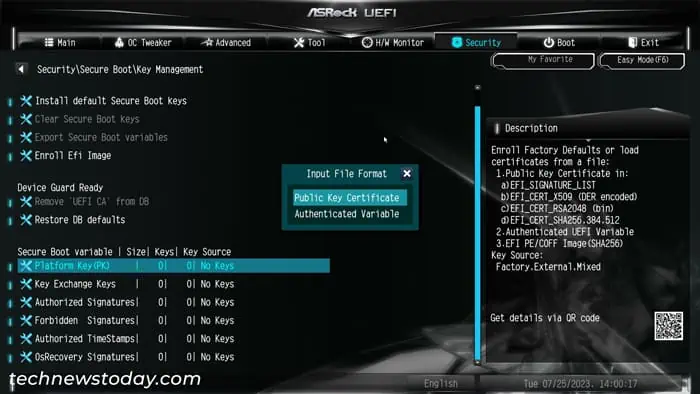
- Choose between the options depending on the key file’s type. You can try selecting one option and if you can’t load it, try again while choosing another option.

- Select Yes and then OK.
- Do so for all possible keys I have mentioned above.
Then, enable Secure Boot using the above steps. You may need to save the changes, restart your system and then get to the UEFI again to do so.
In some situations, your system may show that Secure boot is not active even when it is enabled in the BIOS. You will need to perform a BIOS update to resolve this issue.
