Booting from a USB device is the most common way to install an operating system in your PC. This is true for all PCs including those with ASRock motherboards since people rarely use traditional bootable devices like CD/DVD drives nowadays.
You can also use the USB installation media to access the recovery environment to troubleshoot any system issues on your computer.
Usually, you need to use the boot device menu or change the boot priority list to boot from the USB media. But there are also some other options you may be able to use depending on your firmware or system.
Use the Boot Device Menu to Boot from USB
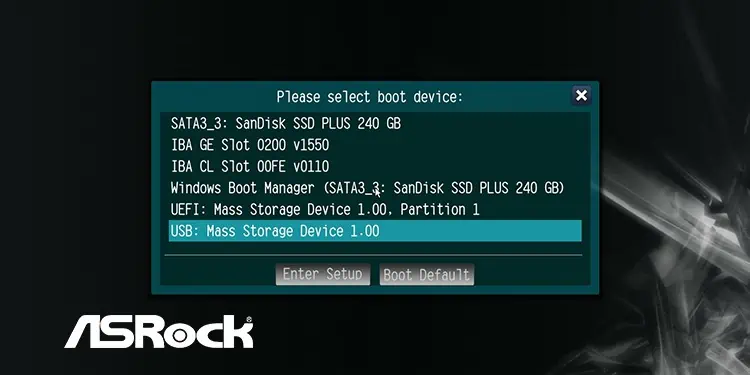
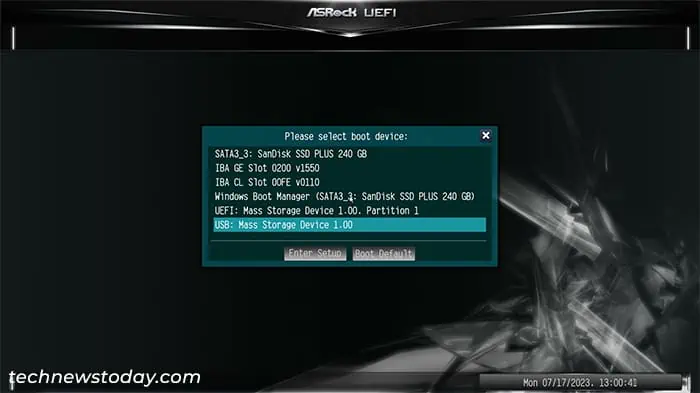
ASRock allows you to easily access the boot menu and select the boot option during the boot process. Here, you need to use this menu and choose the bootable USB as the current boot device.
- Insert the USB installation media into the PC.
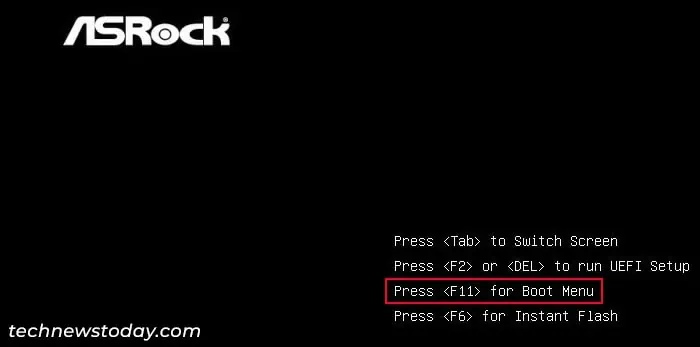
- Restart or power up the computer and press F11 as soon as you see the manufacturer’s logo.

- Select your USB flash drive from the list and press Enter.

Note:
In some older ASRock motherboards, you may need to use specific USB ports that have Legacy support to insert these installation drives. Otherwise, you can’t use these drives in a pre-Windows environment.
I recommend first trying to use any USB port and perform the remaining process. If you encounter any issues, check the user manual for your motherboard model to find such ports and use them instead.
Change Boot Order
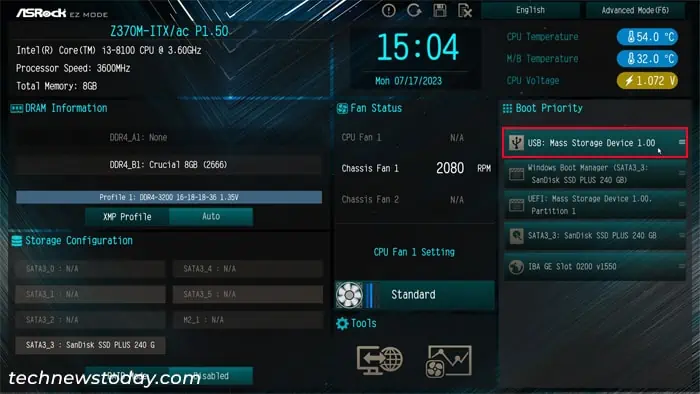
Your BIOS or UEFI stores a boot priority list of devices that shows which boot device it will prioritize first. So if you don’t get the boot device menu or it doesn’t contain the USB installation drive, you can get to your BIOS or UEFI and set the USB media as the highest priority boot device.
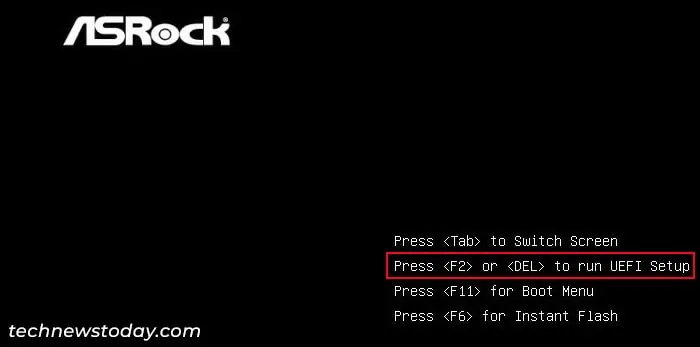
- Power up or restart your computer and press F2 or Del when you get to the manufacturer’s logo screen to get to BIOS. I recommend repeatedly pressing the key after your computer turns on to get the timing right.

- Here, you will see the Boot Priority list on the left side. Drag the USB boot device to the top of the list. If you don’t see any USB device on the list, your computer is not detecting it.
- The USB flash drive might not have connected properly, so check it or try inserting it to some other port.
- Exit the BIOS by pressing the Esc key and selecting Yes.
- Then, get to the BIOS and check again.

- After changing the priority, press F10 and click on Yes to save the configuration and exit the BIOS/UEFI. Now you should be able to boot from the USB even without pressing any keys.
Use Boot Override Option
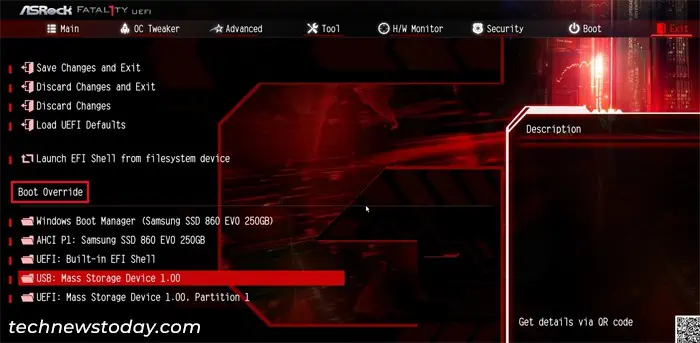
Modern ASRock motherboard BIOS/UEFI also come with a boot override feature. This feature allows you to boot any of your boot devices without affecting the boot priority list. So you can use it if other options don’t help you boot from a USB media and if it is avaliable in your motherboard UEFI.
- Get to the BIOS/UEFI interface by pressing the F2 key on the manufacturer’s logo screen.
- Press F6 to go to Advanced mode.
- Get to the Exit tab.
- Here, if you have the Boot Override section, you should see a list of boot devices there.
- Highlight the USB device on the list and press Enter.

Use Advanced Startup Options
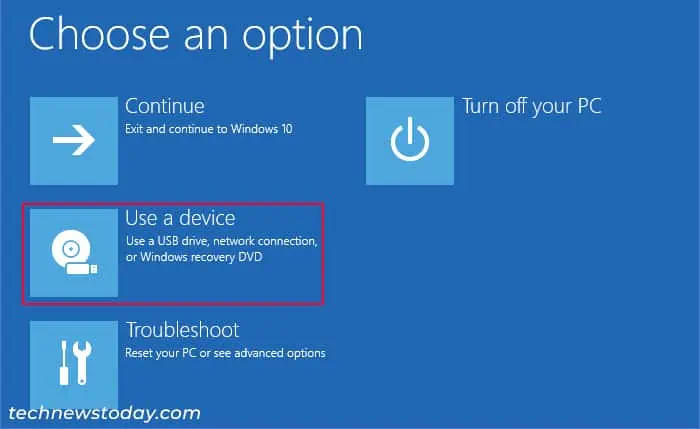
You can also use the Advanced Startup or Windows Recovery mode to boot from a USB device. However, you must already have a Windows system in your computer to get to this screen.
- First, you need to get to the Advanced startup options.
- Power up or restart your computer and get to the login screen.
- Here, click on the Power button to get the power options.
- Press and hold the Shift key and click on Restart. Select Restart anyway if you have to.

- Here, select Use a Device and then USB or EFI USB Device.

Troubleshooting Issues with USB Boot on ASRock
However, while booting from a USB may seem straightforward, you may encounter a few issues due to improper USB installation media or misconfigured BIOS settings.
Check BIOS/UEFI Settings
ASRock BIOS or UEFI firmware comes with a few settings that affect booting from other devices like external USB media. So, you should get to your BIOS and make sure everything is alright. How these settings affect the USB boot process also depends on the USB installation media and your motherboard. But it’s better to note them so that you can troubleshoot your issue properly.
- Fast Boot bypasses certain boot processes to speed up the boot time. It will also bypass the instance where you can choose another boot device. So you will need to disable this option.
- Depending on how you created your installation media, you may need to disable Compatibility Support Module (CSM).
- This mode enables Legacy BIOS support, which can conflict with the UEFI or GPT compatible USB installation drives (check the next solution for more details). So, you need to disable this feature if you have such a USB media.
- On the other hand, if you have a USB media with an MBR-based Windows setup, you need to enable this option.
- Also, if Secure boot is enabled in your UEFI but your installation media does not contain the necessary digital signature, your system won’t be able to use it as a boot device. You may need to disable the Secure boot feature in such cases.
First try keeping the Secure boot enabled and check if USB boot works while changing the rest of the necessary options. If it doesn’t work, you can temporarily disable it while you are booting from the USB device.
Create Proper USB Installation Media
The USB installation media will only work properly as a boot device if it is compatible with the motherboard.
- Your motherboard may use the Legacy Basic Input Output System (BIOS) mode or the Unified Extensible Firmware Interface (UEFI) firmware.
- Most modern computers use UEFI mode that is compatible with the GUID Partition Table (GPT) storage disk by default. On the other hand older computers use Legacy BIOS, which requires a Master Boot Record (MBR) disk instead of a GPT one.
- If you want to install Windows using a USB installation media, the Windows setup must have the same partition scheme as the computer. So, if you want to boot into a GPT-based Windows installation disk, you can’t be running Legacy BIOS on your motherboard and vice versa.
- In fact, it’s best to use the UEFI mode with GPT disks for all modern systems, as they are far better than their older counterparts.
You can use the Media Creation Tool provided by Microsoft to create a bootable USB drive with GPT-based Windows setup.
You can also download or create an ISO file for the Windows setup and use third-party tools like Rufus to create the USB media. Some of these apps also allow you to select the partition scheme (MBR or GPT). So using them is a good option if you want to install Windows in an ASRock computer with Legacy mode BIOS.
