You possibly won’t be able to run Hyper-V or third-party virtual machines like VMware Workstation/VirtualBox on your ASUS system without configuring the related settings on BIOS.
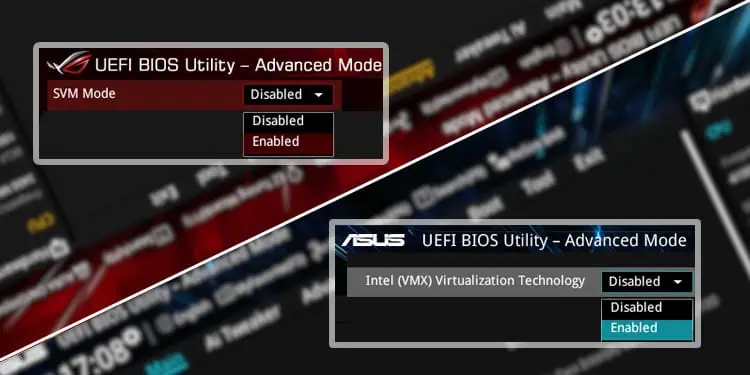
To enable virtualization, navigate to CPU Configuration in the Advanced tab. Intel users can look for Intel Virtualization Technology or VMX option while those with AMD processors should find SVM Mode. Just expand the drop-down, set it to Enabled, and save the settings.
Recalling my first attempt to use Ubuntu on VMWare, I couldn’t start the virtual machine even after properly setting it up. I got the “This host supports AMD-V, but AMD-V is disabled” error and to solve this, all I had to do was tweak a simple setting on BIOS. Since then, I have been able to emulate multiple operating systems on my ROG STRIX B450-F GAMING PC without further issues.
Check Processor Virtualization Support
Even though most modern motherboards include the virtualization setting within the BIOS settings, it might not work if your processor is incompatible.
Here, at our TechNewsToday workplace, all of our Intel and AMD processors support this feature. We have had no complaints from any authors and editors when using virtualization on their ASUS laptops or PCs.
But this might not be the same case for everyone. For that reason, it’s a good idea to first confirm whether your CPU supports it or not.
For Intel Users
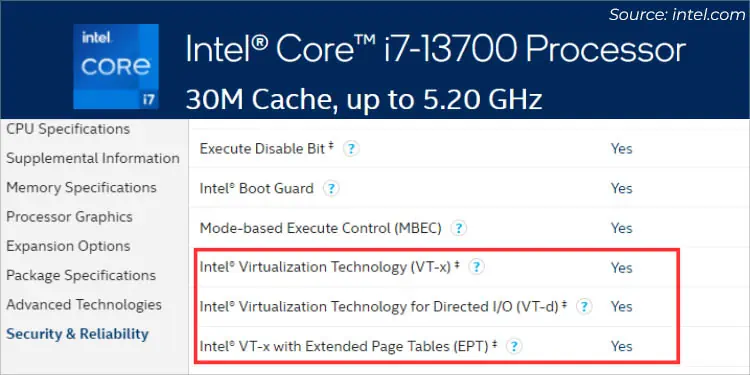
If you’re a Team Blue, you can directly check your processor’s specifications. Identify whether Intel Virtualization Technology, VT-x, VT-d, VT-c, or similar terminologies are included there.
Another way is to download and install their Processor Identification Utility. Launch it and verify if the related option has a checkmark.
For AMD Users
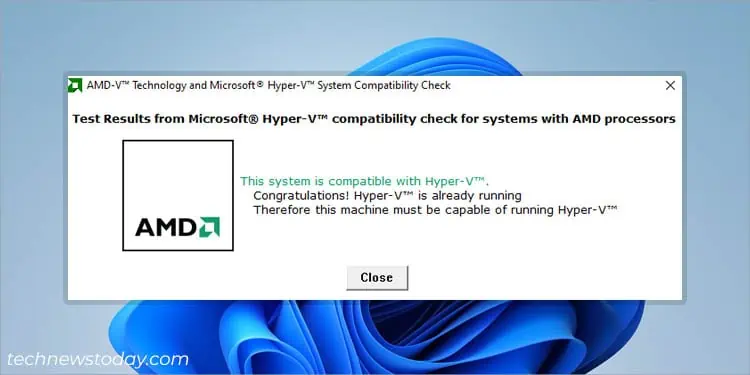
On the flip side, Team Red users do not require digging around their online specifications page as AMD hasn’t included anything related to virtualization, SVM Mode, or AMD-V there. Instead, I suggest downloading their AMD-V Technology and Microsoft Hyper-V System Compatibility Check utility.
All you have to do is extract the zipped folder and run the amdhyperv.exe file. It will automatically show whether your system supports Virtualization and Hyper-V, as demonstrated in the above snap.
Access ASUS BIOS Utility
After confirming compatibility, it’s time to enter UEFI/BIOS screen on your ASUS PC. Just start/restart the computer and spam the Del key as soon as you press the power button.

However, some ASUS models use F2. So, if Del doesn’t work, reboot the computer, and this time, press F2 as soon as you encounter the first ROG/ASUS/TUF logo.
Navigate to CPU Configuration in Advanced Mode
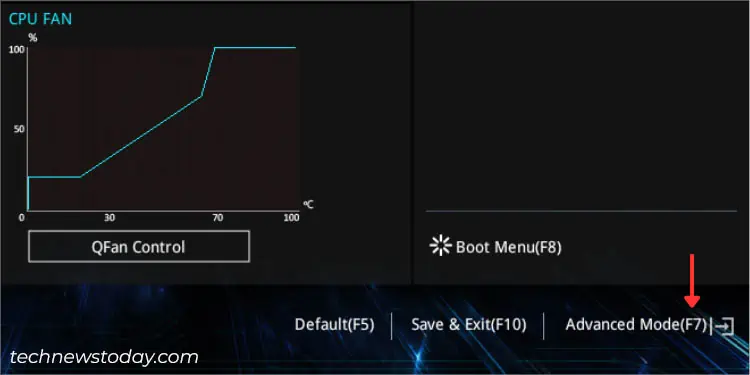
In most systems, you enter the ASUS EZ Utility after using the dedicated BIOS key. But since you can’t make changes to the Virtualization settings here, you need to switch to Advanced Mode. Follow the below instructions on what to do next:
- From the bottom of the screen, select the Advanced mode option. As indicated in the small brackets, you may even use F7.

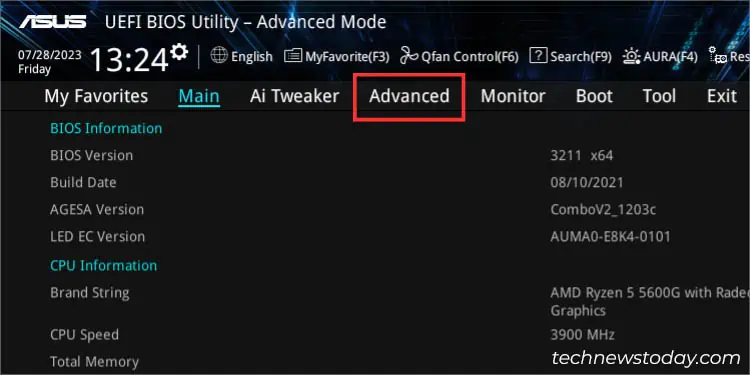
- Next, go to the Advanced Tab.

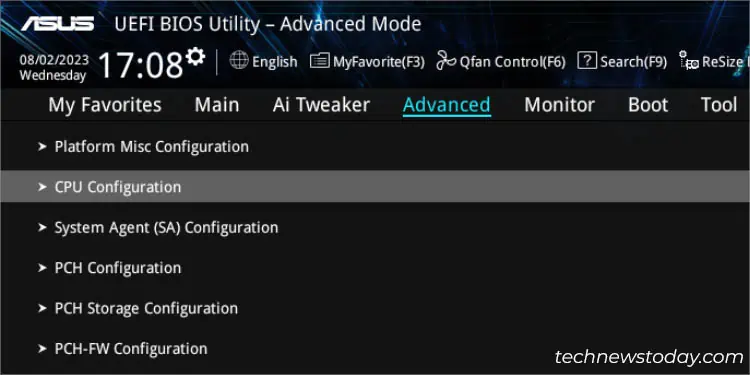
- Then, select CPU Configuration. This is where the virtualization settings in your BIOS lie.

Enable Virtualization
In order for your hypervisor or VMM to utilize the additional hardware capabilities offered by Vanderpool Technology, you need to now enable the related settings.
While the walk-through on both Intel and AMD ASUS motherboards are similar, they use their own terminologies that might confuse you. Don’t worry–I’ll be guiding you with my experience on how to configure them on both systems.
On Intel Motherboards
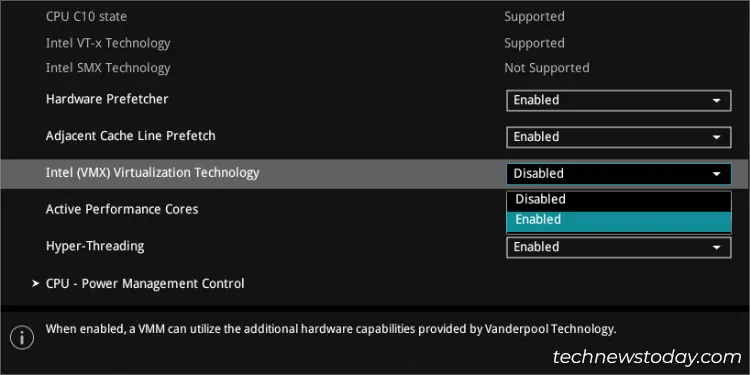
In some Intel ASUS boards, you can only find VT-x, as the demonstration below on my PRIME B660M-K D4 motherboard:
- Once you’re inside the CPU Configuration page, scroll down to locate Intel (VMX) Virtualization Technology.
- Expand the option and set it to Enabled.

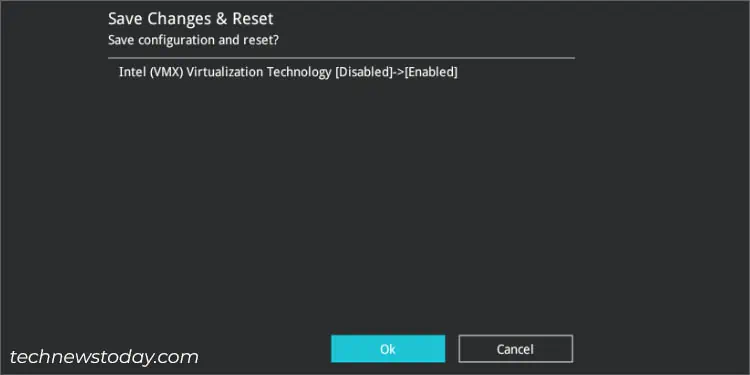
- Now, press F10 to save changes and exit from ASUS BIOS.

Some ASUS laptops and motherboards might provide you with additional virtualization features like VT-d ((Virtualization Technology for Directed I/O) and VT-c (Virtualization Technology for Connectivity).
For instance, my NX580VD doesn’t integrate the exact VT-x option but instead comes with just Intel Virtualization Technology, which is basically the same thing. But along with that, I can enable/disable VT-d as well.
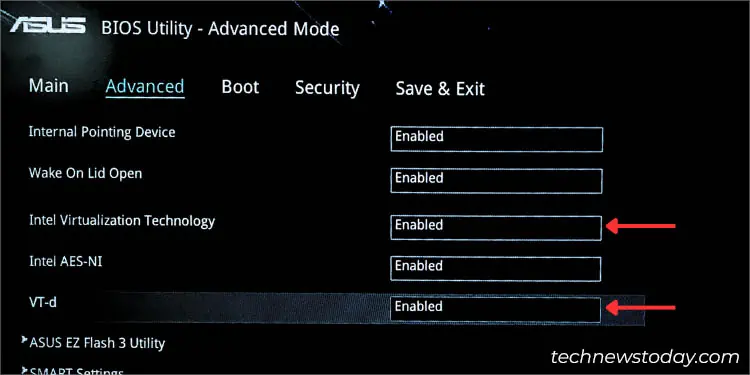
The two are not related by any chance. While the VT/VT-x option allows me to enable CPU virtualization on my ASUS computer, VT-d lets me access my I/O devices directly, including storage controllers, network adapters, add-on graphics, etc.
On AMD Motherboards
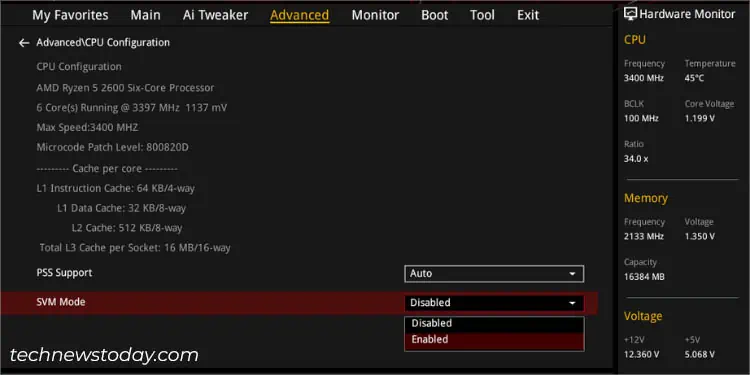
Just like Intel, AMD has its own virtualization feature called AMD-V, which can be enabled through SVM (Secure Virtual Machine) on ASUS BIOS. Here’s a quick demonstration of how I have done it on my ROG STRIX B450-F GAMING motherboard:
- From the CPU Configuration section, find and expand the SVM Mode drop-down.
- Pick Enabled.

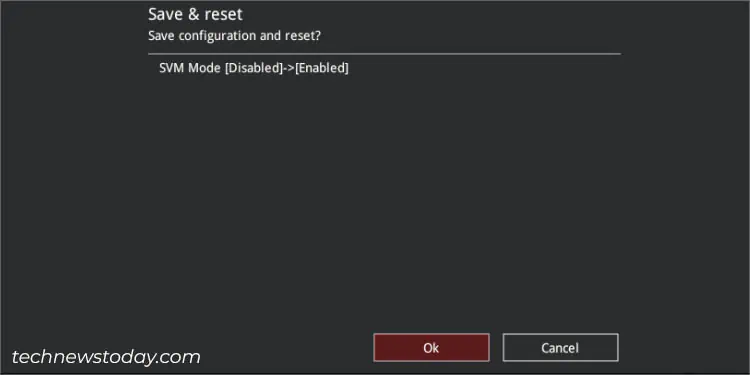
- Now, press F10 to apply and save the changes. Your ASUS system should now reboot.

Verify and Use Virtualization Features
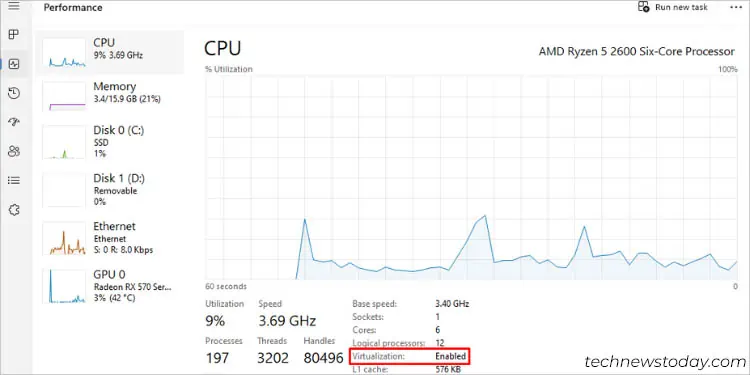
Finally, you can confirm whether the Virtualization option shows up on Windows:
- Once your OS boots up, use Ctrl + Shift + Esc hotkey to open Task Manager.
- Get to the Performance tab and select CPU.
- From the right, find the Virtualization option. It should indicate ‘Enabled’.

While this is normal on systems supporting just VT-x or SVM Mode, you might also find Hyper-V Support here. That was the case with my NX580VD laptop when I disabled the Intel Virtualization Technology option but kept the VT-d option enabled.
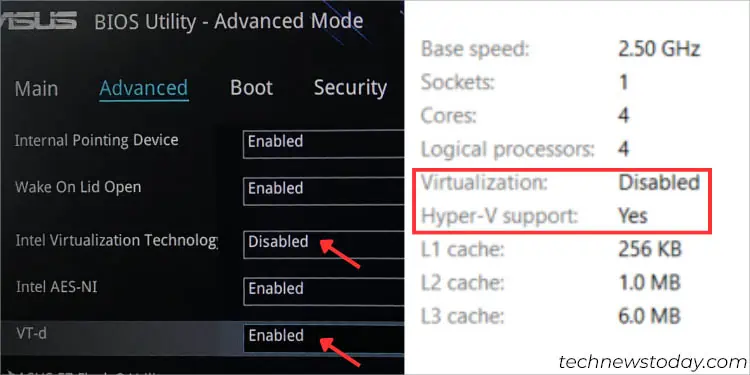
Indeed, I was able to use Microsoft Hyper-V without a hitch. But when I started a virtual machine on my VMWare Workstation Pro 16, I met with the ‘The host supports Intel VT-x, but Intel VT-x is disabled’ error (a similar instance on my AMD ASUS PC as stated earlier).
From here, I came to know that the VT-d option offers Hyper-V support. However, if you wish to run third-party virtualization programs, you must enable the Intel VT-x or SVM mode.
Moving on, you can now start using different hardware virtualization features on your OS. Here’s a list of guides prepared by our TNT team that should help you master virtualization in no time:
- Using Virtualization in Windows 11
- Installing Windows 11 on VMWare Workstation
- Installing Windows 11 on VirtualBox
- A complete guide to using VMWare
- Installing VMWare on Linux

