Dual BIOS is a fail-safe feature available on some high-end ASUS models that can help recover corrupted firmware. It’s a technology that introduces two ROM chips on the motherboard–if the primary BIOS fails, the second one will back you up.
To know whether your ASUS mobo supports Dual BIOS, you can inspect its user manual, check specifications online, or examine the two chips on the board itself. While the recovery should happen automatically, most models also feature a BIOS Switch button for manually shifting between the main and backup BIOSes.
After comprehensive testing on multiple ASUS motherboards (here at our TechNewsToday office), I have presented a simple guide that should help you understand everything about this dual-hardware protection feature.
Basics to ASUS Dual BIOS
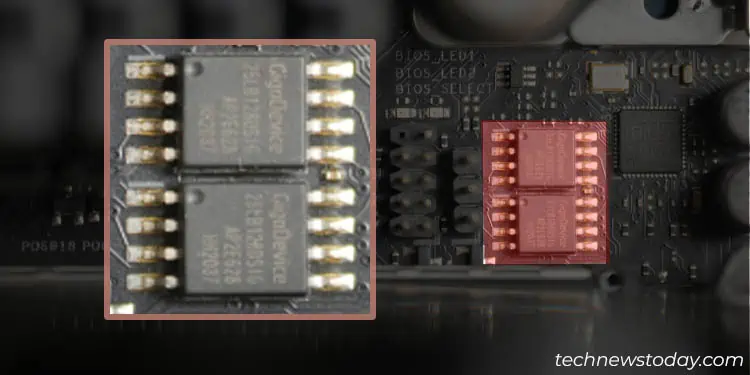
The Dual BIOS feature on ASUS simply refers to having two EEPROM chips on the mainboard. Both store the firmware settings separately and upon failure of the so-called ‘Main’ BIOS, the secondary/backup chip (that usually stores the factory defaults) comes to your rescue.
Think of it this way–you were updating your ASUS BIOS and it was interrupted after a power surge. I understand how panicking it sounds but with the Dual BIOS feature, the primary BIOS gets reflashed automatically or this can even be done manually!
As we know, ASUS motherboards with single BIOS are difficult to recover after a checksum error and may even require factory repair. On the flip side, those boards with two ROMs offer better security by providing an additional level of recovery through the second chip.
Either of them functions even if one gets corrupted, whether it be bad overclocking, improper/interrupted flashing, virus attacks, or physical damage. Clearly, it’s a great security feature for redundancy and fault tolerance.
Checking Dual BIOS Compatibility
If you’re seeking an ASUS mobo, my tip is to keep ‘Dual BIOS’ as your top priority. Recalling my beginner’s mistakes, I once happened to brick a motherboard when there was a power surge when I was flashing a new BIOS version (as it didn’t include a secondary ROM chip or any other BIOS recovery feature).
When test benching various ASUS motherboards at our TNT office, our team has determined the following ROG models that are Dual BIOS-compatible. However, we couldn’t find any PRIME, TUF Gaming, and ProArt boards that support this feature.
| ROG Maximus (Intel) | ROG Rampage (Intel) | ROG Dominus (Intel) | ROG Zenith (AMD) | ROG Crosshair (AMD) |
| XI Extreme, XII Extreme, XIII Extreme Glacial | VI Extreme | Extreme | II Extreme | X670E Extreme |
| VI Apex, X Apex, XIII Apex | VI Extreme Encore | II Extreme Alpha | VIII Extreme | |
| Z690 Apex, Z790 Apex, Z790 Extreme, Z690 Extreme Glacial | V Edition 10 |
While these are some of the verified ones, we certainly have missed out on many models. If you couldn’t find yours in the table above, you may use any one of the below techniques to test for yourself.
From User Manual
The easiest way to identify Dual BIOS compatibility is from your motherboard’s user manual. You can use the physical handbook or even open up the online manual to check for the BIOS Switch Button. Below are some of the different sections that should include this feature:
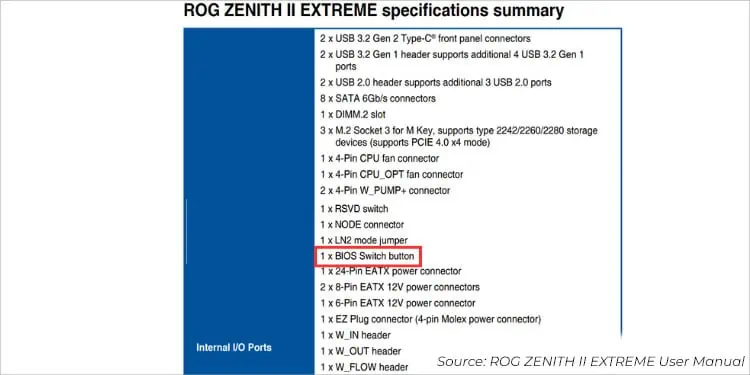
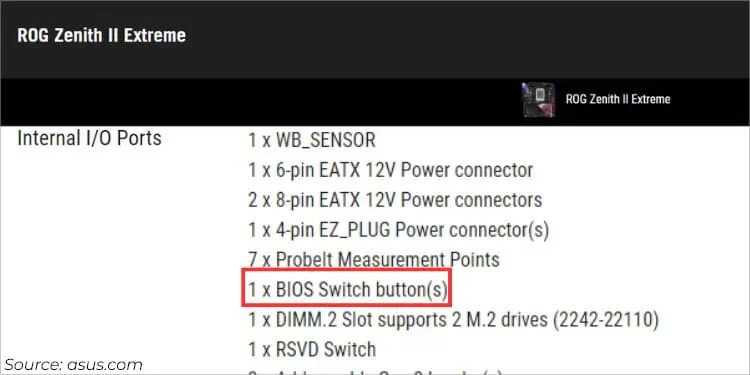
- Check the Internal I/O Connectors filed under the specifications summary to look for the indication of the 1 x BIOS Switch Button.

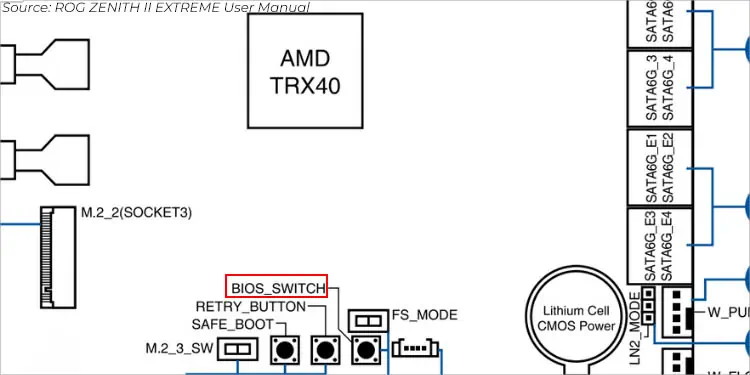
- You may even navigate to the Motherboard Layout section and look for the BIOS_SWITCH label. The location varies on every ASUS model.

- While you’re at it, I also suggest finding the BIOS LEDs. Usually, these should be two attached to the dedicated switch (labeled BIOS_LED1 and BIOS_LED2 respectively).
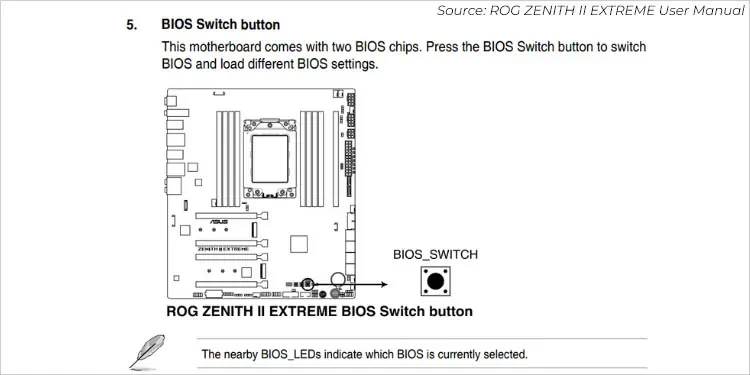
- Lastly, you can even get to the dedicated BIOS Switch Button section to learn the functionalities of both the button and LEDs.

Via Tech Specifications Online
For beginners, looking up the manual might be a daunting task. Nonetheless, the online specification page is certainly another good idea to know whether your board integrates a BIOS Switch Button:
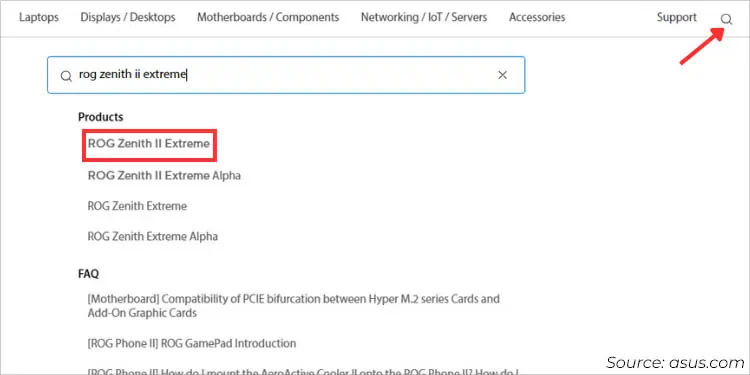
- First, navigate to the official ASUS website.
- Search for your model and select it.

- By default, you should get to your motherboard’s Features page. Switch to the Tech Specs tab as demonstrated below.

- Get to the Internal I/O Ports section and look for BIOS Switch Button(s).

Inspecting the Motherboard Manually
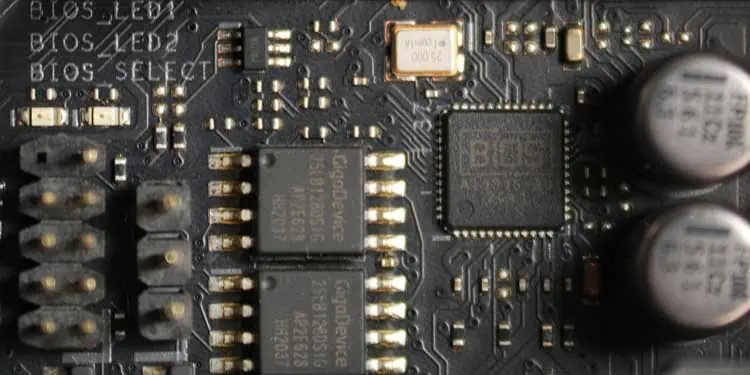
Instead of having to open the user manual or online specifications, you can directly peek into your ASUS motherboard to locate the dual BIOS chip. They might be labeled M_BIOS and B_BIOS respectively or sometimes do not come labeled at all.
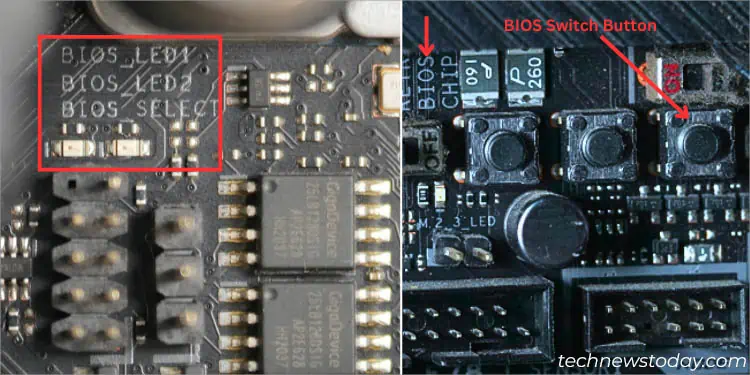
Also, your board should embed a BIOS Switch Button (as shown in the User Manual) along with two BIOS_LEDs. While the location varies on every model, the appearance should be somewhat similar to the one that I have demonstrated for ROG Zenith II Extreme below.
Switching Between Main and Backup BIOS
As mentioned above, most ASUS boards offer a dedicated button that lets you manually switch between the Main and Recovery BIOS. All you have to do is toggle the switch but also keep in mind the safety measures. Here’s a step-by-step guide to help you do just that:
Power Down Your PC

The first step involves closing all the running programs and shutting down your ASUS system. Also, remove the power supply cable for safety purposes.
Since you’re going to get close to the mainboard, it’s a good idea to press the power button for 10 to 15 seconds to discharge the remaining capacitors and ground yourself.
Access the Mainboard

Next, open up the PC’s side panel to access your ASUS motherboard. If you had checked the user manual earlier, you shouldn’t have any difficulties finding the BIOS Switch button.
Press the BIOS Switch Button
Caution: Do not press the switch during an ongoing BIOS update. This may corrupt both the ROM chips.
Once you have located the BIOS Switch button, press it once and the secondary BIOS should get activated.
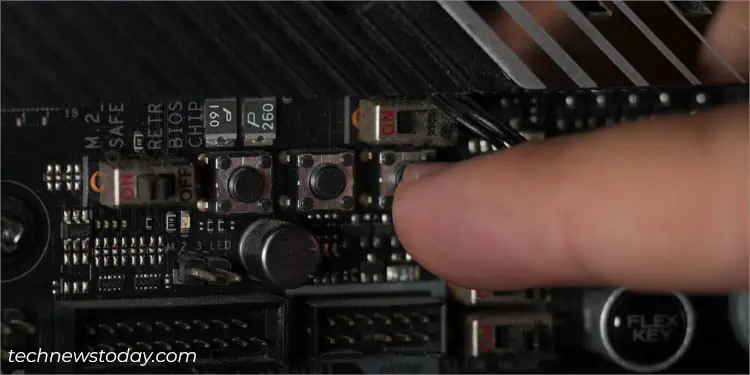
If you had encountered BIOS corruption or failed update, the recovery process should now start. Otherwise, just its related BIOS settings should be loaded.
Inspect the BIOS LED
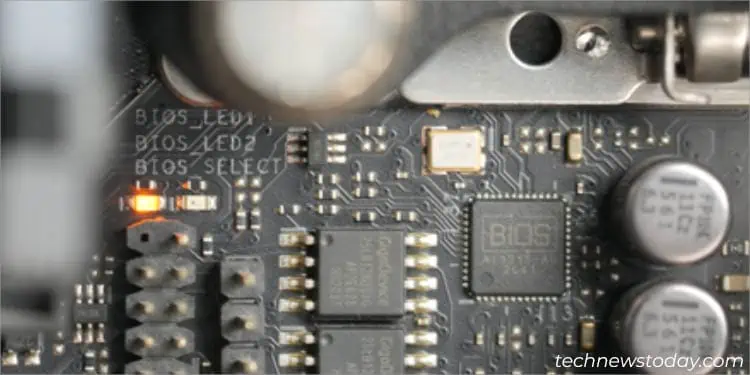
When the main BIOS was active, you probably noticed an orange light in BIOS_LED1. To verify whether the shift has been successful, check whether the BIOS_LED2 is now glowing.
Recovering Failed BIOS Update Using the Backup BIOS
Failed or corrupted BIOS update leads to no boot issues and in some cases, even prevents you from entering the ASUS BIOS interface. However, that’s the case on mobos with a single ROM chip.
If your motherboard supports Dual BIOS, the recovery process should kick in automatically. All you have to do is force shut down your computer and start it again. Within a minute or so, you should get your system back as if nothing has happened.
In case that didn’t help, you may try the manual method that I’ve been discussing throughout this article. Just switch to your ‘Backup BIOS’ and that should do the job.
While Dual BIOS is an excellent way to recover the failed or interrupted update, it’s only available on some high-end boards. If yours do not support it, you can use other recovery methods, like the USB BIOS Flashback or ASUS Crash-Free BIOS Utility.
Can I Flash My Backup BIOS?
As mentioned earlier, Dual BIOS is a fail-safe feature. Your system primarily utilizes the main BIOS chip and the secondary one just contains the factory settings. If anything goes wrong, the backup BIOS is flashed to the main one.
While other manufacturers like Gigabyte include the “Also Update Backup BIOS” option when flashing the main BIOS chip, ASUS hasn’t provided any documentation on whether this is possible.
When my team bench-tested on the ROG Zenith II Extreme board, we couldn’t update its backup BIOS. Also, we didn’t find anything on its BIOS and user manual too. If you’re in the same boat, try checking your user manual first. I wouldn’t recommend flashing a new version unless you’re 100% sure of what you’re doing.
Additionally, some systems even support firmware features, like Wide Range Protection, Halt On BIOS Defects, Auto Recovery, etc. While this is the case with boards from other manufacturers, I haven’t found such features on ASUS.

