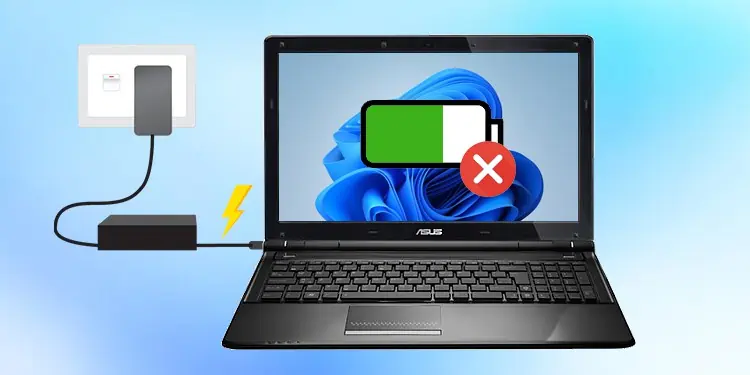
When the charging indicator turns into a blinking orange light on your Asus laptop, it means your charge is too low, and you need to connect a charger ASAP.
However, that could also mean the battery is failing, or the charging voltage is inappropriate (too low or too high). In this case, your laptop fails to charge and sometimes doesn’t even boot with the battery.
On the other hand, it could be a simple issue like a loosely connected charging port, the battery could be damaged. Or, other things like the AC adapter or your motherboard is causing the problem.
Since your Asus laptop could be charging for various other reasons, you may need advanced troubleshooting.
How to Fix the ASUS Laptop Not Charging?
It may sound silly, but you might have forgotten to turn on the AC power outlet after connecting the charger to the laptop. So make sure you turn it on.
Likewise, try a different power outlet. And consider connecting the charger to another Asus device to check if the charger is still working.
Also, if your battery level is at 95%-99% and the laptop’s battery icon displays “plugged in, not charging”, you needn’t worry as it’s the normal behavior to protect the battery. First, remove the charger and let the battery drop below 94. Then reconnect the charger, and it should start charging as usual.
For more complex charging issues, continue reading further in the article.
Check for Hardware Issues
To rule out hardware issues, check if the charging pin inside the laptop is tilted or broken. Also, see if the AC adapter cable is torn.
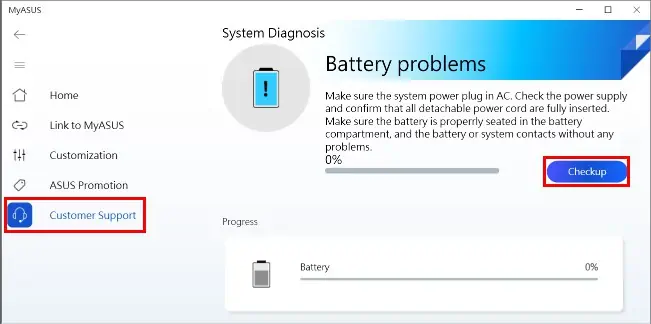
On the other hand, you can use an application called “MyASUS” to check for hardware-related issues on your Asus laptop.
If you don’t find the app on your laptop, you can download it on the Asus official site.
Here’s how to use the app to diagnose battery hardware issues.
- Connect your laptop charger.
- Press Windows + S, search for
myasusand press Enter to open it. - Then, expand the sidebar (three horizontal bars) and click the Custom Support option.
- Under the Customized diagnosis section, check the Battery checkbox.
- Next, click the Checkup button.

If the application finds any problem, it’s most likely a hardware issue. But if it’s not the case, move on to the fixes below.
Check the AC Adapter
Sometimes it’s the adapter that’s causing the charging issue. So check if your AC adapter’s power rating meets the laptop’s power requirement. Otherwise, your battery won’t charge at all.
You can check the power rating/voltage of the adapter written on the charger. Likewise, check the bottom of your laptop or the battery to see its required power rating. If they don’t match, consider replacing the charger/ AC adapter.
You can also check the voltage output of your charger with a multimeter. Make sure to check on the connector to the laptop as well as the outlet to the main adapter.
Check if the Battery Is Loosely Connected
If your laptop has a removable battery, it could be loose, which is why your Asus laptop is not charging. Therefore, remove the battery and reseat it appropriately.
You can do it as follows.
- Power off the laptop and unplug the charger.
- Since the battery lies at the bottom of your laptop, turn it over to the backside and slide its latches.
- Then, reseat the battery to fit perfectly into the laptop.

- Slide the latches appropriately to lock and re-insert the battery.
- Now, connect the charger and see if the laptop is charging as usual.
Furthermore, make sure the charger adapter isn’t loose and connected properly.
Power Cycle Your Laptop
If you constantly use the laptop while charging, it can create excess heat that can bloat your AC adapter capacitors. This creates issues while charging the battery.
Therefore, you need to perform a power cycle to drain the excess charge and discharge the proper voltage to resolve the charging issue.
To perform a power cycle on your laptop,
- First, turn off your laptop.
- Eject the external devices connected to your laptop. Also, remove the AC adapter and the battery (if removable).
- Now, press the Power button and release it after about a minute or so.
- Next, plug in the battery to the laptop and turn it on.
- Check if the battery is charging now.
Update the Device Driver
If your battery device driver is outdated or facing issues, you could face charging issues. So, you have to update the device driver to resolve your issue.
Follow the steps below to do so.
- Press Windows + X and select the Device Manager option.
- Now, double-click to expand the Batteries dropdown.
- Right-click on each option (Microsoft ACPI or any other) and select the Update driver option.

- On the next prompt, choose the Search automatically for drivers.
- Follow the on-screen instructions and install the latest updates.
- Alternatively, right-click and click the Uninstall device option.

- Next, click Uninstall to confirm.
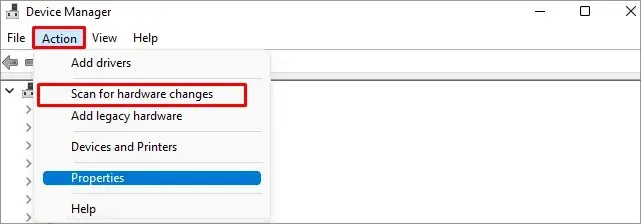
- Click the Action menu at the top and select Scan for hardware changes.

- Check if your charging problem has been solved.
Run the Power Troubleshooter
If your Windows system says “plugged in not charging,” you can run the power troubleshooter to diagnose and fix incorrect power settings.
On Windows 10
- Open the Settings app (Windows + I).
- Then, navigate to Update & Security > Troubleshoot.
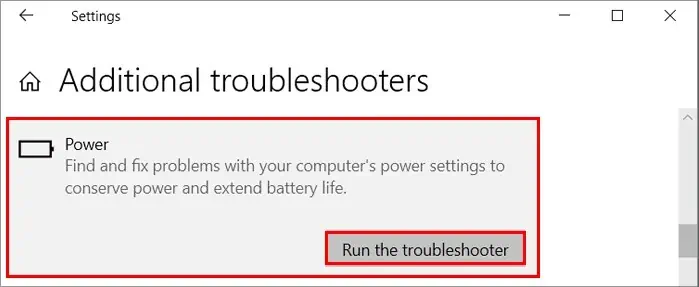
- Select Additional troubleshooters.
- Scroll down to Power and click the Run the troubleshooter inside it.

On Windows 11
- Open the Settings app.
- Under the System tab, select Troubleshoot in its right pane.
- Then, click Other troubleshooters.
- Under the Other section, click Run next to Power.

After running the troubleshooter, follow the on-screen instructions and apply the recommended fixes to resolve the power issues on your laptop.
Reset the BIOS
If your laptop battery doesn’t charge or your system won’t start with the battery, your BIOS could be facing issues. The BIOS settings might be misconfigured or outdated.
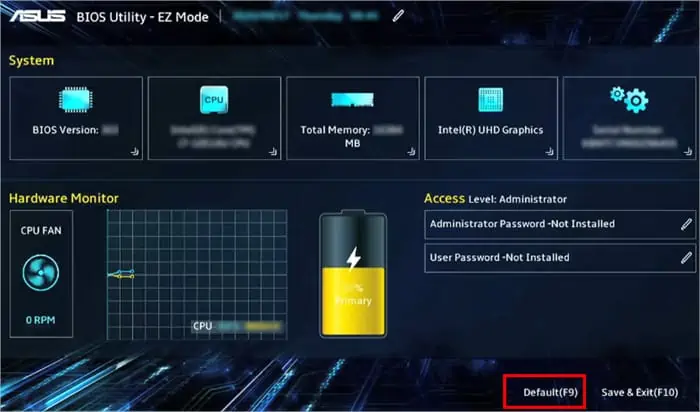
Thus, you need to reset the BIOS to default settings.
- Press and hold the F2 key while the laptop is restarting.
- Then, press F9 to reset the BIOS to default settings.

- Select OK to confirm.
- Check if the charging problem has been solved.
Note: Most Asus motherboards have the same settings as mentioned above. However, the Delete key or the F12 key works for some laptops.
Additionally, update your BIOS on the Asus motherboard with the ASUS EZ Flash application and check if the laptop is charging now.
Replace or Buy a New Battery
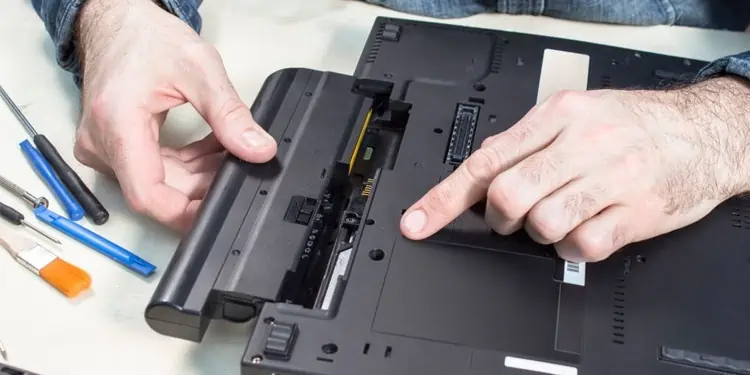
If your laptop still doesn’t charge, your battery is probably dead. Therefore, you need to replace it with a new one.
Now, even if you have a non-removable battery, you could disassemble the laptop and install the battery yourselves. However, you could break other things while doing it, so consider taking the help of a repair technician or a professional to install the new battery.
On the other hand, if you recently bought the laptop/replaced the battery, you could first check if it’s under the warranty period. And, if it’s so, you can exchange it with another or ask for a replacement.
Related Questions
My Battery Doesn’t Charge After a Certain Percentage. how Do I Fix It?
Your system may limit charging after a certain percentage to extend the lifespan of your battery.
In Asus, you have the Battery Health Charging feature, which you can use to change the battery mode.
- First, open the MyAsus app.
- Click Customization from the sidebar.
- Under the Power & Performance tab, select Battery Health Charging.
- Now, choose the Full capacity mode to allow charging up to 100%.

How to Know if My Battery Is Failing?
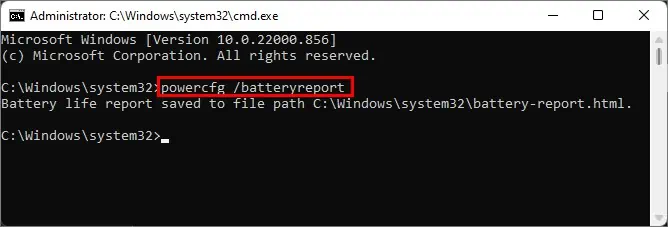
On Windows, you can generate a battery report to know if your battery is failing and if it’s time to get a new one. Here’s how to do it.
- Press the Windows + X key and select the Powershell (Admin) option. On Windows 11, select the Windows Terminal (Admin) option.
- Now, enter the following command and press Enter.
powercfg /batteryreport
- Navigate to the mentioned file path and open it.
- Scroll to the Battery capacity history section.
- See if the full charge capacity is much less than the design capacity. And, if it’s so, your battery is failing, and you need a new battery.

