The touchpad is not a piece of hardware that usually becomes faulty. But if your touchpad stops working, it will be an issue navigating the Operating system. Well, you can use an external mouse or keyboard shortcuts. However, these will not work if you do not have a mouse or do not know any keyboard shortcuts.
If you are facing an issue where a touchpad on Asus laptops does not work, it is most likely due to the hotkey that enables or disables the touchpad. But this does not mean it is the only reason the touchpad malfunctions.
This article lists common reasons the touchpad on your Asus laptop is not working and how to fix this issue.
Why is My ASUS Touchpad Not Working?
Asus laptops have a dedicated function key that enables or disables the touchpad. If the light indication in this function key is on, it means that the touchpad is currently disabled.
- Touchpad disabled
- Outdated drivers
- Driver complications with third-party applications
- Laptop on tablet mode
Fixing an Unresponsive ASUS Touchpad
Below, we have explained some solutions in detail to fix an unresponsive touchpad on Asus laptops.
Enable Touchpad
Sometimes, once a Windows, BIOS, or drivers update, settings inside them may change due to errors during the update process. This may cause certain settings to change even when you have not made any changes.
The same case applies here as well. If you see that your touchpad is not working, it can be that the settings that enable the touchpad is disabled. To fix this, you need to enable the touchpad on your Asus laptop.
There are several options settings where you can enable or disable the touchpad. Below, we have mentioned all the options you need to turn on to enable the touchpad on an Asus laptop.
Using the Hotkey

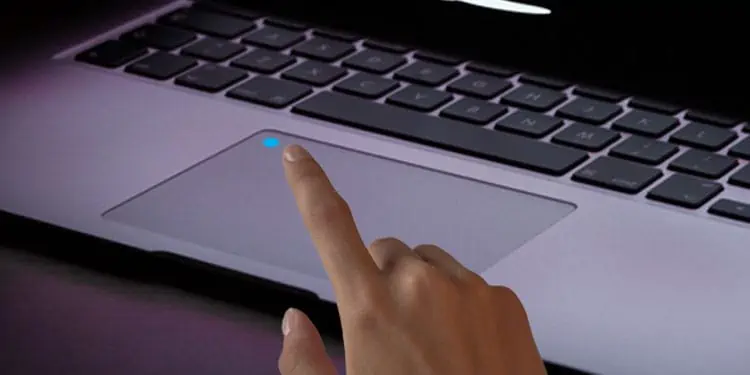
You can double tap one corner of the touchpad in most laptops to enable or disable it. In the case of Asus laptops, it has a dedicated function key. This key is usually located on the F9 key. Press Fn + F9 to enable or disable the touchpad.
If it does not work, check the function keys for a touchpad icon with a diagonal line. Press Fn and the respective button simultaneously to enable or disable the touchpad.
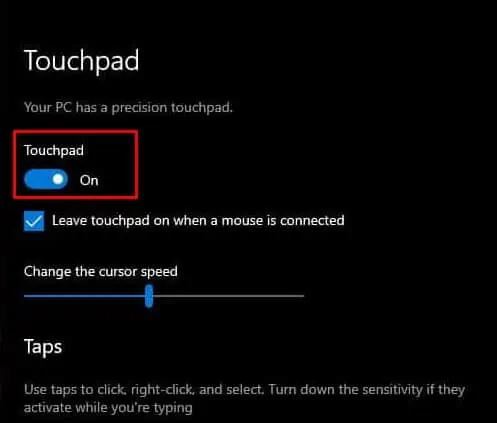
From Windows Settings
These steps will work on any laptop with Windows.
- Press the Windows + I key to open Settings.
- Go to Bluetooth & devices > Touchpad. You can press Tab key to highlight the required section and arrow keys to scroll through the menu
- Here, toggle the Touchpad to On by pressing Space key.

From Mouse Properties
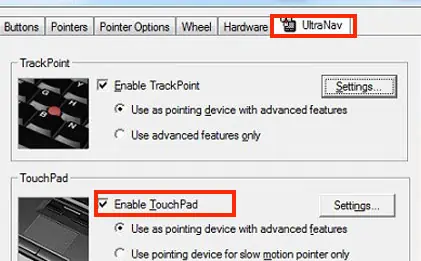
Your Asus laptop may or may not have some configuration settings, as we have mentioned below. In that case, you can search for settings to enable the touchpad in Mouse Properties. You can refer to other solutions if you cannot find these settings.
- Press the Windows + R key to open Run.
- Type
main.cpland press Enter to open Mouse Properties. - Press Tab key to highlight the tab section. Using arrow keys go to the UltraNav tab.
- Under Touchpad, check Enable Touchpad by pressing the Space key.

- Click on Apply, then OK.
Using the BIOS
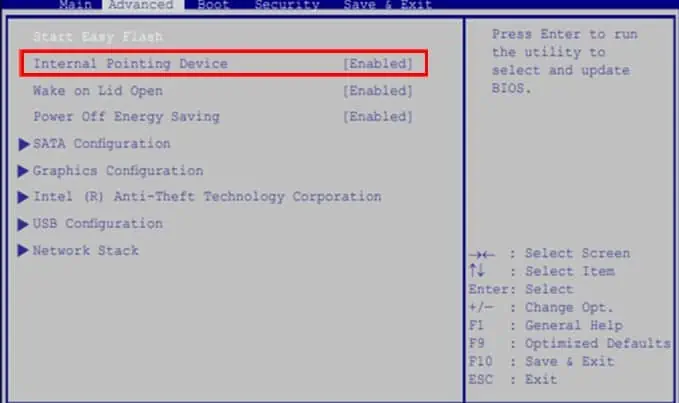
Depending on the Asus laptop and the type of BIOS it uses, you may have trouble finding the correct settings that enable the touchpad. Search for BIOS settings related to the touchpad or internal mouse settings.
- Repeatedly press the F2 button during startup to boot into the BIOS.
- In the Advanced menu, search for settings named, Trackpad, Internal Pointing Device, or touchpad.

- Enable this setting.
- Save and Exit the BIOS
From Device Manager
The device manager holds all the information about the devices connected to the system, their manufacturer, and their drivers. Besides this, you can also enable or disable a device’s state using the device manager.
Follow the steps below to enable or disable the touchpad using the device manager.
- Press the Windows + X key and select Device Manager using arrow keys.
- Go to Human Interface Devices, press right arrow key to expand Human Interface Devices.
- Select ASUS Precision Touchpad and press Enter.
- Go to the Drivers tab by repeatedly pressing the Tab key.
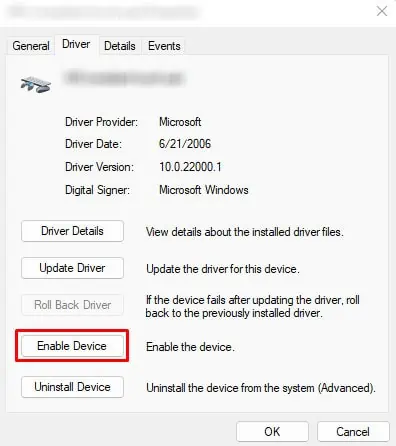
- Now select Enable Device.

Switch Between Tablet mode And Laptop Mode
A laptop with a full 360-degree rotation feature is known to have its hardware stop functioning when switching between the laptop and tablet modes. The keyboard and the touchpad are not supposed to function in tablet mode. But if the laptop’s settings are not configured correctly, you may not be able to use these components even in laptop mode.
To fix this, try switching the laptop to tablet mode and back to laptop mode. If this does not work, try restarting in laptop mode and turning it on again in the same mode.
Run Hardware Troubleshooter
The hardware troubleshooter scans all the pieces of hardware connected to the system. It then pinpoints any issues with them and attempts to fix them. If the touchpad has run into any hardware issues, running the hardware troubleshooter should fix problems with it.
To run the hardware troubleshooter,
- Press the Windows + R key to open Run.
- Type
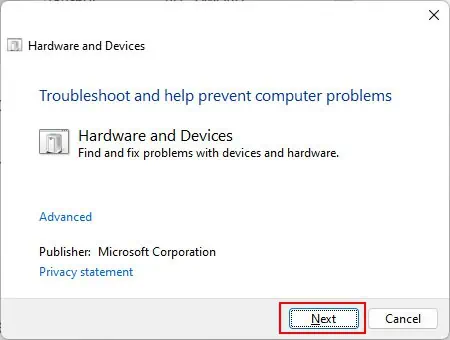
msdt.exe -id DeviceDiagnosticand press Enter to open Hardware and Devices troubleshooter.
- Click on Next and wait for the troubleshooting process to complete.
Update Touchpad Drivers
If the hardware and devices troubleshooter does not find any issues, the problem is most likely with the touchpad drivers. A driver is responsible for smooth data transfer between its device and the Operating system. Outdated or corrupted drivers may cause complications when the device and the OS communicate.
To fix this, you need to update your drivers.
- Press the Windows + X key and select Device Manager.
- Expand Human Interface and Devices.
- Select Asus Precision Touchpad and press Enter.
- Repeatedly press tab key to highlight General tab.
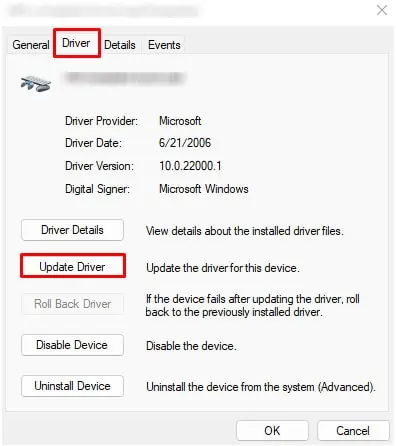
- Using arrow key, go to the Drivers tab.
- Select Update Drivers and press Enter

- select Search automatically for drivers and wait for the drivers to update.
Boot Into Safe Mode
In safe mode, your OS only enables basic hardware drivers and disables all background applications. So, if the issue was due to a third-party application conflicting with the touchpad drivers, booting the PC into safe mode should fix the issue.
If it fixes the issue, you need to uninstall the application that makes the touchpad unusable. Follow the steps below to boot the PC into safe mode.
- Press the Windows + I key to open Settings.
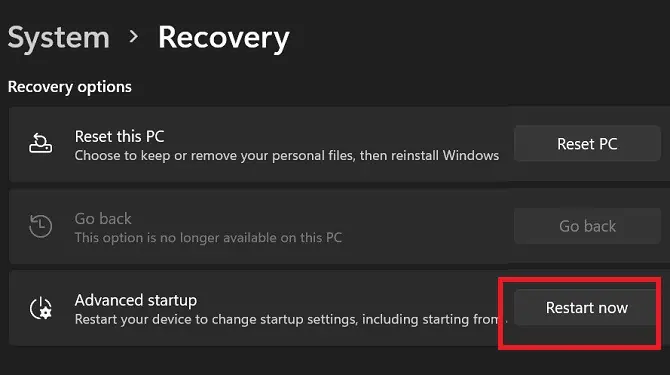
- Go to System > Recovery. You can navigate through settings using the Tab and Arrow keys
- On Advanced startup, select Restart now.

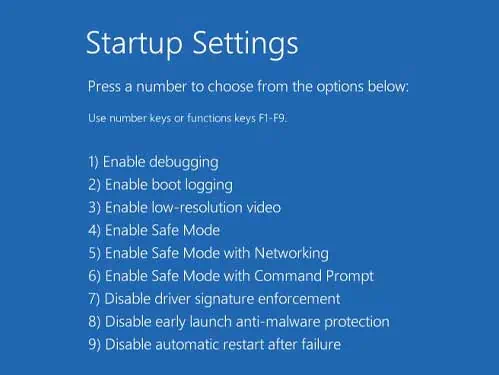
- Once the PC restarts, go to Troubleshoot > Advanced options > Startup Settings > Restart.
- After the restart, press F5 to enable the safe mode with networking.

Update Windows
Microsoft constantly provides its users with updates that fix bugs and security issues. It can be that the touchpad not working issue is just a bug in Windows. Try updating Windows to the latest version to see if it fixes the problem.
- Press the Windows + I key to open Settings.
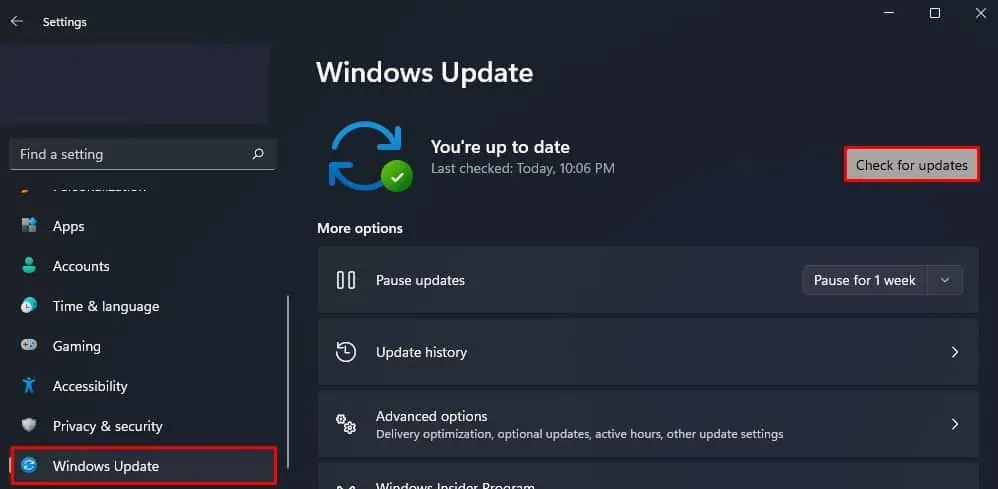
- Go to Windows Update (Security & Update > Windows Update in Windows 10).
- Select Check for updates or Install updates.

- Restart your PC once the update is complete.
Perform a System Restore
If none of the solutions mentioned above works, you can try performing a system restore. The system restore reverts all Windows settings back to the restore point. A restore point is a snapshot of your computer settings.
However, you cannot perform a system restore without a restore point. If you have a restore point set before you start facing the touchpad issue, you can perform the system restore to revert all the settings and Windows configuration.

