If a user opens a bandwidth-hungry application, all the other devices are going to experience a slow internet connection. While it’s possible to kick devices off your network, this isn’t always the best idea.
Instead, you can set a limitation for every connected device to prevent it from hogging up the bandwidth. With the help of the TP-Link router’s configuration interface, you can share the bandwidth equally or even configure the limits individually.
All you have to do is set a minimum and maximum bandwidth limit for both Ingress (download) and Egress (upload). But in some routers, you might not get the dedicated Bandwidth Control option and should instead opt for QoS (Quality of Service). To understand this better, let’s dive deep into the steps below.
Step 1: Access Router’s Configuration Page
For beginners who have no idea how to access a router page, here are the following steps you can employ on Windows. If you want a comprehensive guide for other operating systems, here’s an article that should help you with that.
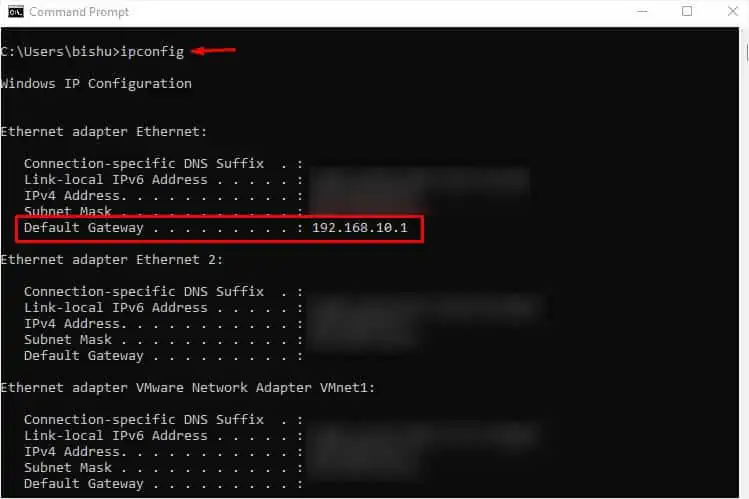
- First, open Command Prompt and execute the below command:
ipconfig - Once all your TCP/IP network configuration values get listed, look for Default Gateway under your current adapter.

- Copy and paste the router’s IP on a browser’s address field.

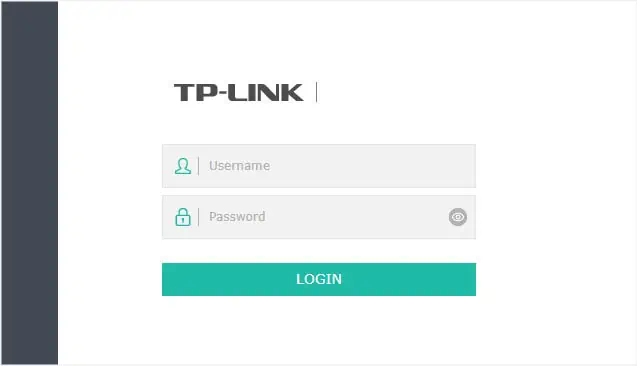
- Hit Enter and you should get to the router’s login page.

- Enter the correct credentials. You can find the default username and password on the router’s sticker beneath or simply look for it online.
- Hit the Login button and you should be able to access the router’s configuration interface.

Step 2: MAC Address Reservation
MAC Address reservation is a special feature available on most routers that lets you use static IP addresses for your specified devices. If you’re seeking to keep the settings permanent, it’s essential to reserve the MAC address for every device you’re trying to set bandwidth limits.
Note: You may skip this step if you’re only trying to control bandwidth usage for a temporary device.
By default, a router utilizes the DHCP server to assign dynamic IP addresses for each connected device. The provided address can change over time and when this happens, the applied settings won’t be applied.
However, if you reserve specific/static IPs for individual devices, the router will recognize its MAC address. So, you do not require reconfiguring the settings even if you disconnect and reconnect it.
Follow the general steps below on how to reserve a MAC address on a TP-Link router. I have used the AX4400 model for the demonstration. The steps may vary slightly on your device.
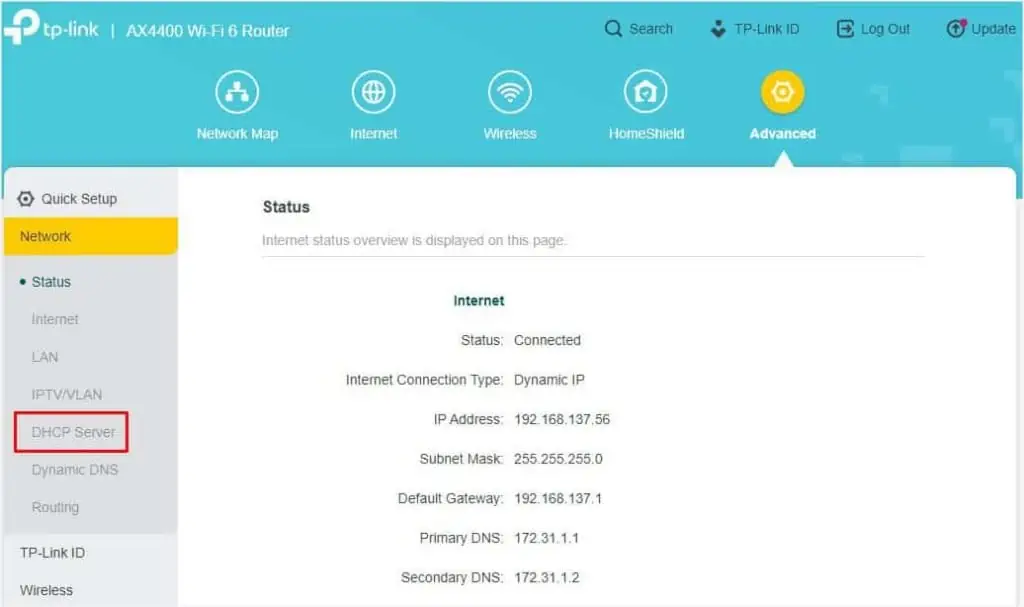
- Navigate to the Advanced tab and get to the DHCP Server field. In most models, it should be under the Network section.

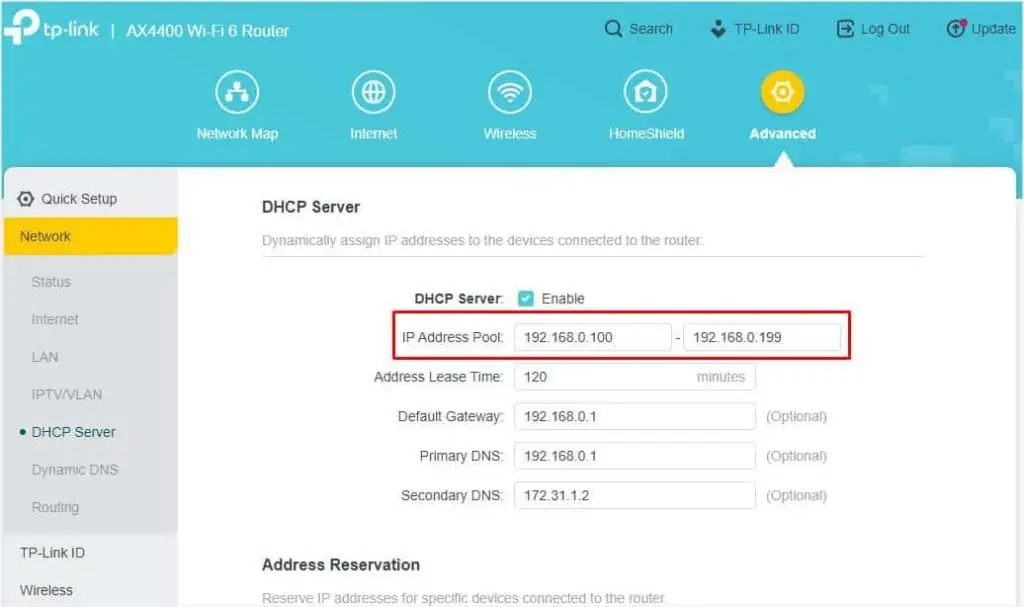
- Here, look for IP Address Pool that indicates the start and end IP range. You may change this as per your need too.

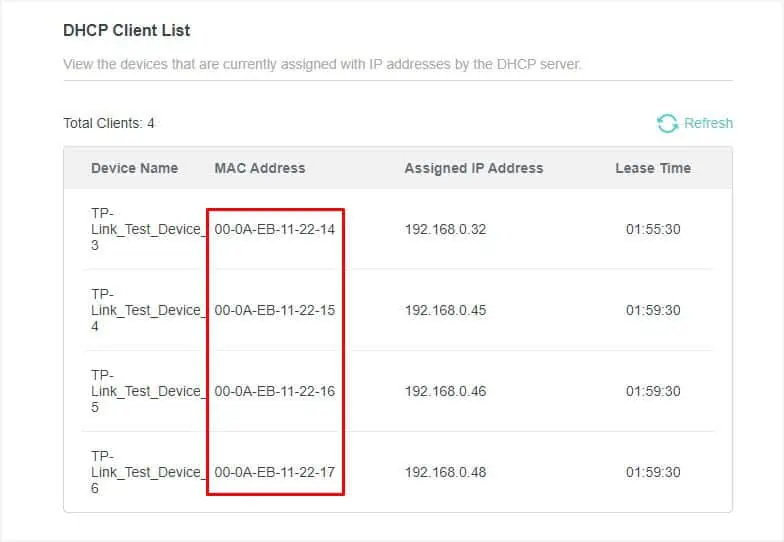
- Next, get to the DHCP Client List section and note down the MAC address of all the devices you’re going to use for bandwidth control configuration.

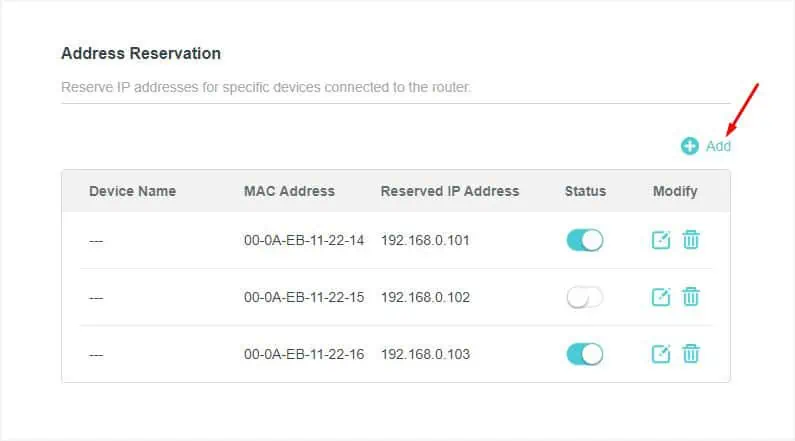
- Then, navigate to the Address Reservation section and hit the Add button.

- Enter the MAC Address of your first device. Some models incorporate a View Connected Devices button that lets you select a device without requiring the MAC address.
- Also, input an IP address that you wish to reserve for the selected device. Note that this IP should be within the address pool that you checked earlier.
- Hit the Save button and your device should get listed.

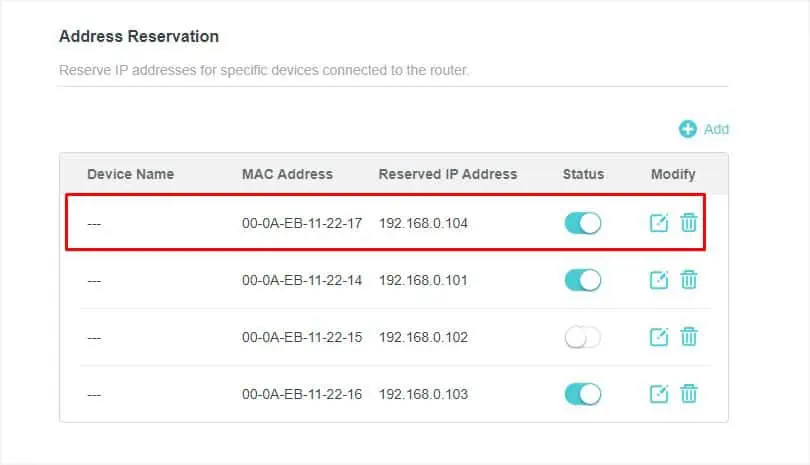
- Check the Address Reservation field again to confirm that the IP has been reserved.

- Repeat the above steps for all the other devices you wish to configure.
Step 3: Configuring Bandwidth Limit
After assigning a static IP for each device, you can now get to the Bandwidth Control section to configure the related settings. However, not all TP-Link models support it. In such cases, you can opt for the QoS feature.
While the two are slightly different, the Bandwidth Control setting is available under the QoS section in some TP-Link routers. Let’s understand how they work and the necessary steps to configure them in the different sections below.
Note: Some lower-end TP-Link models might not include either of the features.
Using Bandwidth Control
As the name suggests, Bandwidth Control allows you to set limits on the maximum rate at which data can be sent (upstream bandwidth) and received (downstream bandwidth). This section comes with the Controlling Rules section that lets you allocate ingress and egress bandwidth ranges for a device or service.
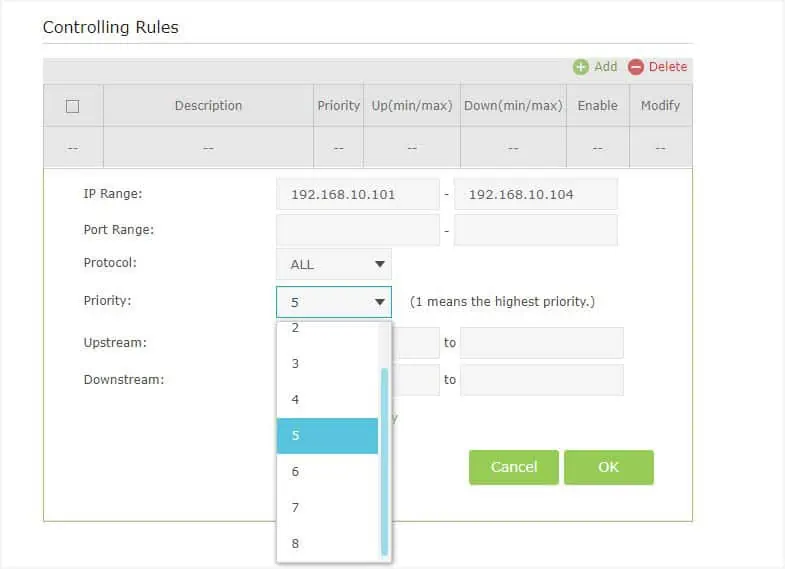
Some TP-Link models also come with a Priority option. Usually, 1 is the highest priority level, and 8 is the lowest. This may vary on some router models.
Before configuring the bandwidth control for a specific device/service, it’s important that you enable the feature first. Also, you require assigning the total upstream and downstream bandwidths provided by your ISP.
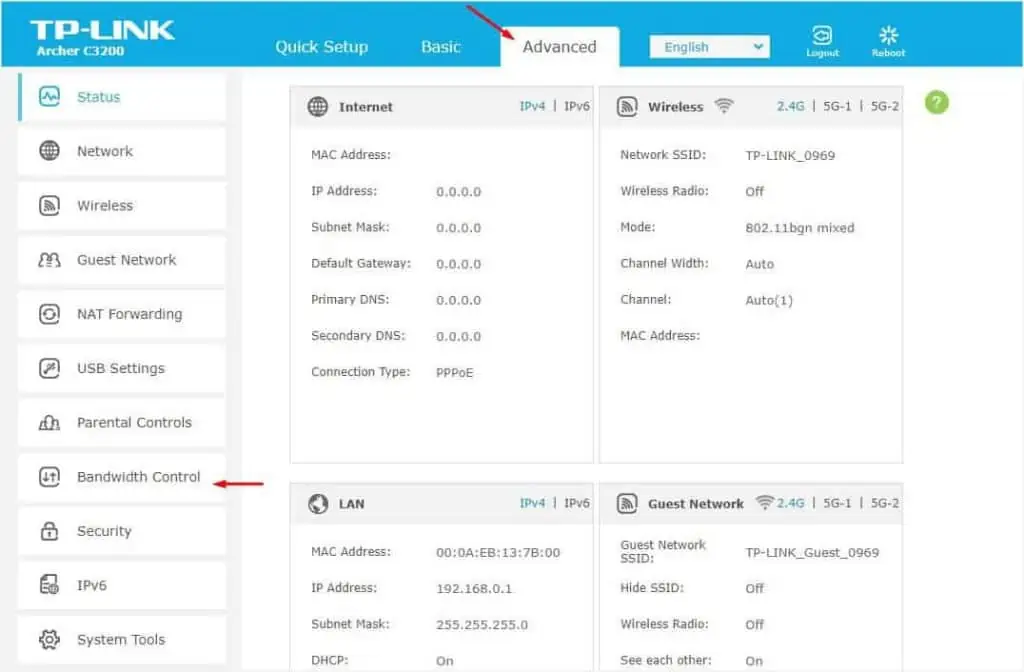
The involved demonstration is for Archer C3200 and the steps are slightly different on other models.
- In the Advanced tab, find and select Bandwidth Control from the left pane.

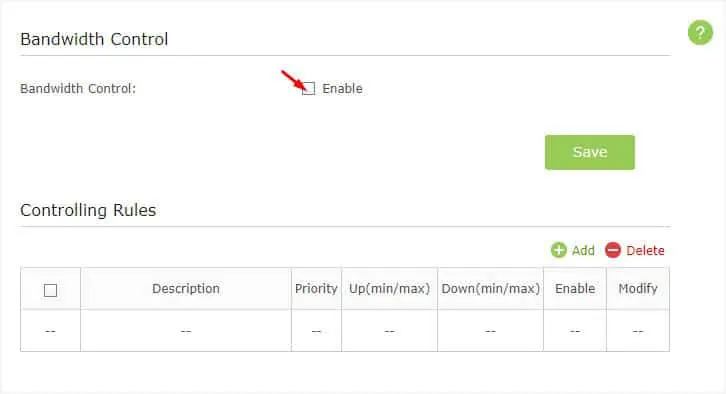
- Start by enabling the Bandwidth Control field as shown below.

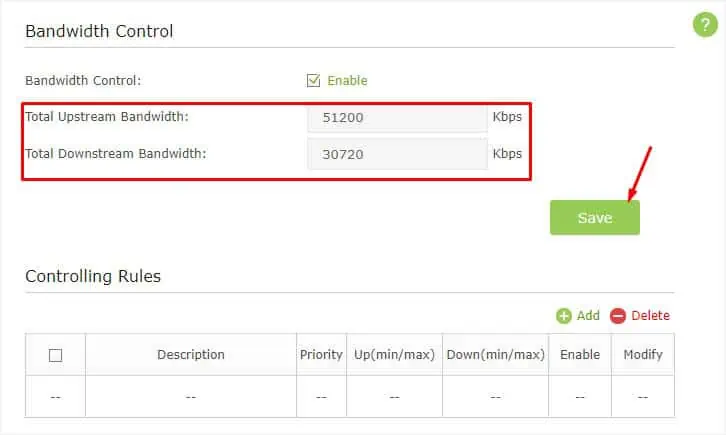
- Now, enter the Total Upstream and Total Downstream bandwidths as specified by your ISP.

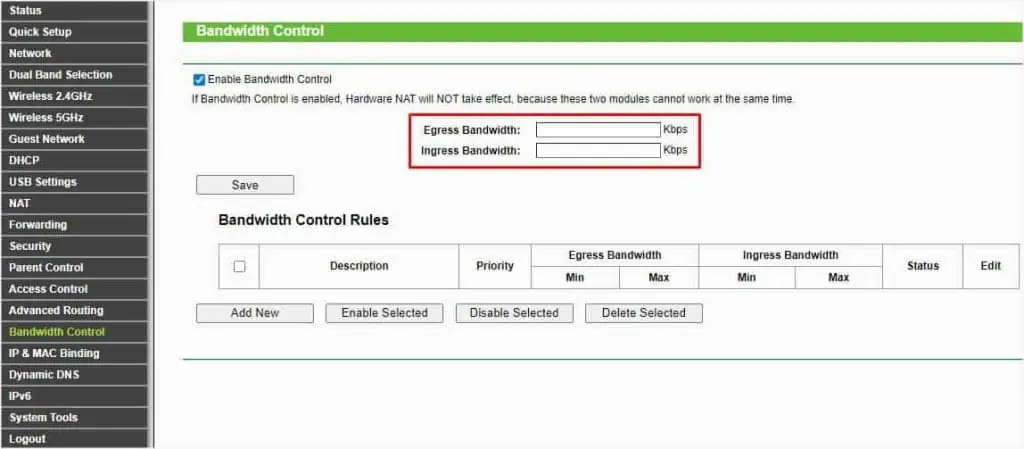
In some models, this might have different labels. For example, the Archer C2 names it Egress Bandwidth and Ingress Bandwidth, respectively.
- Press the Save button.
- In some models like Archer C3200, you should now get a “The device will reboot” confirmation prompt. Hit Yes to continue.

- Now, wait for the device to reboot. In case, you didn’t get this option on your model, you may choose to restart the router in Step 4.

Once the Bandwidth Control setting is enabled, you can now move ahead with the below instructions to configure for specific devices:
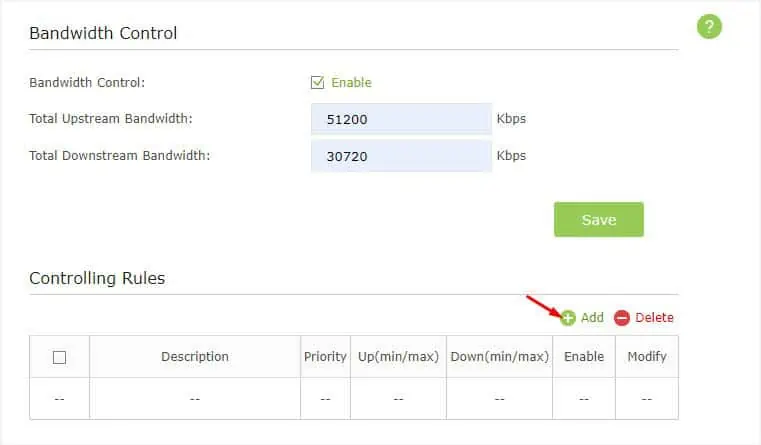
- In the Controlling Rules, Rules List, or similar section, click on the Add button.

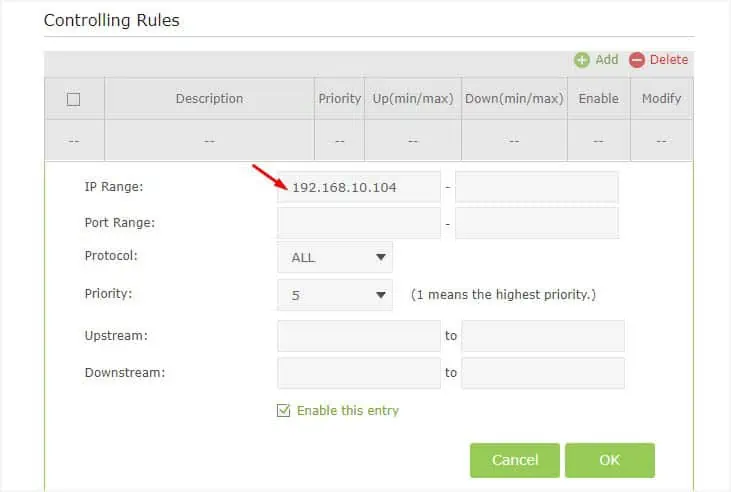
- In the IP Range field, set the IP that you reserved earlier.

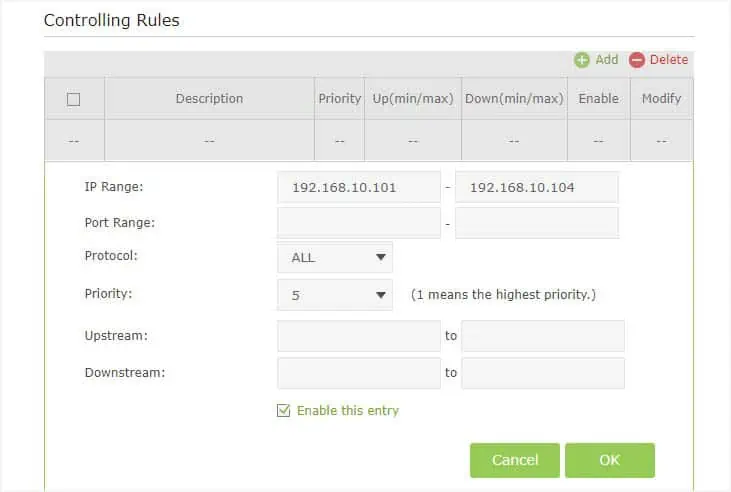
- In case you wish to set a standard bandwidth limit for all the devices, you may enter the IP address pool here. And to apply settings for a certain range of devices, simply enter the starting device’s address in the first box and the last device’s IP in the second.

- Since I am configuring bandwidth limits for specific devices, I’ll be leaving the Port Range and Protocol options empty. But if you’re looking to set a bandwidth limit for a specific service/app, you may enter its port number here.
- Next, set a priority number. In most TP-Link routers, 1 is the highest priority. For example, if I play games that require the highest bandwidth on my PC, I set it to the highest. For devices that I do not use often or do not require fast internet, it’s best to opt for a lower priority (could be 6, 7, or even 8).

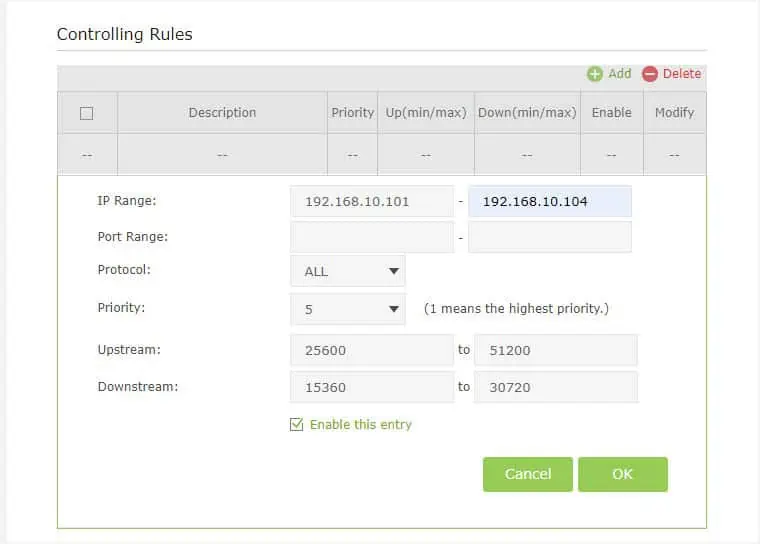
- Now, enter the highest and lowest upstream and downstream values (in Kbps).
- While you’re at it, ensure the Enable this entry option is checked.
- Finally, press the Ok button.

- Repeat the steps for all the other devices.
Using QoS
QoS is a network performance optimization feature that allows prioritizing the internet traffic. In TP-Link routers, you can use it to configure bandwidth control on specific devices.
As with the dedicated Bandwidth Control feature, you need to set the upload and download bandwidth first. Once that’s done, you require adding devices based on priority levels. Interestingly, it’s possible to edit the priorities too.
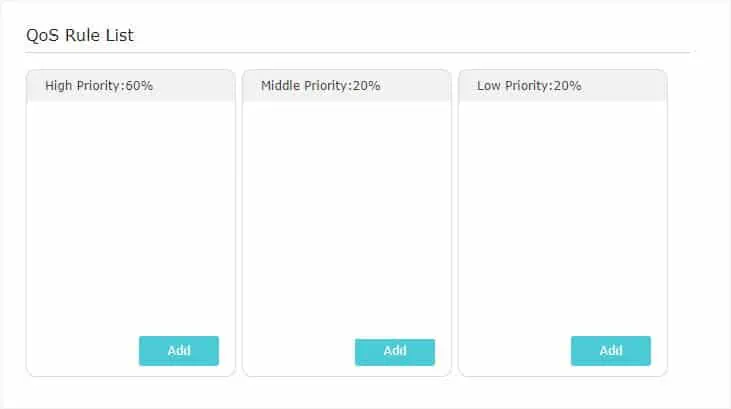
Let’s take an example to understand QoS better. Suppose, my total Internet Bandwidth (taken from ISP) is 50 Mbps. I’ve set 60% to High Priority, 20% to Middle Priority, and the remaining 20% to Low Priority.
This means that devices/services that I assign to High Priority will share 60% (30 Mbps), Middle Priority shares 20% (10 Mbps), and those within the Lower Priority use 10 Mbps.
In case there are no devices/services listed in one of the priority levels, the bandwidth will automatically be used up by the other two. For instance, if there are no devices/services listed under Low Priority, its 10 Mbps will now be shared among those under High Priority (5 Mbps) and Middle Priority (5 Mbps).
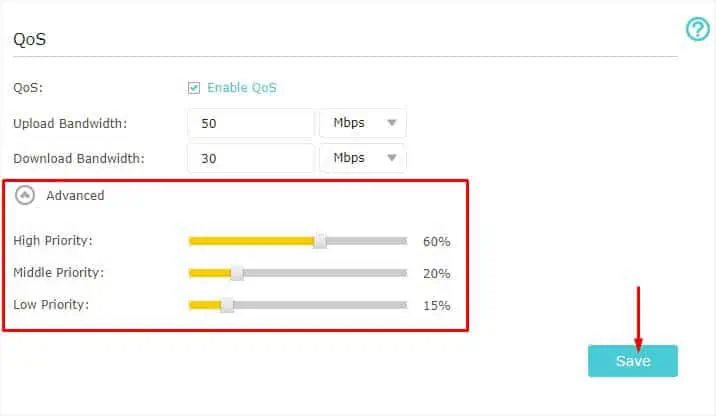
Important: If you do not include a device in any of the priority lists, you might experience connection problems. Often, this issue occurs when joining a new device on the network. Thus, it’s a good idea to leave a certain percentage without any rule. For example, you may set the priority as 60-20-15 and the remaining 5% can be used by the new devices.
Like the Bandwidth Control feature, the steps for QoS vary slightly. Some TP-Link routers have separate sections for Service and Device configuration while in others, it’s included within the same page.
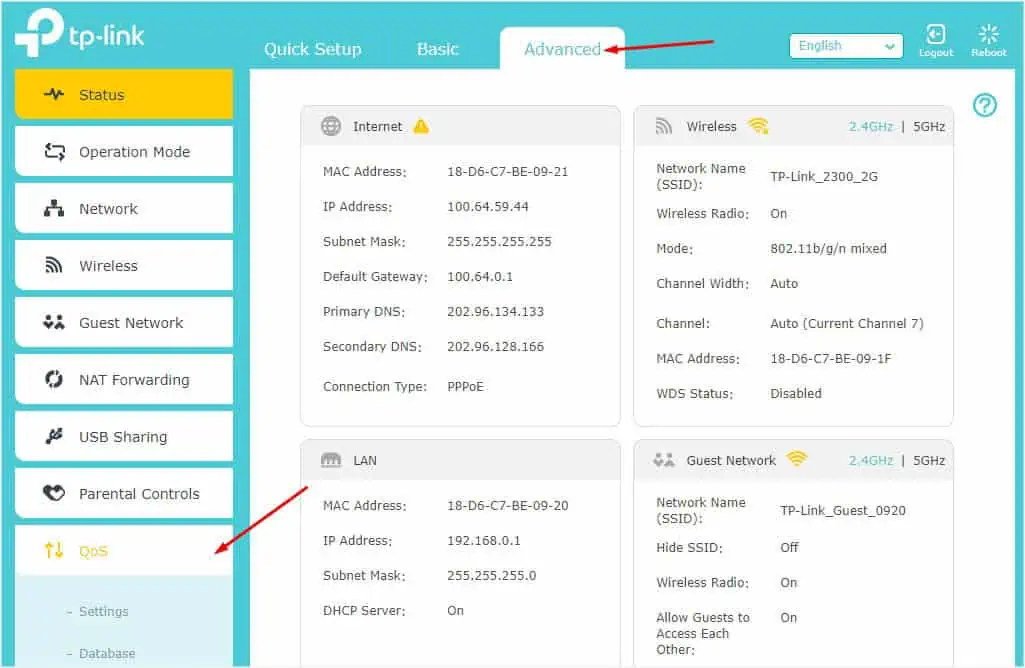
For demonstration, I have used the Archer C2300 model to enable QoS, edit the priority levels, and create a rule by device, application, and physical port.
- After logging in to the router’s configuration page, get to the Advanced section.
- Find and choose QoS > Settings.

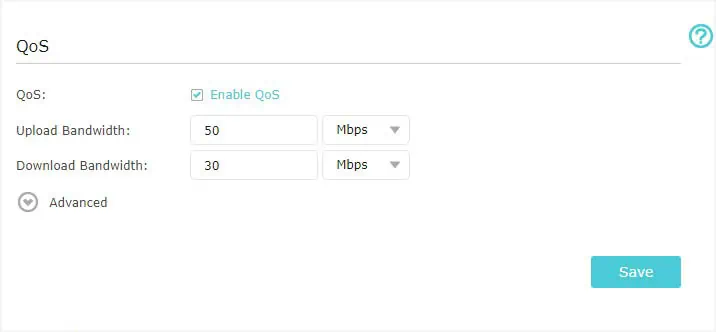
- Start by enabling the feature. You may simply check the Enable QoS field.
- Next, configure the Upload Bandwidth and Download Bandwidth fields as well. Some models, like Archer C2300 allow you to set the values in either Kbps or Mbps.

- Then, expand the Advanced drop-down if you wish to edit the priority.
- Configure the percentage for High, Middle, and Low as per your needs.
- Once that’s done, click on Save to apply the changes. The device should now restart and the QoS Rule List gets updated accordingly.

- Now, you can click on the Add button to add devices, applications, or physical ports:

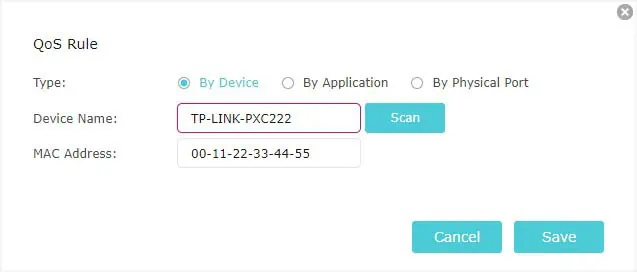
- By Device: Set the Device Name and Mac Address. You may enter the one that you reserved earlier or open the Access Device List by pressing the Scan button. Then, select the connected device from here.

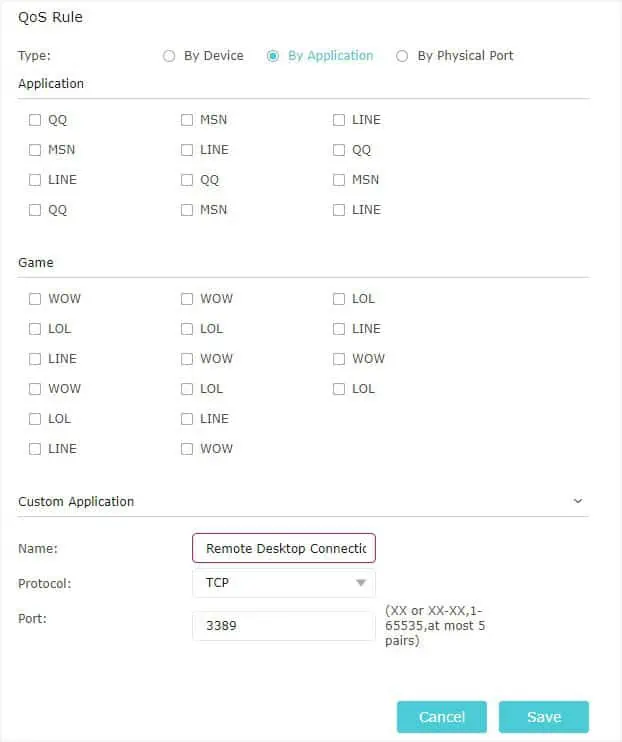
- By Application: You may pick a provided app/game or even add a custom one. For the latter, set the name, protocol, and port like the one I’ve demonstrated below.

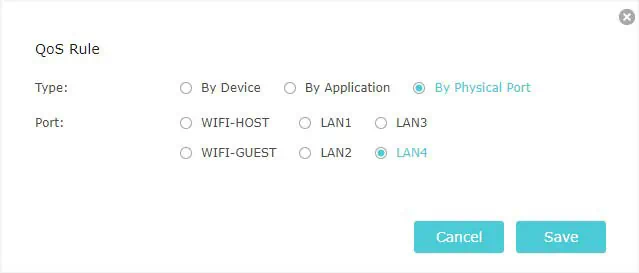
- By Physical Port: You may pick a Wi-Fi (either Host or Guest) or even the physical LAN port for which you want to limit the bandwidth.

- Hit the Save button and your device/app/port should be listed in the selected priority.
Additional Tip: Since the involved steps are going to be different for every TP-Link model, I highly recommend checking the help section on the configuration page. Press the question mark icon, usually available on top of the section. Here, you’ll get the definition for each of the terminologies that are available on your router and even the step-by-step procedure to do it.
Step 4: Test the Setting

After successful bandwidth control configuration on your TP-Link router, I recommend restarting it. While high-end models do not require this step, some models require a restart to apply the updated settings.
Once that’s done, I advise performing a speed test on every device to check whether the applied bandwidth control/QoS settings are working. You may utilize any tool, like Fast Internet Speed, Speedtest by Ookla, TestMySpeed, etc.


