All motherboards, including ASRock, use a boot priority list that helps them determine the proper boot device to boot into. After you start a computer, the firmware performs a Power-On Self Test (POST) operation and then uses this list to load the boot software from the highest priority boot device.
If the highest priority device is the storage device that contains the Operating System (OS), your computer will boot into the OS. Similarly. if it is a USB boot device, it will load the OS setup utility on the USB drive.
If you want to modify the boot order list, you can do so from your BIOS or UEFI settings.
Changing Boot Order on UEFI EZ Mode
Most UEFI interfaces, including that of ASRock motherboards, come with two modes— EZ and Advanced.
The EZ Mode allows quick access to many UEFI settings, including the boot order list. You can quickly change the boot priority configuration on this mode as soon as you get to the UEFI interface.
- Turn on your computer or restart it.
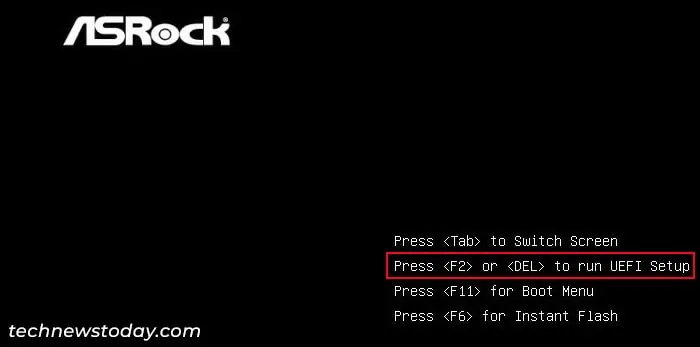
- Then, press the F2 or Del key when you get to the manufacturer’s logo screen to access its UEFI interface. You can also keep pressing the BIOS key (F2 or Del) repeatedly to get the proper timing.

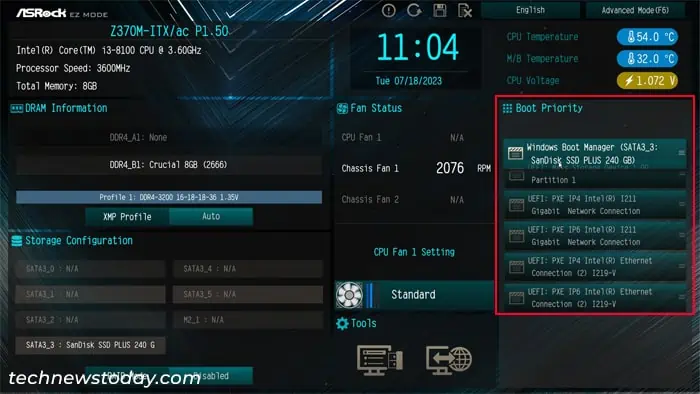
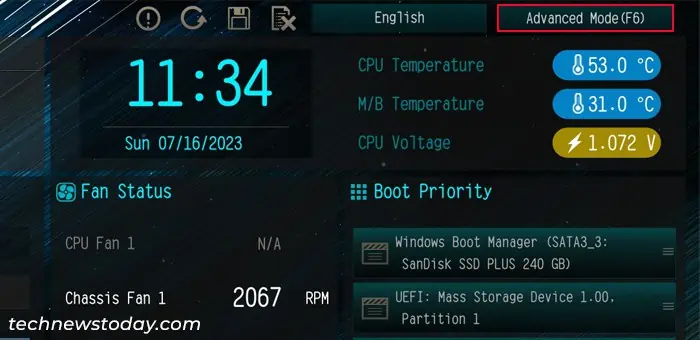
- You should get to the EZ Mode interface initially. Here, look for the Boot Priority section. For all newer versions of ASRock BIOS/UEFI, you will find this setting on the right side.
- You can click on a boot device on the list using the mouse and drag it up or down to change its priority.

- Change the order for all the necessary devices according to your preference.
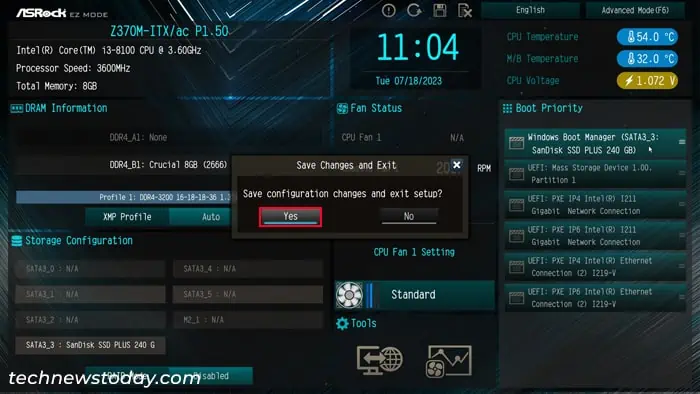
- After that, press F10 and then select Yes on the prompt to save the changes and exit the UEFI interface.

Changing Boot Order on BIOS/UEFI Advanced Mode
You can also change the boot order on the Advanced Mode interface of your BIOS setup utility or UEFI Firmware Settings. Also, the Legacy BIOS interface on older ASRock motherboards does not have EZ mode. So using the advanced mode is the only option for such devices.
- Get to the BIOS/UEFI by pressing the BIOS key (F2 or Del) on the manufacturer’s logo screen.
- If you are currently in EZ mode interface, press F6 to get to Advanced mode.

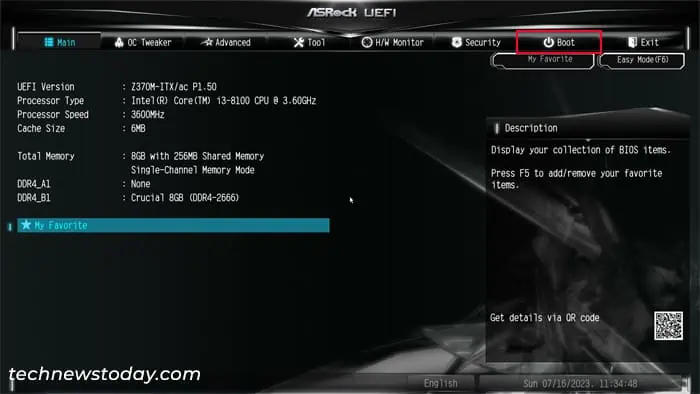
- Go to the Boot tab.

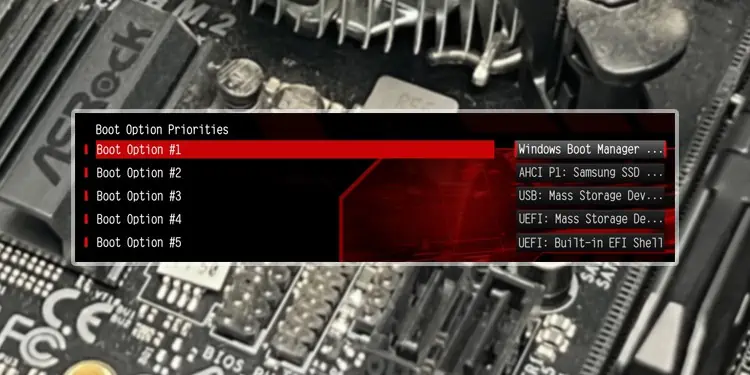
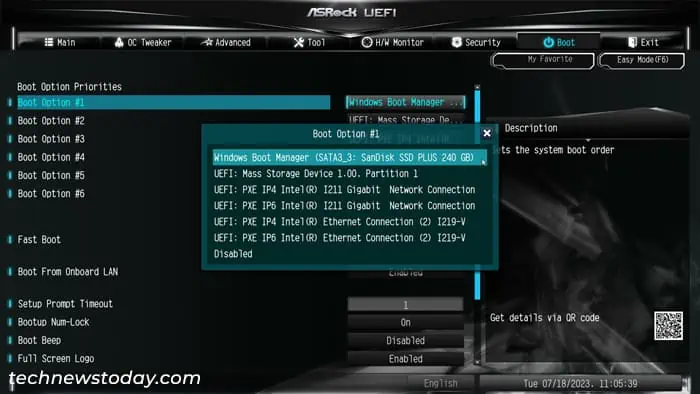
- Under Boot Option Priorities, select Boot Option #1.
- Highlight the device that you want as the default boot device (highest priority device) and press Enter.

- Go to Boot Option #2 and set it to the next priority boot device. Do this process for all the boot options on the list.
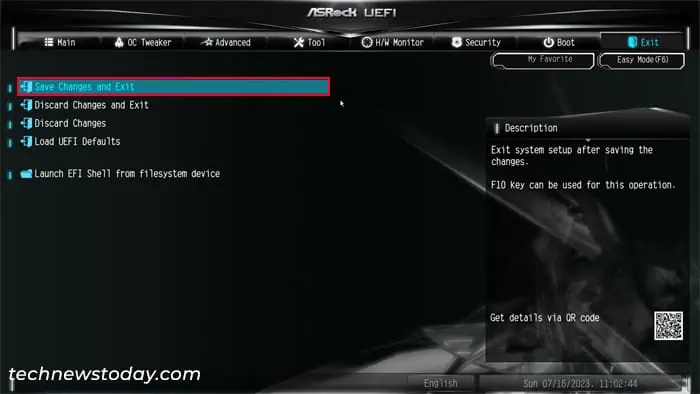
- Go to the Exit tab and select Save Changes and Exit.

- Click on Yes.
Note:
If you have disabled Compatibility Support Module (CSM) mode, only UEFI-compatible boot devices will show up on the priority list.
If some boot devices contain legacy BIOS-compatible OS, they won’t show up at all. You will need to enable CSM and then save the changes to make these devices appear on the boot order list the next time you access the UEFI interface.
Also, with CSM disabled, the boot order will list out your devices with a different notation.
- Storage device with UEFI-based OS — Windows Boot Manager
- A bootable USB — UEFI: Mass Storage Device.
