The boot order determines which boot entries your MSI board will prioritize when booting. For instance, if you’ve placed the USB entry at the highest priority, your system will try to boot from the USB first, then try other devices if required.
In the MSI BIOS, you can move the boot entries around in EZ Mode to configure the boot order. Or, you can go to the Boot section (Advanced Mode) and set the devices as Boot Option #1, #2, #3, and so on.
This is a quick and easy process but there are some outlier cases such as dual-boot systems or multiple similar boot entries that can make things confusing. So, I’ll explain what you should do in all such cases in this article.
Boot to MSI BIOS
Power on or restart your PC and repeatedly press Del/F2 to enter the MSI BIOS.

Settings like Fast Boot can prevent the BIOS key from working on some systems. In that case, use the Restart button on the case to reboot your PC 3 times in a row.
This’ll boot you to the recovery environment. There, select See advanced repair options > Troubleshoot > Advanced Options > UEFI Firmware Settings.
Change Boot Order in EZ Mode
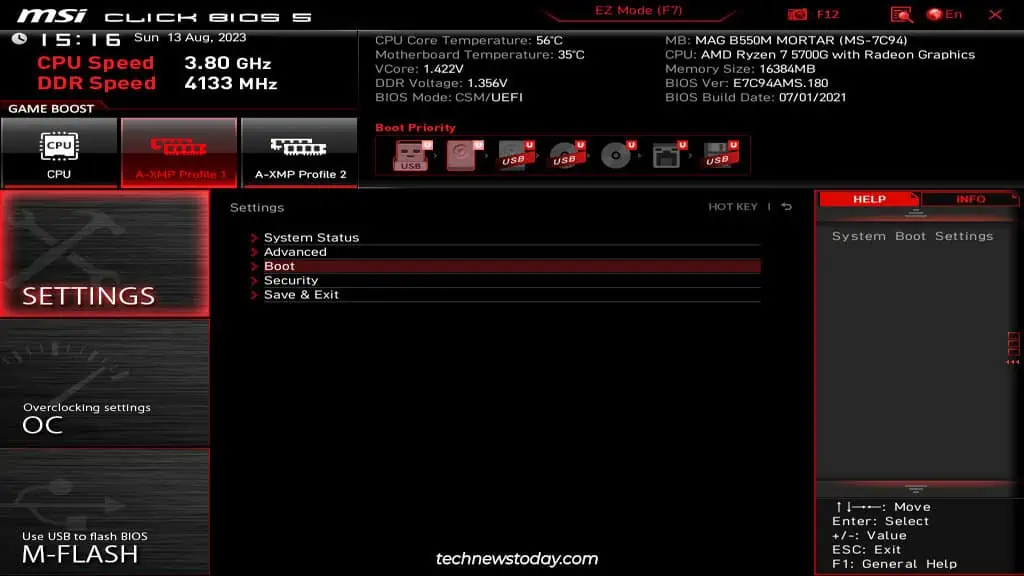
In EZ Mode, you can use your mouse or keyboard to select the entries in the Boot Priority section and switch them around.
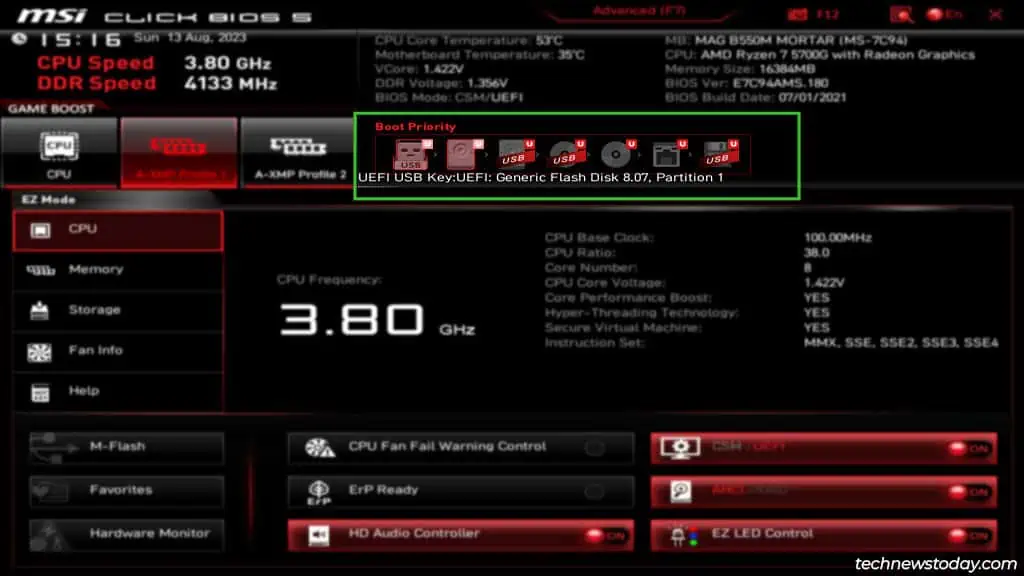
If you’re new to this and unsure how to best set this up, here’s my boot order for reference:
USB Drive > Hard Disk > USB Hard Disk > CD/DVD > USB CD/DVD > Network Boot > USB FloppyIf I have a bootable USB stick connected, my system boots from this drive. Otherwise, it boots as usual from my NVMe SSD (the BIOS refers to SSDs as Hard Disks too). The rest of the order is irrelevant to me as I almost never use them.
After setting the boot order to your liking, press F10 to save the new config and exit the BIOS.
Configure Boot Priority in Advanced Mode
Alternatively, you can also configure the Boot Order along with other boot options in Advanced Mode.
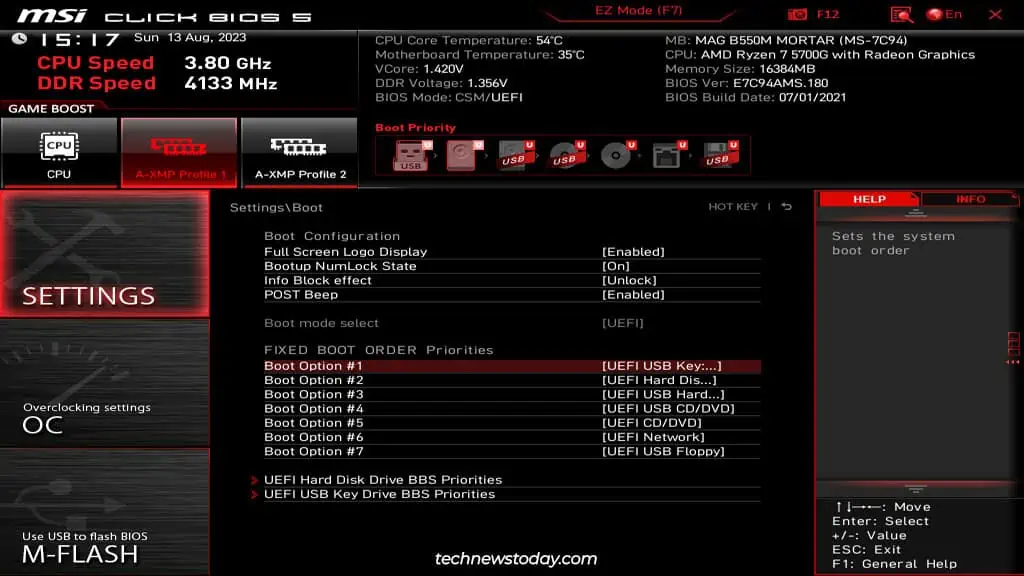
- Press F7 to switch to Advanced Mode and select Settings > Boot.

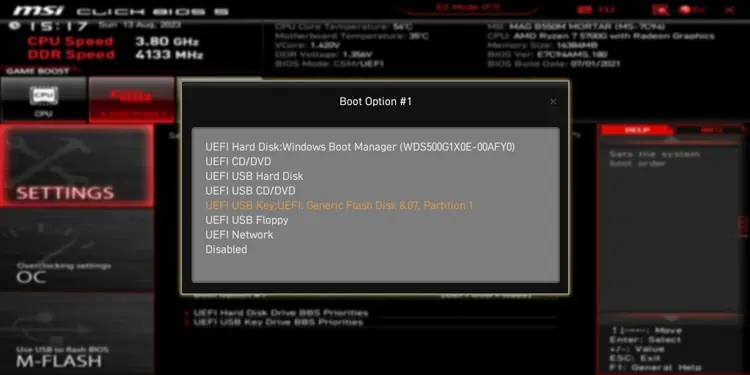
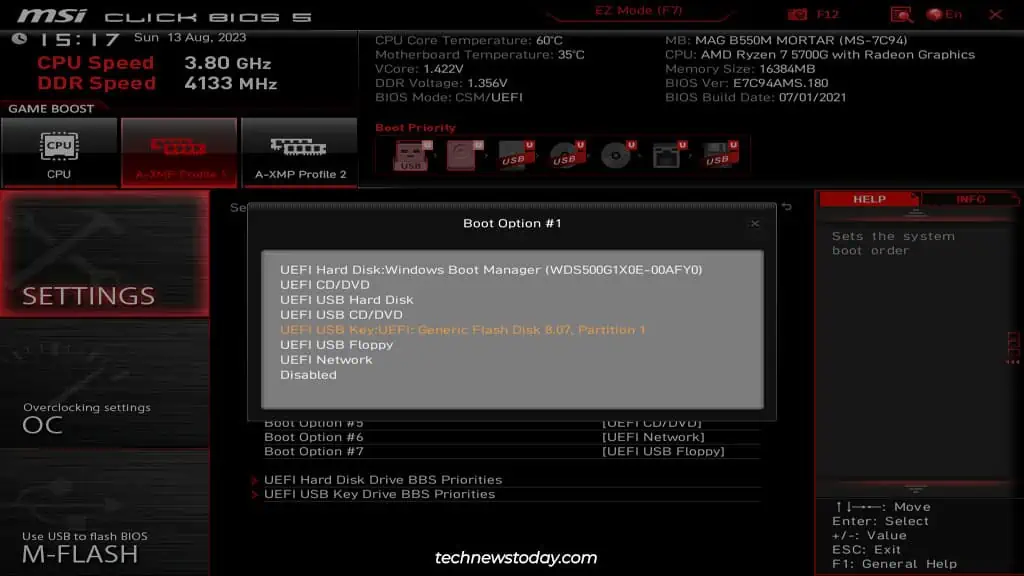
- Click on Boot Option #1 and select the device you want the highest priority for here.

- Configure the other boot options in the same manner. Then, press F10 to save the changes and exit.

Set HDD BBS Priorities
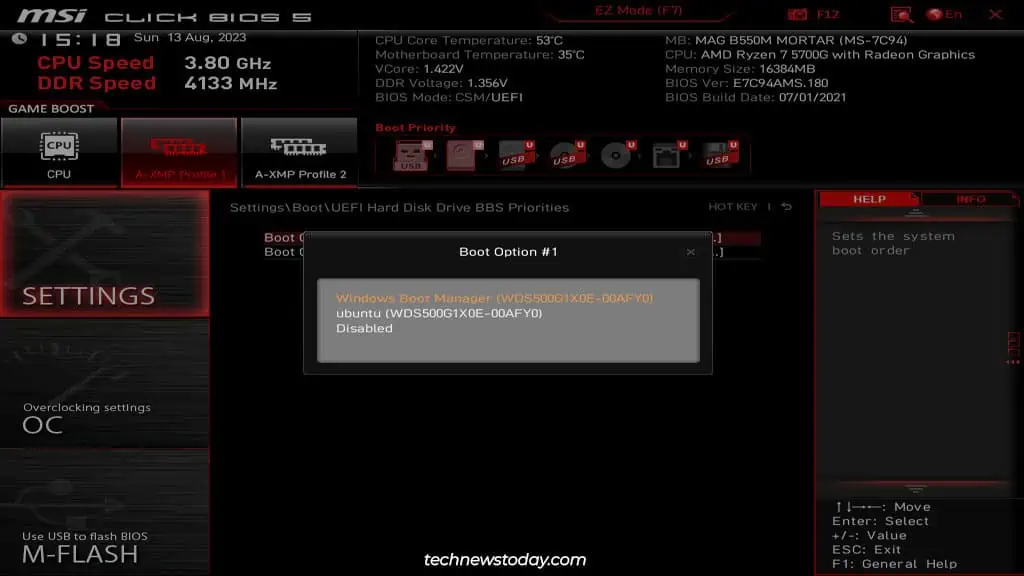
If you’re running a dual-boot like me, or you’ve got multiple bootable drives of the same type, you should additionally configure the Hard Disk Drive BBS Priorities. This’ll let you manage the exact OS or drive to boot from.
Select Boot Device from Boot Menu
Finally, you can also press F11 at the POST screen to access the Boot Menu. This lets you select the device to boot from for the current session. Technically, you’re not changing the boot order here but this is still useful to know.
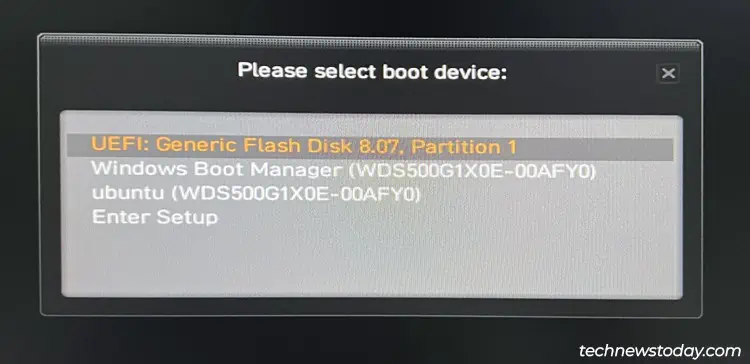
For instance, my system boots to Windows by default, and that’s how I want it to behave most of the time. If I ever need to boot to Ubuntu or a USB stick, using this boot menu is much quicker than entering the BIOS, changing the boot order, saving the changes, and so on.

