The clarity of the screen depends not only on the screen brightness but also on the ambient lighting condition. With low brightness, you will see much clearer on your Surface laptop in dim light than in bright surroundings. If the brightness is too high, it stresses your eyes in low-light conditions.
The contents you are viewing also affect how much brightness you need. For instance, if you are viewing a low-contrast image or display, you need higher brightness to distinguish all elements on the screen. But, lower brightness is sufficient if the display has higher contrast.
So, it is important to adjust the brightness depending on your needs. Surface laptops allow many ways to achieve this task—like using shortcuts or going through the Display settings.
Using Keyboard Shortcut
The easiest way of adjusting brightness on Surface devices is by using the appropriate hotkey shortcut on the keyboard. You need to connect the keyboard to the Surface device to set it to laptop mode and then press the keys.
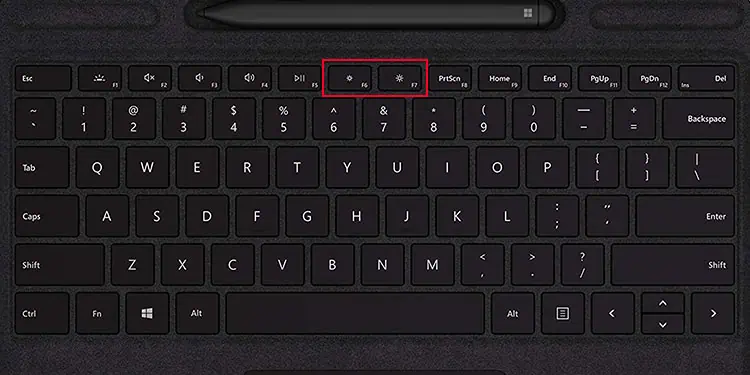
Here are the keys or hotkeys on Surface for decreasing and increasing brightness respectively.
- Surface Pro 1-4: Fn + Backspace and Fn + Del
- Surface Pro 5-7: F1 and F2
- Surface Pro X/8/9: F6 and F7
- Surface Laptop 4/5/Go/Studio: F6 and F7
You may need to unlock the Function keys (no led on Fn) or press Fn + the particular function key.
Using Brightness Slider in Action Center
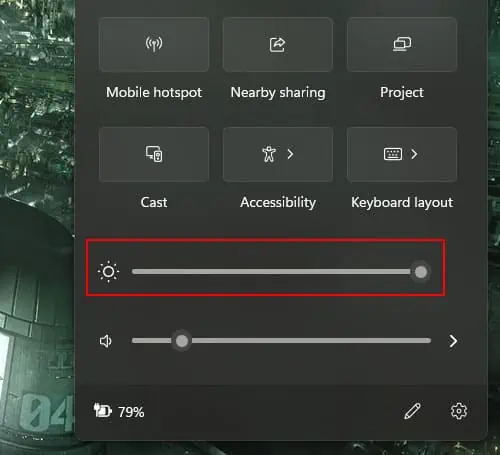
Another easy way to change the brightness on the Surface is through the Action Center. It is a panel that gives quick access to some common settings, including the brightness control slider.
- Press Win + A to open the Action Center. You can also click on the Network or Power icon on Windows 11 and the Notification icon on Windows 10 to pop up this panel.
- Drag the brightness slider to the right to increase the brightness and to the left to decrease the brightness.

Through Display Settings
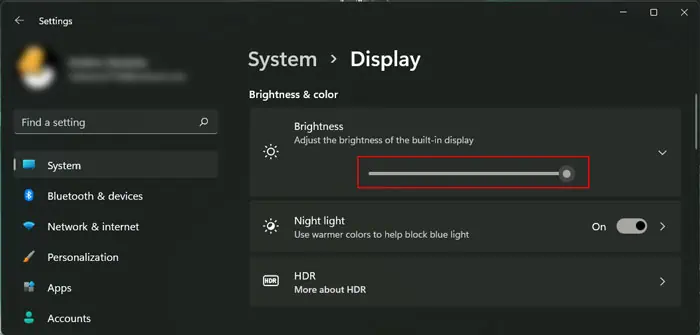
Windows Display settings also allow you to change most of the display configuration on your system, including the screen brightness.
- Open Windows Settings. You can click on Win + I or go to Start and then Settings.
- Click/tap on System and then Display.
- Look for the brightness slider and drag it left/right to adjust the screen brightness.

Through Mobility Center
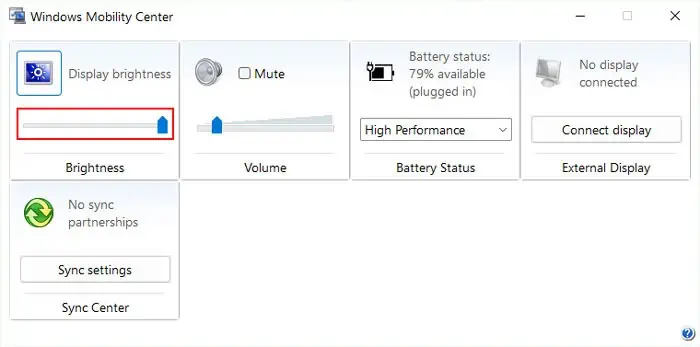
The Mobility Center is another quick-access feature on Windows. It also contains an option to adjust the display brightness.
- Right-click or long-tap on the Start icon and select Mobility Center.
- Drag the slider on Display brightness to change the brightness.

Using Command Line Interface
You can also use command line utilities like PowerShell to adjust your screen brightness. While most users won’t get much use out of this feature, you can create PowerShell scripts to set the brightness to your required values and automate them based on the time.
- Search for and open Windows PowerShell. You can also enter
powershellon Run to open this utility. - Type and enter
(Get-WmiObject -Namespace root/WMI -Class WmiMonitorBrightnessMethods).WmiSetBrightness(1,50)while replacing 50 with the brightness level you want (0-100).
How to Enable Automatic Brightness in Surface Laptop?
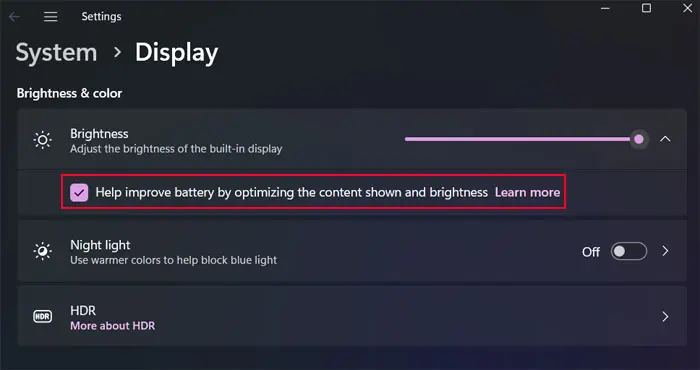
Surface laptops include an option to enable automatic adjustment of brightness under their display settings. When enabled, your system changes the screen brightness automatically based on changes in ambient lighting or content contrast.
- Open Settings and go to System > Display.
- Under Brightness, check Change brightness automatically when lighting changes or Help improve battery by optimizing the content shown and brightness.

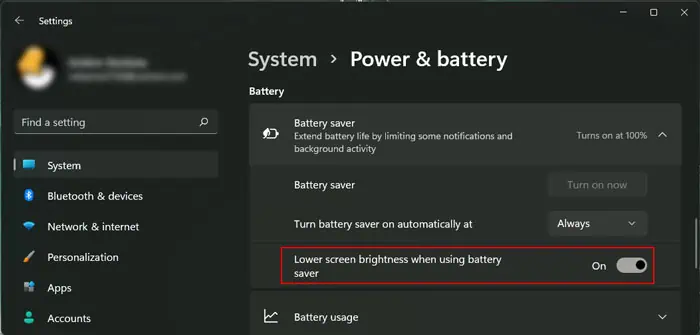
You can also enable automatic dimming of your screen when in battery saver mode.
- Open Settings and go to System > Power & Battery or Battery.
- On Windows 11, select Battery saver under Battery. On Windows 10, simply scroll down to Battery saver.
- Check Lower screen brightness when using battery saver. You can also specify the battery level where the saver triggers through Turn battery saver automatically at.

