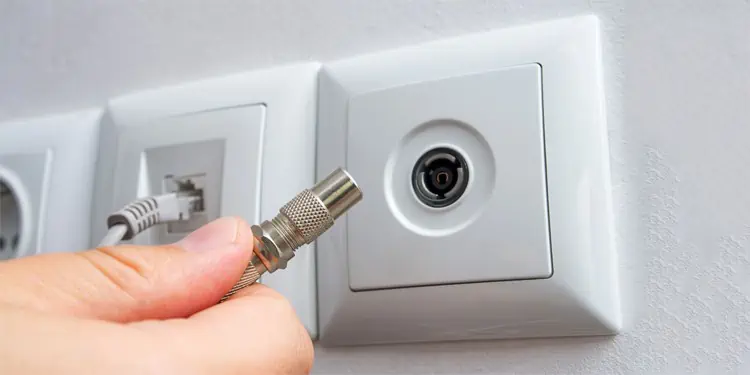
A cable outlet is a terminal on your wall to connect TV or Internet cables. It hides the messy wires and provides convenient cabling through your house. However, sometimes, they run into a problem, and you may encounter issues with your connection.
You may not get an active connection, or your TV or Internet signals can be interrupted. There can be various reasons why your cable outlet starts acting up. There may be an issue with the cable or the outlet itself. Or, if you have pets at your house, they may damage the cables.
Whatever the scenarios are, you will learn how to troubleshoot a cable outlet that is not working after reading this post.
Why Can’t My Cable Outlet Work?
- Expired subscription
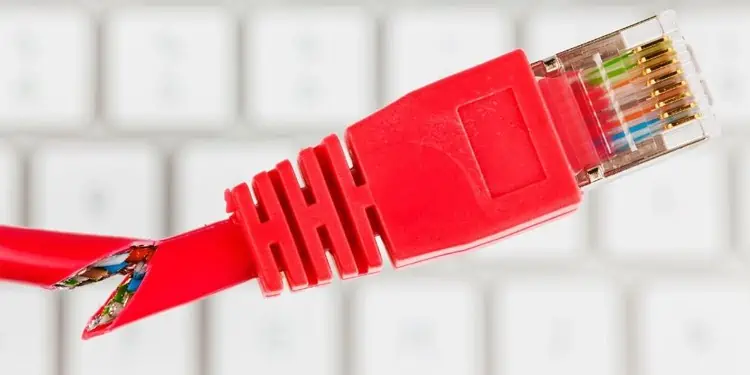
- Damaged connectors
- Debris collected over connector and outlets
- Faulty cables
- Environmental effects
How to Fix Cable Outlet Not Working?
If your cable outlet is not working, you may not be getting an active connection on your TV or Internet on your computer. Therefore, solving this issue is of the utmost importance. Since this is a hardware fix, troubleshooting may require some extra effort, but you will find it easy once you go through this post.
Here, we have compiled a list of 8 fixes to help you out. Let’s get straight into it.
Check Your Cable Subscription
Before you move to hardware fixes, make sure you have an active cable subscription. You may not be receiving the signals from your cable provider and misinterpret the situation as your cable outlet is not working. You will receive a message from your distributor’s side once your package expires. If your subscription has expired, please renew it for uninterrupted service.
Clean the Cable Connector and Outlet
The cable connector and the outlet are subjected to dirt and debris over time. Foreign bodies like cockroaches and spiders are mostly the culprit behind the issue. They are responsible for disrupting your TV or Internet signals. Follow these steps to clean the cable connector and outlet:
- Unplug your connector from the outlet.
- If you have an RJ-45 connector, it has eight yellow pins. Clean the pins with a lint-free cloth. Isopropyl alcohol can be best to dip the cloth and clean the connectors.
- If you have a BNC connector, you can use earbuds to clean anything in the periphery of the copper wire. Be careful while cleaning the coaxial cable connector. You may bend the tip of the central copper wire, and it may stop working.
- Also, clean the outlet and port to remove any foreign particles.
Check the Connectors for Damage

Whether you have a BNC connector for your coaxial cable or an RJ-45 cable for your ethernet cable, you must inspect it for any breakages. Unplug the cable from the outlet and see if it has been damaged. Consider replacing the connector if you see any damage in the connector.
RJ-45 has eight twisted wires. Sometimes, one of the wires may come out of the pin and stop working. While, in the case of a coaxial cable, the central copper wire may get bends or breakage and stop working. Or, it may not be long enough to get into your coax port of the TV.
If you see that’s the case, you must purchase a new RJ-45 connector or a BNC connector and replace it. Steps to replace the BNC connector and RJ-45 connector is given below:
Replacing a BNC Connector
Replacing a BNC connector is quite a technical task to perform. However, I have mentioned the steps with ease that you can follow:
- Unplug the cable from the wall outlet.
- Trim the cable end such that the old BNC connector is cut off. But make sure the cable is long enough to reach your TV’s coaxial port after trimming.
- Your BNC cable has four layers: plastic jacket, metallic shield, dielectric insulation, and central copper wire. Peel the plastic jacket out of the cable.
- Strip the further two layers such that about 1 inch of the copper wire appears. The image below shows what the wire should look like before connecting to the BNC connector.

- After you cut the wire in this form, insert it into the BNC connector and tighten the screw in the connector. The copper wire must be equal in length to the edge of the BNC connector so that it can properly get into the coax port of the TV.
- Connect it to the wall outlet and check if it starts working now.
Replacing an RJ-45 Connector
Replacing an RJ-45 connector is more complex than replacing a BNC connector. You need to know how to work with the RJ-45 crimper tool and the ethernet cable color coding. Get someone who knows to replace an RJ-45 connector and get it replaced. If you have the tools available, you can take help from YouTube video below on replacing an RJ-45 connector.
Inspect the Cable Outlet
The loose connection behind the outlet is another reason why it stops working. You should open the outlet and see if it is the issue. Follow these steps:
- Unplug the cable from the outlet.
- Remove the wall plate of the outlet.
- Pull out the outlet by unscrewing the tightening screws.
- You will see a cable connecting to the outlet port. Fasten it with a screw if it’s loose.
- Insert the outlet again into the wall and screw it.
- Install the face plate and reconnect the connector to the port.
Check the Connections On the Other End
Now that you have inspected the cable and outlet in your room, it’s time to check the connections on the other end. Here’s how to perform a check:
- If you are facing a problem with the RJ-45 outlet, go to the router’s end and see if the cable is properly connected. Also, try changing the port in the router.
- If it’s the case with a coaxial cable, go outside your home and check the connector end at the distribution box.
Check For the External Factors
Some countries have underground coaxial cables, so the external environment does not affect the connection. But in most countries, the coaxial cable comes directly from the electric poles to your wall outlet.
A large vehicle running on the road may break your wire, or environmental factors like storms and hurricanes may break it. Also, splices in the middle of the wires might get loose or corroded, and your cable outlet may stop functioning. In such a case, you should make a call to the cable operator to get it repaired.
Check For the Cable Failure
The cable running from one end to another inside your wall might get damaged. It is mostly due to the dampness in the wall. Or, there might be a breakage in the cable. If the cable is faulty, you need a replacement. But before you do a cable replacement, you should consider checking if the cable is faulty. Here’s how:
Test a Coaxial Cable
Before you test a coaxial cable, you need to have a multimeter and both ends of the coaxial cable. You need to perform continuity test as well as a short circuit test for a coaxial cable. Follow these steps:
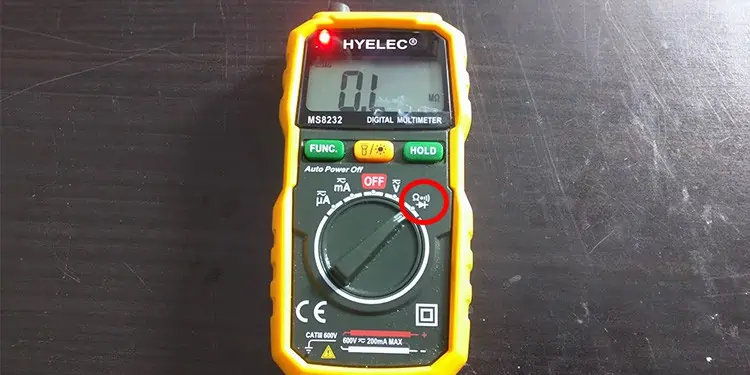
- To perform a continuity test, select the continuity mode by rotating the knob.

- You have black and red probes on a multimeter. Connect the red probe to one end and black to the other end. You can connect any probe to any of the ends.

- If a tester generates a tone, it signifies that your cable is good. Else, it is damaged, and you will need a replacement.
There might also be cases when the coaxial cable is short-circuited, and it might not work. To perform a short circuit test, follow these steps:
- Rotate the multimeter knob and select continuity mode.
- Connect the red probe to the outer radius of the BNC connector.
- Connect the black probe to the central copper wire.
- If your multimeter shows a negative reading or null value, no short circuit is present. If you hear a tone from the multimeter, there’s a short circuit, and you need a replacement.
Test an Ethernet Cable
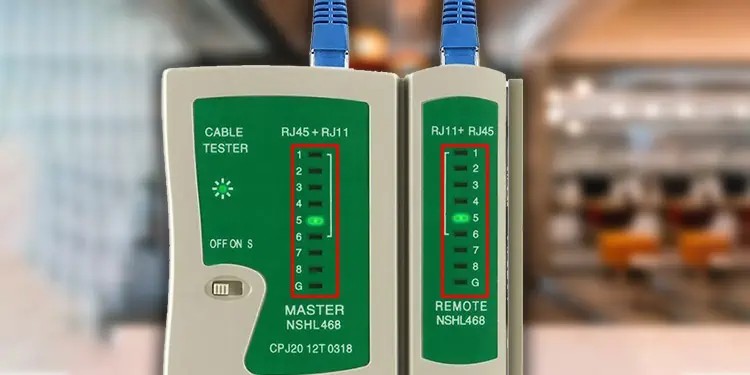
You need an ethernet cable tester to test faults in your ethernet cable. Cable testers are of two types: One type has both the transmitter and receiver end on it, while another has a separate device to insert the transmitter and receiver end of the cable. Whatever type you have, follow these steps to test the ethernet cable:
- Get both ends of the ethernet cable.
- Insert one end on the transmitter side and another end on the receiver side of the tester. You will hear a click sound once it is properly inserted.
- Turn on the tester. Once the test runs, you will see the indicators glowing on the tester.
- If every indicator on the transmitter and receiver side glows, the cable is not faulty. Else there is a fault in the cable, and you need a replacement.

- Once you successfully run the test, remove both ends of the cable from the tester. Be careful while removing the cable. You should press a notch and then only pull the cable out of the tester. Else you may end up damaging the connector.
We also have a comprehensive guide on troubleshooting the wall’s ethernet ports. You can consult the post and learn more about the methods of testing an ethernet cable.
Hire a Technician
You need to hire a technician if you went through every fix mentioned in this article but still can not sort out the issue. There might be some serious issue in your connections, and you might be facing a problem.


