Changing the system drive letter (generally C:) is not advised as applications may encounter errors during execution due to the change of path. But aside from this, users are free to change drive letters that they don’t like, or assign letters to drives that don’t have one yet.
Changing a drive letter in Windows has traditionally been done via the Disk Management utility, but in Windows 11, you can do this more easily via Settings.
The Disk Management method will suffice for most users, but we’ve also detailed various other ways to change the drive letter for those interested.
Via Disk Management
Disk Management is a system utility used for various storage-related tasks such as allocating space, initializing a drive, and assigning drive letters too. Here are the steps to use this utility:
- Press Win + R, type
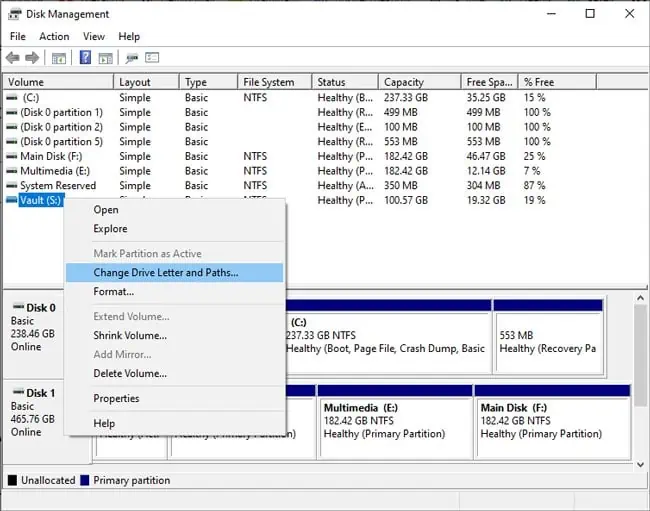
diskmgmt.msc, and press Enter. - Right-click the drive whose letter you’d like to change and select Change Drive Letters and Paths.

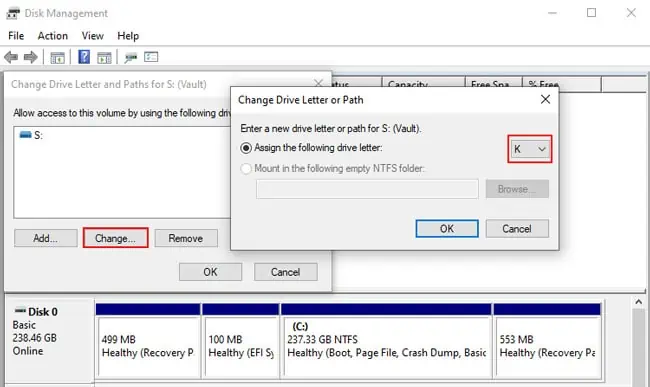
- Click on Change, select an available drive letter, and press OK.

- Accept the prompt to change the drive letter.
Via Settings
Unlike the classic Disk Management method, changing the drive letter via storage settings is a feature only available on Windows 11. So, Windows 10 users should skip ahead to the next section. With that said, the settings method is extremely simple. Here are the necessary steps:
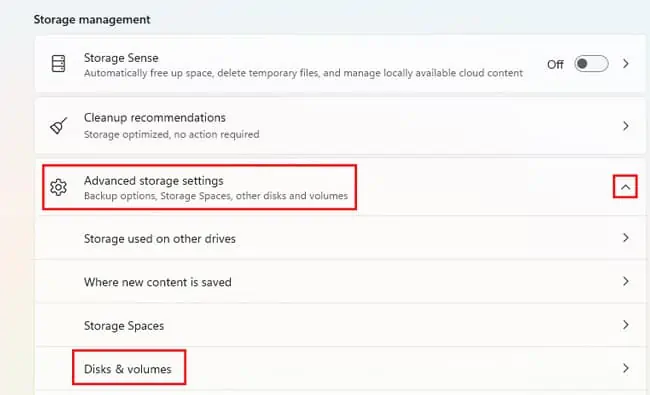
- Press Win + I and select System > Storage > Advanced storage settings > Disks & volumes.

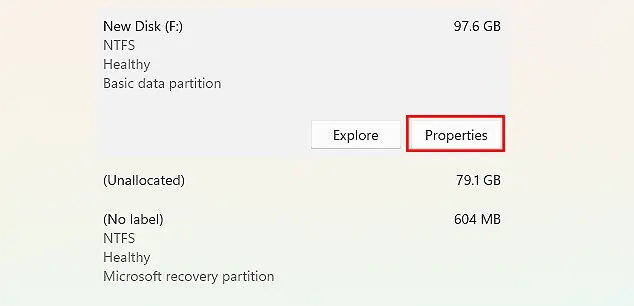
- Select the drive whose letter you’d like to change and click on Properties.

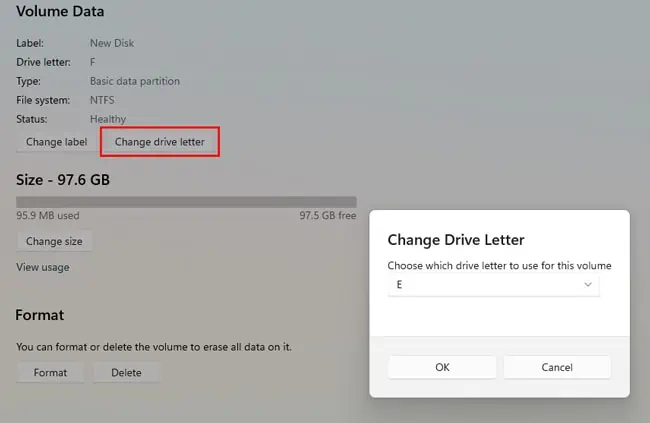
- Click on Change drive letter, select an available drive letter, and press OK.

Using Diskpart
If you face any issues with the earlier GUI methods, we recommend using diskpart. Diskpart is a command-line tool used for managing the system’s drives. It is easy to mess up with diskpart if you haven’t used it before, so please follow the steps listed below carefully:
- Press Win + R, type
cmd, and press CTRL + Shift + Enter. - Type
diskpartand press Enter. - Type
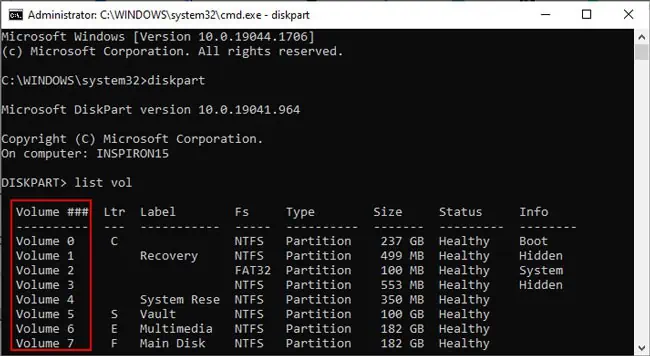
list voland press Enter. Note the volume number (#) of the drive whose letter you’re trying to change.
- Type
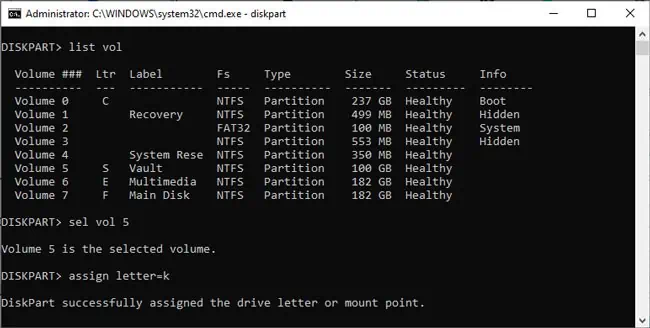
sel vol 5, replace 5 with the appropriate volume number from Step 3, and press Enter. - After you’ve confirmed that the correct volume is selected, type
assign letter=k.
- Replace k with an available drive letter if necessary, and press Enter to execute the command.
Using Set-Partition
You can actually use CMD or Powershell as you prefer. Powershell supports diskpart, but there are also powershell-specific cmdlets for managing partitions. We’ve detailed the steps to use them below:
- Press Win + R, type
powershell, and press CTRL + Shift + Enter. - Type
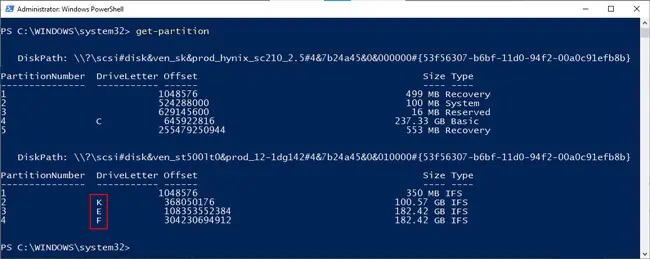
Get-Partitionand press Enter.
- Once again, note the current drive letter of the partition you’re trying to modify.
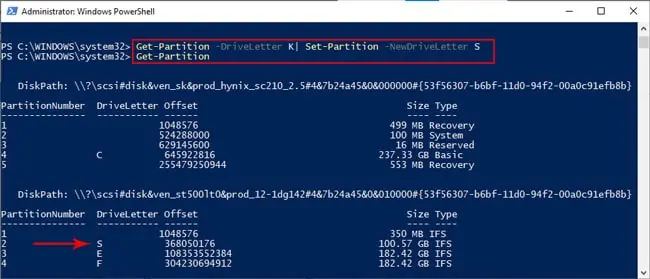
- Copy the following command:
Get-Partition -DriveLetter K| Set-Partition -NewDriveLetter S
- Replace K (current drive letter) and S (new drive letter) with the appropriate values in your case and press Enter to execute the command.
Using Registry Editor
Finally, you can change the drive letter using the registry editor as well. We recommend backing up the registry first if you’d like to try this method. With that said, here are the necessary steps:
- Press Win + R, type
regedit, and press Enter. - Navigate to:
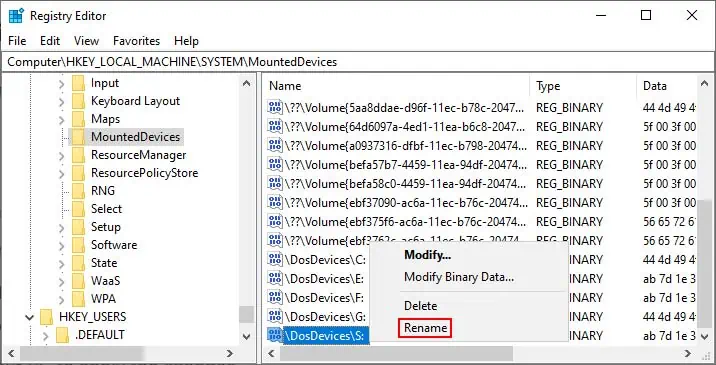
Computer\HKEY_LOCAL_MACHINE\SYSTEM\MountedDevices - Right-click the drive’s value and select Rename.

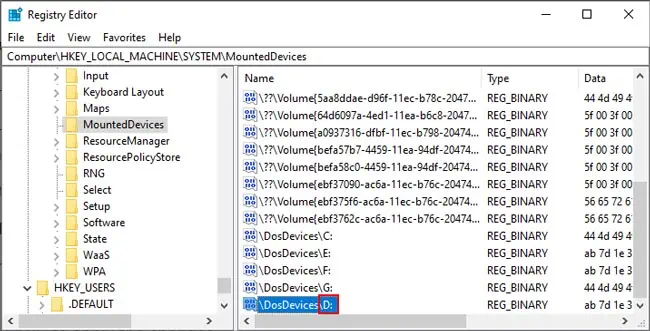
- Change the DosDeviceName (drive letter) to another unused one and press Enter.

- Restart your PC to apply the changes.

