Before flashing your ASUS motherboard, it’s always best to check the current BIOS version first. Compare this with the ones listed on your model’s support page to find whether there’s a worthy update available.
You can check the BIOS Version field on your ASUS UEFI/Legacy interface or by physically inspecting the barcode sticker. But if you’re looking to find it more quickly, you may opt for MyASUS, Armoury Crate, or even Windows-based utilities.
While there are a plethora of ways, I have presented some of my favorite ways to check the BIOS version on an ASUS laptop or motherboard.
From Legacy/UEFI BIOS Utility
If you’re facing a boot issue and wish to quickly check the version, entering ASUS BIOS Utility would be the best choice.
The firmware appearance differs on legacy and UEFI systems. Even every ASUS series (whether it’s TUF Gaming, ROG, PRIME, ProArt, Workstation, or CSM) has individual interfaces, a little varying from one another.
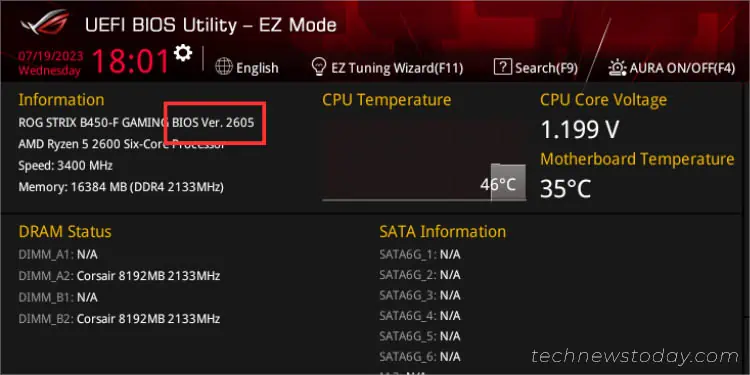
After comprehensive testing on different models, I can confirm that the steps involved are identical. ASUS offers two BIOS modes–EZ and Advanced. Here are the required steps to find the version on EZ Mode first:
- First, enter BIOS by pressing either F2 or Del key on startup.

- Find the Information section.
- Here, you should see the BIOS Ver. next to the system model. Here’s a reference that should assist you:

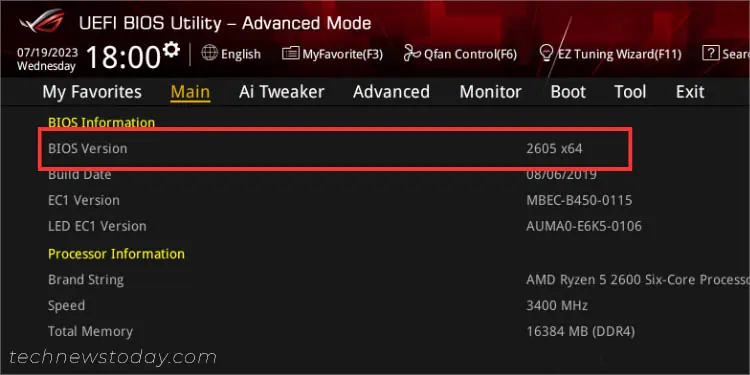
To switch to Advanced mode, press the F7 key. Or if you’re already there, execute the following instructions:
- First, switch to the Main tab.
- Locate the BIOS Information section.
- Now, you should find the BIOS Version field. This displays the current version along with your system’s architecture.

Additional Tip: You can also identify your BIOS version in EZ Flash Utility. When you’re here, check Version under the Flash section.
Inspect Barcode Sticker
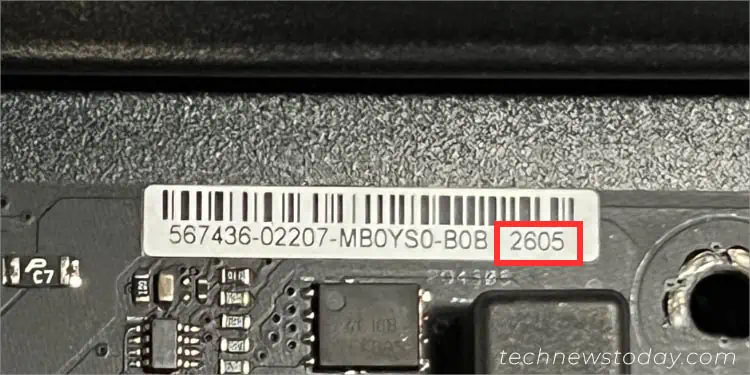
Another way to inspect the BIOS version when facing boot-related problems is from the barcode sticker on the ASUS motherboard. However, this is only applicable if you hadn’t flashed the BIOS before (it only marks the factory BIOS version).
The exact location varies on different models. When I examined the stickers on my Prime B450 Plus and ROG STRIX B450-F mobos, I found them at the top (just above the memory modules). Yours can even lie between the CPU socket and the memory slots.
- Before you begin, shut down Windows and turn off the PSU’s switch (for safety reasons).
- Untighten the screws to open the PC case. You may require a screwdriver but if yours is like mine (demonstrated below), simply unscrew them using your fingers.

- Find the barcode sticker on your motherboard.
- Inspect the final four digits, which is the factory BIOS version.

Using MyASUS Application
If you’re able to access the Windows screen, you do not have to hassle getting into the BIOS interface or inspecting the motherboard’s sticker.
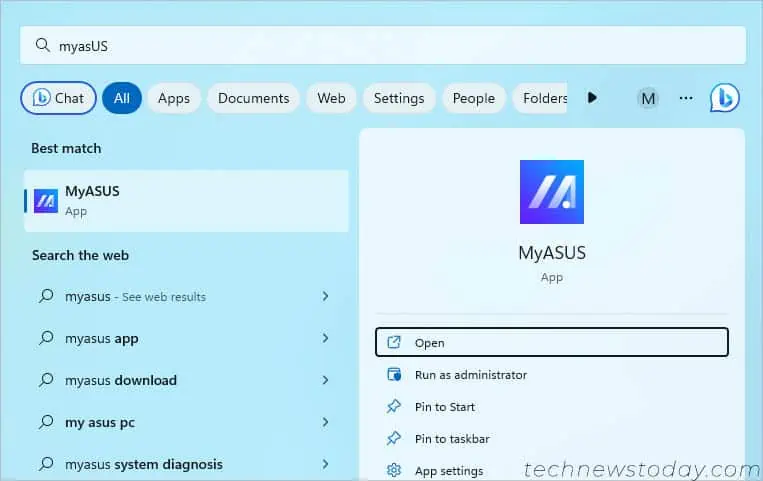
Instead, you can open up MyASUS, an OEM application that comes preinstalled on some ASUS laptops and motherboards. This can even come in handy if you’re planning to update BIOS directly from this utility.
- Launch the program from Start Menu and wait for it to get initialized.

- Ensure you’re on the Home screen.
- Select System Info.

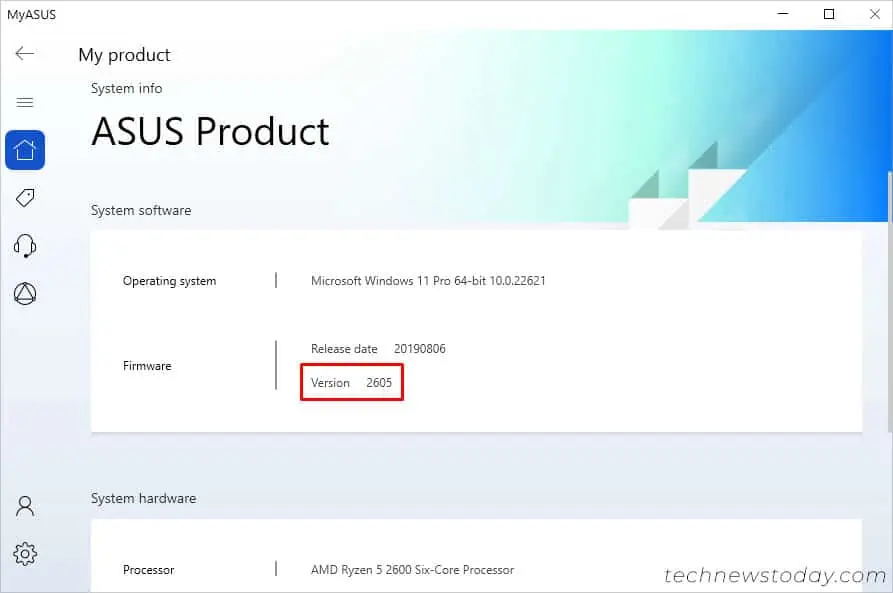
- Under System software, check the Version field within the Firmware section.

Via Armoury Crate
Just like MyASUS, it’s also possible to check your BIOS version from Armoury Crate, which is another ASUS-recommended application. If you have already downloaded it from your model’s support page, you can move on with the general steps below:
- Launch the tool from Start Menu or Desktop (if you enabled the shortcut icon when installing it).

- Make sure you’re on the Dashboard page. If not, select it from the main menu in the left pane.
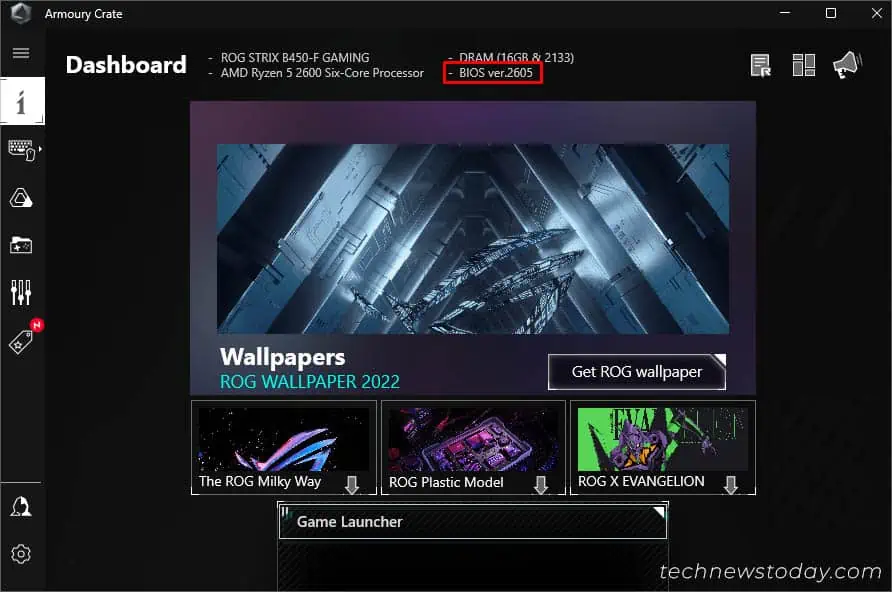
- You should find the BIOS ver. field at the top, as shown below.

From Windows System Information
For users who have installed neither of the two OEM-based software, downloading the application just for a single purpose might look a little unnecessary, which I completely agree with.
But don’t worry–you can find the BIOS version directly on Windows-based tools too. My preferred method is using the System Information application. Let me show you how to do it:
- Use the Windows + R shortcut to get to the Run utility.
- Here, type
msinfo32and hit Enter to launch System Information.
- Ensure you have selected System Summary.
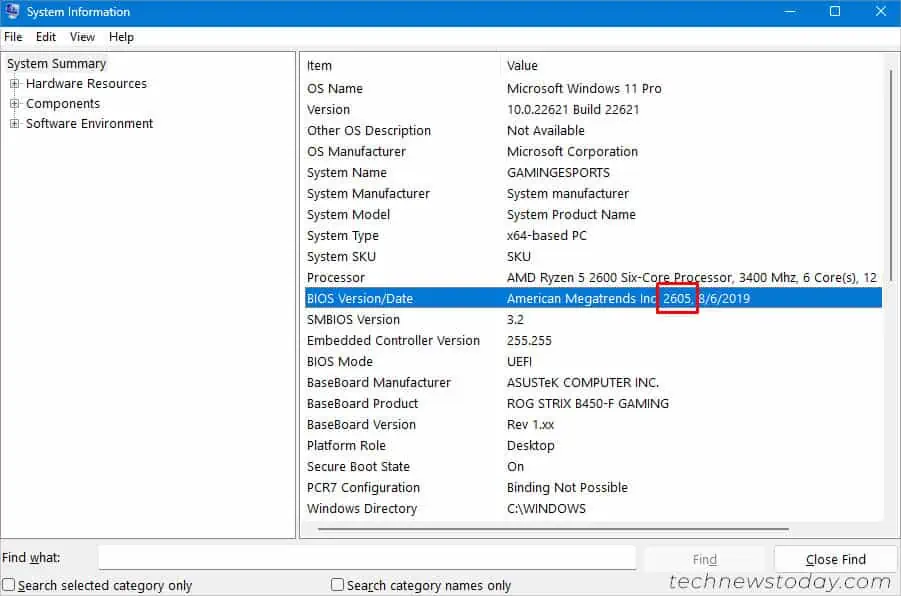
- From the right pane, find the BIOS Version/Date field. It should be in the following format:
American Megatrends Inc. [BIOS Version], [Date]
Apart from that, you can use DirectX Diagnostic Tool, Registry Editor, and even CMD/Powershell commands to quickly check the BIOS version on Windows.
Also, it’s possible to view this information via advanced system information utilities, like HWInfo, CPUID, Astra32, etc.
Final Words
Now that you have learned different ways to find the ASUS BIOS version, the ultimate choice falls into your hand.
I recommend picking the first two methods if you’re unable to boot up. And the latter ones (OEM or a Windows-based tool) for quicker navigation.
Since you’re probably going to flash a new version next, let me guide you on how to check and download the appropriate BIOS file. This will let you know whether there’s an important update waiting for you or you’re already running the latest firmware:
- First of all, navigate to the official ASUS website.
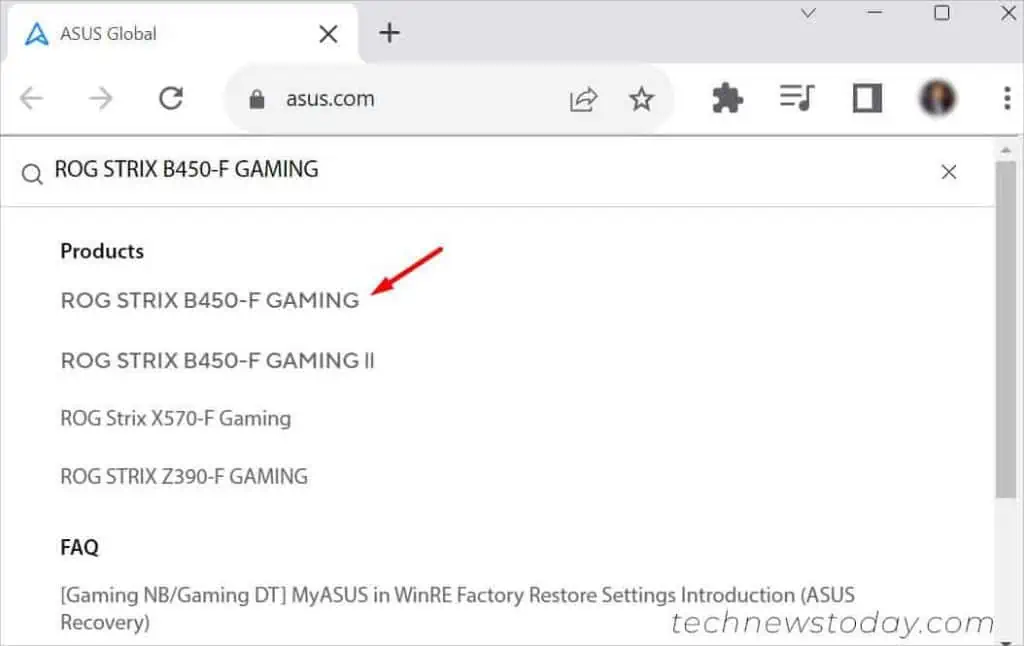
- Click on the search icon and search for your motherboard or laptop. As demonstrated below, I’m going to search for ROG STRIX B450-F GAMING.

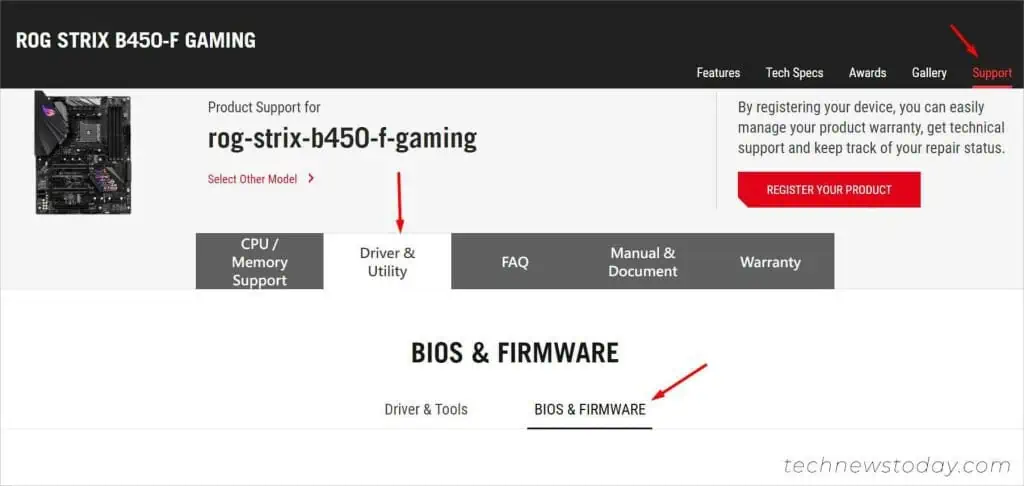
- Select your product and navigate to its Support page.
- Get to Driver & Utility > BIOS & FIRMWARE.

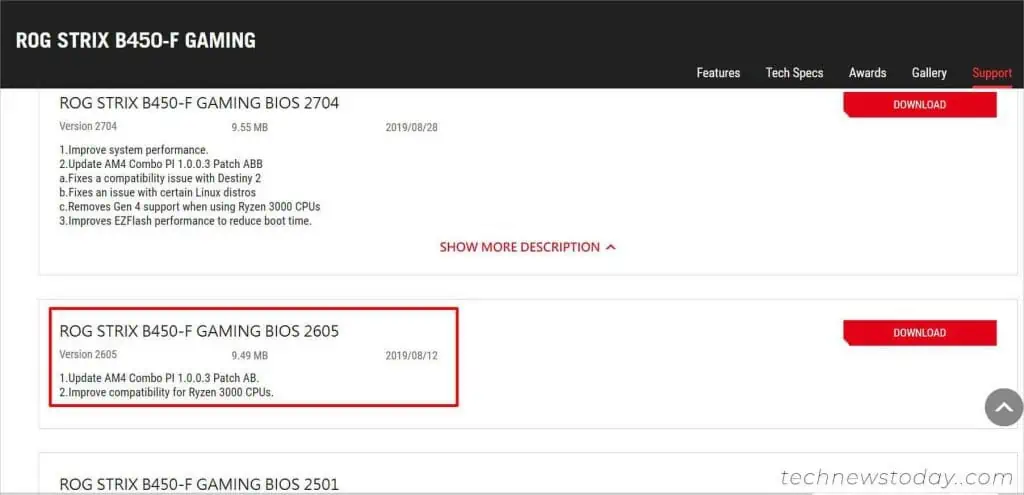
- Find the current BIOS version that you noted earlier.

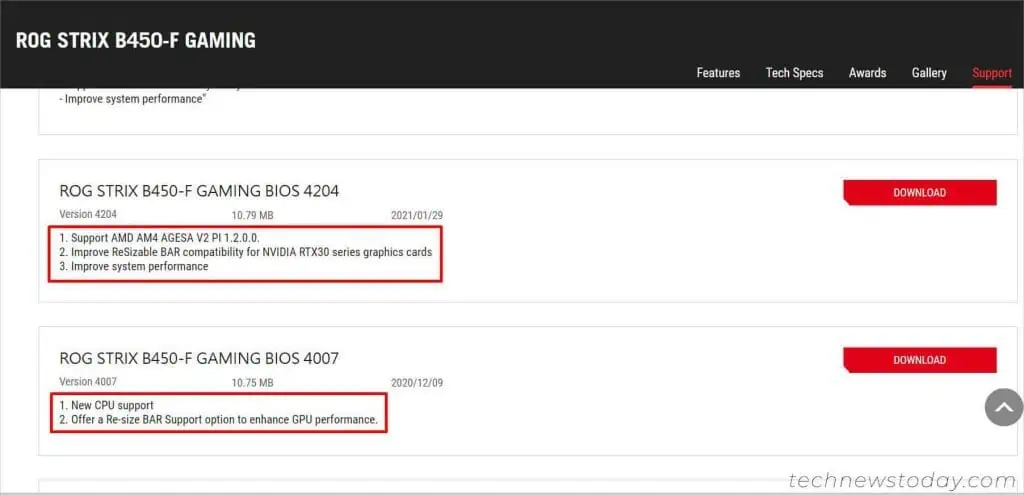
- Now, make sure you check the description of each update above it.

- Once you have identified the proper version that you think can potentially solve your specific problem, you may proceed to download it.

