Knowing your RAM’s serial number is important for verifying authenticity and warranty claims.
The serial number is stored in the RAM module’s SPD (Serial Presence Detect) chip. It can be accessed using system commands or hardware monitor apps.
The data includes memory specifications like maximum speed, voltage, memory rank, chip manufacturer, serial number, etc.
However, some RAM may not display the serial number or show NULL. In that case, you’ll need to physically check the label on the module.
This article will guide you on how to check your RAM’s serial number effectively.
Using Command Prompt
You can simply type a single command in Command Prompt and the system displays all RAM details.
- Press the Windows + R key.
- In the Run window, type
cmdand press Enter. - In Command Prompt, type
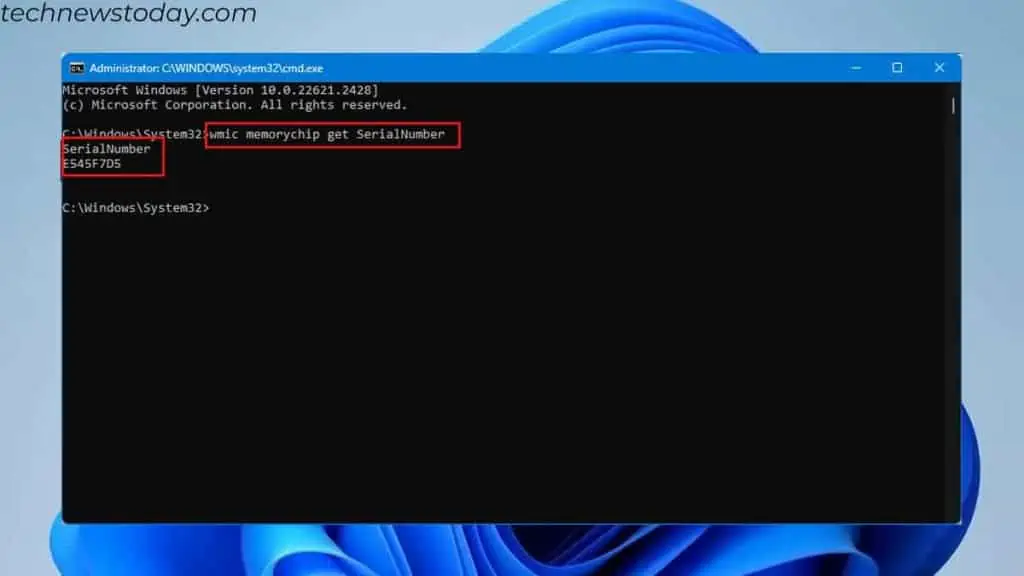
wmic memorychip get SerialNumberand hit Enter. This will simply display the serial number of all the memory sticks connected to the motherboard.
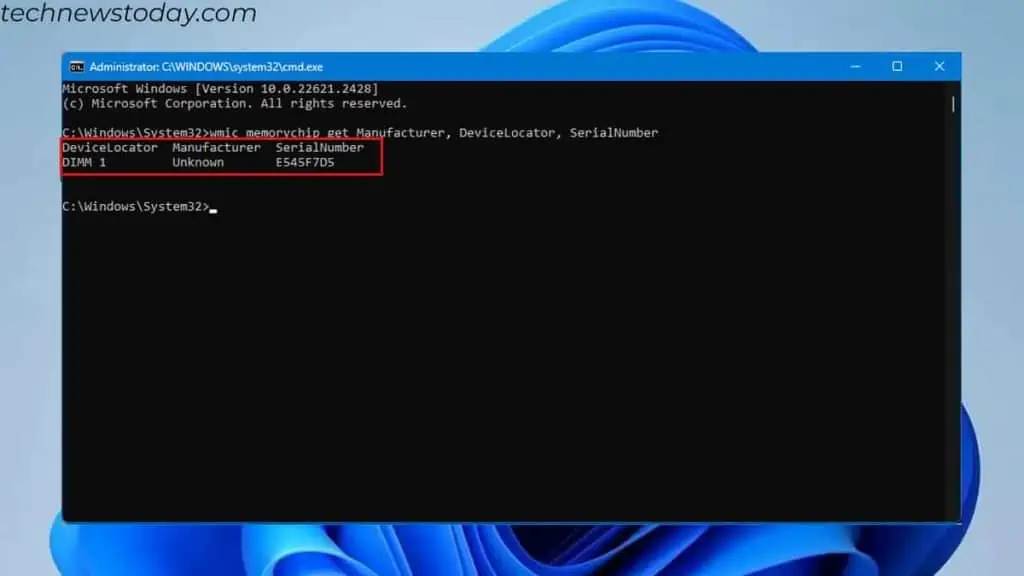
But I suggest you get the manufacturer, and slot detail along with the serial number of your RAM. This could be useful if you have multiple memory sticks and want to know the serial number of the RAM.
- To get this information, execute
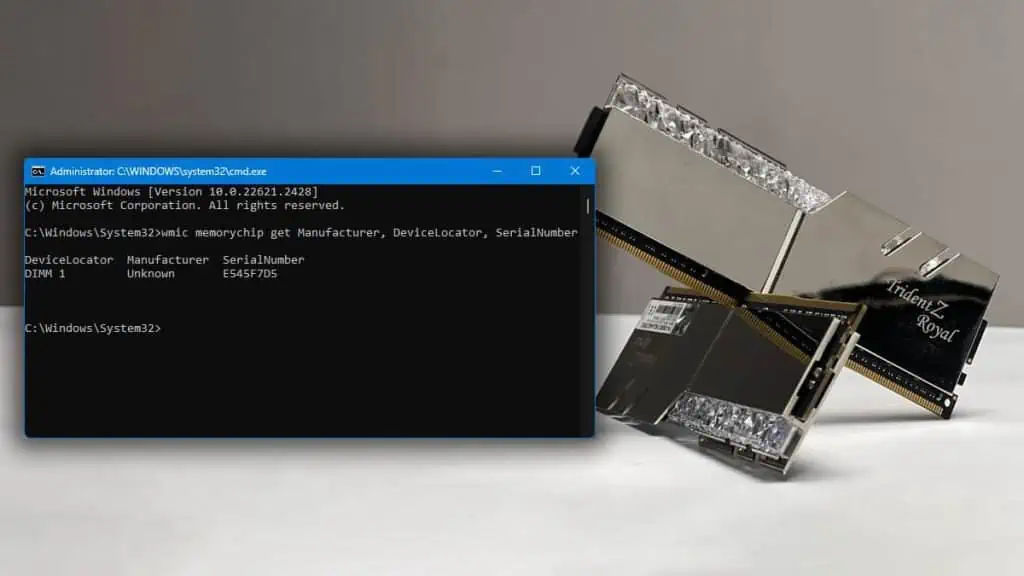
wmic memorychip get Manufacturer, DeviceLocator, SerialNumber.
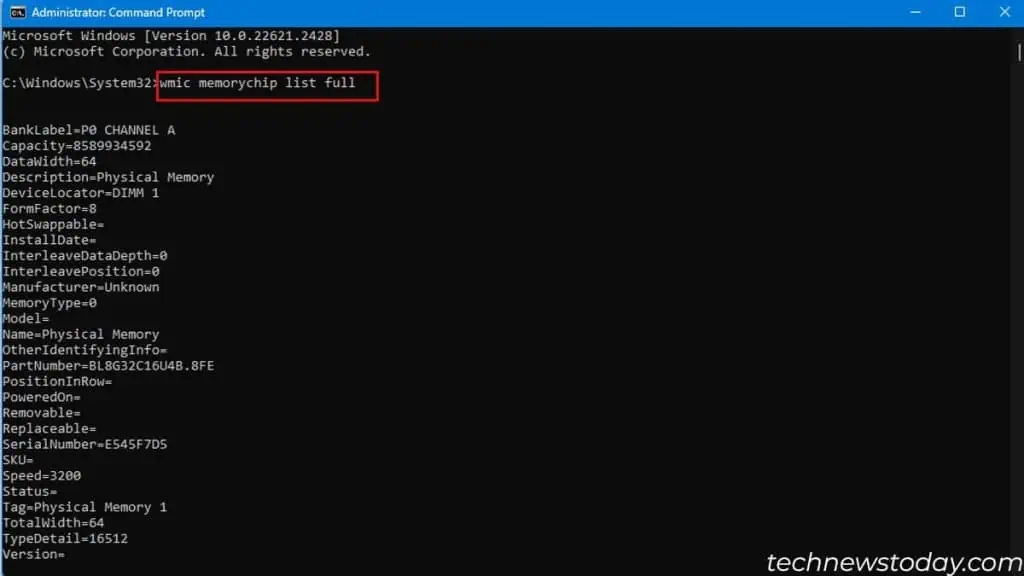
- If you want to get all the information about the installed RAM, run
wmic memorychip list full. This final command will display all the memory details like memory capacity, type, RAM speed, etc.
sudo dmidecode --type 17 | more and press Enter in Terminal.
In Powershell
Alternatively, you can also use PowerShell to check RAM serial numbers. Although the command is different, both PowerShell and Command Prompt display the same information.
- Open Run, type
powershell, and press Enter. - Once PowerShell opens, execute
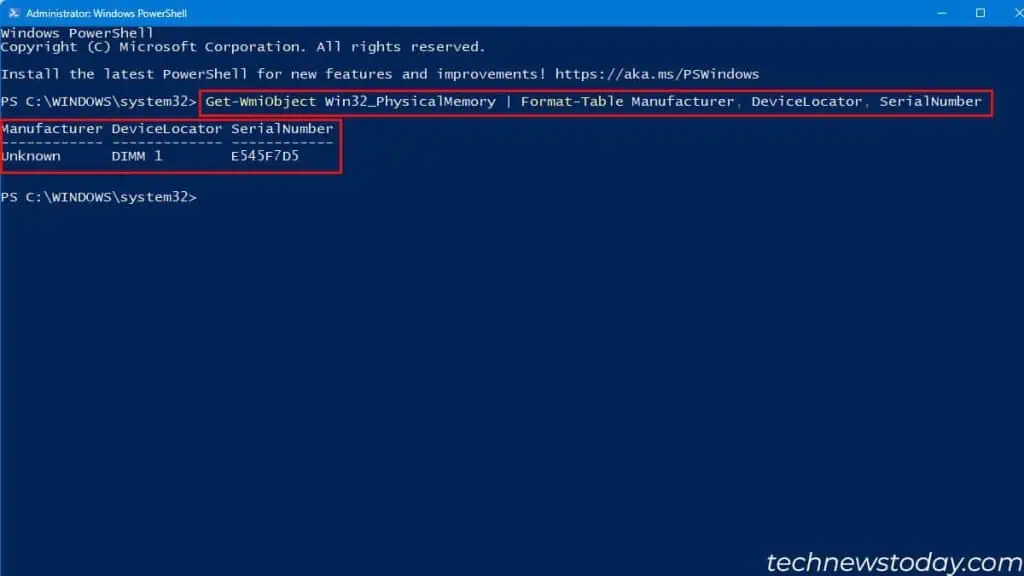
Get-WmiObject Win32_PhysicalMemory | Format-Table Manufacturer, DeviceLocator, SerialNumber.
- This will display a table with the manufacturer, DeviceLocator, and SerialNumber.
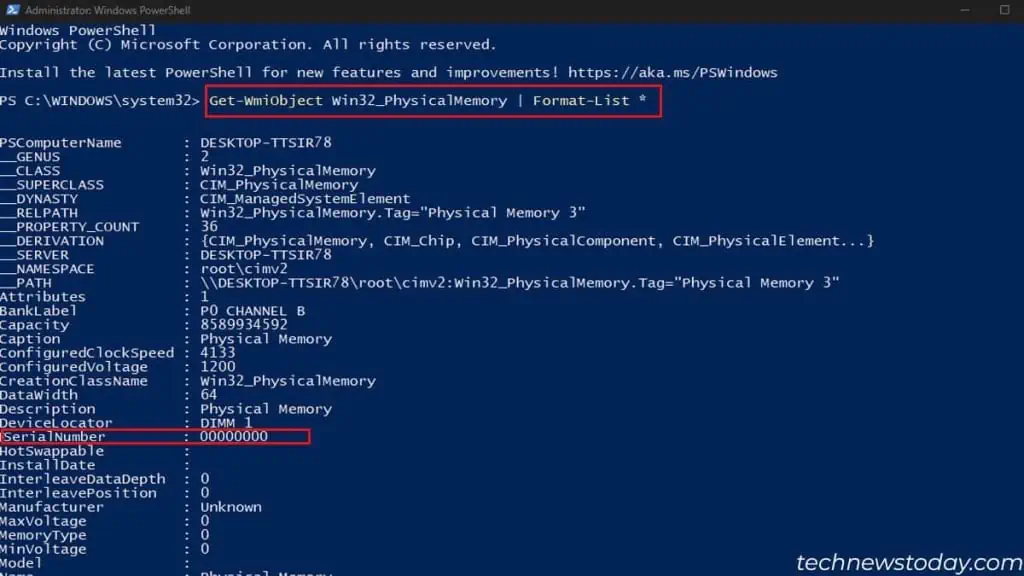
- If you want all the details about the memory, run
Get-WmiObject Win32_PhysicalMemory | Format-List *, and press Enter.
Using system commands is the easiest but definitely not very effective. Users might get confused when multiple memory modules are connected.
It may not display the slot used correctly. So, if I have four memory modules connected, getting data on each of them will get confusing.
Furthermore, the serial number column might also display 000000. To get around this, I suggest using a third-party hardware monitor application.
From Hardware Monitor Application
You can find an application that displays all the information about the system. This includes the motherboard, graphics cards, and everything in between.
As for memory, it displays DDR type, number of channels used, size, and all the information coded into the SPD chip.
You can also find several other applications that read memory information like HWMonitor or HWiNFO. But personally, I prefer CPU-Z.
- Download CPU-Z.
- Install and run the application.
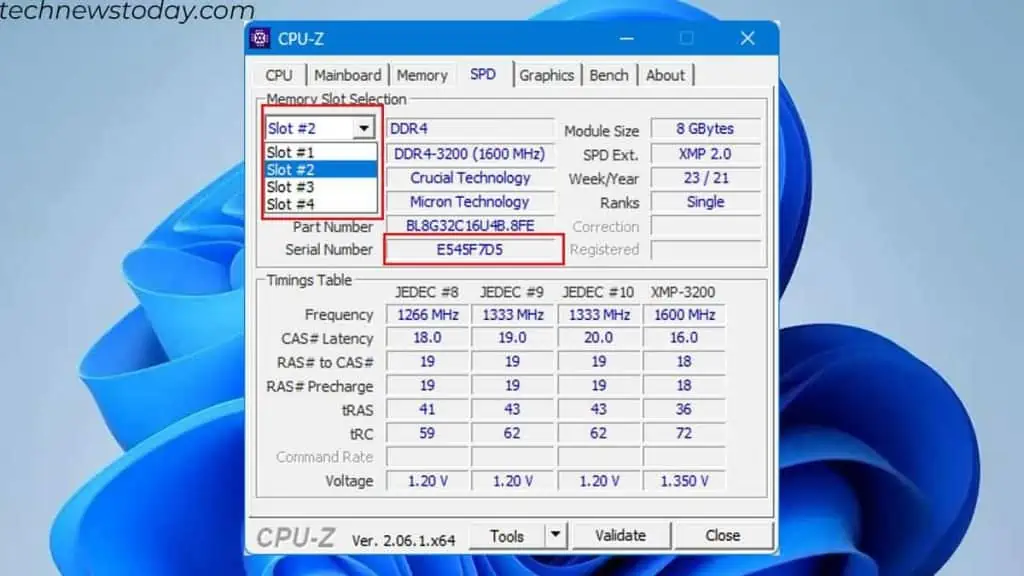
- Go to the SPD tab.
- Under Memory Slot Selection, select a memory slot.

- The application will now display memory information like DDR type, module and die manufacturer, along with Serial Number.
The application could display N/A as the serial number for your motherboard. You may even see this section grayed out.
This means the memory manufacturer did not program the information about serial number into the SPD chip.
In that case, you need to check the label on the memory stick physically.
Check the Memory Stick Label
The label contains all the necessary details about your RAM. This includes RAM speed, frequency, Memory timings, memory rank, and most importantly, serial number.
To check the label on the memory stick, you first need to remove it from the motherboard.
- Turn off the PC.
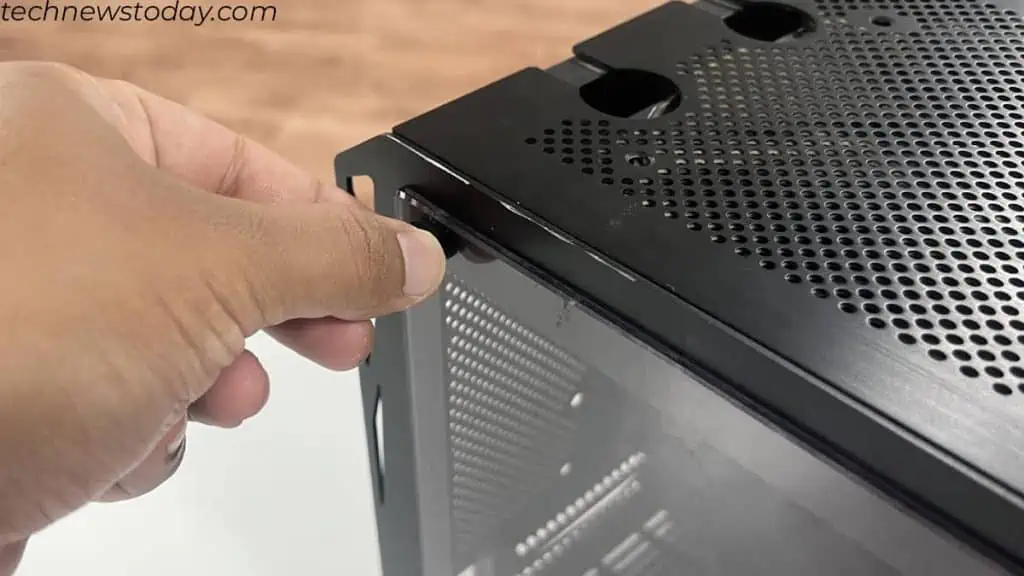
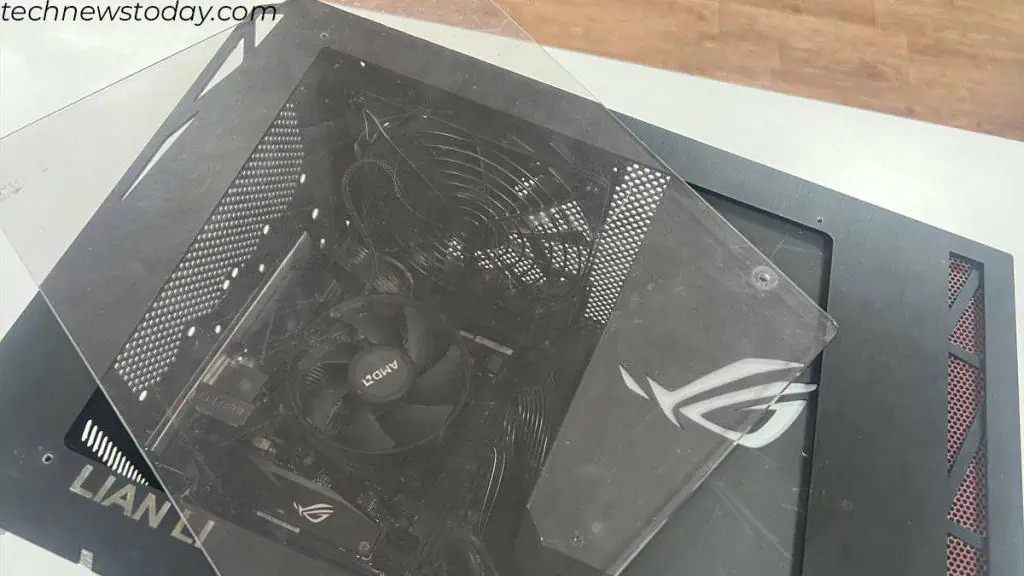
- Remove the screws that are holding the side panel.

- Take the side panel out of the PC case.

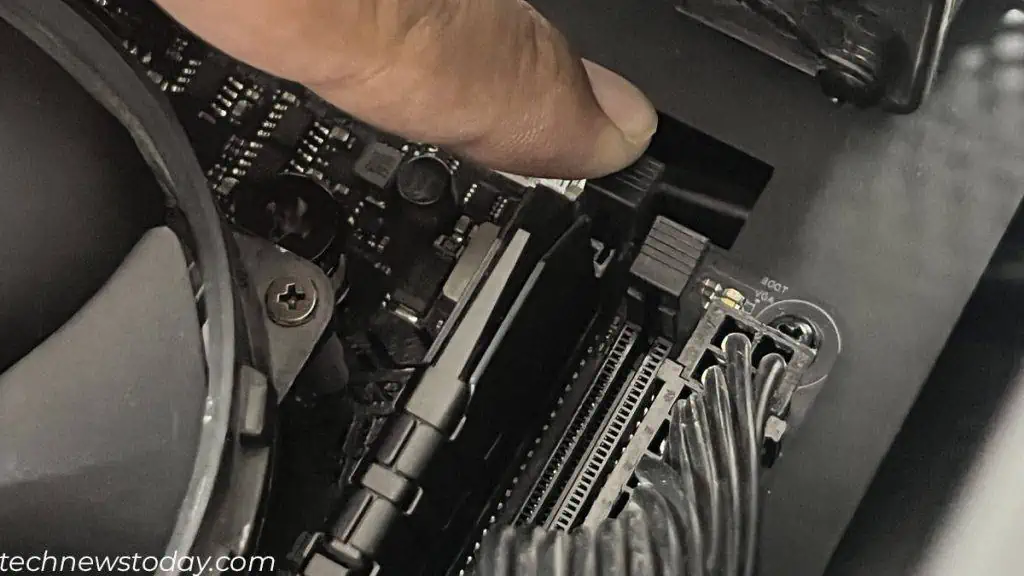
- Locate the RAM and press the lock on one or both sides of the memory slot.

- Now, the RAM should come right out.
Once the RAM is out of the board, check for a label. This will have several writings. Check for numbers or writings near the bar/QR code. Number/writing under the code is your RAM’s serial number.
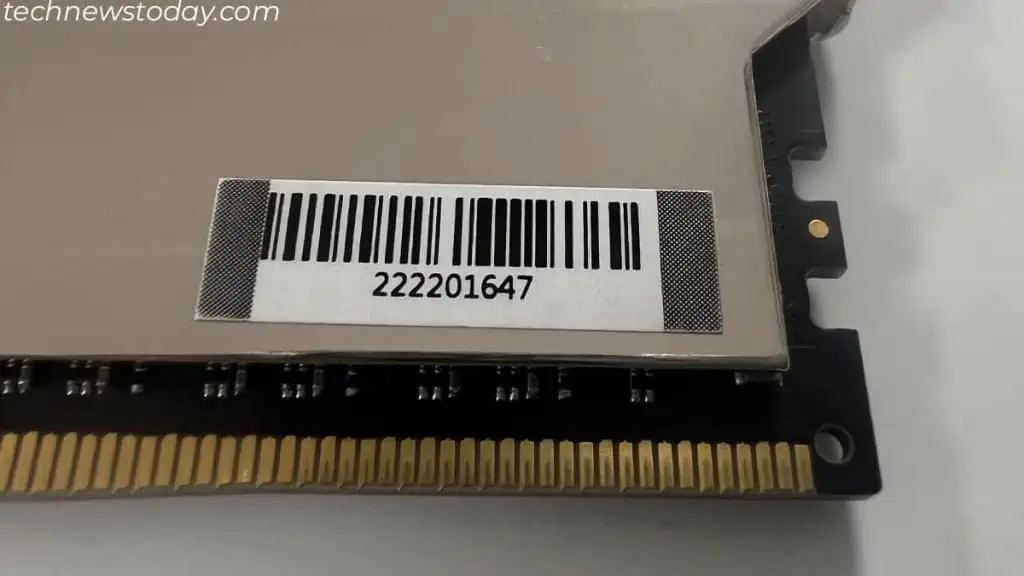
You can also use a barcode or a QR scanner from your phone to get the serial number.
When checking for the serial number, make sure that you don’t confuse it with the product model number. These are unique.
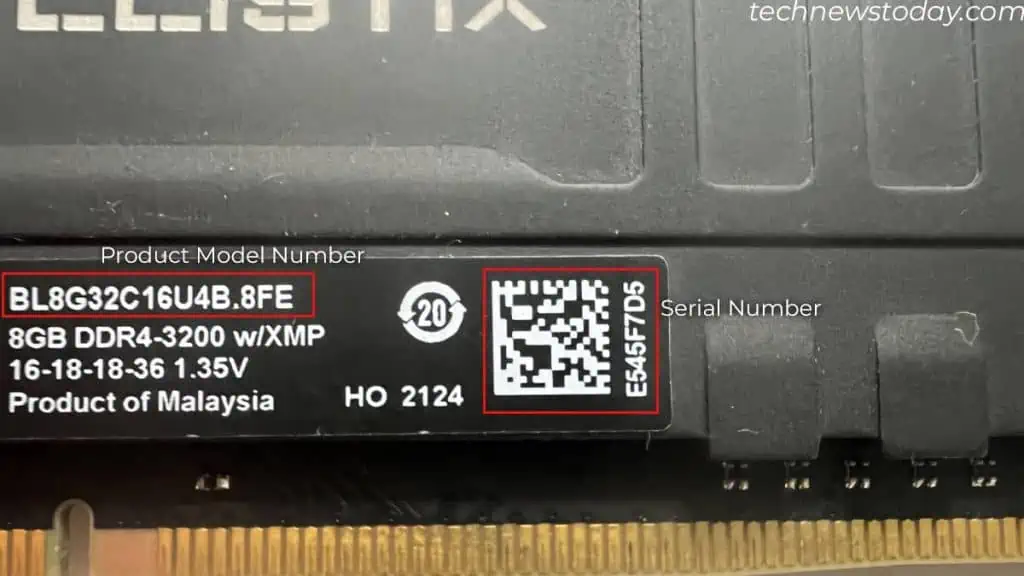
RAM with identical specifications may have the same product model. Serial numbers, on the other hand, are completely unique.
To distinguish the two, check for writing like 8G, 16G, or 32G depending on the memory capacity of the product model. It may also have its RAM Frequency written.

