If you have the most updated operating system, you shouldn’t encounter most system issues, including your computer going to sleep randomly. Whenever this error occurs, it indicates misconfigured power settings.
Even if you suddenly started encountering the issue without having changed such settings, it is possible that another admin user made such modifications. Apart from that, it is also possible that some third-party processes are causing such issues.
So, first, install all the latest updates available. If your computer continues going to sleep, try out the possible solutions below.
Check Power Settings
If you haven’t already checked the sleep settings in your power plan,
- Open Run by pressing Win + R.
- Type
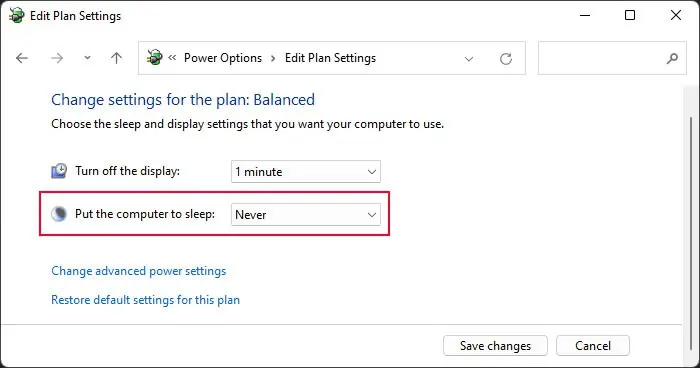
powercfg.cpland press Enter to open Power Options. - Select Change plan settings next to your current power plan.
- Set Put the computer to sleep to Never or your desired value.

- Click Save changes.
If the drop-down box is grayed out, its corresponding group policy setting is overriding this setting. To change it,
- Open Run.
- Type
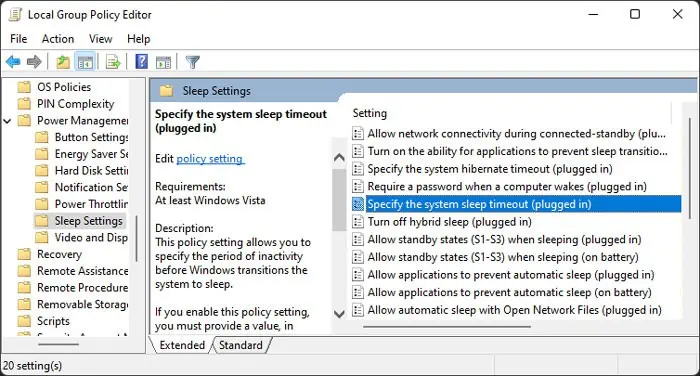
gpedit.mscand press Enter to open the Local Group Policy Editor. - Go to Computer Configuration > Administrative Templates > System > Power Management > Sleep Settings.
- Double-click on Specify the system sleep timeout (plugged in).

- Check Not Configured and click OK.
- Do the same for Specify the system sleep timeout (on battery).
If your computer is part of a domain, you need to contact your network admin and have them make this change in the relevant group policy object.
Check Screen Saver Settings
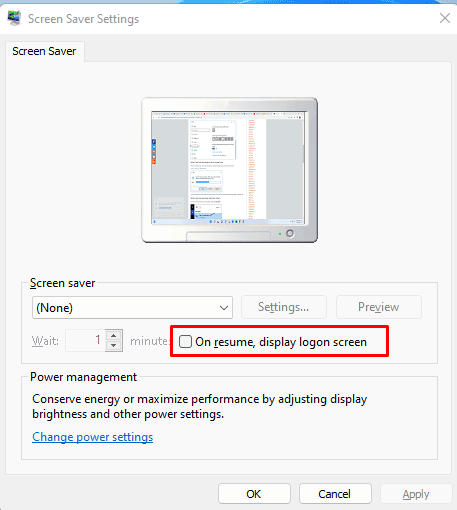
Your screen saver settings include an option to display the logon screen on resuming from the screen saver. If you have a blank screen saver while this option is enabled, the effect will be the same as your computer going to sleep after a certain time. To change the setting,
- Open Run.
- Type
control desk.cpl,,@screensaverand press Enter to open Screen Saver Settings. - Uncheck On resume, display logon screen, and click Apply > OK.

Check System Unattended Sleep Timeout
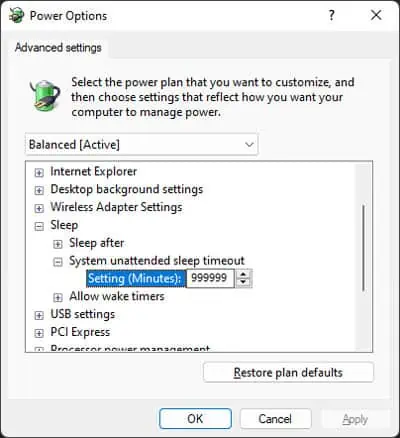
The Advanced Power Options also include an attribute called System Unattended Sleep Timeout. It puts the device to sleep after the specified time of inactivity, which is 2 minutes by default. This attribute is hidden by default, so you need to show it before checking it.
- Open Run.
- Type
cmdand press Ctrl + Shift + Enter to open the Elevated Command Prompt. - Enter the command
powercfg -attributes SUB_SLEEP 7bc4a2f9-d8fc-4469-b07b-33eb785aaca0 -ATTRIB_HIDE
- Then, open Power Options (
powercfgon Run) - Go to Check plan settings next to your current power plan and then Change advanced power settings.
- Expand Sleep > System unattended sleep timeout.
- Set the options to zero or a high value and click OK.

Check Your Programs
You should also check all the available programs in your system and see if there are any apps that may be causing this issue.
- Open Run.
- Type
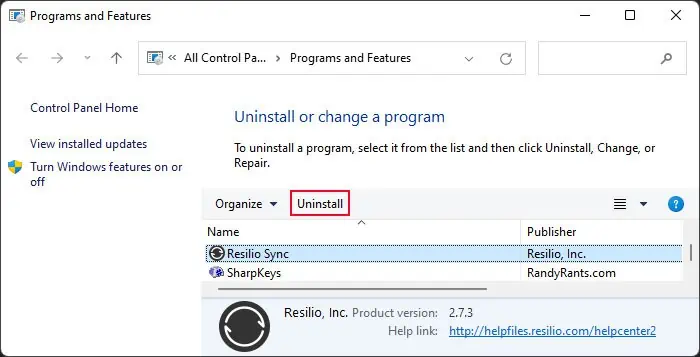
appwiz.cpland press Enter to open Programs and Features. - Look through all the apps on your list and search for suspicious ones. If it’s a program you don’t recognize, search for it on the internet for more information.
- After determining the culprit, select the app on the list and click Uninstall.


