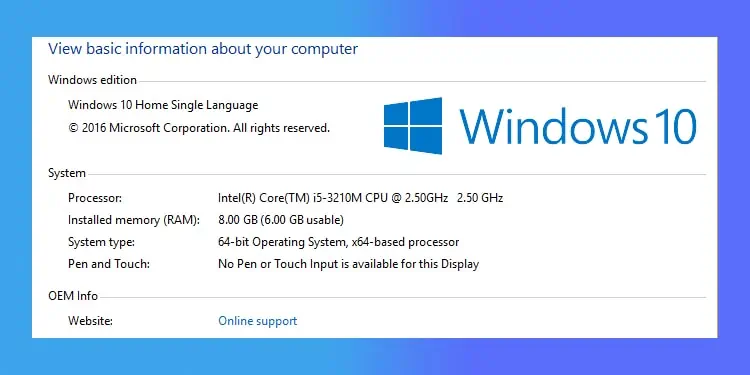
If you discovered that your computer is using only a portion of the total RAM available, you are not alone.
Your computer may not use all the RAM if some of the memory is allocated for certain system components like BIOS and drivers. Or, it could be happening due to actual error such as faulty hardware or misconfigured memory-related settings.
It’s critical to determine whether there’s a problem with your computer’s RAM usage or whether it’s being separated for legitimate system usage, so let’s start there.
Is My Computer Using All of it’s RAM?
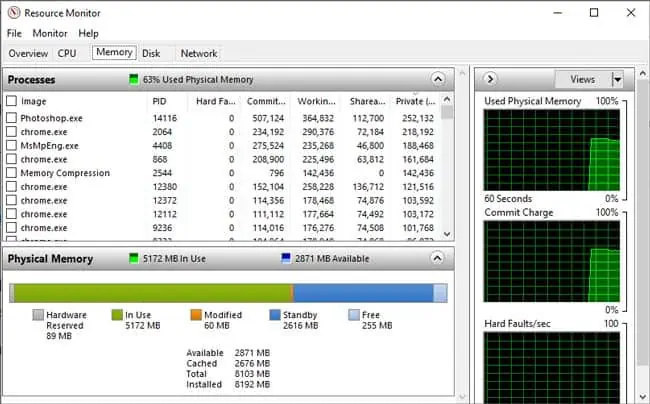
Let’s say your system has 8 GB of RAM, but you found that only 7.4 GB is usable. If you check these stats via Task Manager or the Resource Monitor, you’ll notice that around 600 MB is Hardware Reserved.
To quote Microsoft, “Hardware Reserved is memory that is reserved for use by the BIOS and some drivers for other peripherals.”
The amount of such memory varies according to factors such as the devices installed on the system, the motherboard’s ability to handle memory, BIOS version and settings, system settings, etc.
Higher hardware reserved memory subsequently means that the usable memory available for other purposes is lesser. So, if you see that one or two GBs are allocated as hardware reserved memory, you shouldn’t worry as your system is working as intended.
On the other hand, there have been cases where over half the total memory was allocated as hardware reserved. This is definitely not normal. In such cases, the solutions we’ve detailed in this guide will be helpful.
Finally, there’s also the matter of supported memory. 32-bit systems only support up to 4 GBs of physical memory. If this turns out to be the issue, you’ll have to switch to a 64-bit version of Windows.
How to Fix The RAM Usage Issue?
The first step to fixing this issue is figuring out what’s actually preventing your RAM from being used fully. The memory tests will be useful for this, so we recommend starting the troubleshooting with said tests. Then, you can apply the appropriate solutions from the sections below.
Run Diagnostic Tests
Utilities like memtest86, or Windows’ native memory diagnostic tool stress-test the memory modules and offer considerable insight into any defects present. Here’s how you can use the memory diagnostic tool:
- Press Win + R, type
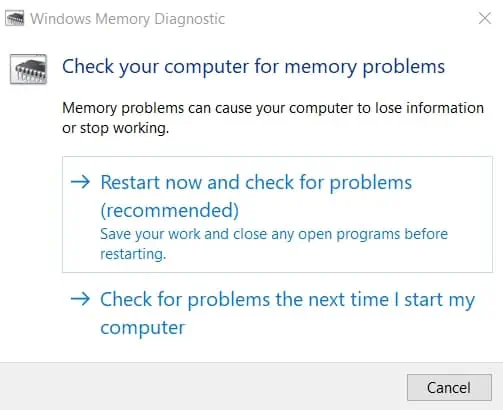
mdsched, and press Enter. - Select Restart now and check for problems.

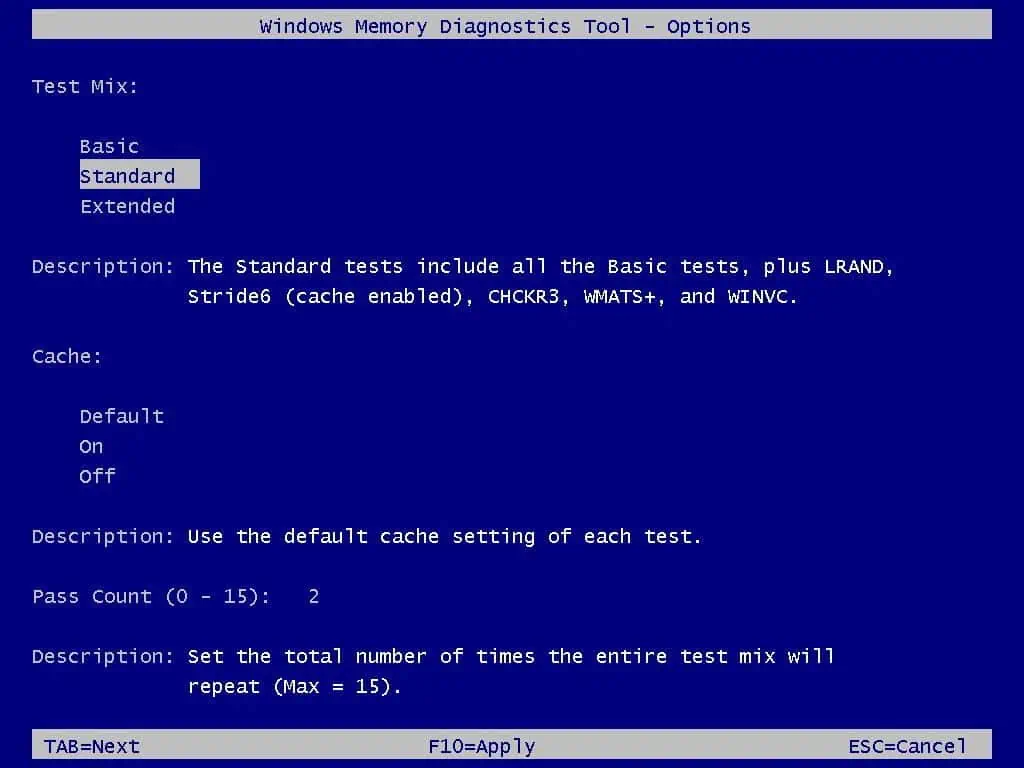
- Upon rebooting, the tests should start automatically. You can press F1 and specify whether you want to perform a Basic, Standard, or Extended test.

- Depending on your chosen option, the number of tests and the subsequent time for the whole procedure will increase.
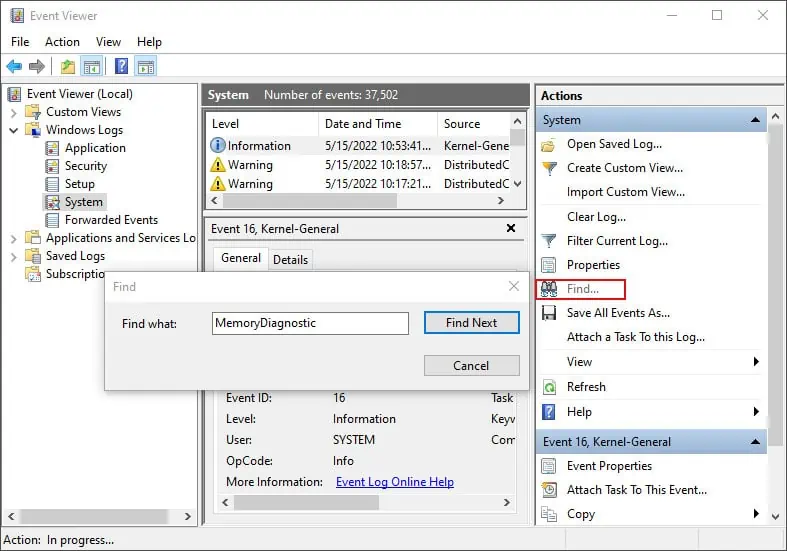
After the test ends, the results will be displayed briefly. If you miss the results screen, you can check the results later through the event viewer. Here are the steps to do so:
- Press Win + R, type
eventvwr, and press Enter. - Select Windows Logs > System.
- Click on Find from the left pane, type
MemoryDiagnostic, and press Find Next.
- Select the log and check its description for details on what the issue is with your RAM.
Troubleshoot Hardware Issues
Aside from the diagnostic results from the above test, if you found that only partial RAM is shown as installed on your system, it’s most likely a faulty stick or slot. In some cases, even if the installed RAM shows the full amount, it still turns out to be a hardware issue. In such scenarios, here’s what you can do:
- First, refer to your motherboard manual for the correct order to insert the RAM sticks in.
- Next, turn off your PC and unplug all the power cables.
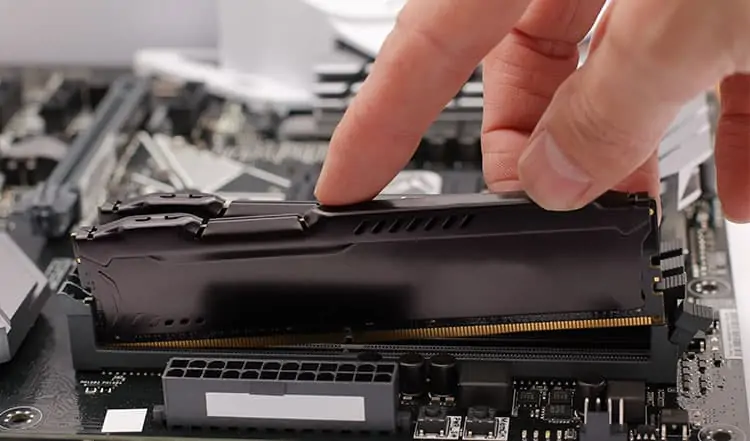
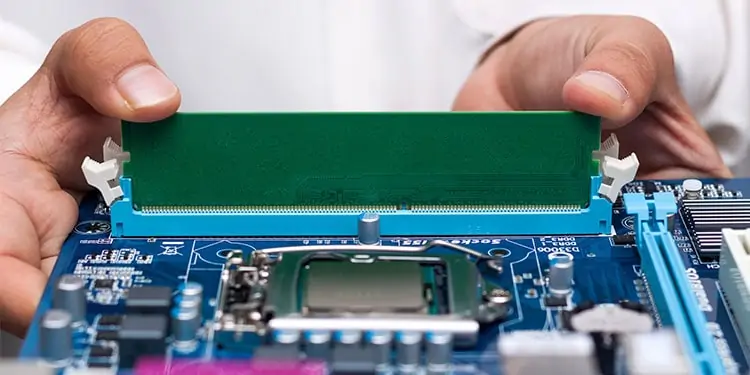
- Unlock the latches holding the RAM in place and take the stick out.

- Take any additional sticks out in the same manner. If the contact points on the RAM or slots are dirty, use some compressed air or rubbing alcohol to clean them gently.
- Now, insert the RAM sticks in the correct order, replug the cables, and boot your PC. Some simple cleaning and reseating are often enough to fix the issue.

- Press Win + R, type
resmon, and press Enter. - Switch to the Memory tab and check the RAM stats.

- If the issue persists, you’ll have to test the RAM sticks and slots one by one. Repeat the same steps as before to remove the sticks.
- This time, insert only one stick and boot your PC. If the system boots and the RAM seems fine, both the stick and slots are good.
- If the system doesn’t boot, the RAM or slot is faulty. Try a different stick in the same slot to confirm which one.
- Once you figure out the faulty component, you can take the appropriate steps, whether that be repair or replacement.
One final thing that’s worth mentioning is that numerous users were able to resolve the issue by reseating the CPU. While this may seem like an unlikely fix, it’s still worth trying.
Troubleshoot BIOS Problems
After faulty components/compatibility issues, the second most common reason for RAM issues is misconfigured BIOS settings or simply an outdated BIOS in some cases. Here’s how you can resolve such problems:
- Reboot your PC and press the BIOS key (Fn keys or Del).
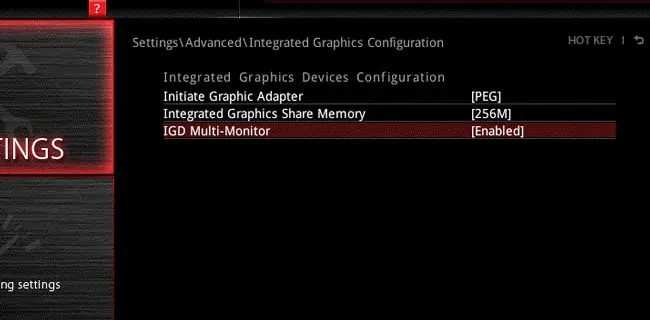
- In BIOS Setup Utility, go to Settings > Advanced.
- If your system has a dedicated GPU, go to Integrated Graphics Configuration and make sure Initiate Graphic Adapter is set to PEG (PCI Express Graphics).

- Next, look for the AGP Video Aperture option. Changing the memory size here will likely only have a minor impact on the system’s usable memory, but it’s still worth trying out the different options.
- Finally, look for the Memory Remapping, Extension, or similar option and enable it.
- Press F10 to save the changes and exit.
If the issue still isn’t resolved, a BIOS update may be necessary. We have in-depth articles on our site that detail various ways to update your BIOS if you’re going to proceed with this.
Check Maximum Memory at Boot
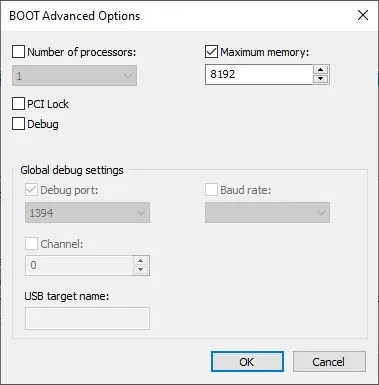
The advanced options tab in MSConfig allows you to limit certain values in case of boot issues. If you suspect that the memory could be limited from here, you can check for the same with the following steps:
- Press Win + R, type
msconfig, and press Enter. - Switch to the Boot tab and click on Advanced Options.
- Set how much memory you’re allowed to boot with here, or uncheck the Maximum memory option entirely.

- Press OK to save the changes, reboot your PC, and check if the issue is resolved.
Manage Page File
Some users reported an issue where they faced low memory issues such as constant crashes, even though the RAM usage wasn’t maxed out and a significant amount of memory was available.
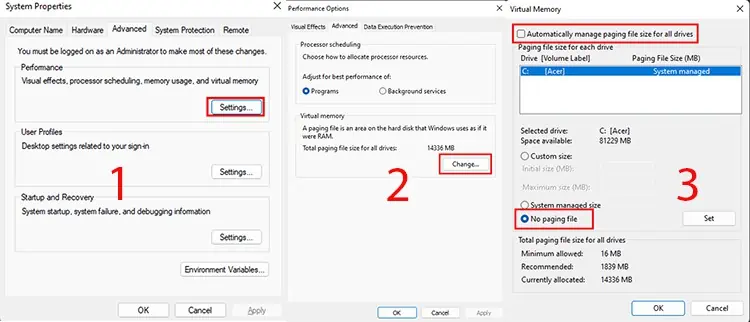
This happened because users disabled the page file, which caused the system to reach the commit limit quite quickly. You can confirm that this isn’t the issue in your system with the following steps:
- Press Win + R, type
systempropertiesadvanced, and press Enter. - In the Performance section, click on Settings.
- Switch to the Advanced tab and click on Change Virtual memory.
- Enable the Automatically manage paging file size for all drives option and press OK.


