When your computer time is wrong, it’s often due to an incorrect time zone setting or a failing CMOS battery in older PCs.
Addressing this problem can be as simple as adjusting the Date & Time settings or replacing the CMOS battery.
This article provides step-by-step solutions to ensure your system displays the correct date and time.
Check Your Time Zone
Whenever your computer time displays a wrong date/time, it’s likely due to incorrect time zone settings. So you must consider checking it and make sure it’s configured correctly.
Here’s how to access and change it.
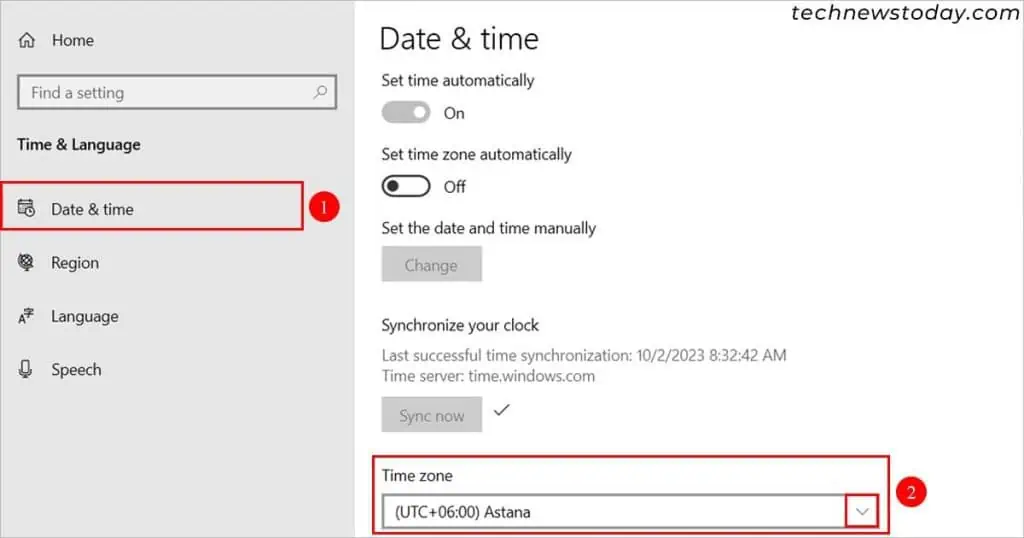
- Press Windows + I key to open the Settings app.
- Select Time & Language.
- Click Date & time on the sidebar.
- Now, to manually set the Time zone, toggle off the Set time automatically option. Then, select the correct time zone under the Time zone section below.

- Alternatively, toggle on both the Set time automatically and Set time zone automatically options and see if that works.
- When done, click the Sync now button below to sync time according to the new time zone.
Replace the CMOS Battery
The CMOS battery is an important hardware component responsible for storing your BIOS settings like the BIOS time.
Under the hood, it provides constant power to the RTC (Real Time Clock) chip, which keeps track of the accurate date and time even after the PC is turned off.
However, if it is damaged or dead, it can reset the BIOS settings like the date and time settings, often leading to an earlier date and time.
While such batteries last several years, they can eventually wear out. In such cases, you need to replace your CMOS battery, which is fairly easy and you can do it on your own.
Check if Windows Time Service Is Disabled
The Windows service “Windows Time” is responsible for the date and time synchronization on your system. However, if it’s not running, the system could display you an incorrect time.
Here’s how you can start the Windows Time service.
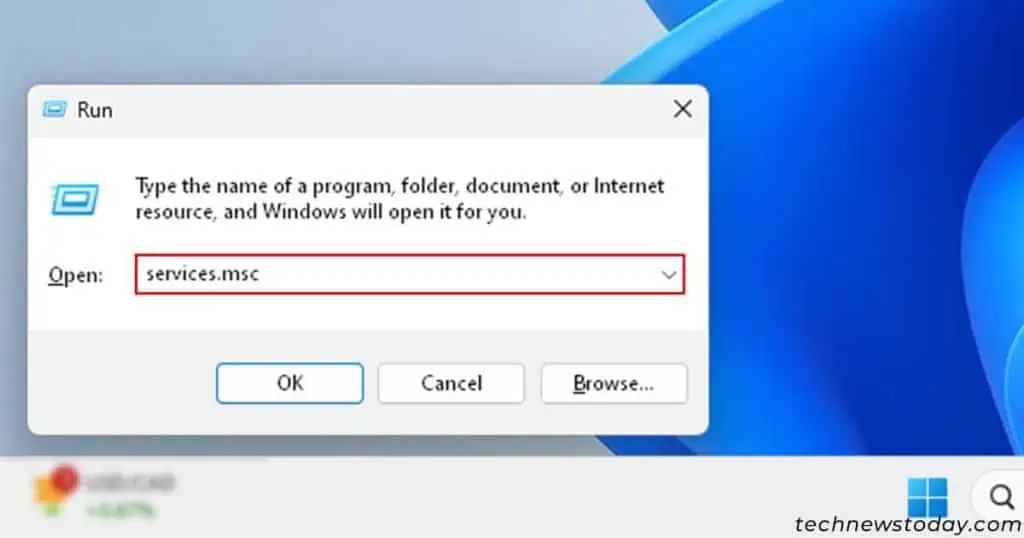
- Press the Windows + R key and type the command
services.msc.
- Click on OK.
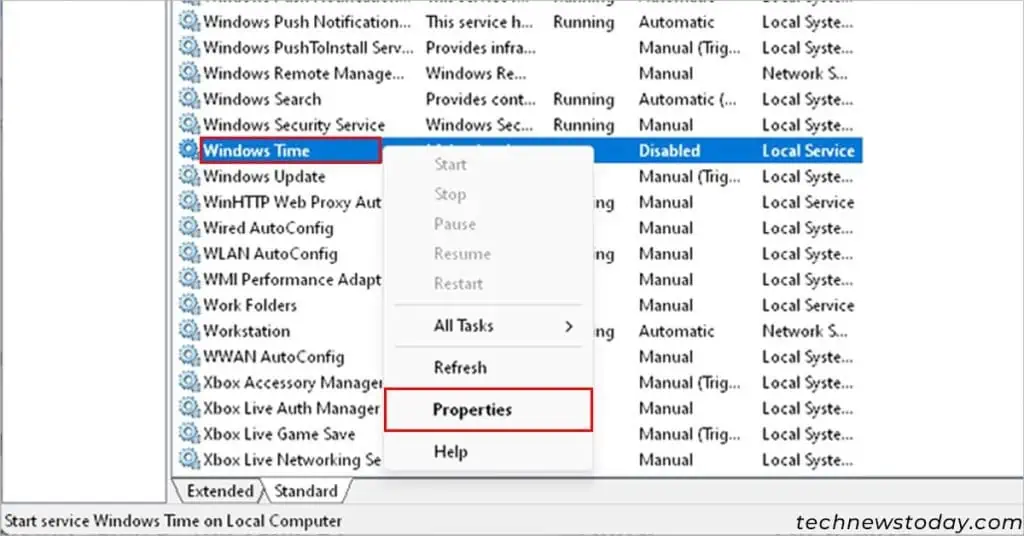
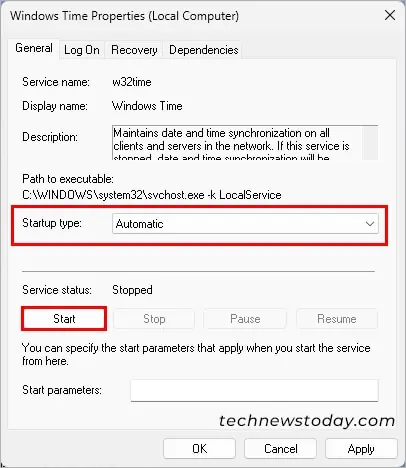
- On the next window, scroll downwards and right-click Windows Time. Then, select the Properties option.

- Under the General tab, if Service status shows Running then leave it as it.
- Otherwise, set the Startup type to Automatic and click Apply.

- Then, click Start and click OK.
- Restart the system to apply the changes.
Switch the Internet Time Server
By default, Windows provides us with its own time server. However, you can switch to other servers or even add a public time server. Doing this will sync your PC to that particular server’s time.
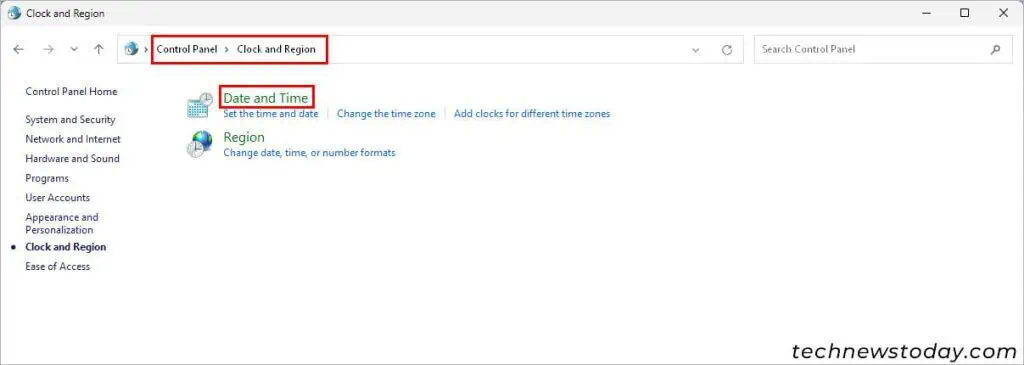
- Press Windows + R, type
controland press Enter to launch the control panel. - Then, select Clock and Region > Date and Time.

- Under the Date and time tab, click Change time zone and select the correct time zone on the next window prompt.
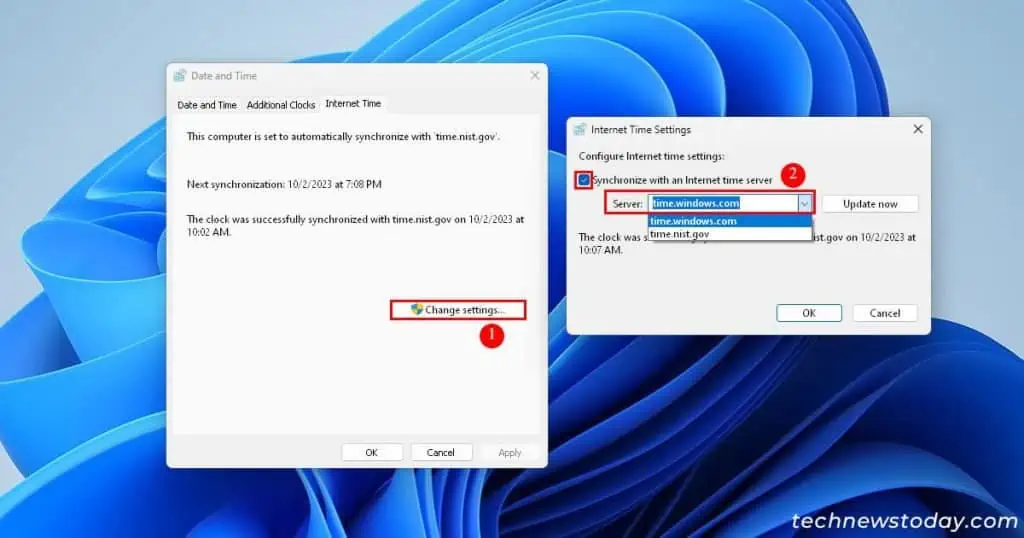
- Now, under the Internet Time tab, click Change settings.
- Then, enable Synchronize with an Internet time server option and choose a different time server like
time.nist.govnext to the Server field.
- Click Update now and wait until Windows finishes the synchronization process.
- Click OK to save changes and check if the system is displaying the correct time.
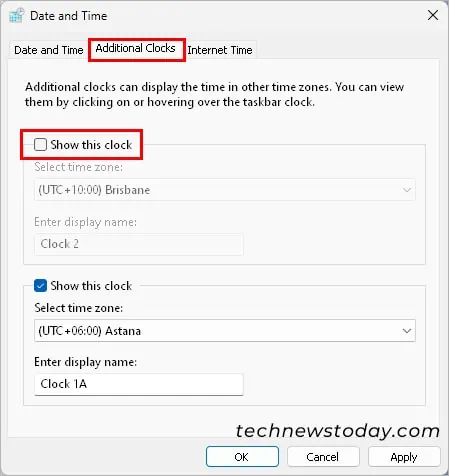
- Also, select the Additional Clocks tab and disable the unwanted clocks.

Configure Using W32time.exe
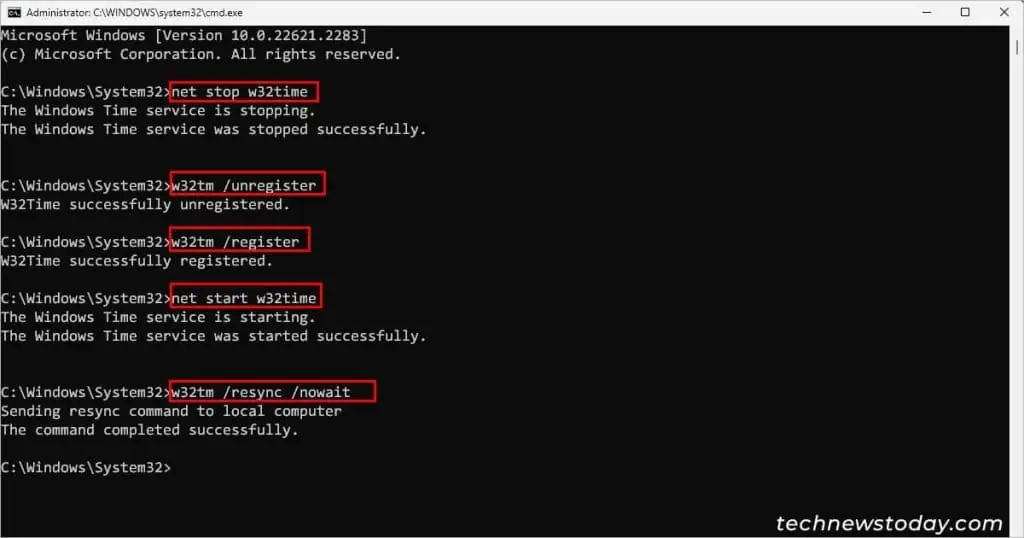
W32time.exe is a tool for troubleshooting the Windows Time Service settings. You can run it with various commands on the Command Prompt. Executing such commands will force your PC to resynchronize its clock as soon as possible.
- Press Windows + R key and type cmd.
- Then, press Ctrl + Shift + Enter key to open the command prompt as administrator.
- Now, type the following commands one by one and press Enter after each command.
net stop w32timew32tm /unregisterw32tm /registernet start w32timew32tm /resync /nowait
- Exit the window and see if your problem has been resolved.
Scan and Remove Viruses or Malware
While it is quite unlikely, a virus/malware could have infected the system files responsible for maintaining the correct date and time on your system. So, we suggest you run a reliable antivirus application and scan to detect any infected files in the system.
Even better, consider scanning your system in safe mode. That’s because your system boots up with only the essential files and device drivers, thus avoiding viruses and malware.
After the scan is complete, get rid of the detected viruses. Then, check if the date and time are restored correctly.

