Wireless keyboards are extremely useful devices that help avoid the hassle of managing cables. They are also not as limited in range as the traditional wired keyboards, so you have more flexibility for your computer setup.
Wireless keyboards come in two varieties—a 2.4GHz Radio Frequency (RF) keyboard, and a Bluetooth keyboard. So, depending on the keyboard you have, you need to use different ways to connect them to your computer. For instance, if you have a Bluetooth keyboard, you need to pair it first. And for the RF keyboard, you need to connect its receiver to your computer.
Connecting RF Keyboard
You should be able to connect and use an RF keyboard on all PCs or laptops as it doesn’t depend on additional hardware components other than the USB ports.
Step 1: Insert the USB Dongle into the Computer
2.4GHz RF keyboards require a paired receiver/transceiver to connect to a computer. You can usually find it inside the battery compartment or in the keyboard packaging.
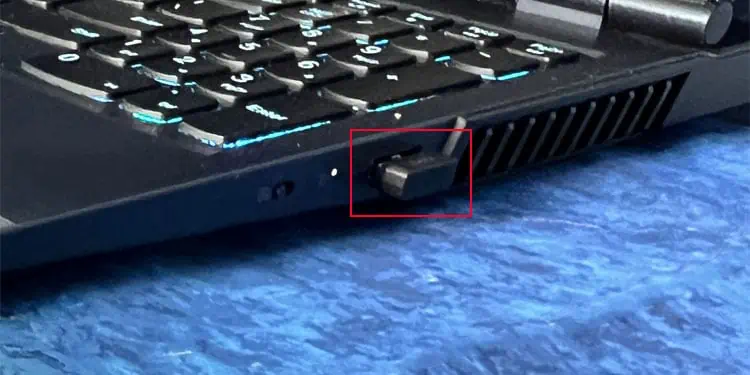
Insert the USB dongle or receiver into your computer’s USB port. Using a USB 2.0 port should be enough for a keyboard but it’s also fine to use a USB 3.0 port if the receiver has a USB 3.0 connector (blue).
Some manufacturers also provide Unifying dongles that support pairing with most of their keyboards. So if you have such supporting keyboards, you can also connect the Unifying dongle to the computer.
Step 2: Power Up the Keyboard and Turn It On
Now, you need to make sure the keyboard has proper power. Most keyboards use batteries (usually AAA batteries) for this purpose, so you should put them in properly.
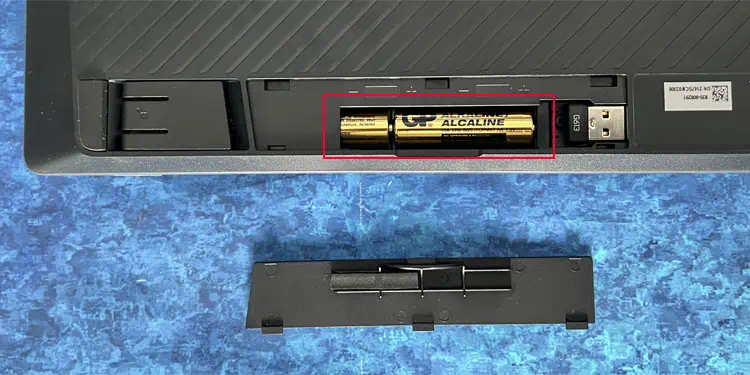
Some keyboards may also contain rechargeable batteries. You can charge these keyboards through the USB power cable that came alongside the devices.
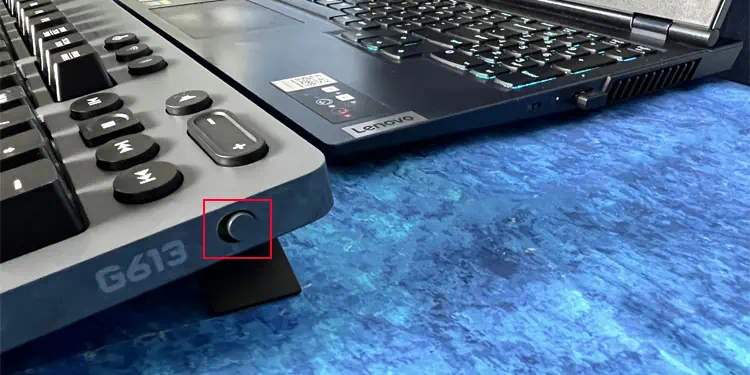
After that, toggle on the On/Off switch. Some keyboards also have LED indicators that glow or blink when powered up, so you should look out for those. If they don’t blink, you may not have inserted the batteries properly.
For keyboards that support both RF and Bluetooth Wireless modes, you need to set it to RF mode. You usually need to press the Wireless icon to do so.
Step 3: Use the Keyboard
Most wireless keyboards usually automatically install the necessary drivers into your computer. So you should be able to use them shortly after connecting to the PC.
Other keyboards may also require a separate installation of drivers or other software. For instance, if you are using a Unifying receiver that did not come with the keyboard, it requires Unifying software to pair the keyboard and the receiver. After the software detects and adds the keyboard, you can use the keyboard.
Make sure the keyboard stays in the RF range and there are no other interfering devices like routers, microwave ovens, etc., nearby for the smooth operation of the keyboard.
Connecting Bluetooth Keyboard
If your computer has a Bluetooth module, you can connect and use a Bluetooth keyboard on the computer.
Step 1: Enable Bluetooth on Computer
The first thing you should do is ensure that Bluetooth is enabled on your computer.
- Press the Windows key + I to open Settings.
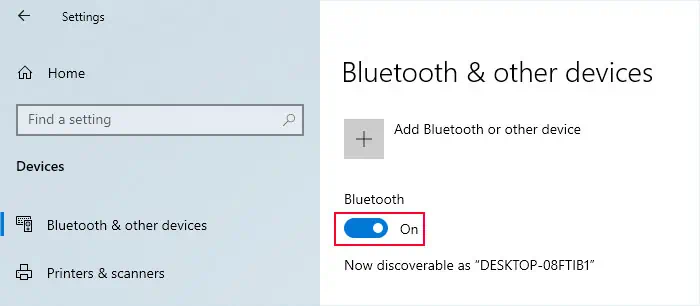
- Go to Bluetooth & devices or Devices > Bluetooth & devices and toggle on Bluetooth.

If you can’t find the option, run Bluetooth troubleshooter by going to Settings > System > Troubleshoot > Other troubleshooters. Then, try enabling Bluetooth again.
Step 2: Turn the Keyboard On and Put It in Pairing Mode
Like RF keyboards, Bluetooth keyboards also require an external power supply. Use proper AAA batteries if it contains a battery compartment. Or charge it using the charging cable that came with the keyboard to make sure it has enough power. After that, power on the device through its On/Off switch and check if any indicators blink/glow.
Some keyboards automatically go into pairing mode as soon as you power it up and if it doesn’t find other paired devices nearby. But for others, you need to perform a certain action to put it in pairing mode. Usually, you need to press the Bluetooth, pair, or connect button for about five seconds.
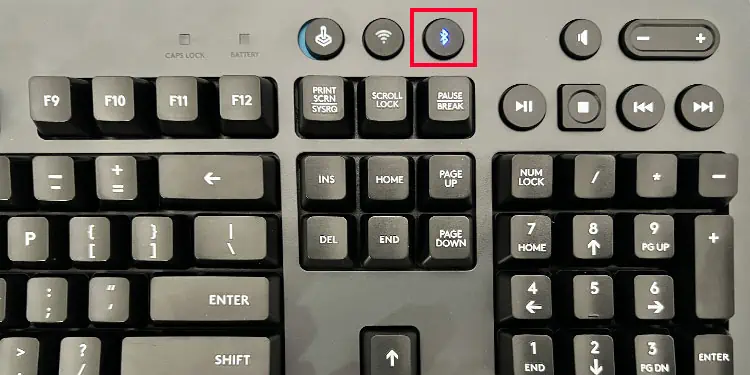
For most keyboards, the Bluetooth LED should start blinking when it is in pairing mode. And it starts glowing without any fluctuation when connected to a device.
Step 3: Pair Keyboard to Computer
After setting the keyboard in pairing mode, you must add the Bluetooth device to your computer to pair it and install its drivers.
- Go to Bluetooth & devices Settings if you closed it earlier.
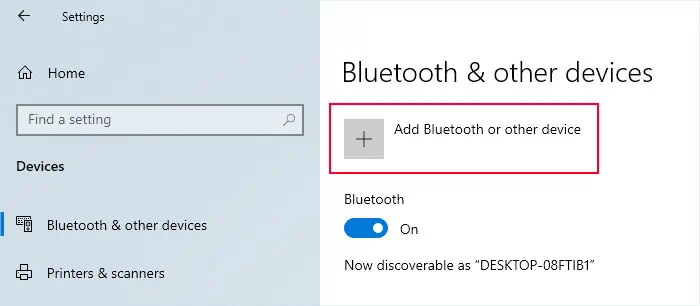
- Click on Add device or Add Bluetooth or other device> Bluetooth.

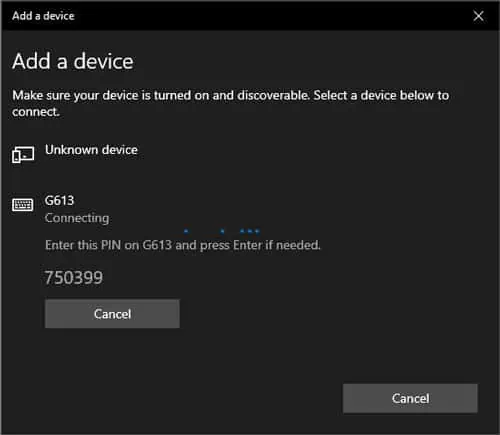
- Search the Keyboard from the list and click on it to pair the device with your computer.
- Sometimes, you may need to perform additional steps like entering the pin on the keyboard.

- It will also automatically connect the first time you pair the devices. From next time onwards, the keyboard shows up on the Bluetooth & devices settings page. Click on the Connect option to connect the keyboard to your computer.
Step 4: Use Your Keyboard
Now you should be able to use the keyboard as long as you have no Bluetooth issues. If your keyboard is already paired with another device, you may not be able to connect to it on the computer even if it is paired. You need to disable Bluetooth on all other devices, restart the keyboard and try connecting to it again.
Also, some Bluetooth keyboards allow you to cycle between a few devices. So, you have to make sure the relevant computer is the currently paired device to be able to use it. You may need to press a Function key or Fn + the Function key to specify the paired device.
