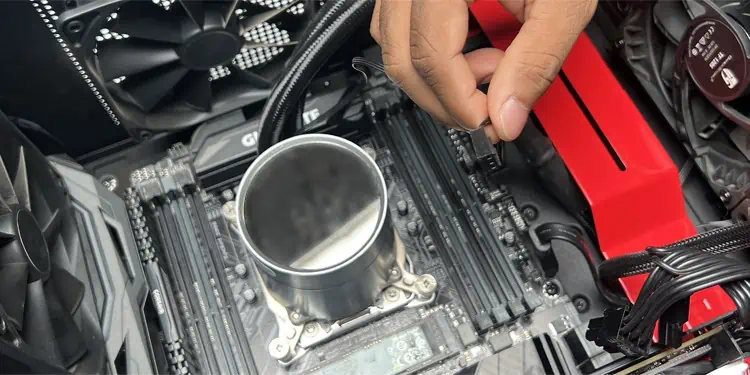
After mounting an AIO cooler, you need to connect all of its cables to the motherboard so that the cooler can run properly. All AIO comes with the main pump cable that you need to connect to a fan header.
However, it might be difficult to choose a usable fan header since motherboards have so many of them.
Depending on the AIO manufacturer and model, your cooler’s pump may come with extra cables for additional functions like RGB, additional power, and so on.
Most AIO pumps come with a 3-pin or 4-pin connector. You’ll need to locate the appropriate header on your motherboard that’s often labeled as “AIO_PUMP” or “PUMP.” If your motherboard lacks a specific AIO pump header, the CPU_FAN header can be used as an alternative.
Connecting the 3/4-Pin Main Pump Connector
Your AIO pump includes a pump connector cable (usually 3-pin) to power up the pump and get temperature information from the motherboard. This connector has no clips and comes with a notch that corresponds with the plastic guide on the fan/pump headers on the motherboard.
Depending on your motherboard, you need to connect it to either the AIO_PUMP/WP/W_PUMP header or the CPU_FAN header.
Best Choice: AIO_PUMP Header
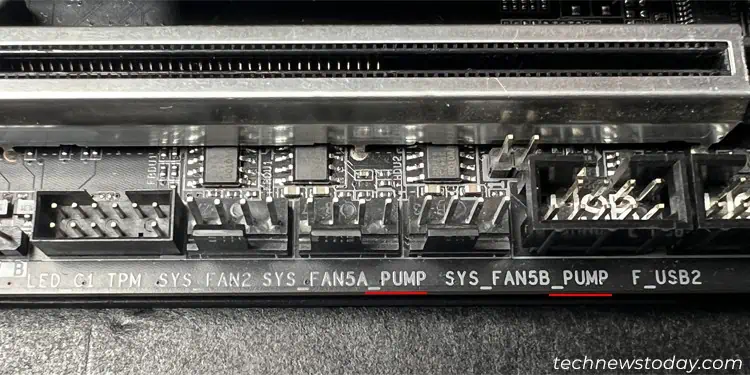
If your motherboard contains separate AIO_PUMP or WP headers, using those is the best option. While there are not much differences between the header’s architecture, the fan controllers optimize these headers in the following ways:
- They usually provide full speed voltage from the get go. AIO pumps work best at full speed since they are not noisy and having a fluctuating speed can wear down the pump.
- If AIO stops working, the CPU can get damaged due to overheating. So these AIO headers usually come with failure monitoring. If the header detects that the pump is not working, your PC will crash or won’t turn on for the CPU’s protection.
Some motherboards have PUMP header functions integrated with other fan headers. They usually contain labels like SYS/WP (or SYS_FAN_PUMP), CHA/WP, or even CPU2/WP. You can also safely use them for the pump.
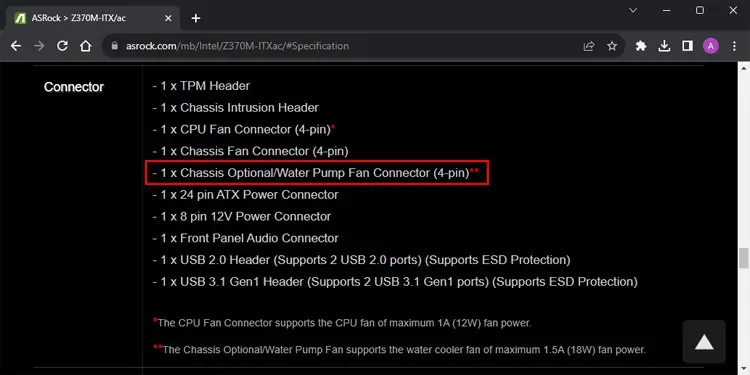
The headers may not have these labels on the motherboard even if they integrate the pump functions. So it’s always a good idea to go through your motherboard’s user manual or official specifications to look out for such functionalities.
Note: Some motherboards will only allow the computer to run when a fan is connected to the CPU_FAN header. So, if you are using the separate AIO_PUMP header for the pump, you need to connect one of your radiator fans or a case fan to this CPU_FAN header.
Also, if you are using any headers with support for both water pumps and fans, you need to set them to W_PUMP mode in your motherboard’s BIOS. Also make sure that they are running at full speed on all temperatures.
Next Alternative: CPU_FAN Header
For older motherboards that were not designed for AIO coolers, there won’t be any WP headers. In such cases, it’s best to use the CPU_FAN header for the AIO pump since these also come with failure monitoring functionalities.
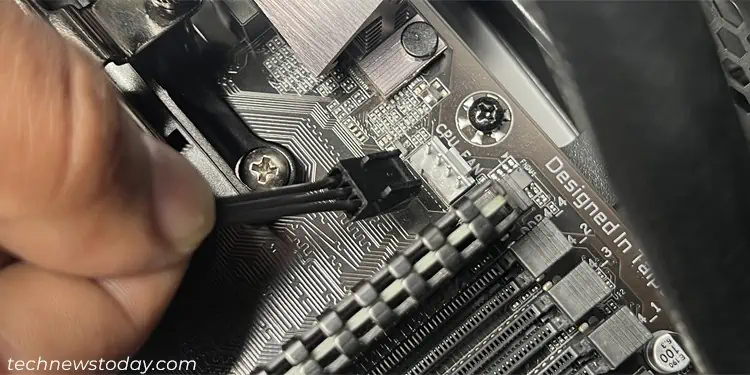
Other fan headers like CHA_FAN or SYS_FAN may not have such functionalities, so you should only use them for the pump as a last resort.
Connecting the 3-Pin RGB Connector
If your AIO cooler comes with RGB lighting, it should have a 3-Pin RGB connector cable. Its connector should also have two clips on the sides. This cable goes to the 3-pin 5V ADD_Header (+5V, DATA, GND) or the VDG header on your motherboard.
However, not all motherboards have such a header where the Voltage, Data and Ground pins lie side by side. You may find an empty header between the Data and the Ground Pin (i.e., +5V, DATA, N/A, GND) on your motherboard.
In such cases, you will need to use the adapter cable that came with the AIO to connect this cable to the motherboard’s header. You may also need the adapter if the original cable is not long enough to reach the VDG header.
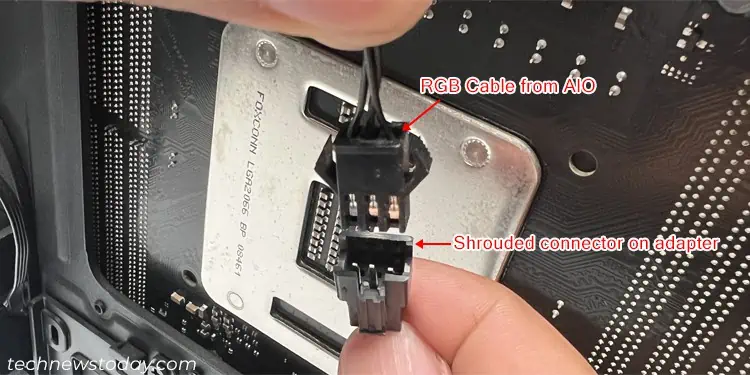
You need to first connect the shrouded end of the adapter to the AIO’s RGB cable. Then connect its other end to the relevant header depending on your motherboard.
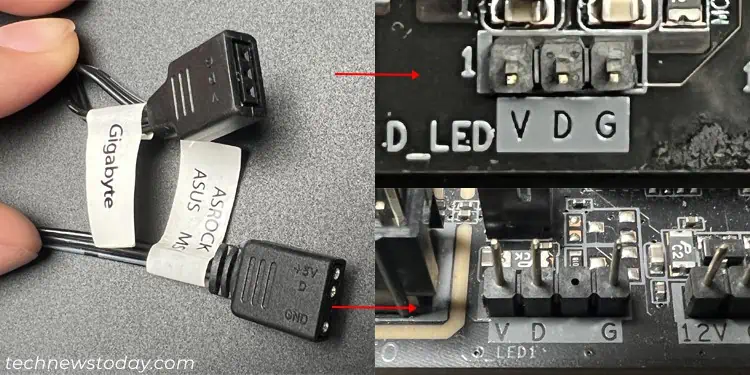
If the motherboard does not contain any such RGB headers, you need to use a separate RGB controller.
Connecting the 4-Pin Splitter Connectors
Some AIO coolers come with shrouded 4-pin connectors. These connectors are meant to be connected to the fan cables from the radiator’s fans. They will power up as well as control the radiator fans depending on your current CPU temperature.
Connecting the USB Connectors
A few AIO coolers have a USB connector cable so that the AIO configuration software can control the AIO along with the RGB elements.
This cable comes with a 7-pin connector at one end and a mini-USB connector at the other. The 7-pin connector goes to a USB header on your motherboard and the mini-USB connector goes to your AIO pump.
Connecting the SATA Connector
Some AIO units also come with SATA connectors that provide power for the pump or other features like RGB. You need to connect them directly to the SATA power supply from the PSU.
