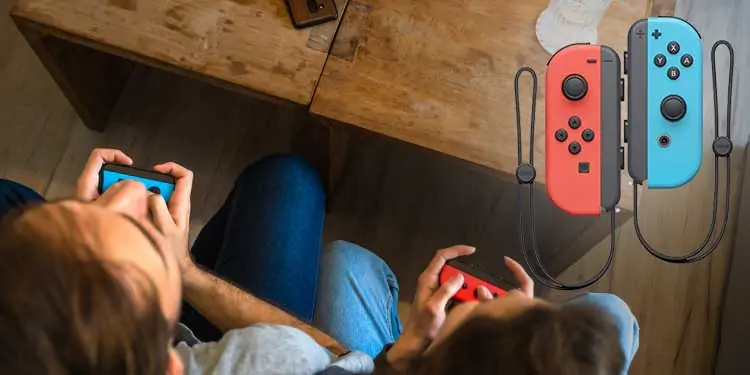
Your Joy-Cons can connect to the Switch with Bluetooth. You can use the same type of pairing to connect it to your computer, as long as it is Bluetooth-enabled. However, they don’t work as well as some controllers just because they’re connected. You need to install specific software to have more functionality and customization options.
Why Use Joy-Cons on the Computer?
Some people just prefer the feel of Joy-Cons to other options, like different controllers or keyboard and mouse. They might also be the only controllers a person has lying around for a multiplayer game where more than the usual number is needed.
Also, once you’ve gotten used to playing Fortnite on the Switch, you might be more comfortable using the Joy-Con buttons even if you want to play on the computer.
People try to use plenty of new and old controllers on all kinds of devices – and in this case, it’s both possible and useful for certain purposes.
How to Connect Joy-Cons to PC
Before you connect the Joy-Cons to your PC, you should properly disconnect them from the Switch. Consider removing the Bluetooth pairing so that it doesn’t interfere with the connection between the Joy-Cons and the PC. You want to delete the Bluetooth pairing before removing the Joy-Cons.
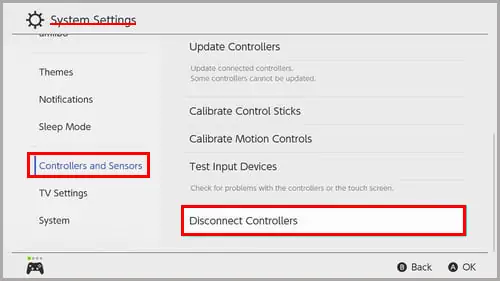
- Navigate to the Home menu on the Switch.
- Press System Settings.
- Choose Controllers and Sensors.
- Click Disconnect Controllers.

- Press and hold the X on the right Joy-Con until the blue circle is complete. You’ll still be able to use them as long as they’re plugged in.
Next, you can remove the Joy-Cons from the Switch. You won’t be able to use them with the Switch until you plug them back in or restore the Bluetooth connection.
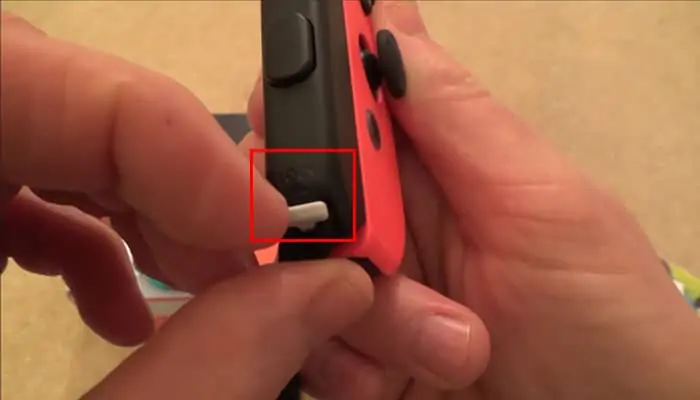
- Press down the release button on the top back of the Joy-Con.
- Slide the Joy-Con up until it is released from the console.
It’s effortless to take them on and off the console itself. It’s essential to go slow and not force it on or off if it feels stuck or hesitant. Once they’re detached, you can connect them to your PC.
Connecting Joy-Cons to a Windows PC is a fast process as long as you have a Bluetooth module on your computer.
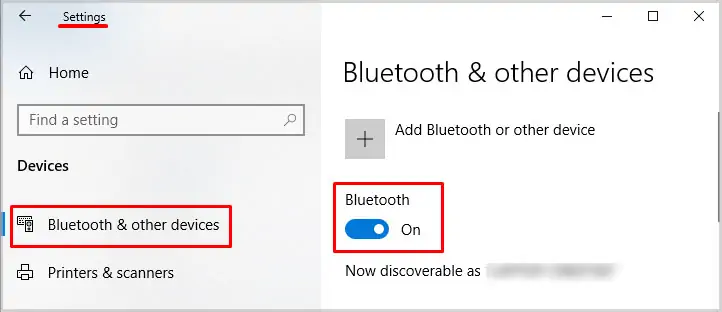
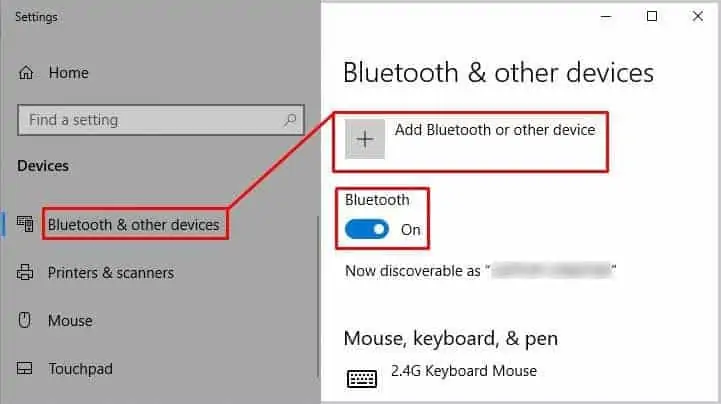
- Press Windows key + X.
- Choose Settings.
- Click Devices.
- Toggle Bluetooth to On.

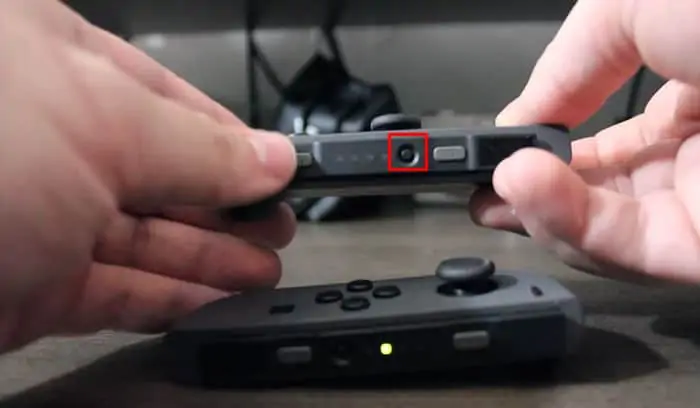
- Press the sync button on both controllers. It’s on the slim outer edge of each Joy-Con in the center.
- Wait for the LED lights to start flashing on each Joy-Con.

- Click “Add Bluetooth or Other Device” on the PC.

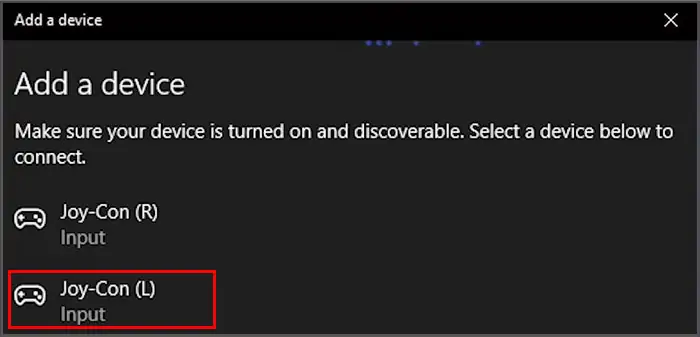
- Click the Joy-Con L entry and wait for it to pair.

- Click Done and return to the Bluetooth menu.
- Click “Add Bluetooth or Other Device” again.
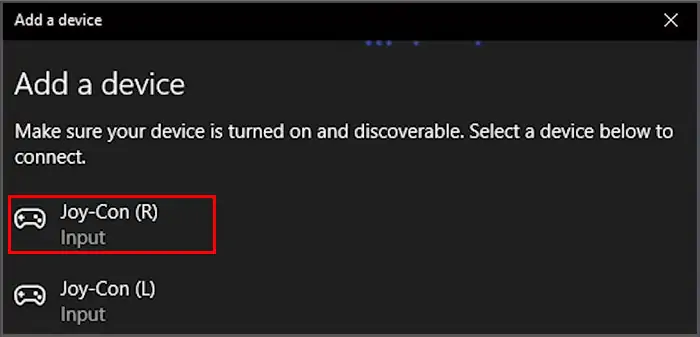
- Click the Joy-Con R entry and wait for it to pair.

- Click Done after the device pairs.
The Joy-Cons should be available for you to use with compatible apps.
Next, you want to attach straps to the Joy-Cons. They’re much safer to use with the attached straps because they won’t fly out of your hands easily. More than one person has lost a television or monitor to a rogue Joy-Con.
- Slide the strap lock into the unlock position.

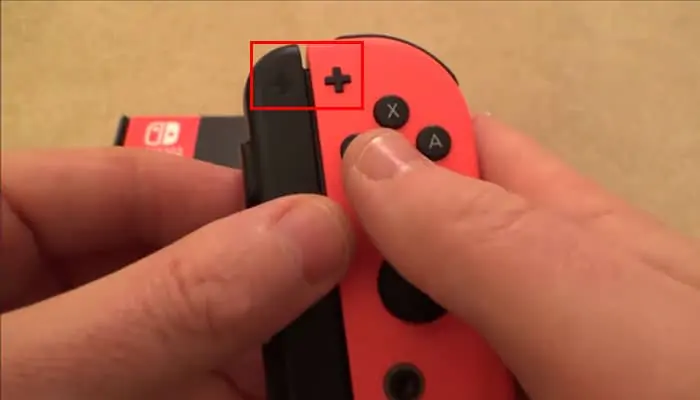
- Match up the plus on the right strap with the plus on the right Joy-Con.

- Match up the minus on the left strap with the minus on the left Joy-Con.
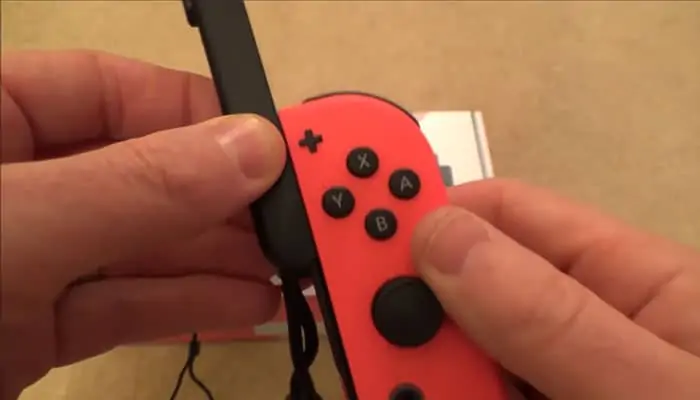
- Slide the rail down the side of the Joy-Con until it clicks into place. Repeat the process on the other Joy-Con.

- Push the strap lock into the lock position.
- Slide the wrist straps over your hands.
Make sure to tighten the strap around your wrist so that it’s tight enough to not fly off your hand. Of course, if you aren’t ready to play immediately, you can set them aside and put them on later when you’re ready.
What if I Only Want to Pair One Joy-Con?
Your computer sees each Joy-Con as a separate device. You only have to use one and pair one if you choose.
You can also pair both, but they won’t work as a single unit automatically. It will be like you have two different controllers paired to your computer.
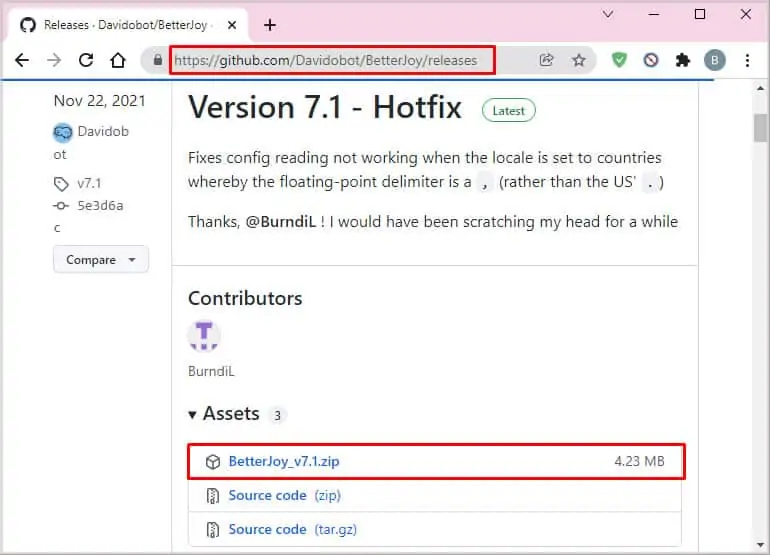
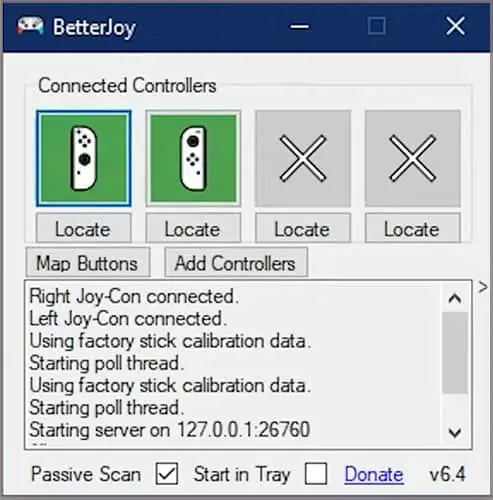
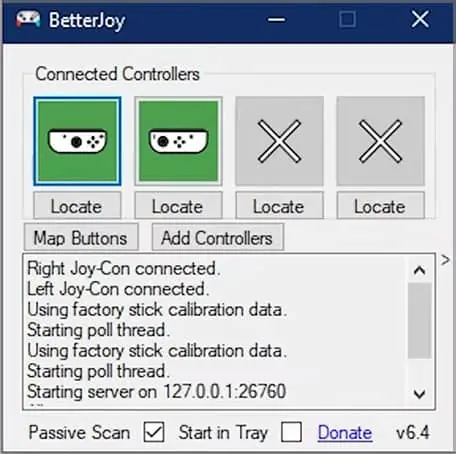
If you want to use both Joy-Cons as a single unit, you require third-party software. One of the more straightforward and more popular programs is called BetterJoy. It lets you switch between single Joy-Cons and use them as a unit.
- Download BetterJoy. Click on the latest release’s ZIP file. You don’t need the source code.

- Right-click on the downloaded file.
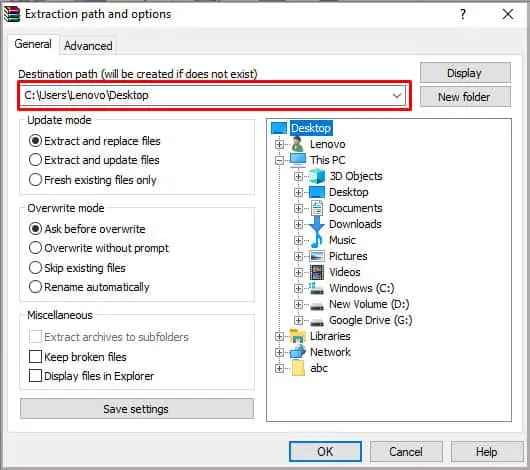
- Click Extract All.
- Choose a location to save the files.

- Click Extract.
- Open the extracted folder.
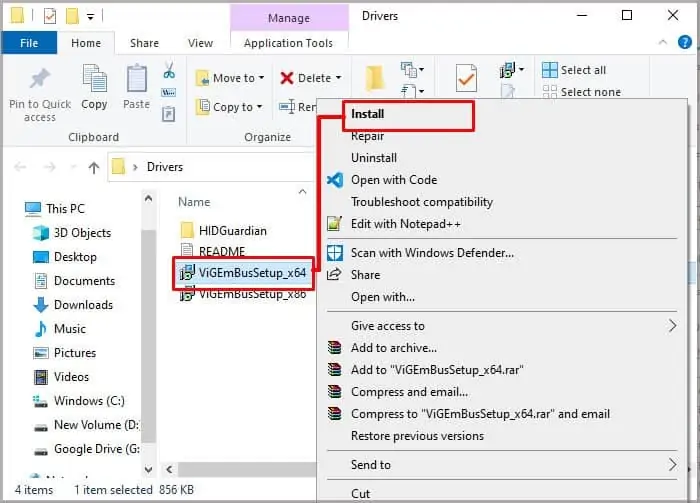
- Double-click on the Drivers folder.
- Right-click on ViGEmBusSetup. You can choose x64 or x86, depending on your system.
- Choose Install.

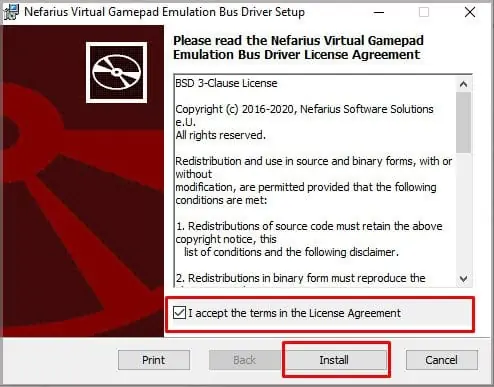
- Click Next.
- Accept the License Agreement.
- Click Install.

- Click Finish.
Now the software is on your computer. You should pair the Joy-Con controllers and run the software from the installation location.
- Right-click on BetterJoyForCemu.exe.
- Choose Run as Administrator.

- Click Yes.
- Click a Joy-Con icon to change to a horizontal image if you want to use a single one.

- Click it again to make it a vertical image again to use them as one controller.

You can also use BetterJoy to map your buttons.
What About the Pro Controller?
The Pro Controller can connect to your PC the same way the Joy-Con controllers do. You press the pairing button on the top rather than the side. Of course, it also appears in the menu as the Pro Controller and not as a Joy-Con.
Frequently Asked Questions
What Is the Sync Button on the Joy-Con?
The sync button is a circular black button on the rail side of the controller. When you press it to scan for available Bluetooth connections, you need to hold it down for about five seconds.
Why Won’t My Joy-Con Connect to the PC?
Make sure your controllers are both charged. If they’re low on battery, slide them back into the docking station and leave them for a few hours before trying again. You should also try restarting your computer and ensuring that your Bluetooth is active.
How Can I Charge My Joy-Cons Without a Switch?
You can get a grip controller designed for the Joy-Cons. It includes a USB-C port that will charge the Joy-Cons when inserted into the controller.
