Connecting two computers has a number of benefits, the main one being the ability to share and modify resources across both systems.
In the past, you’d typically use crossover cables to connect two computers, but this usually isn’t required anymore. In fact, thanks to technologies such as WiFi, Bluetooth, Hotspots, etc., wireless is the new meta.
In this article, we’ve detailed the steps to connect two computers on a network with these and more technologies. So, depending on which method you prefer, you can check the appropriate sections accordingly.
Ways to Connect Two Computers
The most common method is to connect two computers over a local network. However, other methods like VPNs or Bluetooth may be better options depending on your circumstances.
Connect Over Local Network
Getting two computers to communicate is very simple if they’re connected to the same Wi-Fi. In this case, you can skip ahead to the File Sharing section further in the article. However, if Wi-Fi isn’t an option, some preliminary steps are required to get the two machines on the same local network. The next two sections will deal with this.
Ethernet
The first method is to connect the two with an Ethernet cable and assign a static IP to the machines. Here are the steps to do so on Windows:
- Press Win + R, type
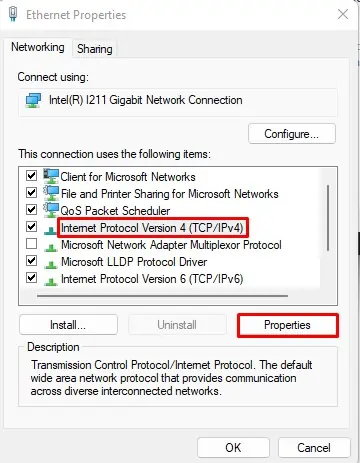
ncpa.cpl, and press Enter. - Right-click the Ethernet connection and select Properties.
- Select Internet Protocol Version 4 (TCP/IPv4) and click on Properties.

- Select the Use the following IP Address option and assign the IP manually.
Here’s how you can set a static IP on Mac:
- Click on the Apple logo and select System Preferences > Network.
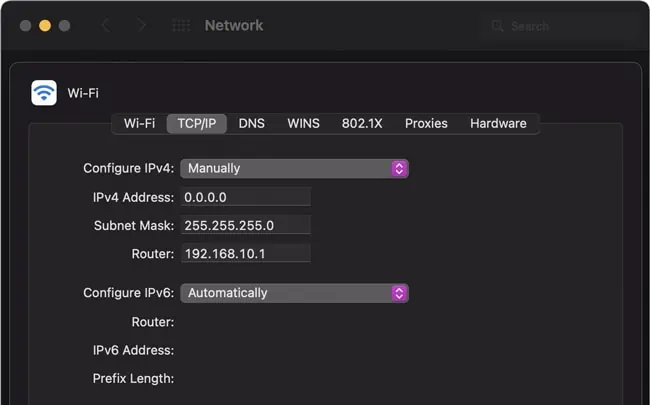
- Select your network from the left pane and click on Advanced.
- Select Configure IPv4 Manually, assign your IP address, and press OK.

WANET
The second method is to create a wireless ad-hoc network (WANET) which allows you to wirelessly form a local network without a router. Here are the steps to do so on Windows:
- Press Win + R, type
powershell, and press CTRL + Shift + Enter. - Type
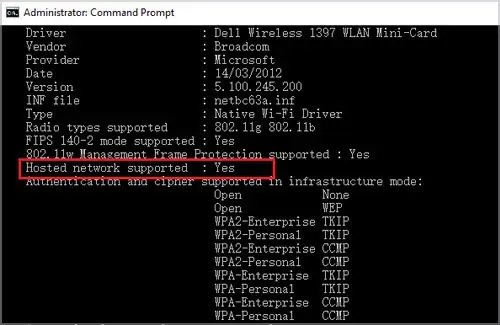
netsh wlan show driversand press Enter. - Check that the Hosted Network Support section shows YES. If it doesn’t, you may need to update your network drivers.

- Next, type
netsh wlan set hostednetwork mode=allow ssid=name key=password. - Replace name and password with your preferred values and press Enter.
- Finally, type
netsh wlan start hostednetworkand press Enter.
- You should be able to connect to the network from the other device now as if you were connecting to any other Wi-Fi.
Here’s how you can do the same on Mac:
- Click on the Apple menu and select System Preferences > Network.
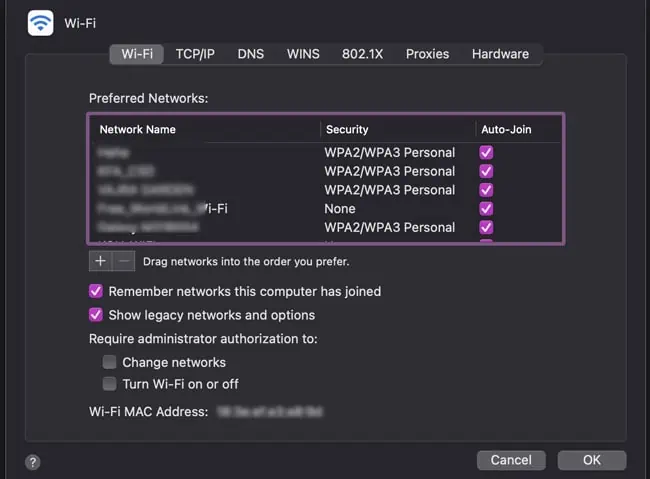
- Select WiFi from the left pane and click on Advanced.
- Enable the Show legacy networks and options checkbox and press Ok > Apply.

- Next, click on the WiFi icon from the menu bar and select Create network.
- Name the network, select a channel, and press Create.
- Your Mac’s network will now be accessible to other devices.
File Sharing Permissions
The most common reason for connecting two computers is to access, modify, and share resources between the two systems. There are two parts to this; the first is enabling file sharing on the two systems, and the second is actually sharing the files.
Assuming you’ve followed the steps listed above to connect the two computers, here’s how you can do this on Windows machines:
- Press Win + R, type
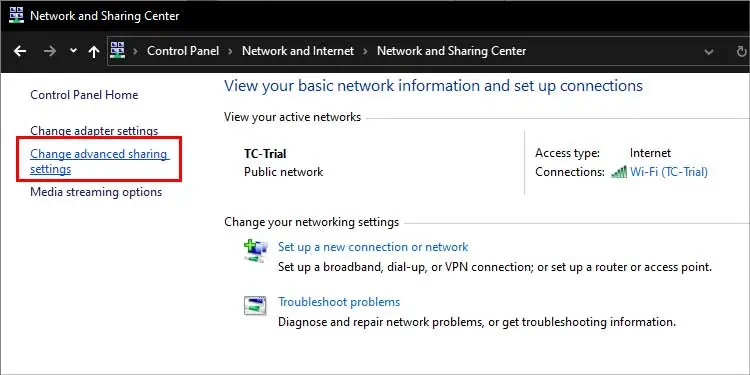
control, and press Enter. - Go to Network & Internet > Network and Sharing Center > Change advanced sharing settings.

- Expand your current network profile.
- Enable the Network Discovery and File Sharing options and save the changes.

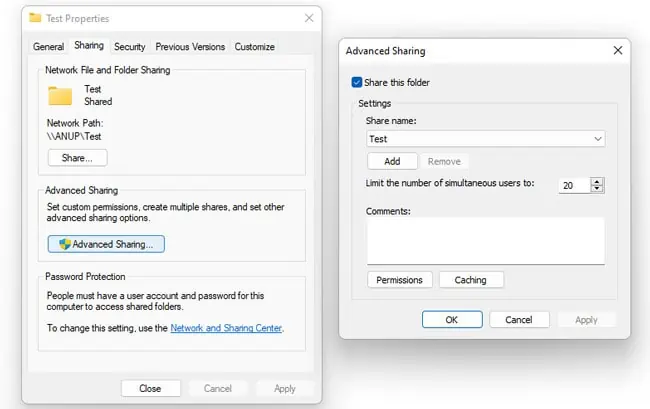
- Right-click the folder or drive you’re trying to share and select Properties.
- Go to the Sharing tab and click on Advanced Sharing.
- Enable the Share this folder option and press OK.

- The folder’s network path should be displayed in the Sharing tab now. You can use this path to map the folder as a network drive on the second PC, or you can simply access it via File Explorer > Network.
Here’s how you can share files from Windows to Mac:
- Follow the steps from the section above to share the folder from Windows.
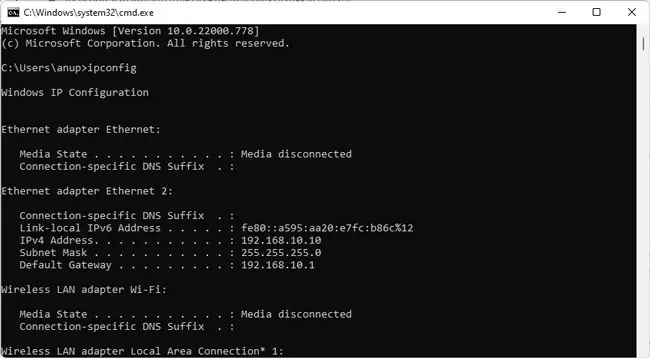
- Type
ipconfigin a Command Prompt window and note the Ethernet adapter’s IPv4 address.
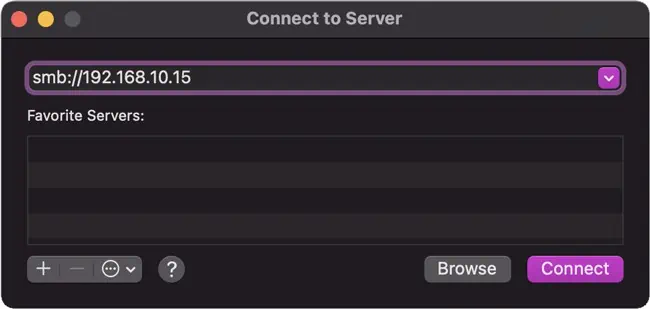
- On the Mac, select Go > Connect to server.
- Enter
smb://IPand replace IP with the value from Step 2.
- Press Connect, enter the Windows account’s login credentials, and press Connect again.
- After you select the volume to mount, you’ll be able to access it via the Finder.
Finally, here’s how you can transfer files from Mac to Windows instead:
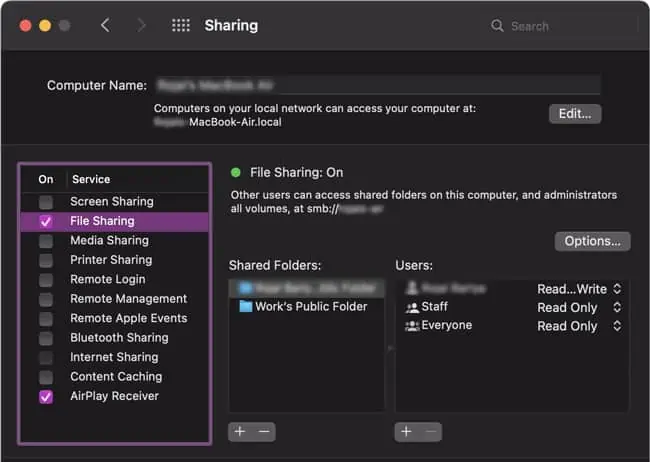
- Click on the Apple menu and select System Preferences > Sharing.
- Enable the File Sharing tickbox, note the Mac’s IP, and click on Options.

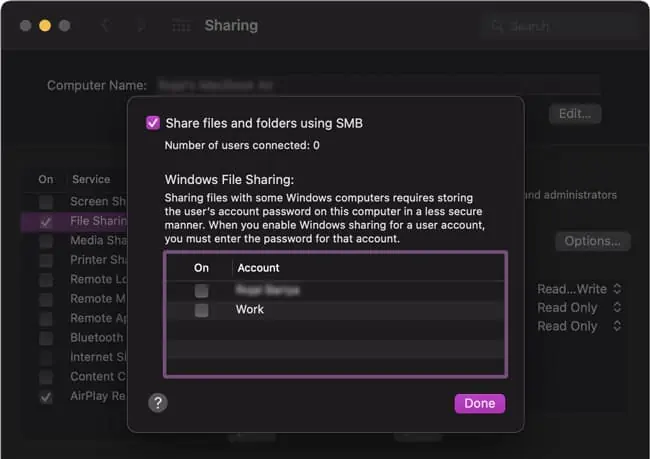
- Select the Share files and folders using SMB option.
- Select the account you’ll use to log in from the Windows PC, enter the password, and press Done.

- Under Shared Folders, press the Add (+) button.
- Browse and select the folders to share and press Add.
- On the Windows system, go to File Explorer > Network. You’ll be able to connect to the Mac from here.
Bluetooth
Assuming both computers support Bluetooth and range isn’t an issue, Bluetooth is a very convenient way to connect two computers. Here’s how you can send and receive files via Bluetooth on Windows:
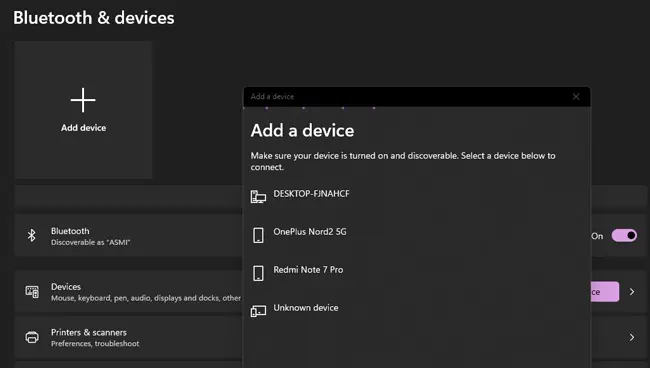
- Press Win + I and select Bluetooth & devices.
- Press Add device +, select the other computer and follow the on-screen instructions to pair the computers.

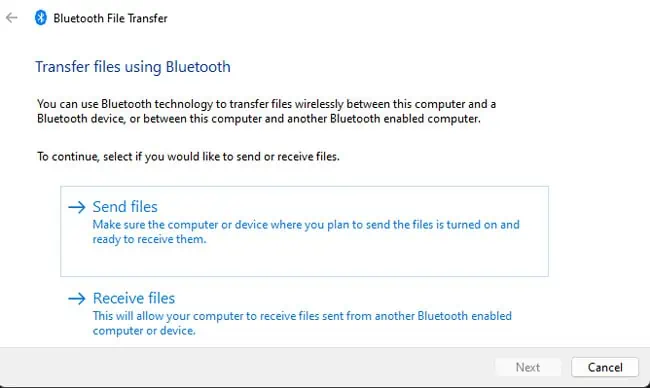
- After they’re paired, go to Bluetooth & devices > Devices and click on Send or receive files via Bluetooth.

- Click Send files on one computer, and Receive files on the next.
Here’s how you can do the same on Mac:
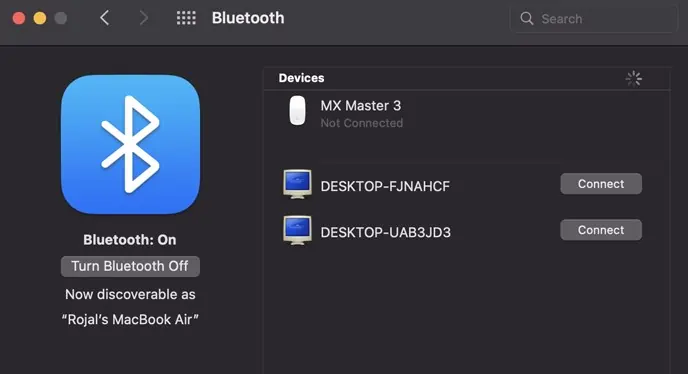
- Click on the Apple menu and select System Preferences > Bluetooth.
- Select the other computer and press Connect > Accept.

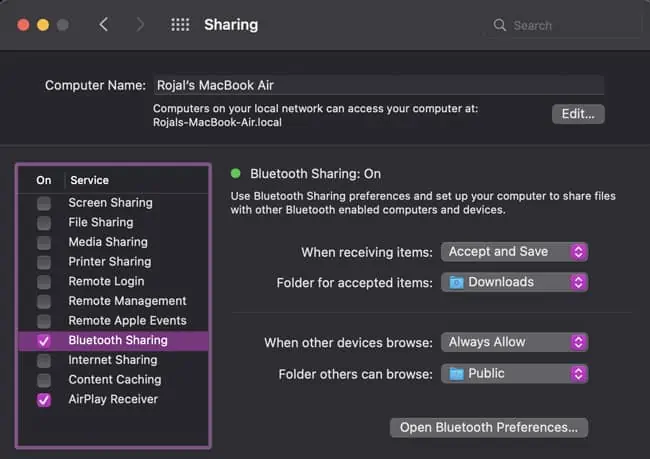
- After they’re paired, go to System Preferences > Sharing and enable Bluetooth Sharing. You can configure the options as you prefer.

- Press Shift + Command + U and open Bluetooth File Exchange.
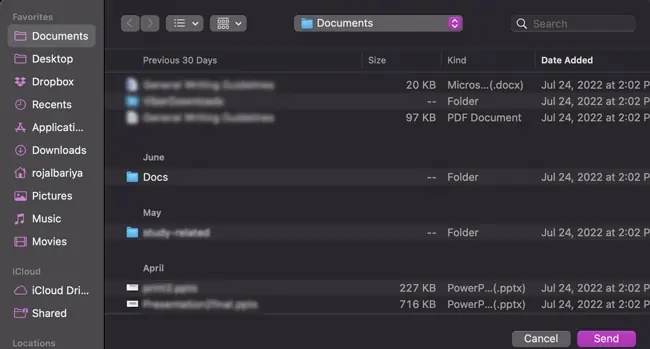
- Select File > Send File, pick a file, and click Send.

- Select the other computer from the list and press Send again.
VPN
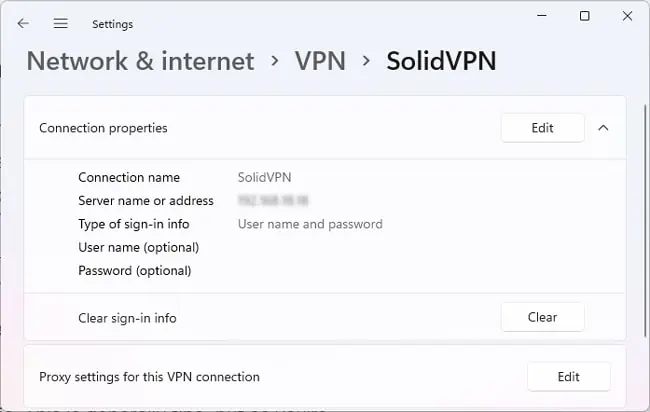
In the context of remote work, VPNs are commonly used to access resources on a private network remotely. Here’s how you can set up a VPN on Windows:
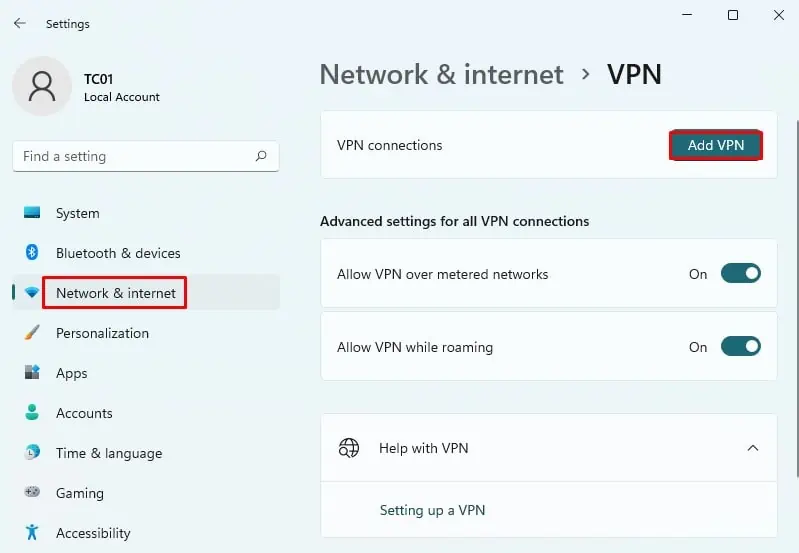
- Press Win + I and select Network & Internet.
- Select VPN > Add VPN and input the connection details.

- Name the connection as you prefer, enter the address of the VPN server you’re trying to access, input your login details, and press Save.

- After the VPN is listed under VPN connections, press Connect.
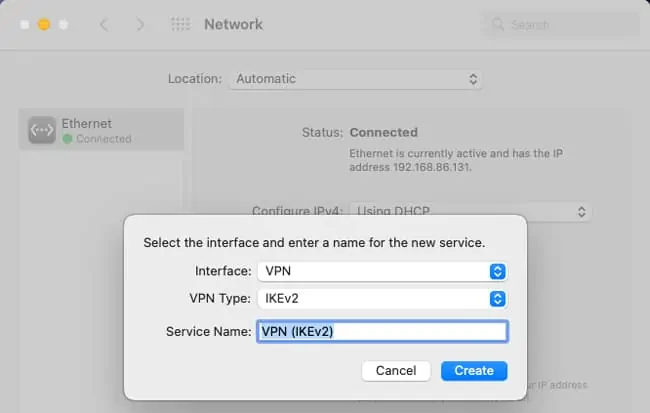
Here’s how you can do the same on Mac:
- Click on the Apple menu and select System Preferences > Network.
- Click on Add > VPN and select the VPN type.

- Name the connection and press Create.
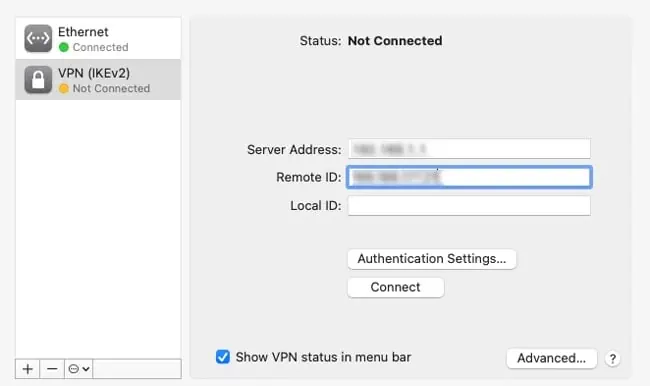
- Enter the VPN server address and login details.
- If necessary, you can also input additional info such as TCP/IP or DNS from the advanced tab.
- Press Apply > OK and enable the Show VPN status in menu bar option.

- You can now use the VPN status icon to connect to the VPN.
Hotspot
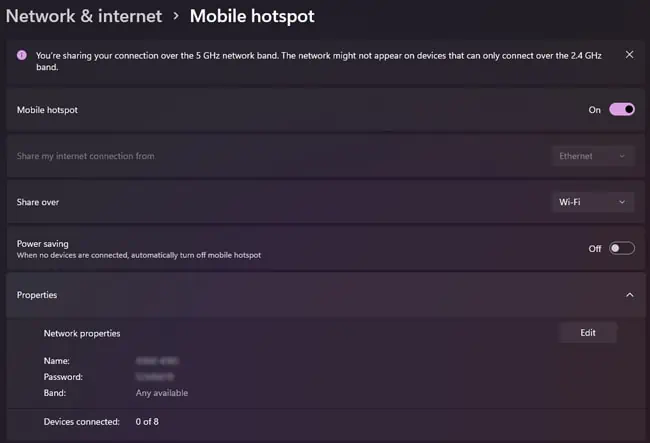
Here’s how you can create a hotspot on Windows:
- Press Win + I and select Network & Internet.
- Click on Mobile Hotspot and select Share my internet connection from Ethernet / Wi-Fi.

- Select Share over Wi-Fi or Bluetooth.
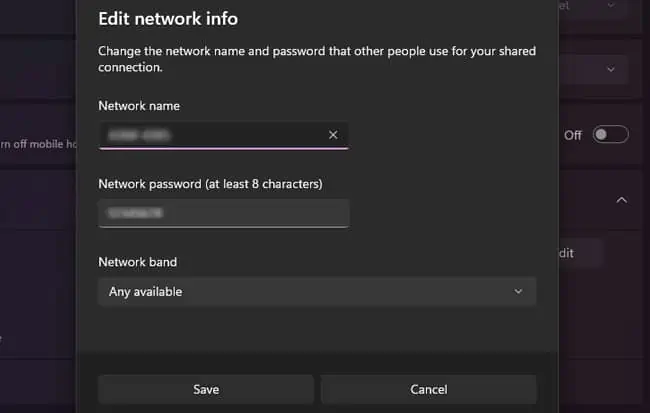
- Click on Edit, input the network info, and press Save.

- Once you turn on the Mobile Hotspot, you should be able to connect to it from the other computer.
Here’s how you can do the same on Mac:
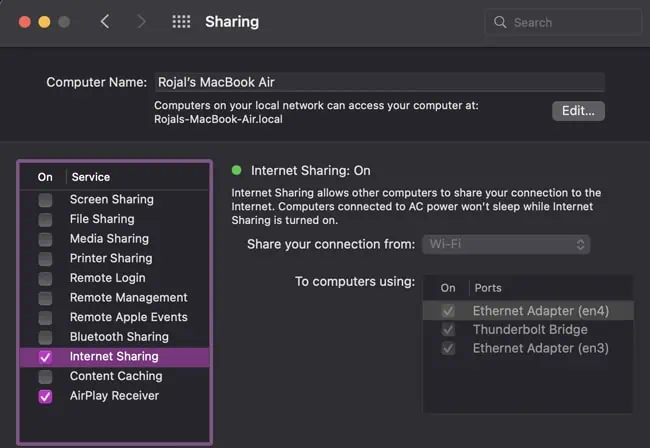
- Click on the Apple menu and select System Preferences > Sharing > Internet Sharing.
- In the Share your connection from section, select Wi-Fi.

- In the To computers using section, select Wi-Fi as well.
- Click on Wi-Fi Options and configure the hotspot settings.


