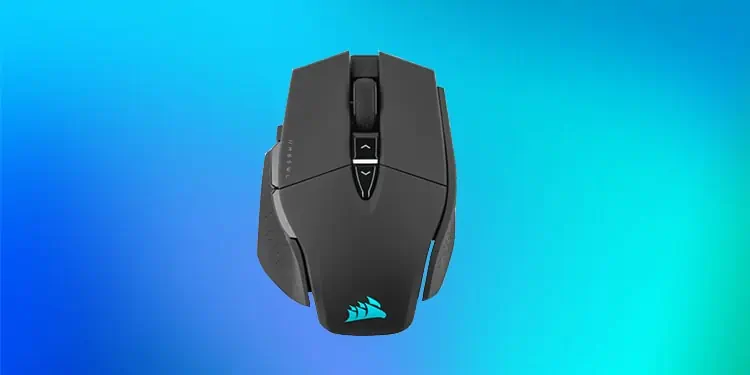
Do you own a gaming mouse from Corsair Gaming, Inc.? If you are into gaming, you certainly know the value of a gaming mouse, and you probably own one of them.
But what if you are having a problem with it? CORSAIR mice can stop working sometimes, and it can get you enraged.
There are several reasons why your CORSAIR mouse stops working. Reasons lie anywhere from faulty hardwares to the outdated CORSAIR Utility Engine (iCUE), and solutions can be fixing the same.
This article will discuss the fixes you can apply when the CORSAIR mouse is not working.
How to Fix CORSAIR Mouse Not Working
The ergonomic design and functionalities of the gaming mouse have made it a must to own during the gameplay. So if your CORSAIR mouse is not working, you should fix it as soon as possible.
You can fix the issue by as simple as performing the basic hardware check and going up to updating the iCUE.
Fixing won’t take much of your time and is not that complex. But before moving on to the fixes, I recommend you take an ordinary mouse to troubleshoot the issue. You can also read our article if you do not have an extra mouse for navigation.
Likewise, CORSAIR devices are supported only on Windows 10 64-bit and above, so ensure your system is compatible.
I have listed nine fixes here to help you sort out this problem. Let’s dive straight into them.
Perform Basic Hardware Check
The first thing you should do when your CORSAIR mouse is not working is to perform a basic hardware check.
It includes checking if the mouse buttons are broken or if dirt has been accumulated under the mouse. The buttons can be jammed too. Consider cleaning it. Likewise, if you place the mouse over an uneven surface, it can create issues. For smooth navigation, you can use a mouse pad.
If you are using a wired CORSAIR mouse, inspect the USB cables and see if there is any wear or tear. Try swapping the ports as well. Unplug the cable for a few seconds and then replug it to fix any loose connections.
And in the case of a wireless mouse, check if the batteries are dead. Also, minimize the distance between your mouse and the USB receiver.
Reset the Mouse
If your CORSAIR mouse is not responding, you can reset the mouse physically. To reset it, first, unplug the mouse from the USB port. Then press the left and right mouse buttons simultaneously for a few seconds.
While you keep pressing it, plug it back into the USB port. Release the buttons after about 5 seconds. It will reset your mouse. Check if it works now.
Update the CORSAIR Device Driver
If the driver for your CORSAIR mouse has a new update, the mouse may start acting up. So it would help if you considered updating the driver. Follow these steps to update the CORSAIR driver:
- Press the
Windows+Rkey to open the Run dialog box. - Type
devmgmt.mscthere and press Enter key to open the Device Manager. - Expand the Human Interface Device
- Right-click on Corsair composite virtual input device and select the Update driver option.

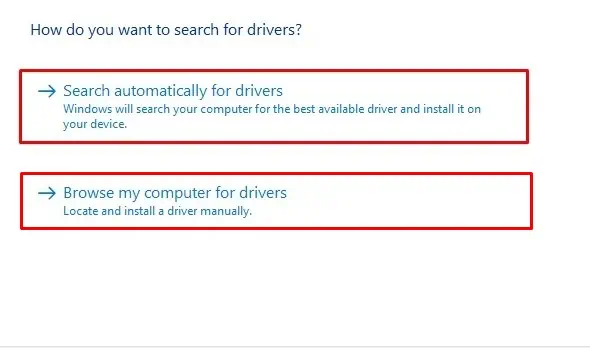
- On the next window, select the Search automatically for drivers option. It will download and install new updates if available. If you have the latest driver with you, proceed further with the Browse my computer for driver software option and install it.

- Restart your computer.
Updating the driver should solve the problem. But if you still face the issue, move to the fixes discussed below.
Reinstall the CORSAIR Device Driver
If the driver for your CORSAIR mouse is corrupted or possibly has some bugs and glitches, reinstalling the driver will help you. Uninstalling and restarting your PC will reinstall the driver and probably fix the issue. Follow these steps to reinstall the CORSAIR driver:
- Hit the
Windows+Rkey at once to open the Run dialog box. - Type
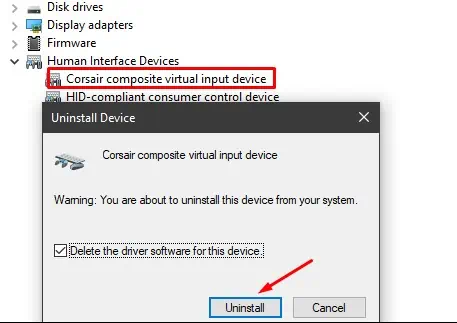
devmgmt.mscin the search box and hit Enter key to open the Device Manager. - Expand the Human Interface Device menu and right-click on Corsair composite virtual input device.
- From the right-click context menu, choose Uninstall device option.

- Confirm the uninstallation in the next pop-up window.
- Restart your computer.
It will install a fresh copy of the device driver for your CORSAIR mouse. Check to see if it works now.
Create New Configuration Files for iCUE
CORSAIR has developed an application called iCUE(Corsair Utility Engine) that acts as a console for controlling and configuring its devices.
Configuration files of iCUE define and save the preferences and settings for your CORSAIR devices, and not to mention; the mouse. They can get corrupted sometimes, and it can cause issues with the working of the mouse. So you can rebuild the configuration files to see if it gets the mouse in working condition.
Follow these steps to create new configuration files:
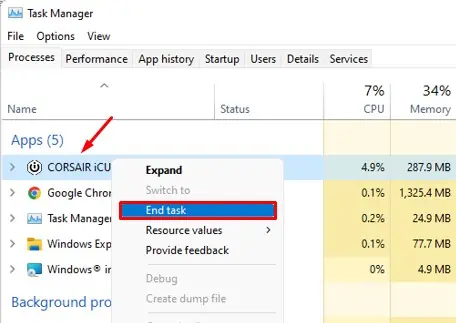
- First, you need to close the iCUE application. For this, press
CTRL+ALT+DELto open the Task Manager. - Under the Processes tab, find iCUE, right-click on it and select the End task option.

- Now press the
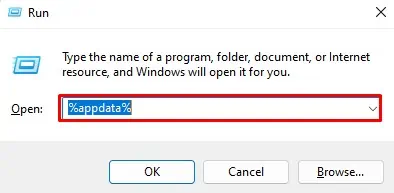
Windows+Rkey simultaneously to open the Run dialog box. - In the search box, type
%appdata%and hit Enter key.
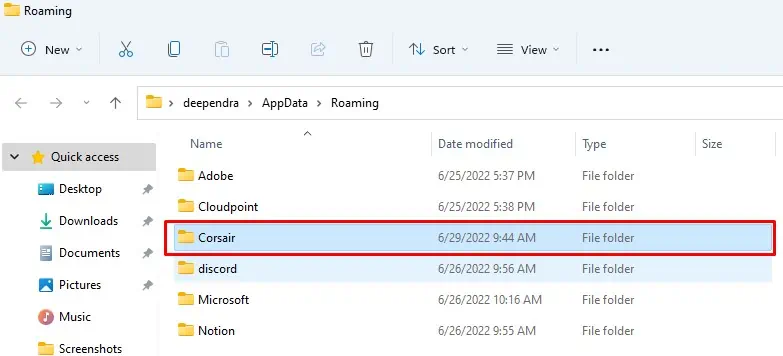
- Please search for the Corsair folder there and Cut it. Paste it elsewhere for backup purposes.

- Open the iCUE application. It will now create new configuration files in the system.
Once you complete the process, check if the mouse is working now.
Enable Auto-start of iCUE
iCUE must always start at the Windows startup for the proper functioning of the CORSAIR devices. If the auto-start is disabled, it can create problems with the working of the mouse. Follow these steps to enable the auto-start of iCUE:
- On the Windows search box, type Task Scheduler and open it.
- Click on Create Task option in the right pane of the Task Scheduler window.
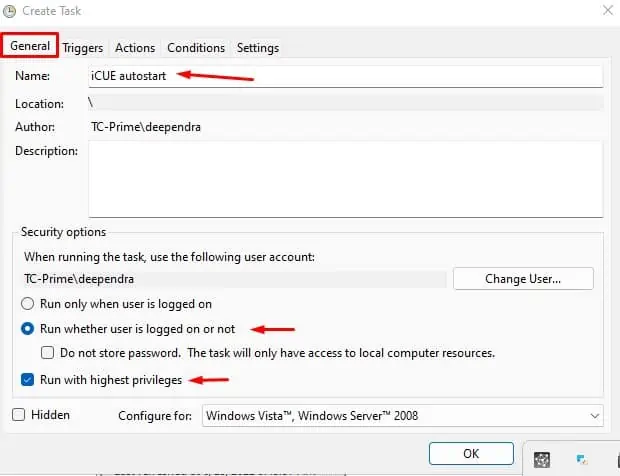
- Under the General tab, give a name to your task (example: iCUE autostart).
- Check the options that say Run whether user is logged on or not and Run with highest privileges.

- Next, navigate to the Triggers tab and click on the New button.
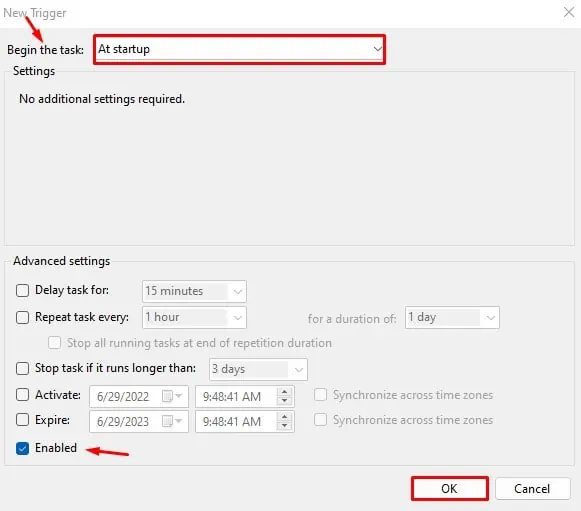
- In the New Trigger window, Select At Startup from the drop-down list next to Begin the task. Don’t forget to check the Enabled option. Click the OK button.

- Move to the Actions Tab and click the New button.
- In the New Action window, select Start a program from the drop-down list.
- Click the Browse button and find
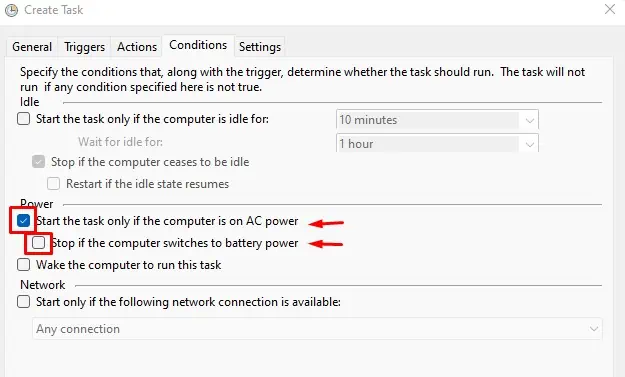
iCUE.exe. It is normally located atC:\Program Files\Corsair\CORSAIR iCUE 4 Software\iCUE.exe. Click the OK button. - Now move to the Conditions Tab and check the option Start the task only if the computer is on AC Power and uncheck Stop if the computer switches to battery power option.

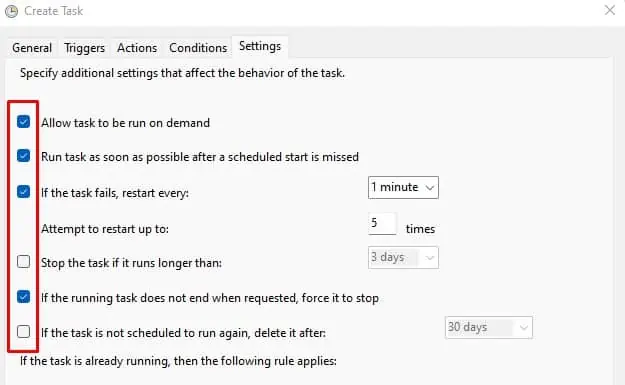
- And finally, on the Settings Tab, check the following options:
- Allow task to be run on demand,
- Run task as soon as possible after a schedule start is missed,
- If the task fails, restart every: 1 minute,
- Attempt to restart up to 5 times,
- If the running task does not end when requested, force it to stop.

- Save the changes and restart your computer.
Check to see if your mouse is detected now.
Keep Running the iCUE Tool
The iCUE tool must run in the background to properly function your CORSAIR devices. But the other applications may prevent the iCUE process from running, or it may crash and stop on its own.
You can use Task Manager to check if it is running in the background. If not, launch the iCUE application again and minimize it to let it run in the background.
Clear the Onboard Storage
Clearing the onboard storage of iCUE will flush any predefined settings for your mouse and let you configure it again. To clear the onboard storage, follow these steps:
- Open the iCUE application.
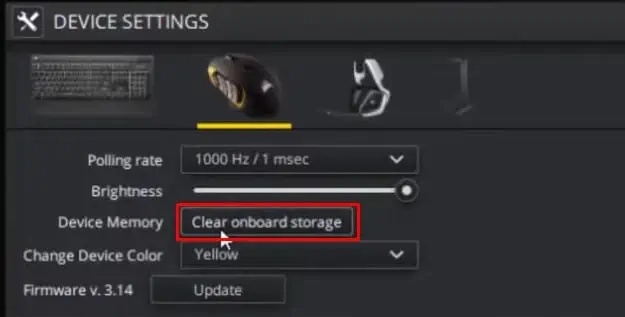
- Navigate to Settings > Device Settings
- Click the Clear onboard storage button and confirm it.

- Reboot the computer
After reboot, all your profiles will be cleared, and you need to create them again. Your mouse will probably start working after this.
Clean Install iCUE
Clean installation of iCUE is the final fix you can apply to solve the CORSAIR mouse not working problem. It will clear up the issue if it is caused either due to system file corruption or an outdated application. Follow these steps to install a fresh copy of iCUE:
- Press the
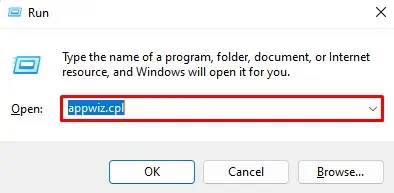
Windows+Rkey simultaneously to open the Run dialog box. - Type
appwiz.cplin the search box and press Enter key to open the Programs and Features window.
- Right-click on the program that says iCUE and click the Uninstall button.

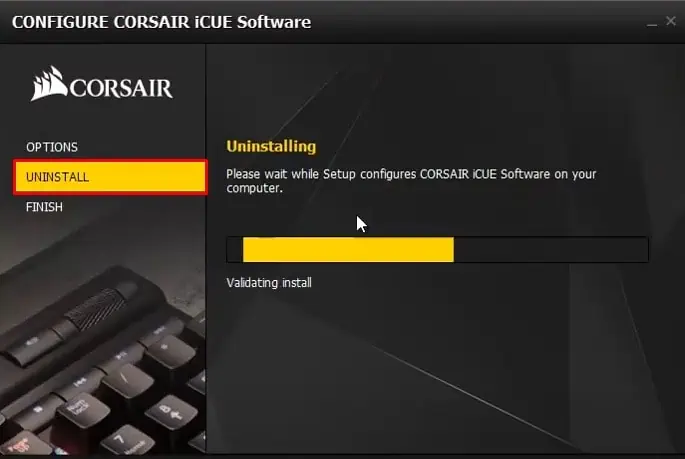
- A new window will open asking you whether you want to Uninstall or Repair the application. If you want to repair only, proceed with the Repair option. But since we are clean installing here, you should select the Uninstall option.

- Now follow the on-screen instructions to complete the uninstallation.
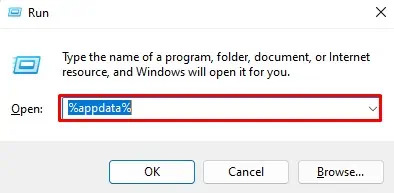
- Next, you need to delete all the files from Appdata. Again, open the Run dialog box, type
%appdata%, and press the Enter key.
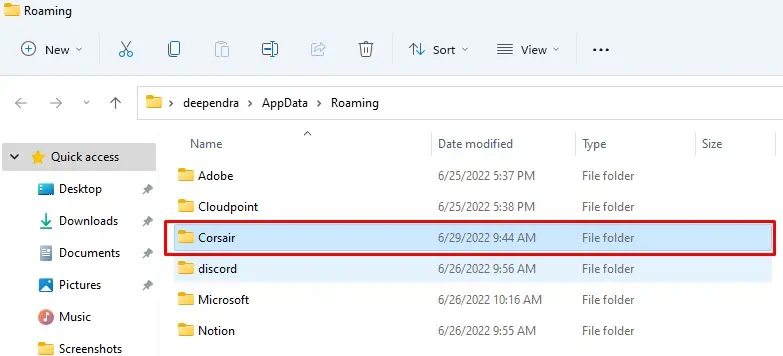
- Please search for the Corsair folder there and delete it.

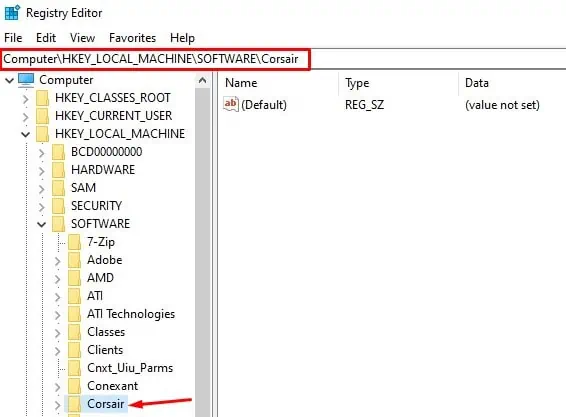
- Again, type regedit in the Run dialog box and hit Enter to open the Registry editor.
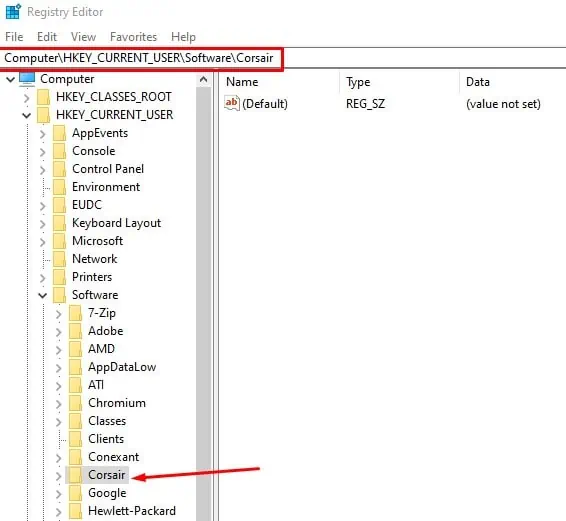
- Navigate to
Computer\HKEY_CURRENT_USER\Software\. - Please scroll down to see the Corsair folder and delete it too.

- Also, navigate to
HKEY_LOCAL_MACHINE\SOFTWARE\, search for the Corsair folder and delete it.
- Restart the computer.
After the computer reboots, download and install the CORSAIR iCUE application from their official website. There should be no issue with your mouse now.

