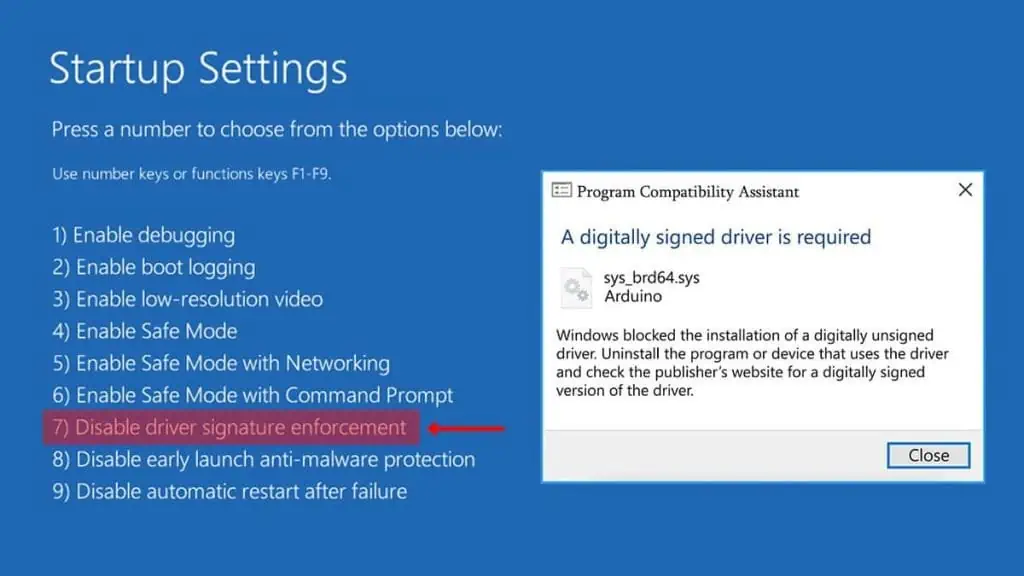
Driver Signature Enforcement prevents loading or installing drivers without valid digital signatures to protect your system.
However, it also means that you can’t use any unsigned drivers even when you know they are safe. Fortunately, you can disable this enforcement temporarily or permanently.
To disable driver signature enforcement, select the relevant option in the Advanced Startup’s startup settings, or use some bcdedit commands on Command Prompt. You can also disable the group policy regarding code signing.
Let’s discuss all these methods in detail.
Temporarily Disabling Driver Signature Enforcement
Temporarily disabling driver signature enforcement will disable it for the next boot only. Once you restart your system, it will automatically enable this feature.
Regardless, it’s a good method to install any unsigned drivers (for instance an old printer, scanner, or fax) in your system.
You can change a startup setting or enable test mode using Command Prompt for this purpose.
Using Advanced Startup Settings

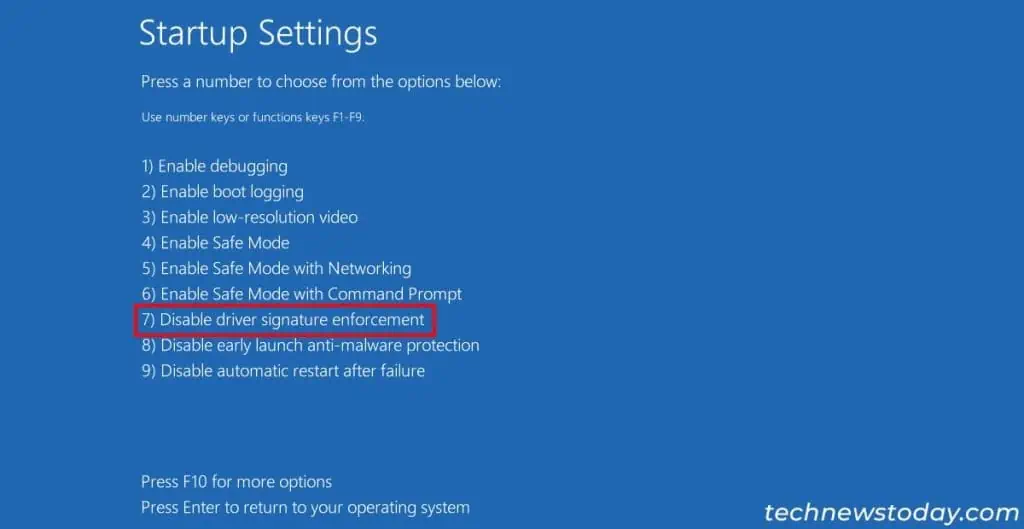
The quickest way to disable driver signature enforcement is to use an advanced startup option. It is especially useful if you run into a blue screen error due to an invalid driver signature. Here are the necessary steps:
- Get to the Advanced Startup interface.
- Go to Troubleshoot > Advanced options > Startup settings and click Restart.
- Press F7 or 7.
Using Command Prompt

Windows also comes with a test mode that disables driver signature enforcement and enables you to load test-signed drivers.
You can use the boot configuration data editor bcdedit.exe tool through the Elevated Command Prompt to boot into this mode.
First, make sure to disable secure boot on your motherboard BIOS. Then follow the steps below after loading Windows:
- Press the Windows key + R to open Run.
- Type
cmdand press Ctrl + Shift + Enter. - Type
bcdedit /set testsigning onand press Enter. - Restart your computer.
Permanently Disabling Driver Signature Enforcement
It is also possible to disable driver signature enforcement permanently. You can use a different command or tweak a group policy setting.
However, keep in mind that this enforcement is an essential security feature. Disabling it leaves your computer vulnerable to malware-infected drivers.
Using Command Prompt

You can also use another command on the Elevated Command Prompt to permanently disable the driver signature enforcement.
Like with the temporary method, you need to disable secure boot to run this command.
After that,
- Press the Windows key + R to open Run.
- Type
cmdand press Ctrl + Shift + Enter. - Type
bcdedit /set nointegritychecks onand press Enter. - Restart your computer.
If you wish to enable driver signature enforcement again, use the command bcdedit /set nointegritychecks off.
Using Group Policy Editor

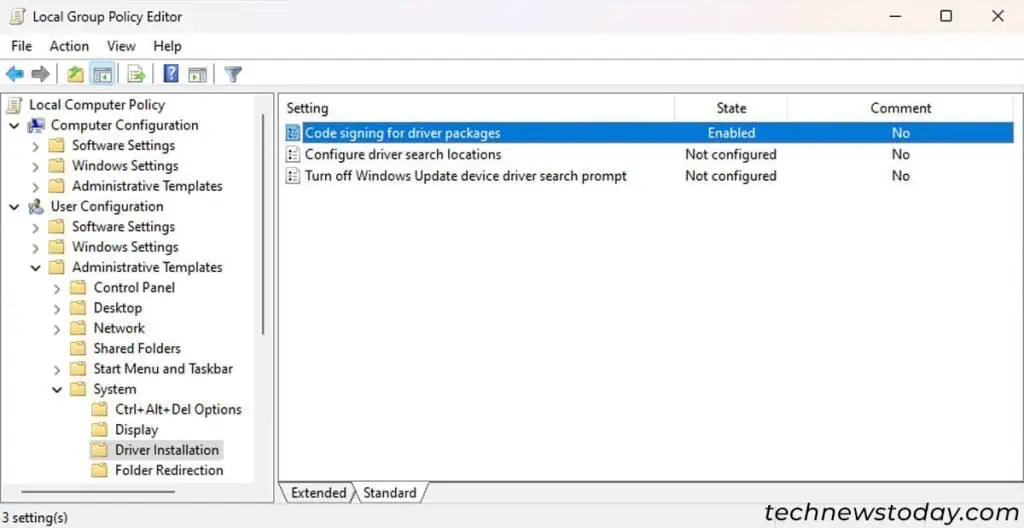
Windows also comes with a group policy setting to disable the code signing requirement for drivers. It is a user-specific policy, so it will only allow you to install unsigned drivers from within the particular user account.
Here’s what you need to do:
- Press Windows key + R to open Run.
- Type
gpedit.mscand press Enter. It will load the Local Group Policy Editor. - Go to User Configuration > Administrative templates > System > Driver installation.
- Double-click on Code signing for device drivers.
- Check Enabled and set the drop-down box under Options to Ignore. Click Apply and OK.
