Laptops use both the integrated GPU and dedicated GPU depending on the graphical workload. When you disable iGPU on a laptop, the system either switches to Microsoft’s basic display driver or runs entirely on the dedicated one, depending on your system configuration.
You can either disable the iGPU driver or completely disable iGPU from within the BIOS to stop the integrated graphics from operating. You can also disable it using your laptop’s companion applications.
If you want a specific application to use a certain GPU, you can do so, too, by setting a graphic preference.
And since the laptop uses both GPUs, I was curious about how the system would react when iGPU is disabled. So, I disabled iGPU from both the device manager and within BIOS and found some interesting results.
Using the BIOS
With the BIOS, you can also disable integrated GPU on a hardware level. This way, the OS will not even detect that the system has an integrated graphics card.
Note: Keep in mind that if you disable the integrated GPU, you’ll need an alternative graphics solution (such as a dedicated graphics card), or else your system cannot display.
Here is how to do it.
- Turn on the PC and repeatedly press the BIOS key to boot into the BIOS. Depending on your motherboard, the BIOS key could be the Delete key or one of the function keys.
- Once the PC boots into BIOS, you need to navigate it and find settings named Integrated graphics, iGPU, Graphics device, or Onboard graphics.
- Here is the location of the required settings in a few of the popular motherboard brands.
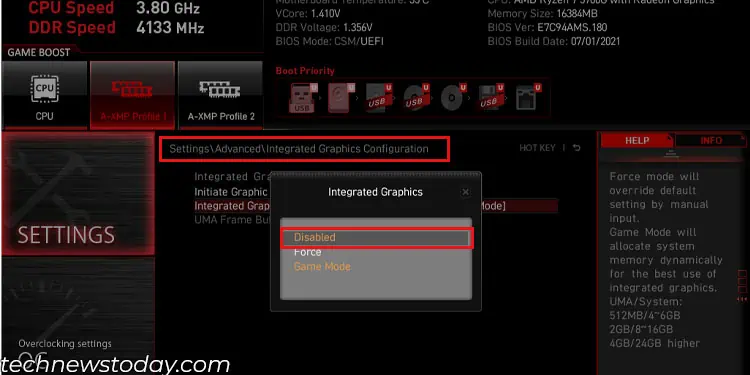
- For MSI BIOS: Settings > Advanced > Integrated Graphics Configuration > Integrated Graphics (Disable).

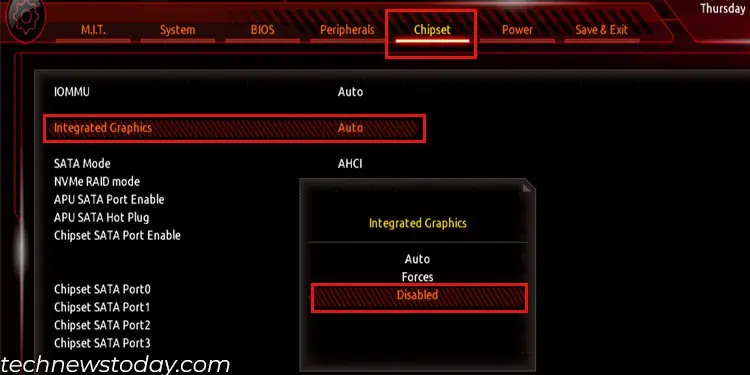
- For Gigabyte BIOS: Chipset > Integrated Graphics (Disable)

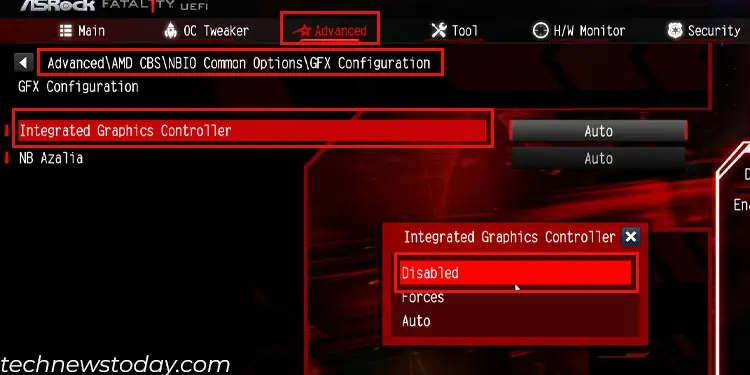
- For ASRock BIOS: Advanced > AMD CBS > NBIO Common Options > GFX Configuration > Integrated Graphics Controller (Disable).

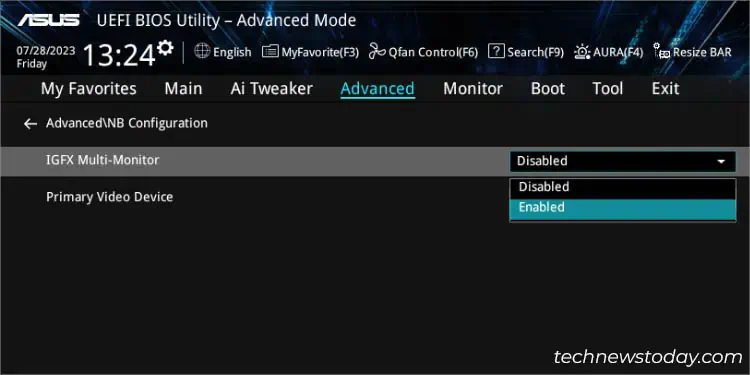
- For ASUS BIOS: Advanced > NB Configuration

- In some laptops, you might see a setting named Hybrid Support. Disable Hybrid Support to completely stop the OS from using the integrated GPU.
On desktop PCs with dedicated graphics cards, it does not matter if you enable or disable the iGPU as long as the display device is connected directly to the graphics card.
But if your monitor is connected to the motherboard equipped with a CPU that has an iGPU and you have disabled the iGPU, the system will not POST. The motherboard will turn on VGA lights as it cannot find any GPU.
On laptops, when Hybrid support is enabled, the OS simultaneously switches between the iGPU and the dGPU. This means the power-hungry dedicated GPU is not constantly on, and the battery will last longer.
But, if you disable the Hybrid support, the OS will only use the dedicated GPU. So, the laptop will draw maximum voltage. This means the battery drains a lot faster. This is why I do not recommend that you disable hybrid mode in the BIOS.
Disable Using Companion Application
Your laptop can easily switch between the GPUs if it has a Mux (Multiplexer) Switch. If you are using such a laptop, I recommend that you use its companion application to use just the discrete graphics card.
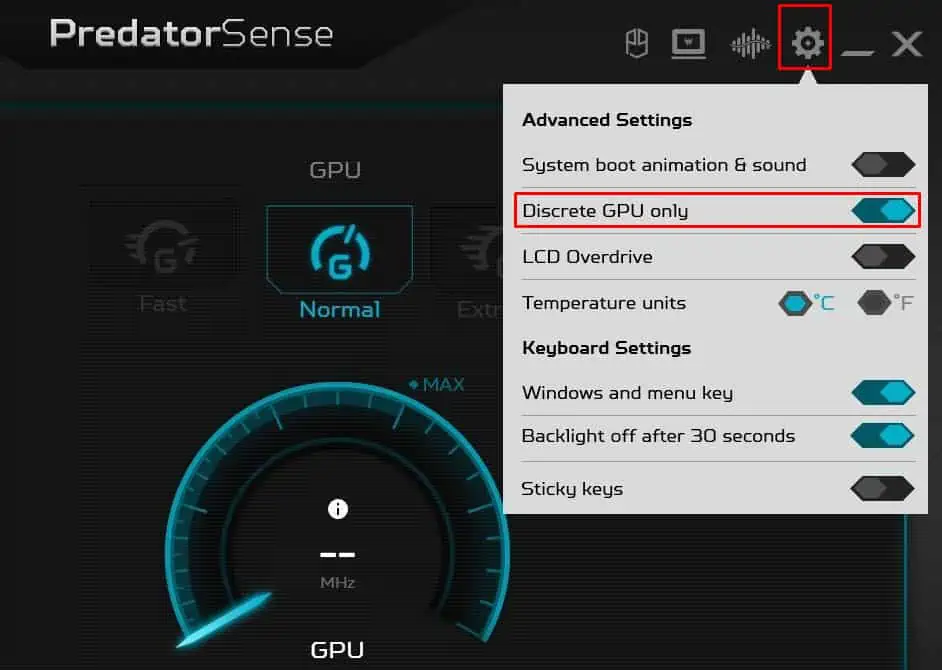
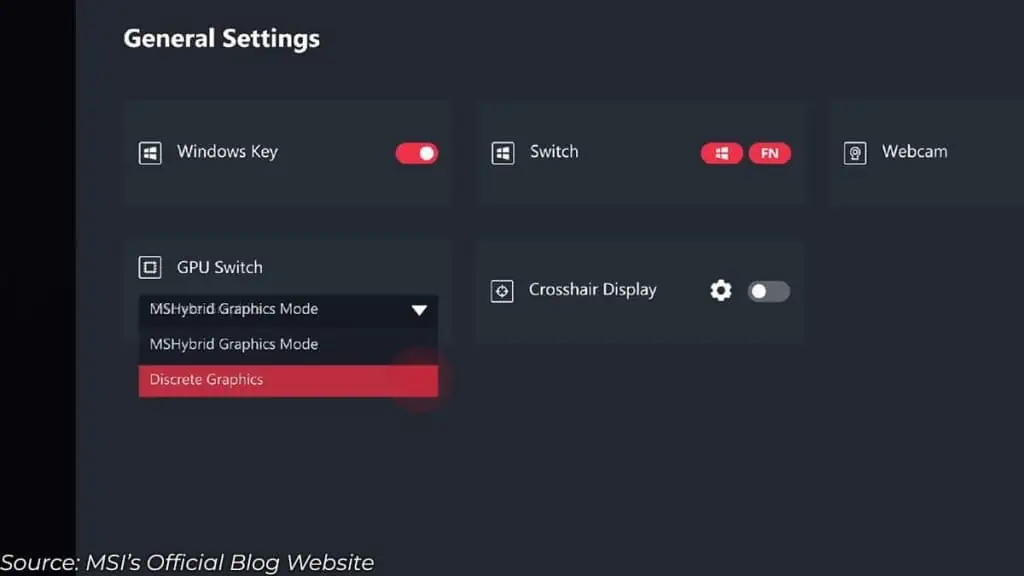
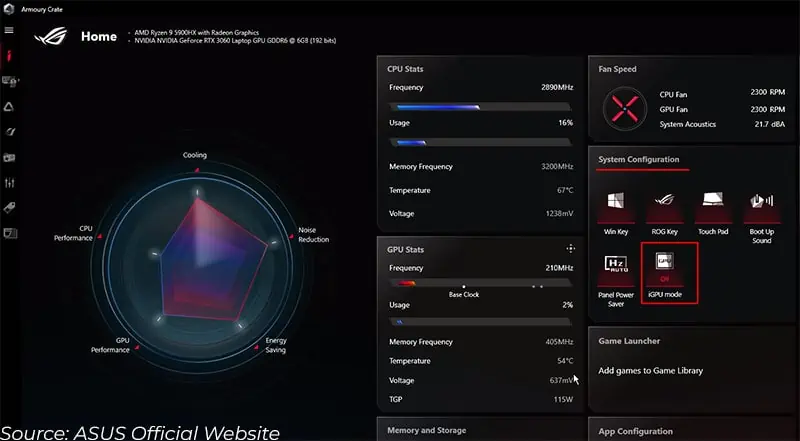
For MSI, the companion application is Dragon Center. PredatorSense or NitroSense is for Acer laptops. And finally, Armoury Crate is used by ASUS laptops.
For Acer Laptops,
- Open Nitro Sense or Predator Sense, depending on your laptop.
- Click on Settings.
- Here, enable Discrete GPU Only.

For MSI Laptops,
- Open MSI Dragon Center and select Features.
- Under General Settings, set GPU Switch to Discrete Graphics.

For ASUS Laptops,
- Open Armoury Crate.
- In the home screen, under System Configuration, you should see and option named iGPU mode.

- Toggle it to Off.
Once you disable the integrated graphics, make sure you restart the system.
Using Device Manager
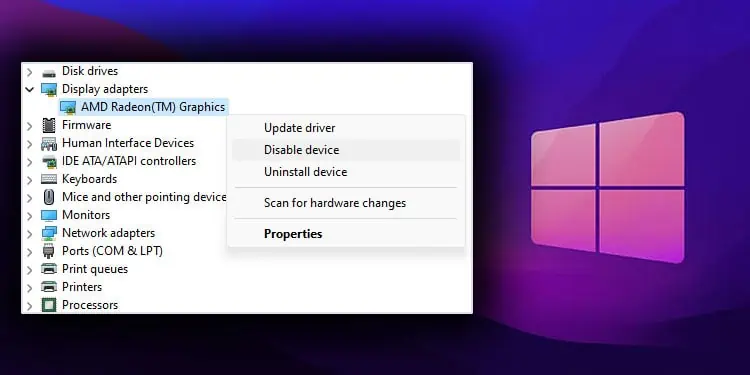
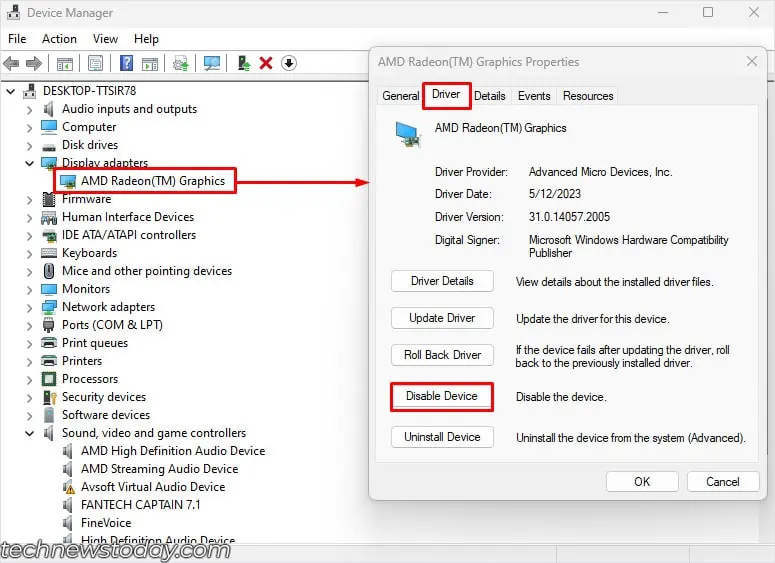
Any piece of hardware connected to the PC requires a driver to function. Disabling this driver means the OS has no way of communicating with the component. And this is exactly what we will be doing to disable the iGPU.
- Press the Windows + X key, then click on Device Manager.
- Double-click on your integrated graphics driver.
- Click on the Driver tab and select Disable Device.

- Click on Yes when it asks for confirmation.
For laptops, integrated GPU does basic graphical processing tasks, and dedicated GPU processes graphics-intensive data. So, even if you have a dedicated GPU, the OS will switch to Microsoft’s Basic Display Driver.
This means the screen will flicker as it switches to Microsoft’s Basic Display Adapter. Remember that your Windows experience will not be smooth when using the basic display adapter.
As for desktop PCs, you will not find an integrated graphics driver in Device Manager as long as the display device is connected to the graphics card.
But if you have an iGPU with the monitor connected to the motherboard, disabling its driver will cause the screen to flicker as the OS switches to Microsoft’s Basic Driver.
What I suggest is that you change your graphics preference depending on the application.
Change Graphics Preference
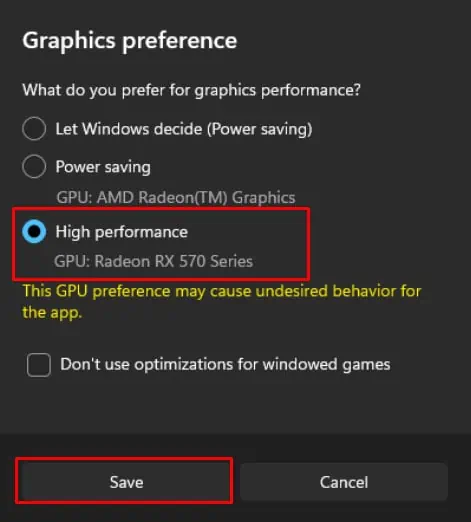
Changing graphics preference allows a specific application to use a GPU of the user’s choice, power saving, or High performance. You cannot change this option on a desktop, as the display device is only connected to one GPU, motherboard, or graphics card.
As for laptop users, setting this option to power saving will use the iGPU, and setting it to High performance will use the dedicated GPU.
To change the graphics preference on an application,
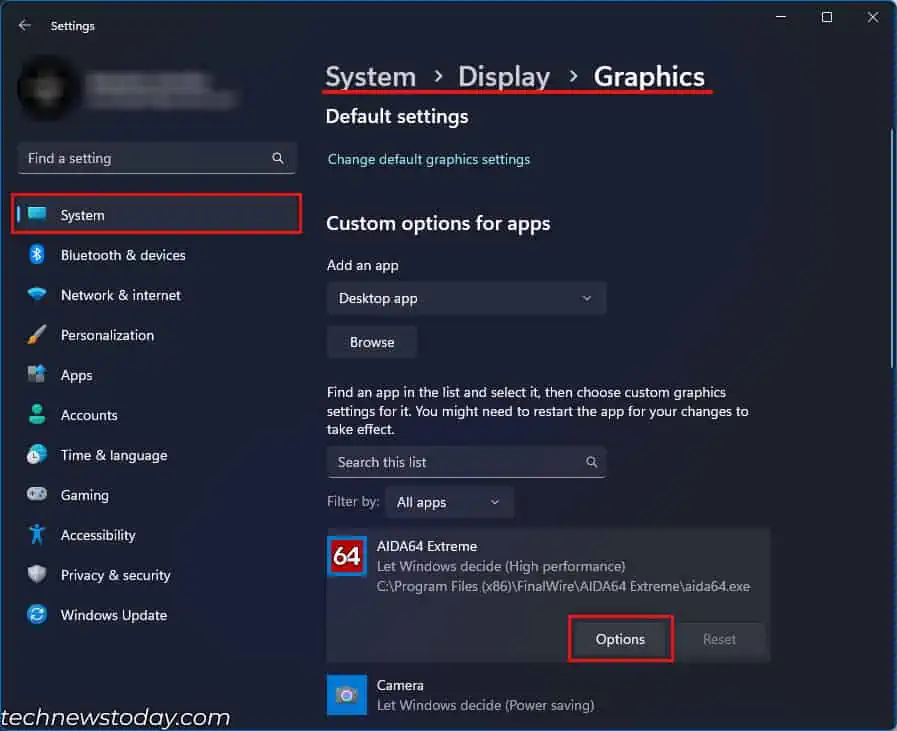
- Press the Windows + I key to open settings.
- Head over to System > Display > Graphics.
- Scroll down and select the application of your choice.
- Click on Option.

- Here, check High Performance and click on Save.

- Now, the application will only use the highest-performing GPU for this specific application.

