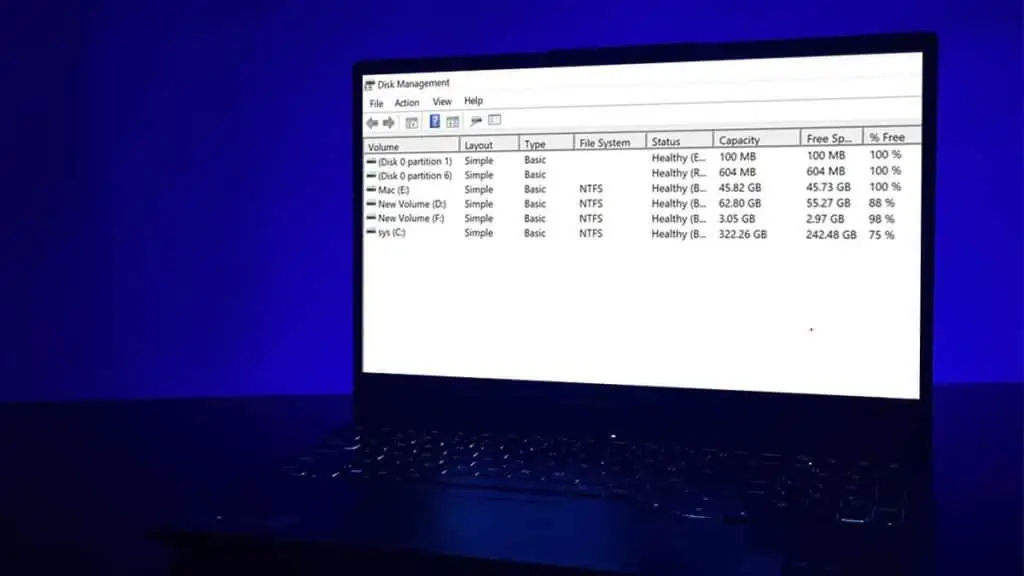
Disk Management is a built-in tool in Windows that primarily lets users manage storage drives in Windows 11.
It basically lets you split your storage drive into partitions. Additionally, it provides the option to extend and shrink the volume of a particular disk.
You can launch the Disk Management tool in a handful of ways. Here I will be showing you different ways to launch Disk Management in Windows 11.
Using Quick Access/Search Menu
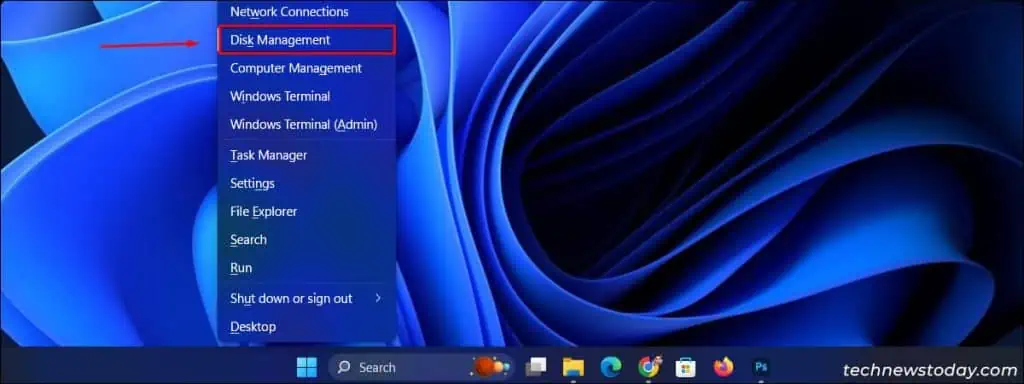
Right-click on your Start Menu icon or press Win + X to open the Quick Access menu. Now, select Disk Management from the list which will open the Disk Management utility tool.
Additionally, you can open the search menu by pressing Win + S. Now, search for “Create and format hard disk partitions” and click to open Disk Management Utility.

Via Run Command
Alternatively, you can also access the Disk Management utility tool through a Run command.
Press Win + R to open the Windows Run Prompt, enter the command diskmgmt.msc, and press Enter. This command will redirect you to the Disk Management tool.

Uses of Disk Management Utility Tool
From Shrinking/Extending disk volume to Managing disk partitions, there can be several uses of the Disk Management Tool. Listed below are some of the major uses of it.
To Initialize a New Disk
When you add a new disk to your system you will have to initialize it as it will not appear in the file explorer. Here’s how you can initialize it.
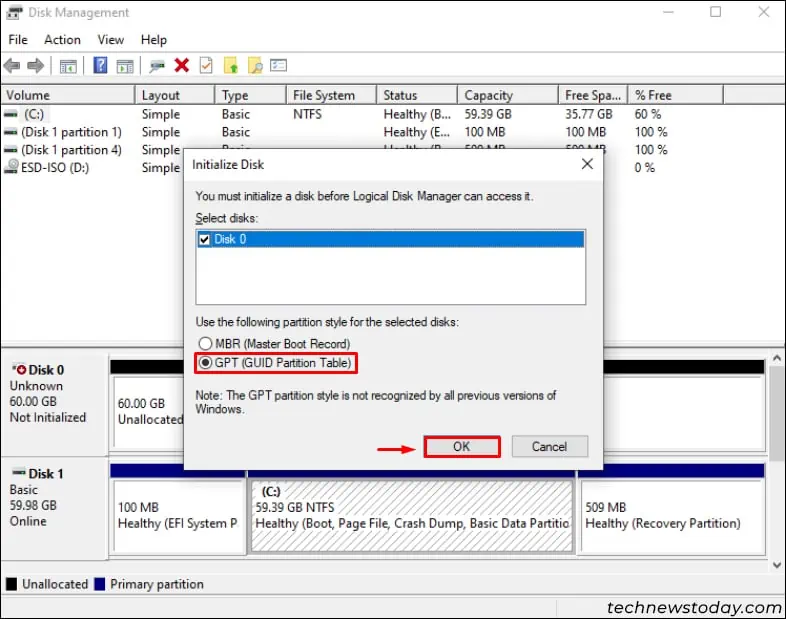
- Once you open Disk Management after initializing a new disk, a dialog box will appear to select Partition Style. Here, select MBR or GPT then click OK.

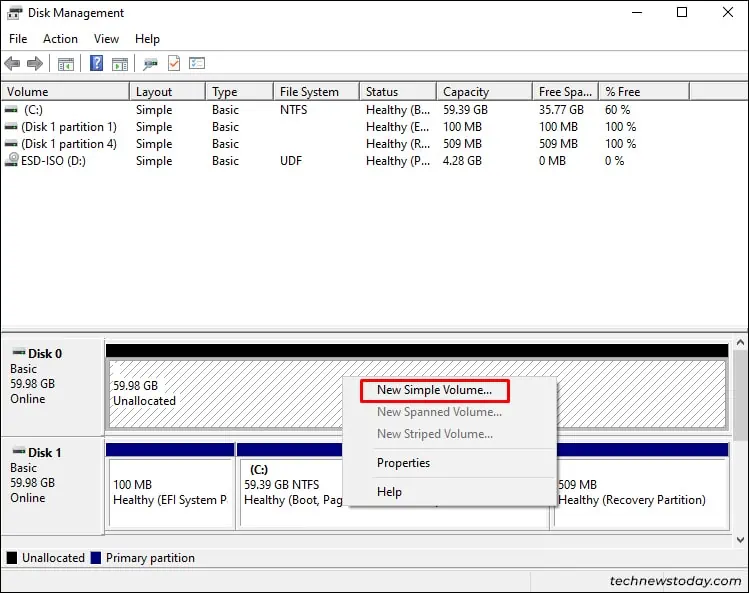
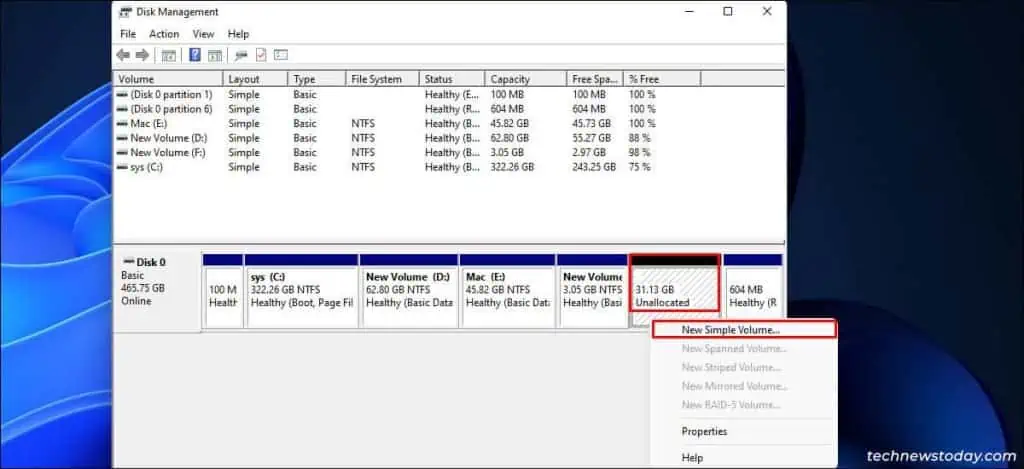
- Now, right-click on the unallocated space, select New Simple Volume, then follow the on-screen instructions.

To Change Drive Letter
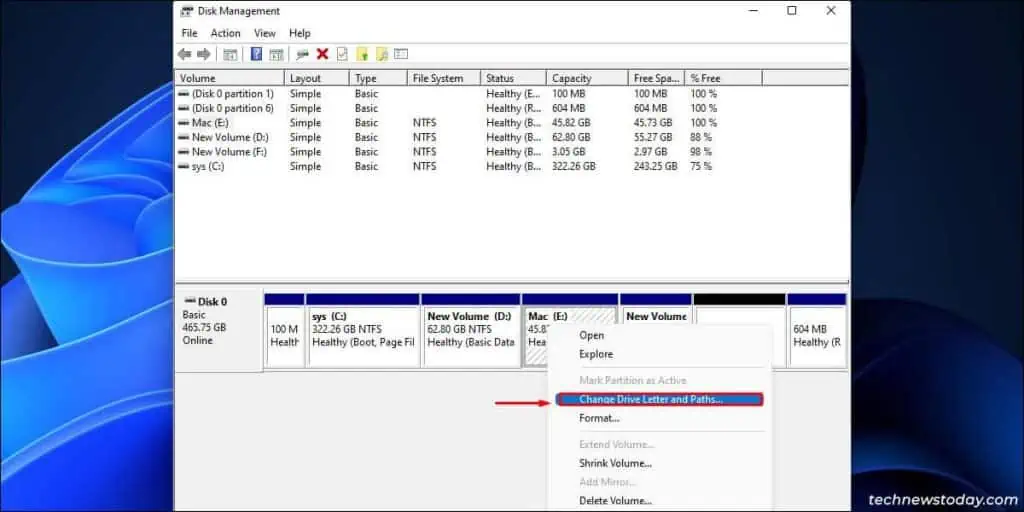
Changing the Drive Letter can be useful whenever you add or split a Drive. You can simply right-click on your desired drive on the Disk Management Tool and select the Change Driver letter and paths option to rename it.
To Format Drives
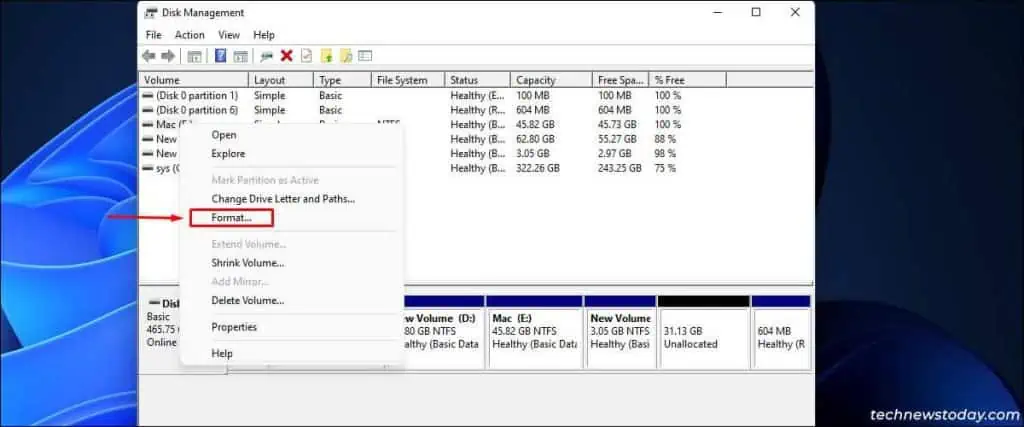
Inside the Disk Management Tool, right-click on the drive you want to format. Now, click on the Format option from the menu. Make sure to backup your data before formatting your SSD or HDD so that no data is lost.
To Partition Hard Disk
The Disk Management tool can be used to partition both SSD and hard disk drives. Partitioning your drive can enhance performance as well as separate system files from personal files.
Before you begin, keep in mind that you will have to shrink the volume of an existing drive before partitioning it. Also, note that you can only shrink the volume of a drive with the NTFS file system.
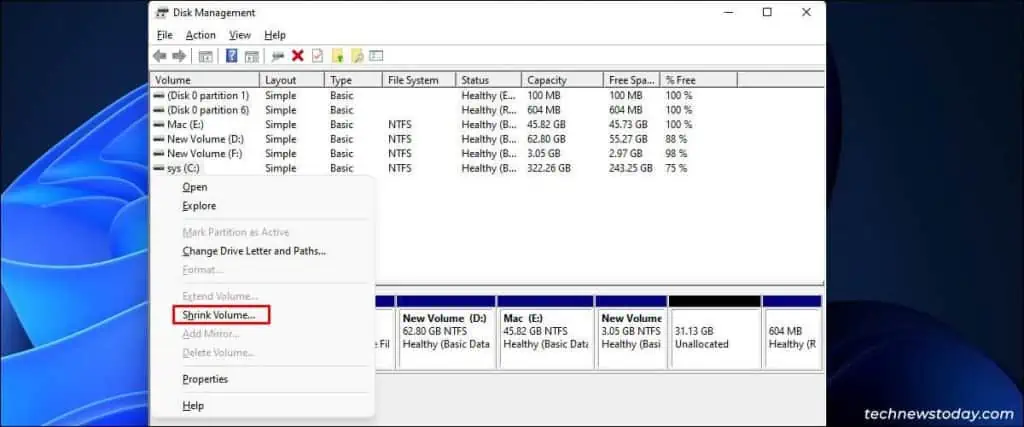
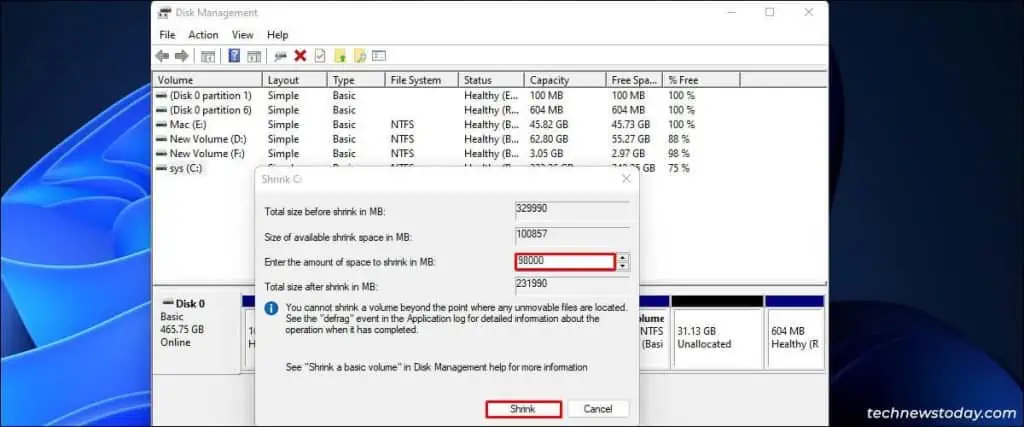
- Firstly, right-click on a drive and click on Shrink Volume.

- Now, enter the amount of space to shrink from the drive with reference to the available shrink space.

- Lastly, right-click on the New Unlocated Space > New Simple Volume and follow the on-screen instructions to finalize the partition.

OS RAID Setup
There are multiple types of OS RAID setup and it works depending on your configuration.
It uses various storage drives and creates a sole workable storage system. To conclude, its end goal is to achieve better performance on your storage drives.
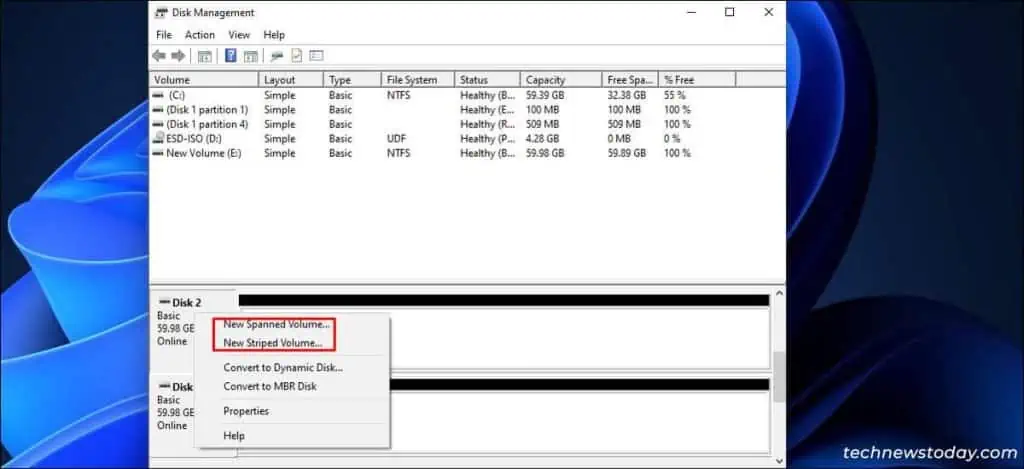
- Spanned Volume: In a multiple-disk system, allows you to use space more efficiently by combining unallocated space from multiple-disk to one logical volume.
- Striped Volume: It uses RAID 0 to strip data across multiple disks. It is created by combining free space from two or more disks into one logical volume.
- Mirrored Volume: It duplicates the data and stores it on separate disks. If data from one disk fails, the system will continue to operate using the mirrored data from another disk.

