Whether you’re just trying out a new operating system or need both Windows and Linux for work/personal reasons, dual-booting makes things very convenient.
Right off the bat, we’re going to assume a couple of things. First, as Windows 11 is generally the primary OS in a dual boot setup, this article assumes Windows 11 is already installed, and you’re trying to install Linux on top of that.
Second, we’re installing Ubuntu for tutorial purposes, but you’re free to choose your preferred Linux distribution as the steps will apply to most of them.
With that said, you’ll find the prerequisites and all the necessary steps to dual boot Windows 11 and Linux in the article below.
- Approximately 40 GB+ Disk Space
- Linux Distro ISO (Ubuntu in our case)
- 4 GB or higher capacity USB Stick
Create Bootable Media
First things first, you’ll need to create a bootable Linux USB. We recommend using Rufus for this task, but you can use other alternatives if you prefer. Here are the necessary steps:
- Download Rufus if you haven’t already, then launch it.
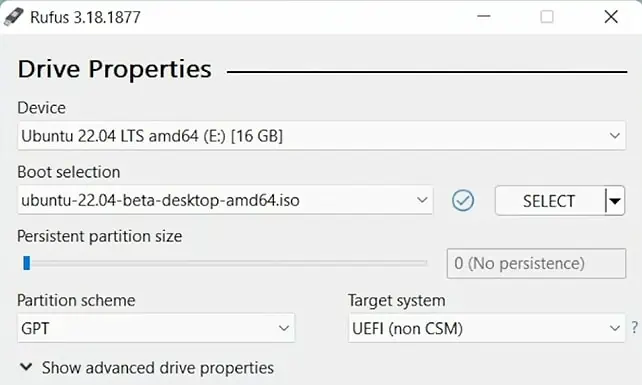
- Select the USB in the device section.
- Click on the SELECT button and import the Linux ISO.

- Select GPT (partition scheme) and UEFI (target system).
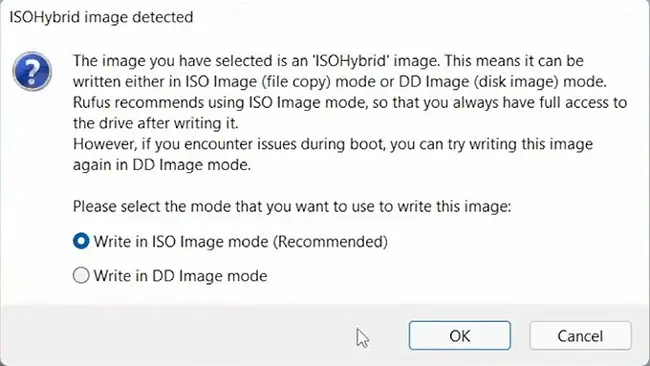
- Press the START button, select Write in ISO Image mode, and press OK.

Get Things Ready
While the bootable drive is being created, you can free up some space for the Linux partition. Once that’s done, you’ll set up your PC to boot from the USB. Here are the steps to do so:
- Press Win + X and select Disk Management.
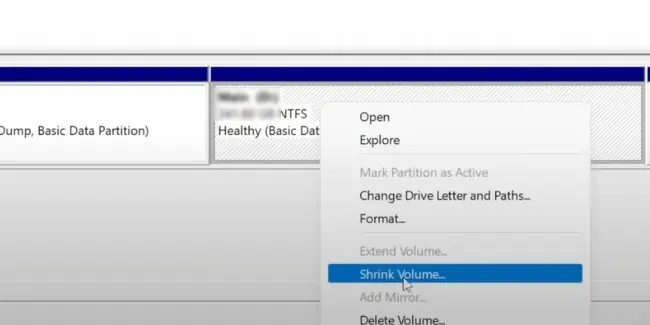
- Right-click the partition to free up the space from, select Shrink Volume, and select the capacity.

Alternatively, if you have an empty partition that you’d like to use for this, you can right-click it and select Delete Volume instead. - Once 40+ GBs of space is unallocated, restart the PC.
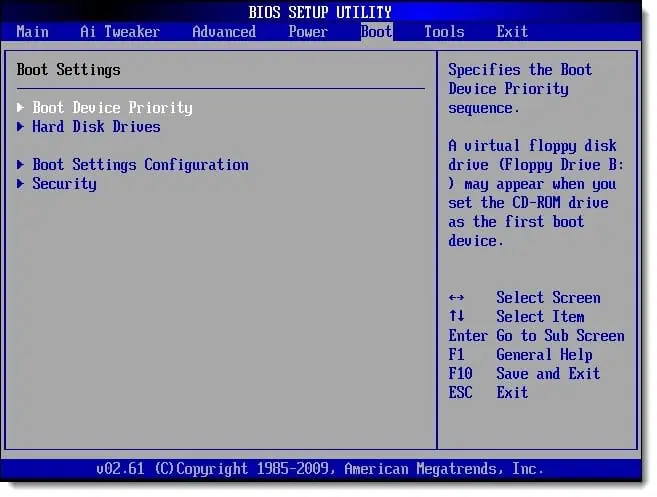
- Press the BIOS Key (Fn keys or Del) at boot to access the BIOS Setup Utility.
- Locate the Boot Order Priority section and move the USB to the top of the list to boot from it.

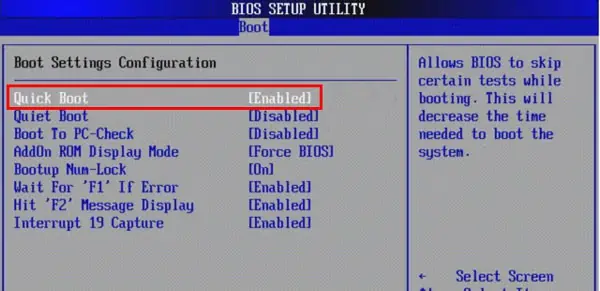
- Next, locate the Fast Boot setting and disable it. Depending on the distro, you may also need to disable Secure boot.

- Press the Save and Exit button shown on the screen (usually F10).
- After exiting the BIOS on some systems, you may also have to manually select the USB and Ubuntu to boot to it.
Install Linux
After exiting the BIOS, you should boot to the Setup Wizard. Going forward, the setup process is very simple. Here are the necessary steps:
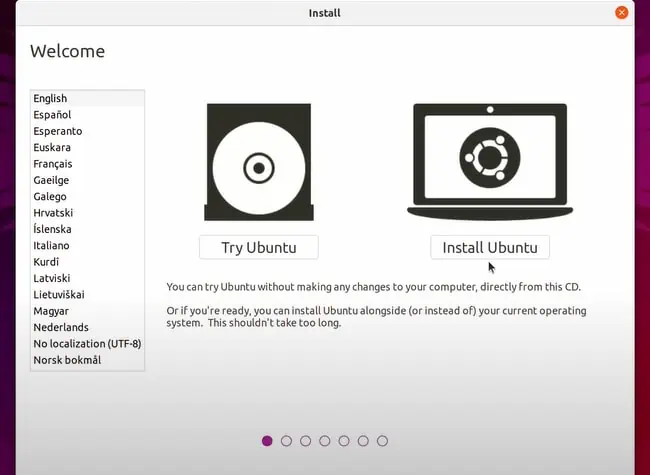
- Select the language and click on the Install Ubuntu button.

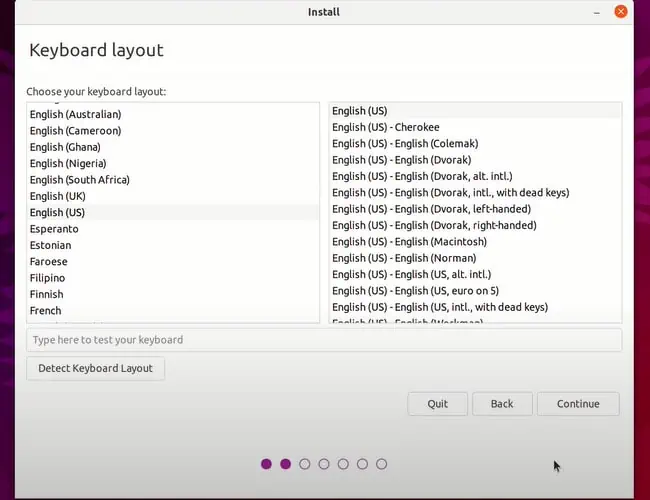
- Pick a keyboard layout and press Continue.

- Select the Connect to this network option. This will allow you to install additional software and updates during the installation.
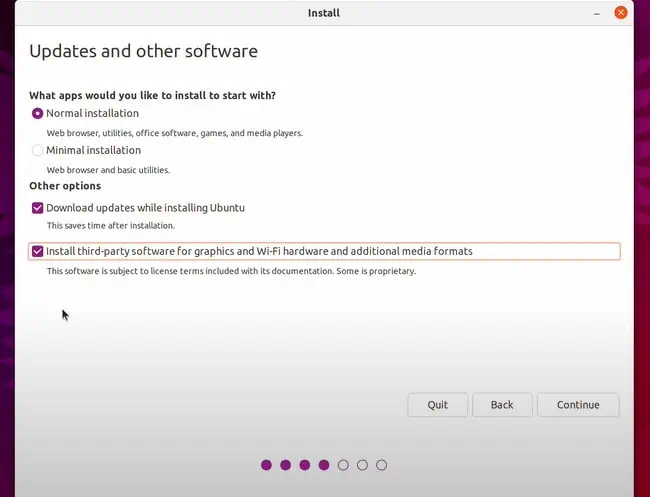
- Select Normal Installation and enable the Install third-party software… option.

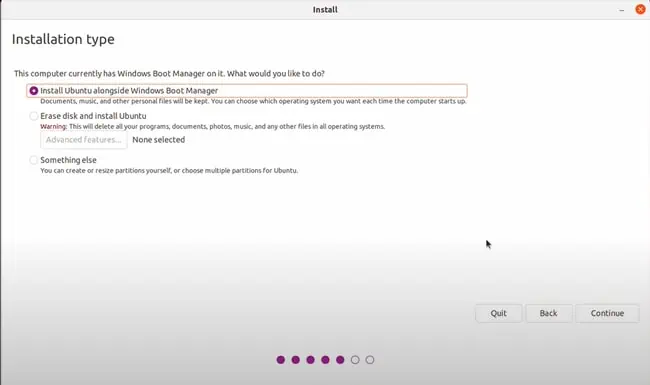
- If you’re ok with a single partition for Linux, select the Install Ubuntu alongside Windows Boot Manager option. Manage the disk space allocation for Windows and Linux here and skip ahead to Step 11.
Otherwise, to configure the partitions yourself, select Something else instead and press Continue.
- Select the free space and press Add (+).
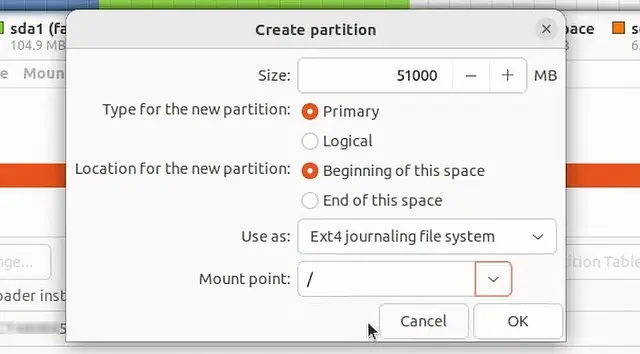
- Allocate space for the root directory in the size field. Select Primary, Ext4 journaling, and select / as the Mount Point.

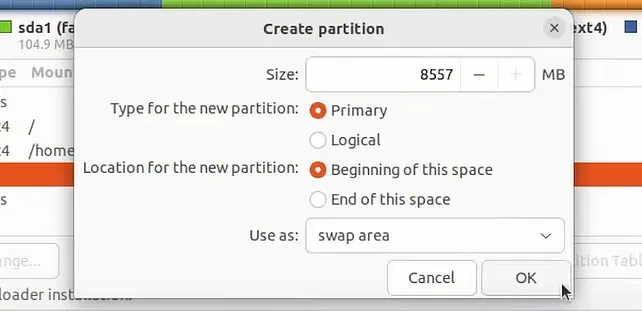
- Next, select the free space and press Add again. We recommend allocating We recommend allocating the same amount as your RAM, or 1.5/2 times the RAM.

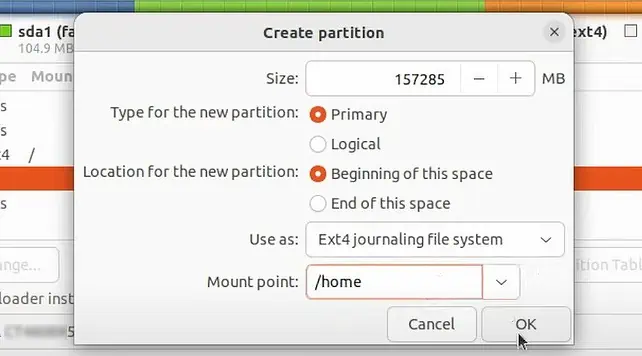
- Finally, select the free space and press Add. Allocate the remaining space to the home partition. Select Primary, Ext4 journaling, and /home as the mount point.

- Click on Install now, accept any prompts, and press Continue.
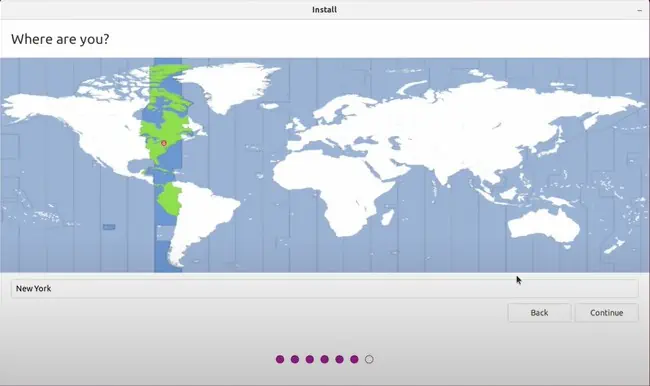
- Select the time zone and press Continue.

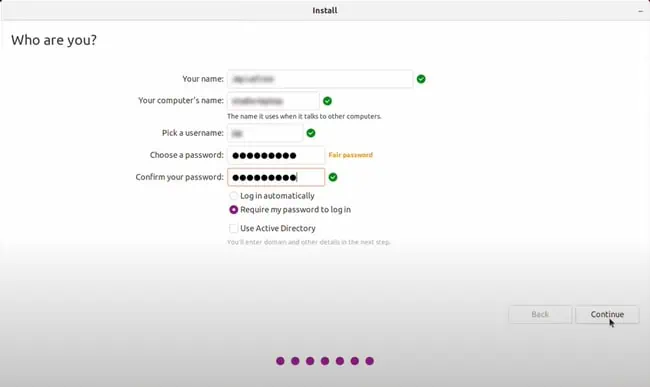
- Set up your user account details and press Continue.

- The installation process will take around 10 – 20 minutes. Once it’s complete, press the Restart Now button.
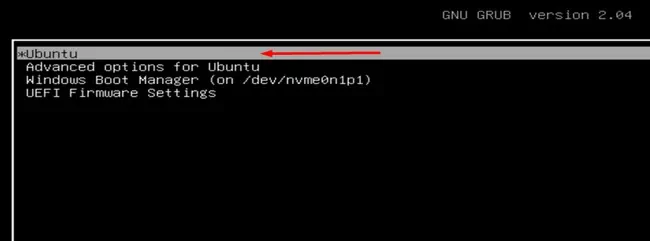
- Disconnect the USB and select Ubuntu in the GNU GRUB.


