Trusted Platform Module (TPM) is a cryptographic module that adds hardware-based security benefits to a system. It restricts unauthorized access to your data, particularly from vectors like brute-force attacks.
Historically, TPM used to be implemented through a dedicated chip on the motherboard. On modern boards, manufacturers tend to integrate TPM into the chipset and implement it as a firmware-based solution rather than a discrete chip.
In either case, you can enable the Firmware TPM (fTPM) on ASRock motherboards from your firmware interface. The steps will vary slightly between Intel and AMD processors.
Why Should You Enable TPM
A major reason why TPM has suddenly become a mainstream concern is that TPM 2.0 is one of the minimum requirements for Windows 11. While there are ways to bypass this requirement, officially you can’t install Windows 11 without enabling TPM 2.0.
Besides this, it’s just a good idea to enable TPM for its security benefits. Some of the ones relevant to the end-user include:
Measured Boot
TPM can create and store a hash key summary of your system configuration. Anti-malware software can use TPM’s log of boot components to determine whether this hash matches or not for each boot. If a system has been tampered with, the measurement won’t match and the system won’t boot to protect your data.
Some examples of tampering include malware, brute-force attacks, remote access attempt from an unauthorized source, or simply moving the HDD to a different system (usually done to bypass password protection at log-in).
BitLocker Drive Encryption
BitLocker encrypts the OS volume so that even if the volume is mounted to a different system to bypass protection methods, your data still remains secure. BitLocker works with TPM to ensure you can only access the data if system integrity is verified (through measured boot).
Dictionary Attack Protection
Keys protected by TPM can use an authorization value like a PIN. TPM can limit the number of attempts to determine the PIN in a more secure manner compared to software solutions.
Windows Hello
Windows Hello replaces passwords with other authentication methods like encrypted keys. Protecting these keys with TPM is more secure compared to software-based techniques.
Enabling TPM On ASRock Intel Boards
As mentioned earlier, TPM is configured through your firmware interface. Here are the necessary steps if you’re using an Intel processor:
- Power on your PC and press F2 or Del to enter BIOS Setup.
- In the Security tab, set Intel Platform Trust Technology to Enabled.

- Switch to the Exit tab and select Save changes and exit.

Enabling TPM On ASRock AMD Boards
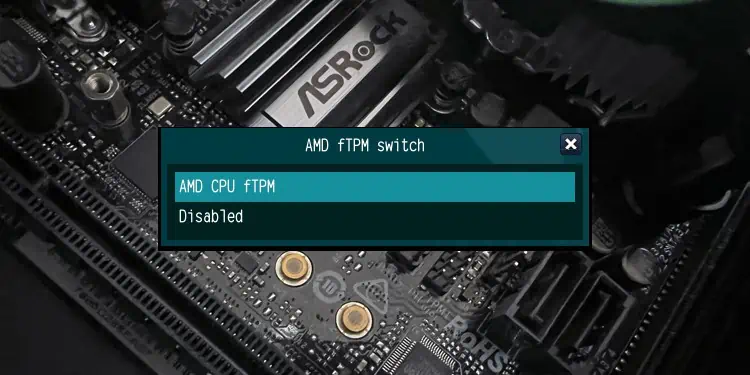
The process is mostly the same for AMD processors as well. You access the BIOS/UEFI interface and configure it as shown below:
- Power on your PC and press F2 or Del to enter BIOS Setup.
- Switch to the Advanced tab and select CPU Configuration.

- Set AMD fTPM Switch to AMD CPU fTPM and press Enter.

- Switch to the Exit tab and select Save changes and exit.

Verifying TPM Status
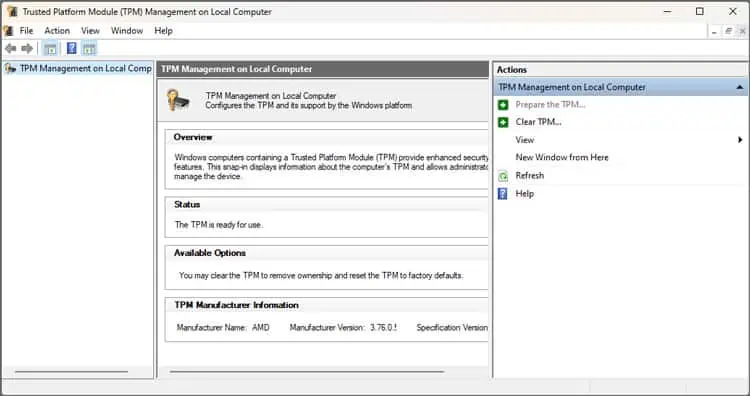
After saving the changes and exiting, the PC should reboot. You can now verify that you successfully enabled TPM from its Microsoft Management Console.
Press Win + R, type tpm.msc, and press Enter. You should see the “TPM is ready for use” message in the Status section.

At this point, you can start using various TPM-supplemented security features like BitLocker or Windows Hello. It’s worth noting that you can perform tasks like clearing the TPM from the console.
In case you still see the “Compatible TPM cannot be found” message, there are two possibilities. You might’ve exited the BIOS without saving the changes properly. Or, the TPM device may not be detected, in which case you can refer to the linked guide on how to proceed further.


