The TPM feature on ASUS motherboards provides advanced security features, such as Bitlocker Encryption, Windows Hello, fingerprint/face recognition, and more.
Whether you’re using hardware or firmware-level TPM, you can enable the option easily from the ASUS BIOS. Find fTPM (on AMD boards) or PCH-FW Configuration (on Intel boards) in the Advanced tab and set the switch to Enabled.
Despite simple toggling, you may still encounter unexpected TPM errors–a situation that I recall when attempting to install Windows 11 myself. Even though my ASUS motherboard supported the specified TPM 2.0 feature, I had to enable the ‘Security Device Support’ first.
For users experiencing a similar problem, this guide covers everything from configuring TPM settings to enabling the 2.0 version.
Access UEFI BIOS Utility
Let’s begin the process by getting to the ASUS UEFI/BIOS screen. This involves using the appropriate key before the POST is completed and switching from EZ to Advanced mode (if required):
- First of all, start or restart your PC.
- During the startup process, press Del or F2 to enter BIOS. In most ASUS models, it should be F2. But as far as I have tested, both should work.

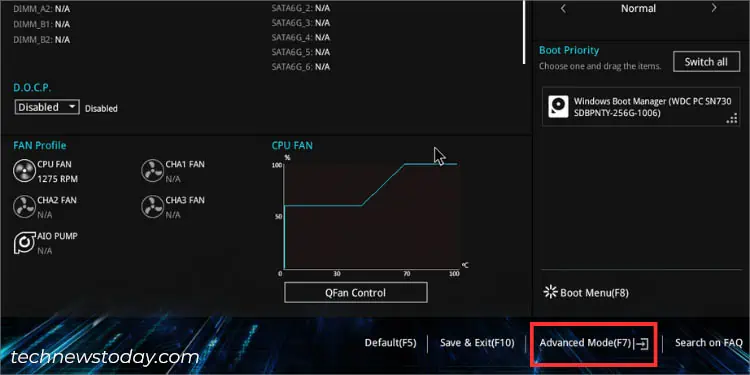
- In some ASUS boards, you’re directed to the Advanced mode. However, users who are in the EZ Mode can use F7 to quickly switch to it.

Enable Firmware TPM
While the UEFI interface of both the Intel and AMD motherboards is identical, there are certain processor-specific options. That being said, the steps for configuring TPM vary slightly but the general concept remains the same.
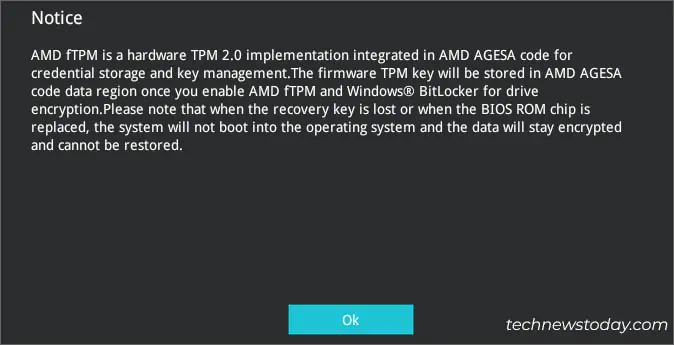
Caution: Enabling the fTPM or PCH-FW options might lead to booting issues in case you lose the recovery key (for users who have implemented BitLocker for drive encryption) or even after the BIOS chip replacement.
For ASUS AMD Motherboards
The security protocol on ASUS AMD BIOS is referred to as fTPM. Once you have entered the ASUS BIOS Utility, follow the step-by-step instructions below to enable this option.
To demonstrate, I have used the PRIME B450 PLUS motherboard. While the process is almost the same in all the AMD models, you may find contrasting field names on every series, which should still not be confusing.
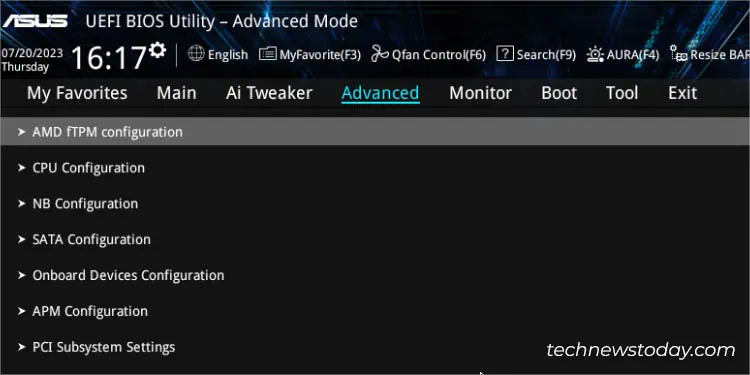
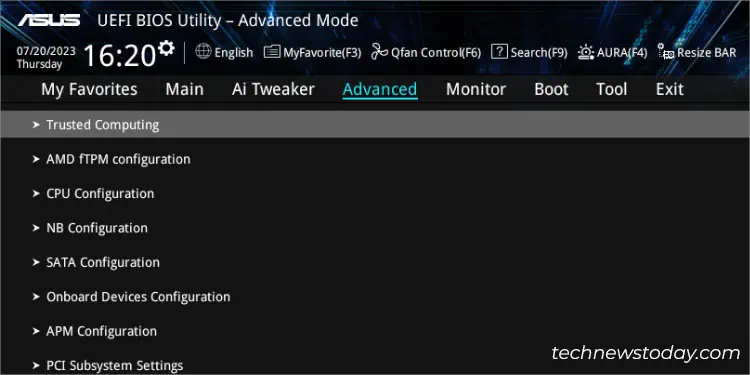
- Navigate to the Advanced section.
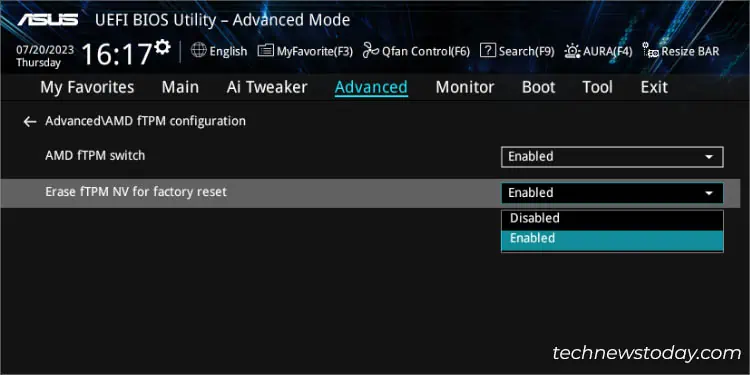
- Select AMD fTPM configuration.

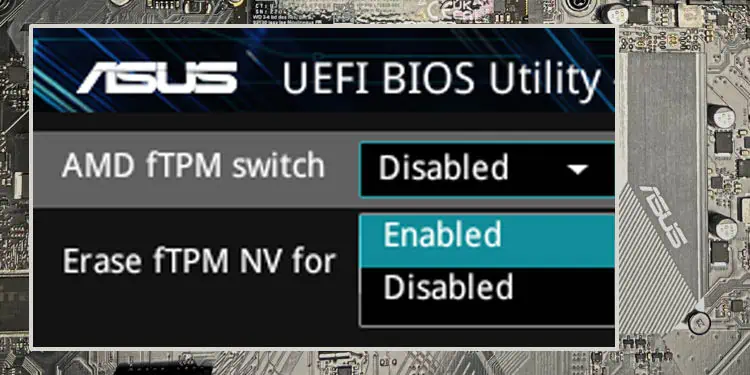
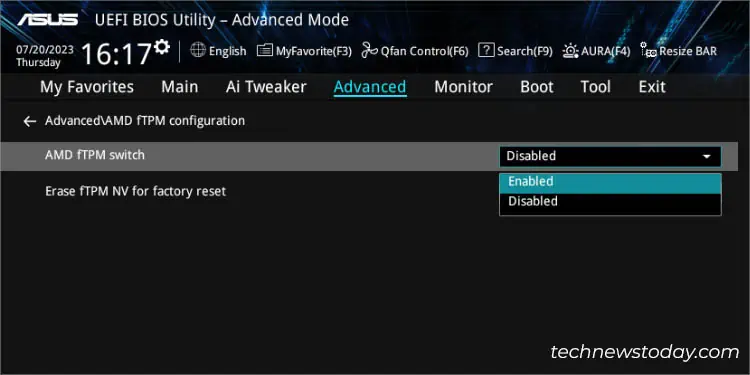
- Expand AMD fTPM switch and select Enabled from the drop-down. In case your motherboard supports both discrete and firmware TPM, you should have the option to pick one from the list.

- In case you get a notice claiming boot-related issues if understanding the risk, hit Ok.

- If you want to clear the fTPM record and start with fresh values when replacing the CPU, I recommend setting the Erase fTPM NV for the factory reset option to Enabled.

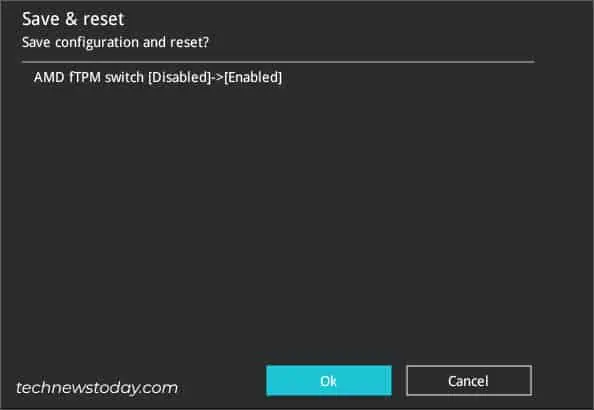
Note that keeping it disabled will load the same record and won’t allow you to boot into the OS. - Now, press F10 to save the configuration and exit from BIOS.

For ASUS Intel Motherboards
On the flip side, Intel provides its own version called Platform Trust Technology (PTT). As stated above, the configuration might slightly be different from the ASUS AMD BIOS:
- Get to the Advanced tab.
- Look for PCH-FW Configuration and select it.
- In the new configuration screen, expand the PTT drop-down and choose Enable from the list.
- Next, press Ok in the warning notice.
- Save your current setting and exit.
Additional Tip: In case the PCH-FW Configuration option is unavailable, try disabling the CSM, save the setting, and check for it again.
Verify in Windows TPM Management
Once you have applied the TPM settings, you should be able to use BitLocker drive encryption, Windows Hello, and other advanced security features.
But sometimes, the feature remains disabled in the Windows TPM Management console and you might meet with the “Compatible TPM cannot be found” error. So, it’s a good idea to verify this before proceeding to install Windows 11 or tweak the related TPM settings:
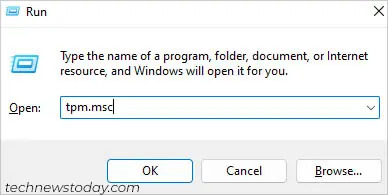
- Open the Run utility (using the Windows + R shortcut should do).
- Type
tpm.mscand press Ok.
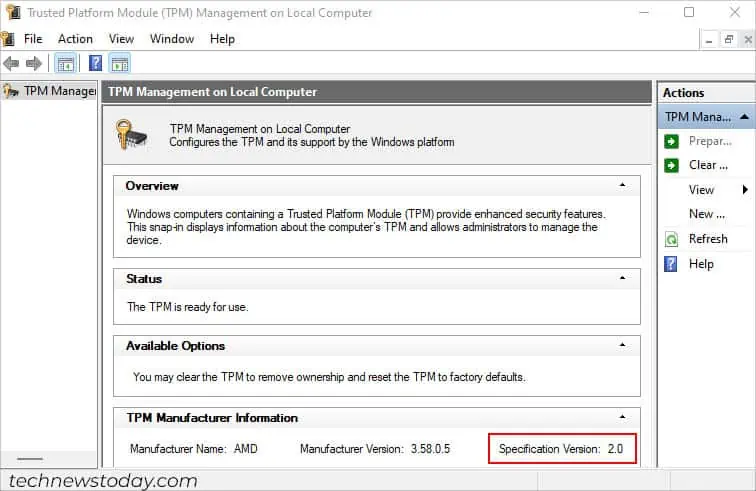
- Once the TPM Management on Local Computer window opens up, you’ll notice that the Status reads “The TPM is ready to use”.
- Also, verify the Specific Version field under TPM Manufacturer Information.

I understand your frustration on why your Windows is unable to detect the TPM even after following the right instructions.
You do not have to scratch your head. Although the TPM is already enabled, it still requires a slight modification in the firmware settings.
As per the minimum system requirements, you must have TPM 2.0 enabled during the upgrade, which we haven’t configured yet.
Enable Security Device Support
In general, turning on the TPM should also enable Security Device Support. But when I checked this on my PRIME B450 PLUS motherboard, the option remained disabled. This could be the same case for you as well.
Only after the Security Device Support feature is set, you can make additional changes to your TPM settings. Let me guide you in the quickest way possible:
- Reboot your computer to get to the ASUS BIOS interface again.
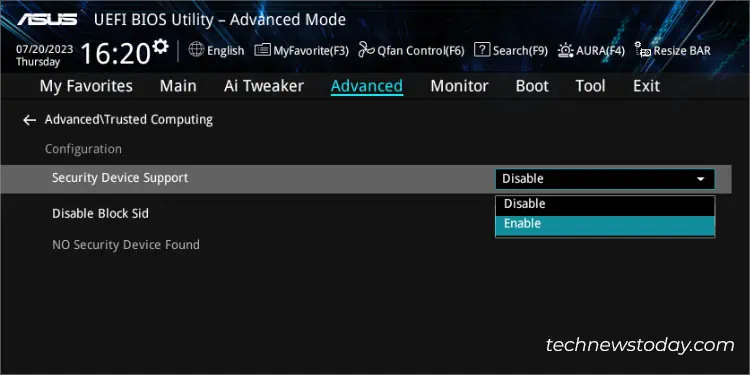
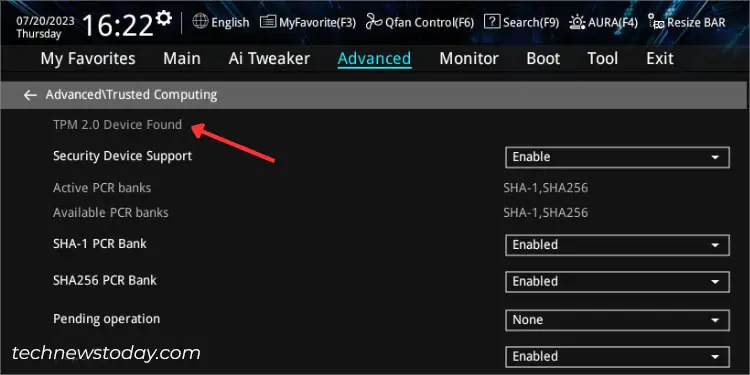
- Switch to the Advanced section and select the ‘Trusted Computing’ platform, which was unavailable when the fTPM was disabled.

- Then, enable the Security Device Support option as demonstrated below:

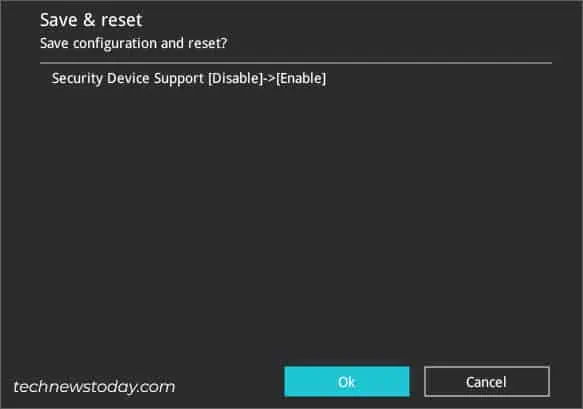
- Hit F10 to save the changes and exit from the BIOS screen.

- Once your computer boots up, open the TPM Management console, and the “Compatible TPM cannot be found” error should be resolved.
- Also, check the Specification Version field. If it’s showing 1.2, you can proceed to the next step to enable TPM 2.0.
Set TPM Version
Usually, ASUS motherboards supporting TPM 2.0 should be automatically configured after enabling Security Device Support. However, if yours is set to 1.2, here’s how you can switch to the latest version to achieve enhanced security.
- Get to the UEFI screen again and go to Advanced > Trusted Computing.
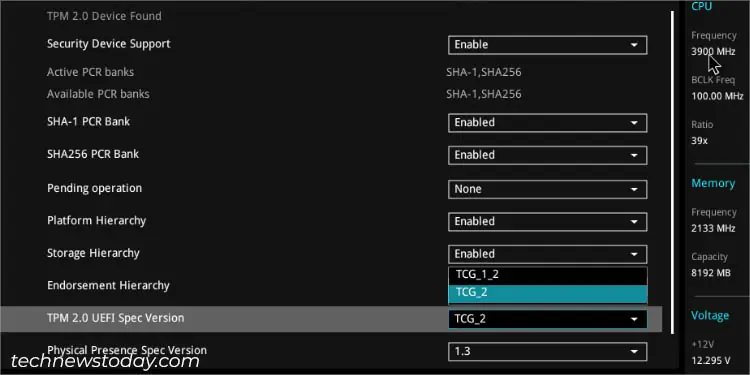
- You’ll now notice a list of more options added. Also, at the top, you should get the ‘TPM 2.0 device found’ message. This indicates that your ASUS motherboard supports TPM 2.0.

- Once that’s confirmed, get to the TPM 2.0 UEFI Spec Version and upgrade it to TCG_2. For earlier Windows versions (say, Windows 8), it’s fine to settle for TCG_1_2.

- Save the changes and exit. Now, you can access all the TPM security features and even proceed with upgrading to Windows 11.
If you do not find the TPM 2.0 or TCG_2 option, know that your motherboard doesn’t support it. Nonetheless, you can still bypass the requirement to install Windows 11, which is, however, unsafe and not recommended by Microsoft.

