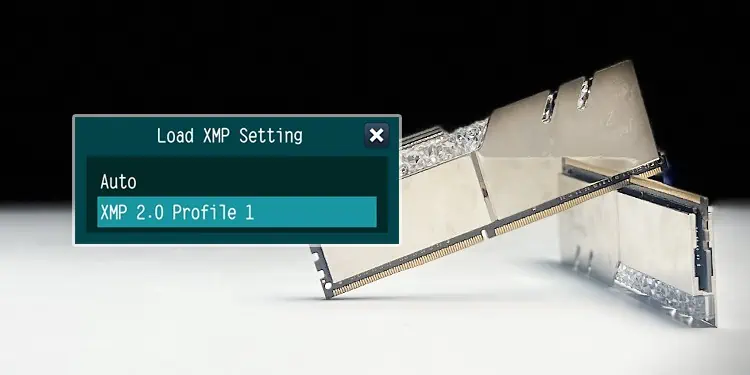
Enabling XMP (Extreme Memory Profile) allows you to easily get the best out of your RAM.
Normally, RAMs run at the default speed or frequency according to the JEDEC specifications. However, the maximum safe and stable frequency for any RAM is way higher.
By enabling the right XMP profile in your BIOS, you can effortlessly run your RAM at faster speeds without tedious manual tweaking.
- Ensure your motherboard supports Intel Extreme Memory Profile (XMP) or AMD Extended Profiles for Overclocking (EXPO).
- Enabling XMP might void your CPU warranty according to Intel and AMD warranty policies.
- To enable XMP, enter your motherboard’s BIOS menu on startup. Look for the XMP, DOCP, or A-XMP setting and enable the first profile. Save changes and exit BIOS. Your RAM should now run at its rated speed
The exact steps to enable XMP depends on the motherboard but the steps are generally similar. I will be using the following components to give you a practical example so that you can follow along.
- Motherboard: ASRock Z370M-ITx/ac
- RAM: Crucial RAM 8GB DDR4 3200MHz
- CPU: Intel Core i3-8100
Check Support for XMP
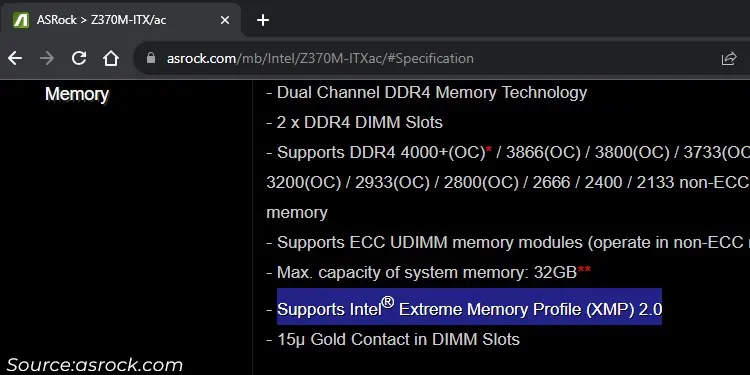
First, check if your Motherboard comes with Memory Profile support by looking into its Memory specifications. It should say something like “Supports Intel Extreme Memory Profile (XMP) 2.0” or “Supports AMD Extended Profiles for Overclocking (EXPO)” or “Supports Extreme Memory Profile (XMP).”
If we look into the Z370M-ITx/ac’s support page, you can see that it supports Intel Extreme Memory Profile (XMP) 2.0
Also, while modern RAMs do support XMP, it’s better to check your RAM’s specifications anyway. Some older RAMs do not include any XMP profile on their Serial Presence Detect (SPD) chip. Make sure to note down the highest frequency supported by the RAM while you’re at it.
Then, check your CPU’s specification to know its maximum theoretical support for the RAM frequency. However, do note that it may not represent the frequency limit on your system.
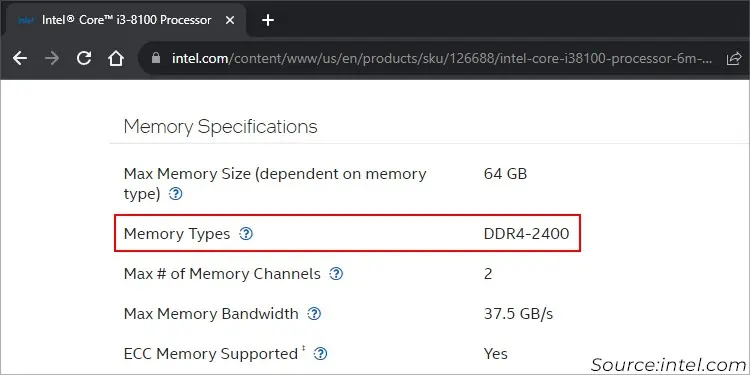
While testing out XMP on different systems, I discovered that some CPUs could support even a higher-than-rated frequency while some didn’t. This happened even for separate CPUs of the same model.
As you’ll see later, I could use 3200MHz XMP on my RAM even though Intel displays support for only 2400 MHz RAM frequency.
It might be because the tolerance range during the manufacturing process caused some hardware differences or the CPU manufacturer didn’t test with higher frequency RAM. So take the CPU’s theoretical supported RAM frequency as a baseline but don’t overly rely on it until you test it out yourself.
Get to BIOS
The option to enable XMP lies in your motherboard’s BIOS, so get to it first. The easiest way to do so is by pressing the BIOS key when the computer is starting up and you see the motherboard manufacturer’s logo.
I actually recommend repeatedly pressing the key as soon as you restart or power up your computer to not miss the timing.

The BIOS key for my ASRock motherboard is Del or F2. For some other motherboards, the keys are:
| Manufacturer | BIOS Keys |
| ASUS | Del, F2, F9 |
| Gigabyte | Del, F2 |
| MSI | Del, Delete |
You can also get to the Advanced Startup options and select Troubleshoot > Advanced options > UEFI Firmware Settings > Restart to boot to the BIOS/UEFI. This method is especially useful if the BIOS doesn’t show up when you use the BIOS key.
Enable XMP on BIOS/UEFI
XMP is an Intel technology, but you will find memory profiles even in AMD motherboard BIOS. Most AMD motherboards show it similarly as XMP. But they may also show it as A-XMP or EOCP (Extended Overclock Profiles) or DOCP (Direct OverClock Profile).
Latest AM5 motherboards support additional profiles called EXPO (Extended Profiles for Overclocking) which is basically for DDR5 RAMs.
The exact steps to enable XMP or any of these profiles depends on your motherboard. In general, you need to look for XMP or similar option on the EZ Mode Interface and select the memory profile.
If your motherboard only comes with Advanced Mode Interface, look for overclock or memory settings and modify the relevant XMP setting.
Here’s how I could enable this profile on my ASRock motherboard:
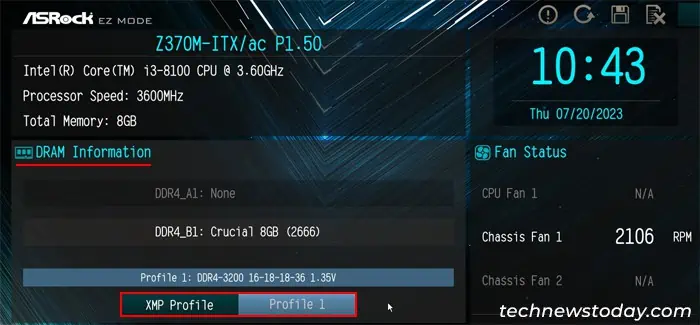
- On EZ Mode Interface, look for XMP Profile under DRAM Information. Then, click on the profile to toggle between the options. You can check the frequency and timing information for the profiles right above.

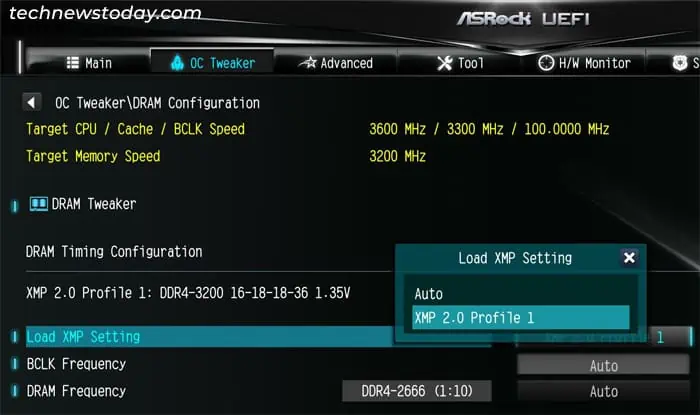
- On Advanced Mode Interface, go to OC Tweaker > DRAM Configuration and set Load XMP Setting to the XMP profile. Its frequency and timing changes should show up right under DRAM Configuration.

If you also have an ASRock motherboard, and want to know more about the process, I recommend checking out my dedicated article on enabling XMP on ASRock Motherboard.
We also have dedicated articles on this process for some other motherboard,
Save and Exit BIOS
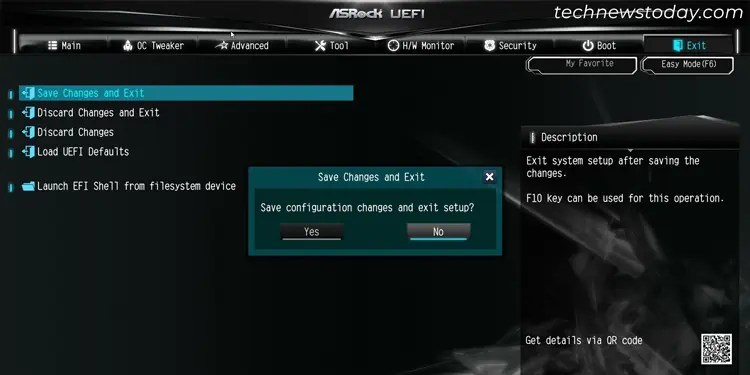
After enabling the XMP profile, save and exit the BIOS to apply the changes. On most motherboards, press the F10 key and select Yes to do so.
Or you can go to the Exit tab in Advanced Mode, select Save and Exit and confirm with Yes.
Test Your System
Now, attempt to boot into your system. If your CPU or motherboard fully support the XMP, you should not encounter any issue. Otherwise, your computer may crash or show other signs of system instability like stuttering issues.
After getting into your system, run RAM and CPU intensive tasks to observe the performance improvement due to the new RAM frequency. You can also run benchmark and stress tests to further confirm system stability and enhancement.
If you run into stability issues, disable XMP by reverting the BIOS settings or resetting the BIOS.
If you wish to improve RAM performance in such cases, try manual overclock first. If it doesn’t help much, upgrade your existing RAM sticks or add another RAM in dual channel mode instead.
Manually Overclock RAM
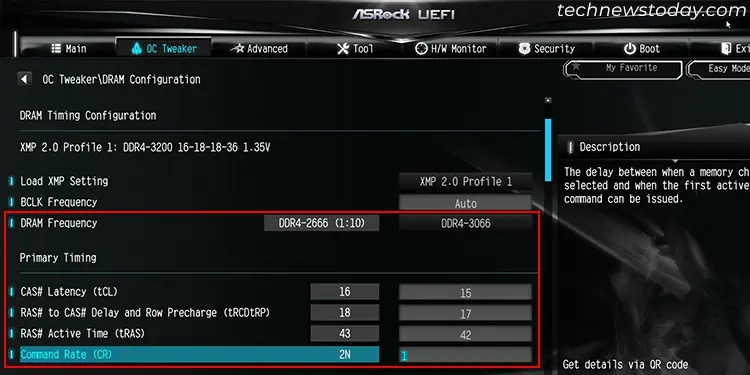
If the system is not that stable, or if it is but you wish to push it even further, overclock your RAM by manually changing the frequency and timing options. You should also check out our article on RAM Latency to understand what all these timing values mean and how you should change them.
However, keep in mind that unlike XMP, which is the tested and stable RAM overclock, manually changing the settings can affect RAM health.
As for me, I could not go over the 3200MHz frequency on manual overclock. So I simply enabled the XMP profile and left it as is since it didn’t bring about any stability issues.
