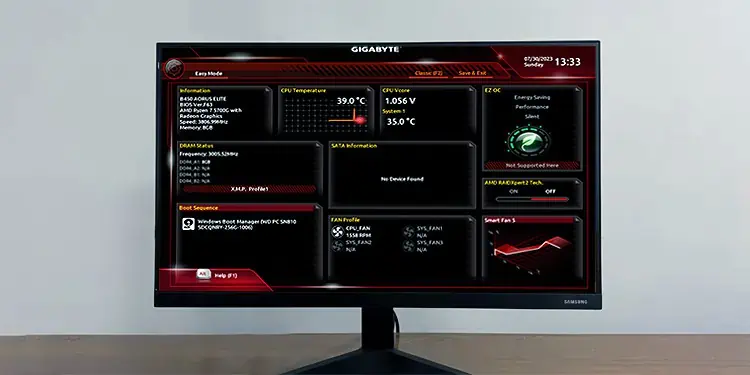
The Gigabyte BIOS/UEFI is an interface for managing hardware configurations. From the RAM frequency and fan speed to settings like the boot order and virtualization, they’re all configured from the BIOS.
Of course, you need to get to the BIOS first before you can monitor or modify any of these. On Gigabyte boards, you can do this by pressing the BIOS key (F2/Del) at boot. Alternatively, you can also use the UEFI Firmware Settings option from WinRE.
There are occasionally edge cases where neither of these methods work. For such scenarios, I’ve also detailed a lesser known third-method to enter the BIOS using Gigabyte’s Fast Boot app.
Using BIOS Key
When you turn on your PC, it performs the Power-on Self-test (POST) and displays the manufacturer’s logo. During this time, you can press F2 or Del to access the BIOS on Gigabyte boards.

If you’ve enabled Fast Boot, the system will only display this screen briefly, or may even skip it entirely (Ultra Fast Boot).
In this case, spamming the BIOS key after powering on the PC usually works. If it doesn’t work, you can use the other two methods from this article.
Via WinRE
If you’re running a Windows system in UEFI or CSM modes, you can also access the BIOS via the Windows Recovery Environment (WinRE). There are numerous ways to boot to the recovery environment:
- You can press the Restart button on the case to force-restart your PC 3 times in a row.
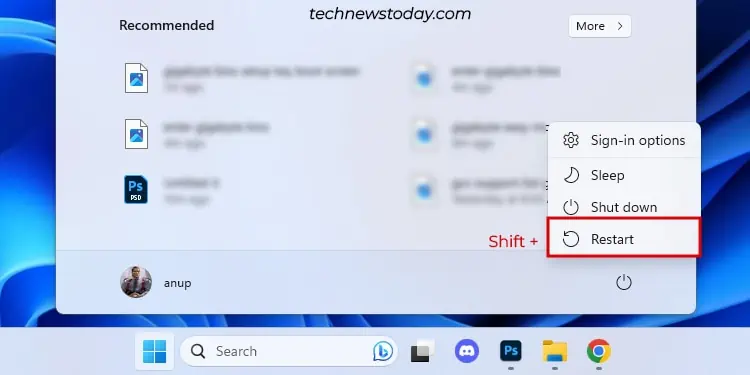
- In Windows, you can hold Shift while selecting the Restart option.

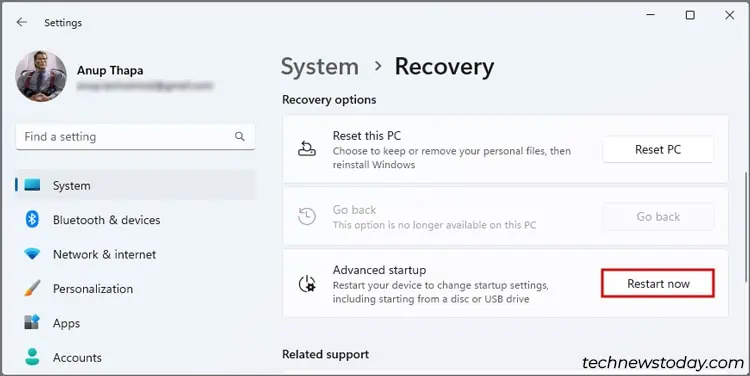
- Alternatively, you can go to Settings > System > Recovery > Advanced Startup and select Restart now.

- If you’re booting using a Windows installation media, you can also select the Repair your computer option.

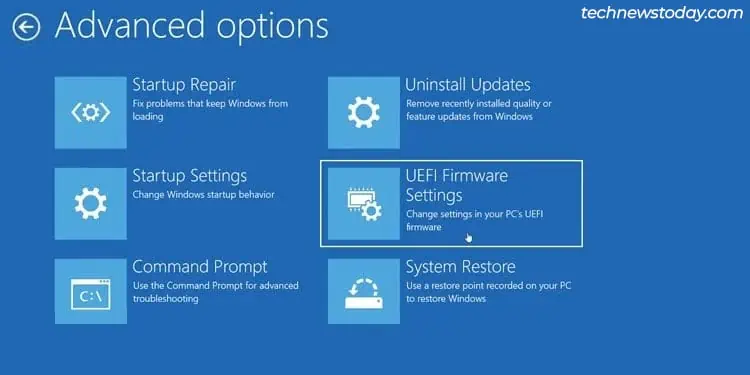
Regardless of the method, you should get to WinRE. There, select Troubleshoot > Advanced Options > UEFI Firmware Settings to boot to the BIOS.
Using the Fast Boot App
Sometimes, the UEFI Firmware Settings option may be missing from WinRE. In such cases, you can use Gigabyte’s Fast Boot app to boot from Windows to the UEFI interface.
- Use the
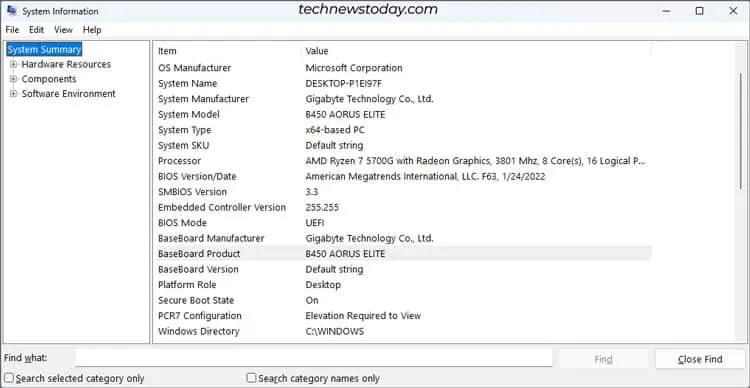
msinfo32run command to find your Gigabyte board model.
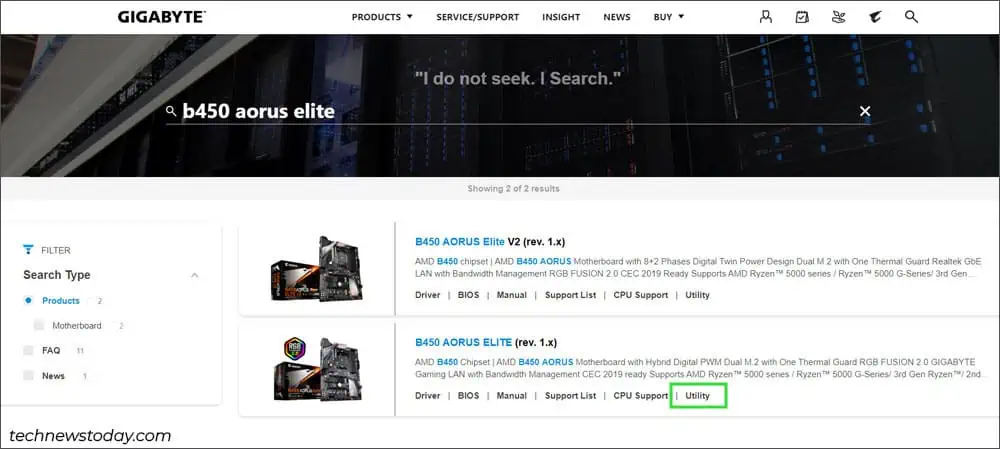
- Search for your motherboard model on Gigabyte’s site and click on Utility.

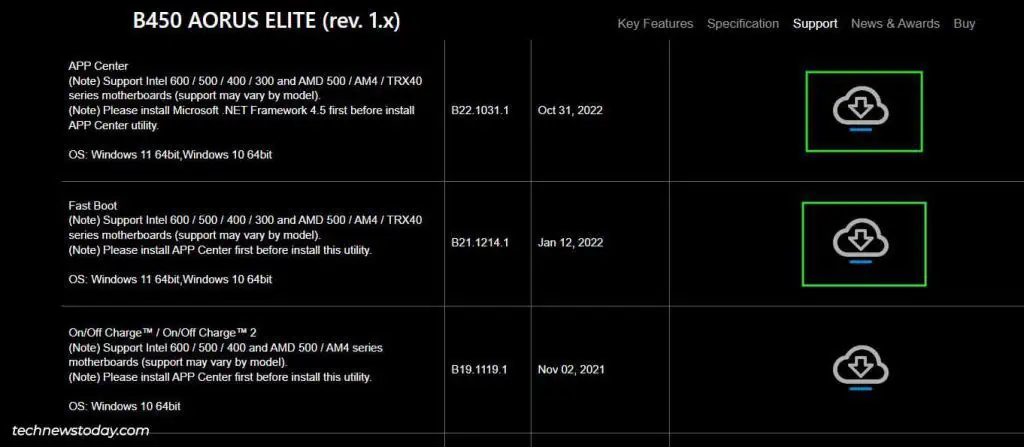
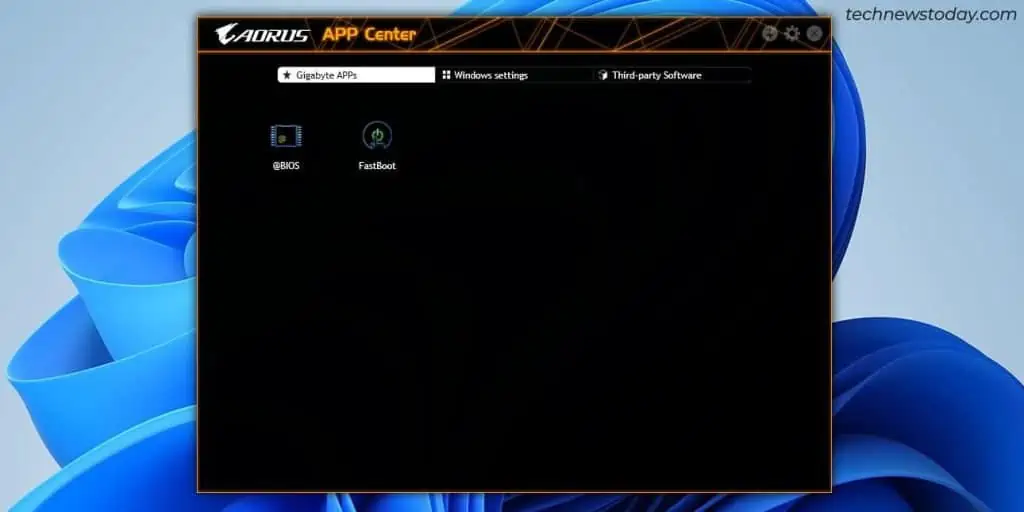
- Download and install the Gigabyte App Center, and then the Fast Boot app.

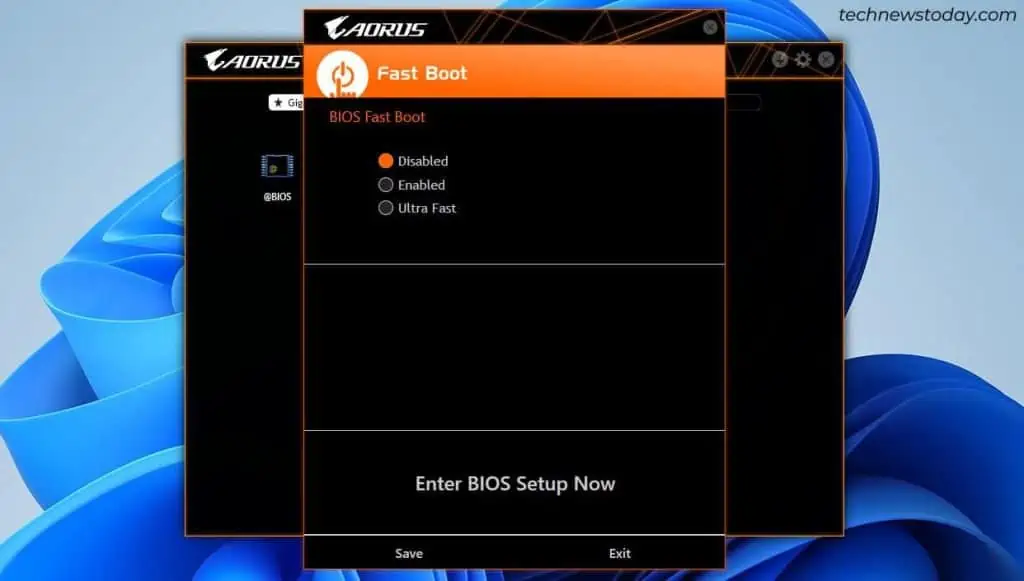
- Launch the App Center and open the Fast Boot app.

- Click on Enter BIOS Setup Now.

What If You Can’t Enter the Gigabyte BIOS
Like a lot of our readers, I’ve had the Fast Boot and the Fast Startup setting in Windows prevent me from accessing the BIOS before. Back then, I fixed the issue by disabling these settings. But you can also bypass the problem by using the second or third method from this article.
In rare cases, users can’t boot to the BIOS regardless of the method. If you’re facing a similar situation, I recommend four possible solutions:
- If the PC isn’t booting at all, listen for beep codes or check the debug LED on the motherboard for POST error codes.
- If the PC runs normally and you only have problems accessing the BIOS, disconnect the boot drive. Most Gigabyte boards boot to the BIOS by default if no bootable device is detected.
- If that doesn’t work, try a different display cable or monitor. Sometimes, the monitor doesn’t support the BIOS resolution.
- Lastly, you can try booting without any peripherals.

