Ethernet is usually superior to WiFi, but one metric it falls short in is durability. As more physical components are involved, Ethernet is much more prone to hardware-related issues.
When an Ethernet cord stops working, the cause can be hard to figure out at first. It could be physical damage on some part of the cord or perhaps one of the ports. Or there could also be some issue with your network configurations.
In this article, we’ve listed step-by-step instructions to figure out the culprit in your case and troubleshoot it accordingly.
Why Is the Ethernet Cord Not Working?
- Physical damage to cord, connector, or ports
- Ethernet is disabled via Network Connections or BIOS
- LAN Card isn’t working
- Outdated or corrupt drivers
- Faulty network configurations
How to Fix the Ethernet Cord Not Working?
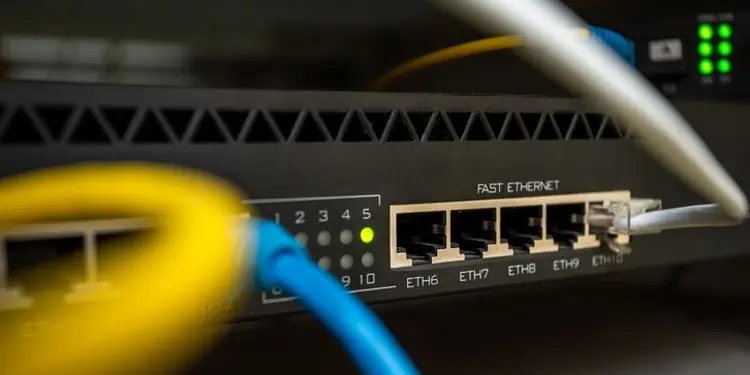
The first step to troubleshooting is figuring out where the problem actually lies. When you connect the Ethernet to the ports on your PC, router, or switch, the appropriate LEDs should light up. In this case, there’s likely some software issue that’s causing your Ethernet connection to fail, giving an incorrect impression of cable failure.
Alternatively, if the lights don’t turn on, that indicates physical damage with the cord itself. By distinguishing whether it’s a hardware or software issue, you can apply the appropriate solutions from the sections below.
Finally, when dealing with network issues, giving the router a quick restart is always a good idea. Doing so clears the router cache and resets the active sessions, which often is all that’s needed to resolve the issue.
Check the Integrity Of Cable
Ethernet cables generally have a lifespan of around 5 – 7 years. Even before this point, it’s not uncommon for the cord to be physically damaged and stop working.
The best way to check if the cord itself is the issue is with a network cable tester. Most people won’t have this on hand, in which case, you can take a few simpler but effective steps.
First, check if the LEDs light up when connecting the Ethernet cable to the PC or router. If they don’t, the cord is likely physically damaged. Look for any sharp bends or tears. It’s possible that the cord may be damaged internally at such points. In case of minor damage, you may be able to repair the cord. But generally speaking, it will need replacement.
Second, the RJ-45 connector could be the issue too. If you see bent pins on the connector, you could try to straighten them. Alternatively, you could trim the cord and install a new RJ-45 plug as well.
When installing the RJ-45 connectors, make sure the all the wires make proper contact with the gold pads. Additionally, also ensure that you’re using the same wiring pattern on both ends as shown below:
Orange stripe
Orange
Green stripe
Blue
Blue stripe
Green
Brown stripe
Brown
Try a Different Port
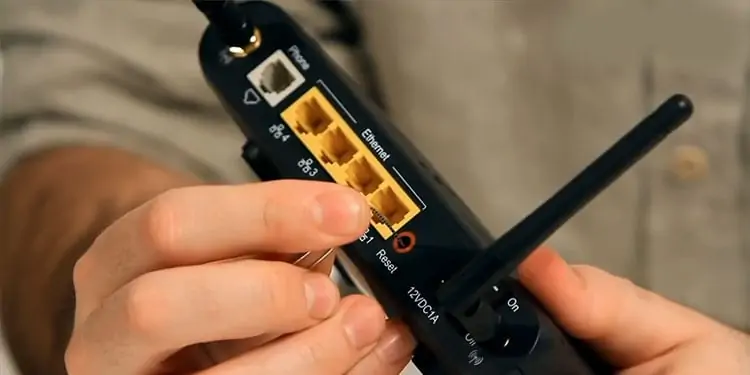
It’s also possible that it’s not the cord or the connector that’s the issue but the port instead. The ports can stop working due to dust/debris on the contact points or due to damaged components such as bent pins.
Either way, try using a different set of ports on both your PC and the router. To eliminate the router as a potential cause, you could also test the Ethernet cord with a different PC or laptop. Make sure to firmly insert the plug all the way into the ports.
If the Ethernet port turns out to be the culprit, this article on fixing the Ethernet port is sure to be helpful. For users with wall ports in their homes, we recommend this article on Ethernet ports on walls instead.
Ensure Ethernet Connection Isn’t Disabled
One very common scenario is that users manually disable the Ethernet connection to fix network change issues or for various other reasons. Later, they forget about it, and because of this minor and easily overlooked detail, it becomes impossible to figure out why the Ethernet isn’t working. Here’s how you can ensure that this isn’t the issue in your case:
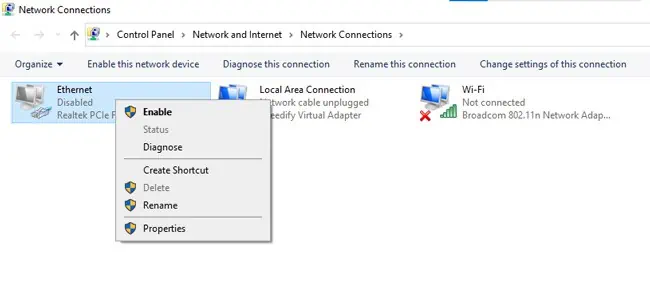
- Press Win + R, type
ncpa.cpl, and press Enter. - Check the Ethernet connection here. If it is disabled, right-click it and select Enable.

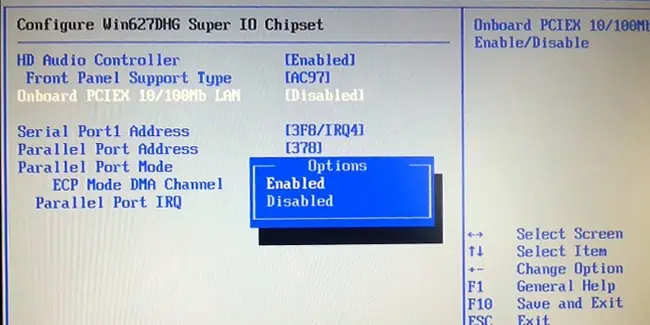
Additionally, we also recommend doing the same via the BIOS. Here are the necessary steps:
- Restart your computer and press the BIOS Setup Key shown on the screen (Fn keys or Del).
- In the BIOS Setup utility, switch to the Advanced tab and make sure the Ethernet/LAN option is enabled.

- Press the Save and Exit key shown on the screen (usually F10).
Manually Set Speed & Duplex Value
The max connection speed is set to auto-negotiate by default. Many users have found that manually setting this value to an appropriate amount resolved the Ethernet connection not working issue for them. We recommend that you do the same with the following steps:
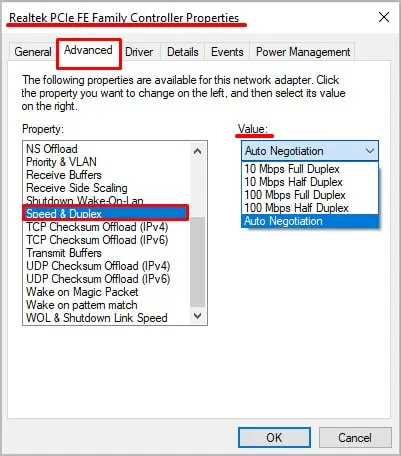
- Press Win + X and select Device Manager.
- Expand the network adapters section and double-click the Ethernet adapter.
- Switch to the Advanced tab and select Speed & Duplex from the list.

- Set its value to 1 Gbps, and press OK to apply the changes. If that doesn’t work, try 100 Mbps instead.
Run Network Troubleshooter
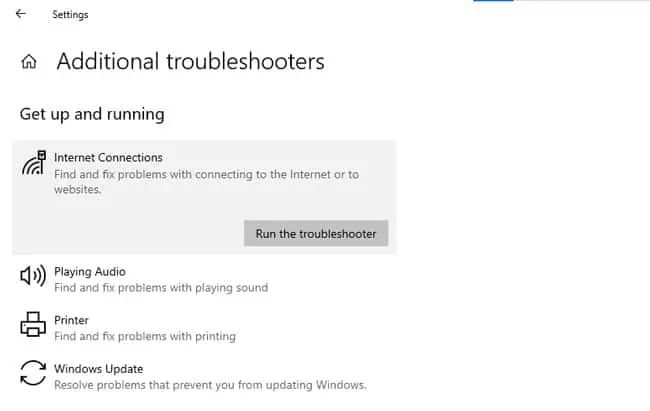
Windows has a dedicated troubleshooter for dealing with network issues in general. You can use this utility with the following steps:
- Press Win + I and select Update and Security > Troubleshoot > Additional troubleshooters.
- Click on Internet Connections and press Run the troubleshooter. Run the Network Adapter troubleshooter in the same manner as well.

- Follow the on-screen instructions to resolve any issues found.
Update/Reinstall the Network Adapter
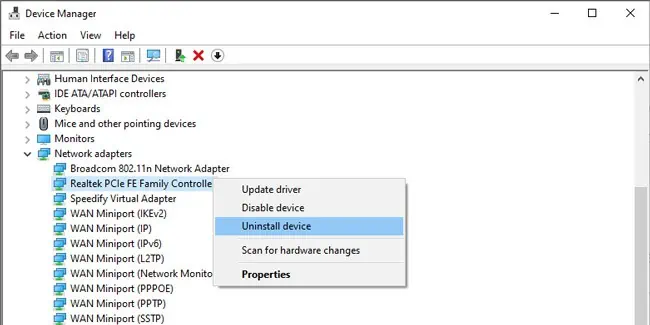
If the drivers for your Ethernet adapter are outdated or corrupt, this can also lead to the Ethernet not working issue. You can uninstall and reinstall the adapter or update the driver as appropriate with the following steps:
- Press Win + X and select Device Manager.
- Expand the Network Adapters section and right-click the Ethernet adapter.
- To uninstall the adapter, select Uninstall device. It will be reinstalled when you restart the computer.

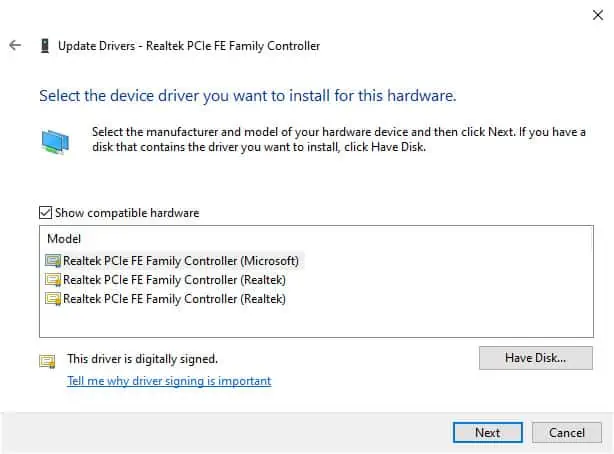
- To update the driver instead, select Update Driver > Search automatically for drivers.
- If you’ve downloaded the latest driver beforehand, select Browse my computer for drivers instead, select the driver file, and follow the on-screen instructions.

Note: In some cases, the Network Adapters section may be missing entirely from the Device Manager. This can happen if the adapter on the motherboard has failed. In such cases, you’ll need to install a new LAN card entirely.
Reset Network Configurations
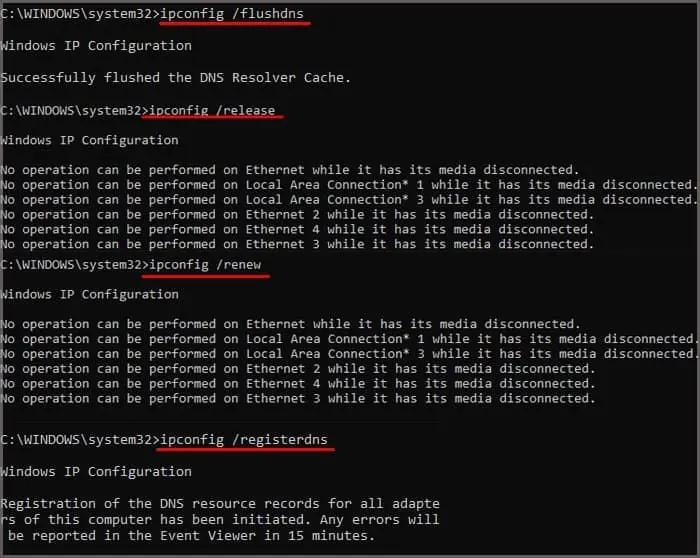
As misconfigured network settings can also lead to Ethernet connectivity issues, we recommend resetting them to default with the following steps:
- Press Win + R, type
cmd, and press CTRL + Shift + Enter. - Execute the following commands:
netsh winsock reset
netsh int ip reset
ipconfig /release
ipconfig /renew
ipconfig /flushdns
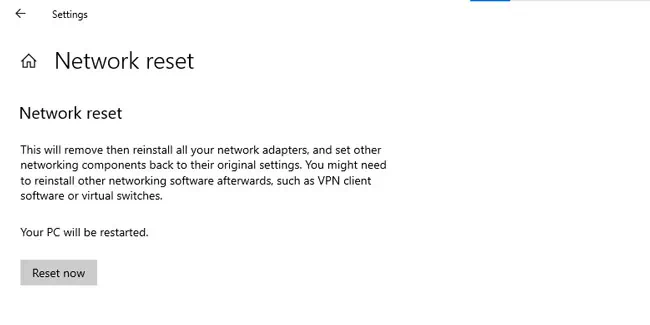
Additionally, Windows also has sort of a ‘nuke button’ for resetting networks. This feature removes and reinstalls all the network adapters, as well as resets the configurations to default. As such, you should only use it if none of the other fixes work. But if you do decide to use this option, here are the necessary steps:
- Press Win + I and select Network & internet > Advanced network settings > Network reset.
- Click on Reset Now and accept the confirmation prompt.

- Once your PC restarts, check if the issue is resolved.
Can an Ethernet Cable Go Bad?
As with anything else, Ethernet cables have a lifespan too. If well protected from the elements, they can last well over a decade. But generally speaking, the cables suffer from minor physical damage which accumulates over time. On average, you can expect an Ethernet cable to stop working after 5 – 7 years.

