Did you just watch a view with an extremely scenic beauty? Or watched a movie with a funniest bit? You can save that bit and set it as your wallpaper! Or simply share them in your circle.
Videos are a series of images or frames. When you play a footage, you are actually seeing number of frames playing one after the other in motion. You can extract these frames from a video quite easily.
In this article, we will guide you on how you can extract frames from a video easily.
How to Extract Frames From Video
Although there are multiple ways you could extract the image, we will guide you on the top 5 of them. We will start out simple and go bit complex through the list.
Take Screenshots
One simple way to extract an image from a video is by taking a screenshot. You can capture the exact frame you want through this method.
Simply pause the video in the exact frame you want to capture. If you want to capture the full view of the video, open your video on full screen. If you’re a Windows user, hit the combination of Windows key + Prt Sc on your keyboard. If you see a black film on your screen briefly, your device has successfully taken a screenshot.

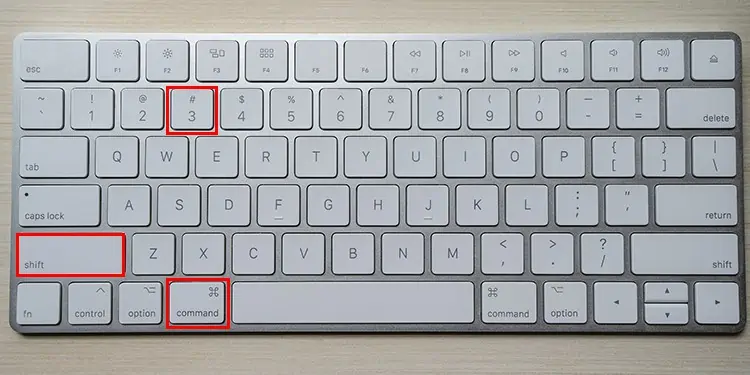
Mac users can hit the shortcut, Shift + Command + 3, to take a screenshot. After using this combination, if you see the thumbnail of the screenshot on the bottom left corner of your screen, the screenshot was successful. You can even edit the screenshot slightly by clicking on the thumbnail.
From VLC Media Player
VLC is probably one of the most used media players. You can easily extract the frames of videos you play on VLC from the application itself. Follow these steps to extract frames from the VLC media player:
- Open VLC media player.
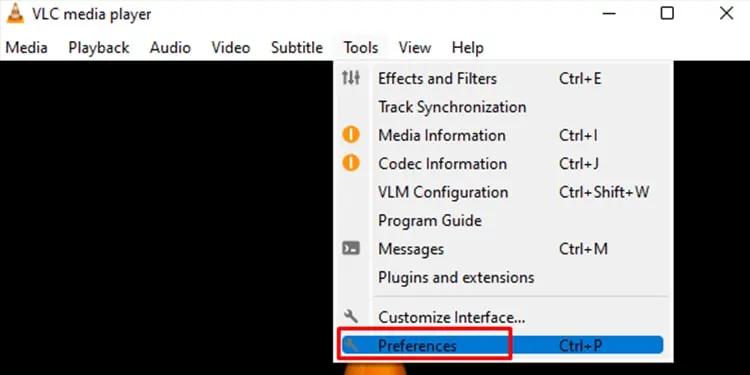
- From the menu bar on top, select Tools.
- From the drop-down menu, select Preferences (Ctrl + P).

- Select Video from Preferences.
- On the lower left corner of the tab, select All under Show Setting.
- On the sidebar, scroll down to Video.
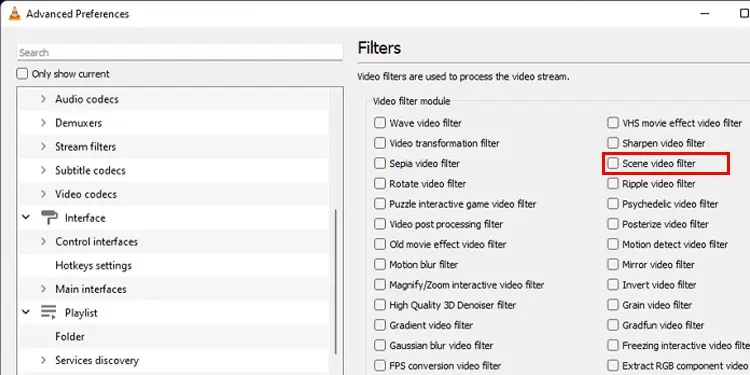
- Under Video, select Filters.
- A list of filters will appear on your left. On the right-row, select the third option, Scene video filter.

- Expand Filters on the left sidebar.
- Scroll down to select Scene filter.
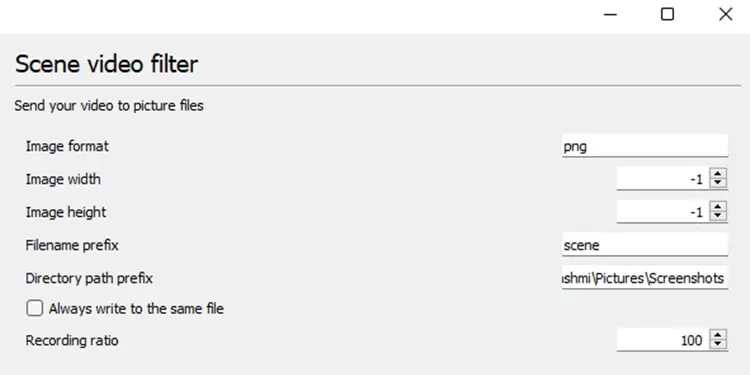
- Customize the settings for Scene Videos

- Image format: Type in the format you want the extracted frame to be in. Kindly look for any typing errors as your images could be corrupt or with the wrong format.
- Image width/Image height: Set a value to determine the resolution of your image concerning your video. If you want to export your image in the same resolution as the video, enter -1.
- Filename prefix: In this field, enter the name you want to give your images. VLC will add numbers next to the name to uniquely identify each image.
- Directory path prefix: From your File Explorer, enter the path of the folder you want to save your image.
- Recording ratio: Set a recording ratio. Suppose you want VLC to export 1 in every ten frames, then type in the value 10. If your video is 30fps, VLC will export three frames every second. Select Save, Re-open VLC and play your video.
After completing the extraction, please follow these steps to disable the Scene filter. If you keep these settings, VLC will extract images for every video you play using the player.
Adobe Premiere Pro
Did you find the perfect image while editing a video on Premiere Pro? Extract the exact frame from Adobe Premiere Pro! Follow these steps to export a selected frame from Adobe Premiere Pro:
- Open Adobe Premiere Pro.
- Browse or open your project.
- On the video sequence, place playhead on the exact frame you want to export.
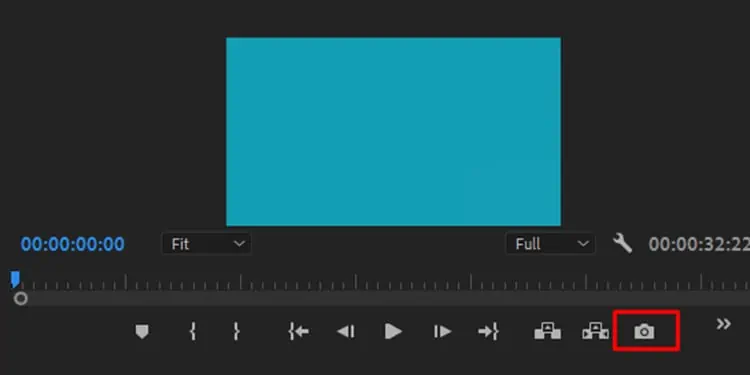
- On the bottom-right of the video player, click on the Camera icon.

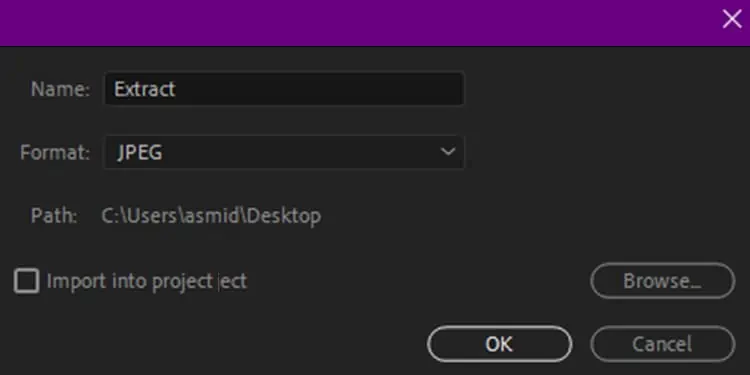
- In the dialog box, customize the format:

- Name: Set a name for your exported frame.
- Format: drop this menu down to set an image format for the extracted frame (PNG, JPG).
- Select the Browse button to change the location for your extracted image.
- Click on OK.
Use FFmpeg
You can use the command prompt to extract specific frames from a certain time frame. This method might be a little confusing for some users but stick tight because we’ll break it down for you.
Firstly, you’ll have to install FFmpeg. Head to the official FFmpeg site and install your operating system specific zip file. After you’ve downloaded the file, unzip it and follow these steps:
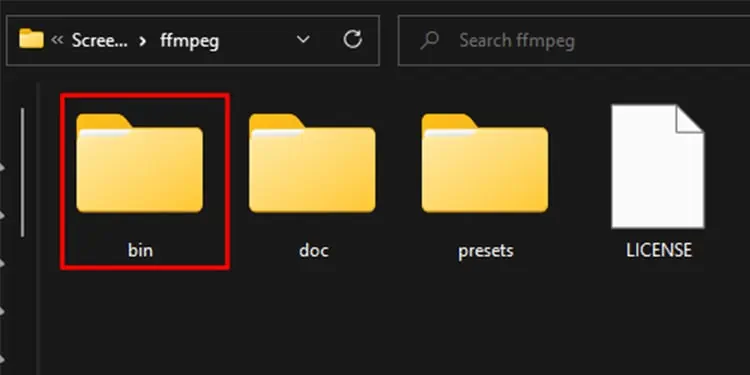
- Open the file you’ve extracted, select Bin.

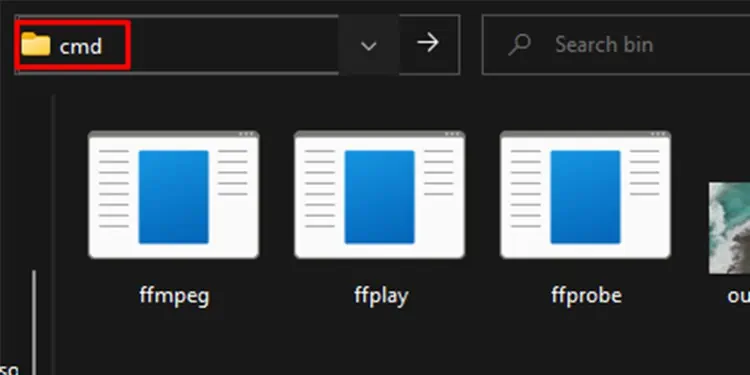
- Type,
cmdon the path to open and change the directory on Command Prompt.
- On the command prompt window, type in the following command and press Enter.
ffmpeg.exe -ss 00:00:00 -t 00:00:00 -i input_file.mp4 -qscale:v 2 -r 10.0 output_image-%4d.jpg
- –ss: Enter the start time for the image extraction.
- -t: Amount of time you want to extract images.
- -i: Path to your video.
- -r: Number of frames to capture per second.
Online Converter
You can find many websites online that can convert video files to still images. You’ll need to upload your video to the website. You can also cut your video to set a time frame to extract your image. Additionally, you may also set the frame size and quality of your extracted image.
Frequently Asked Questions (FAQ)
Why are my Screenshot are blank or black on Netflix
When taking screenshots of movies or streaming services, you may get a blank screenshot. Streaming services like Netflix, Disney plus and so on, does not allow any sorts of screen-record or screenshots of their movie. This is to protect against any media infringements.
How Do I Extract High-quality Photos From a Video?
You can use FFmpeg to extract high-quality. The conversion process of FFmpeg is lossless. This means non of the details, including the number of pixels, are lost in the compression process. This makes FFmpeg one of the best options for extracting high-quality images from a video.
Can VLC Split Video Files?
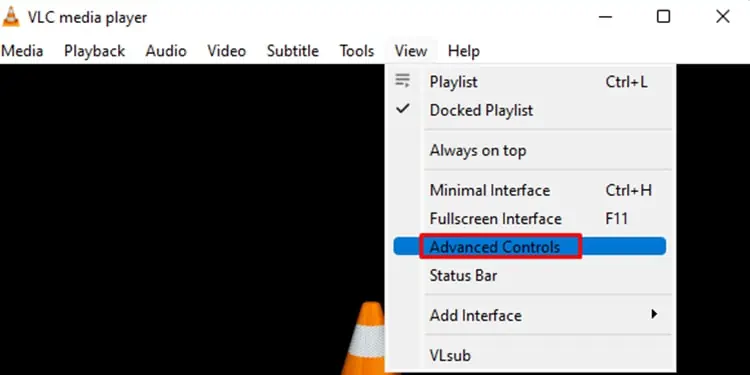
You can split your videos from Advanced Controls on VLC. If you want to split videos using VLC, follow these steps:
- Open your video file with VLC media player.
- From the menu bar, drop the menu down for View.
- Select Advanced Controls.

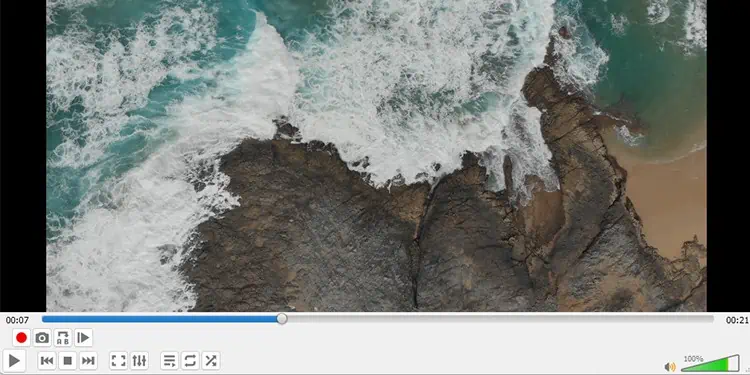
- Select the button with the Red dot (Record).

- Hit the Play button to the length you want the first part of the video to end.
- Drop the menu down for Media from the menu bar and select Quit.
VLC automatically creates and stores your trimmed video in the Videos folder on your device.

