Imagine you’re watching a video of your family celebrating Christmas, only to realize that you can’t tell if the red and white mix of pixels in the center is the Santa or the red velvet/white choc-chip cookie. Or, you’ve posted a video of your gaming setup on Facebook only to realize your Facebook video is blurry. Trust me, we’ve been there too.
Whether it’s for entertainment, work, content creation, or more, if you’re looking for a more HD experience, we’re here to help!
Common Causes of Blurry Videos
Video Compression
Facebook’s ideal video size is 720p (1280px wide and 720px high). Therefore it tries to fit all the videos within that specification, leading to video compressing. Think of it like stuffing a jacket into your bag, causing wrinkles. Makes sense, right? Facebook compresses videos higher than 720p into their frame, causing poor quality.
Video Quality Settings
Facebook sets the video quality according to your internet connection. Higher quality videos require a better, fast speed internet connection. So, if you have a poor WiFi connection or you’re on data savings mode, chances are that your videos will be of lower quality but they will load much faster.
Insufficient Space on Device
If your device does not have sufficient space for Facebook to run, your videos will appear blurry and pixelated. Think of it as an athlete underperforming because they don’t have enough room to practice to their full potential! Luckily, these common problems can be fixed.
Troubleshooting and Fixes of Blurry Videos on Facebook
Video Compression
Try uploading videos that fit Facebook’s standard specifications. You can use a variety of online tools and applications like Adobe Spark to change the size of your video without losing its quality.
Change the Video Quality
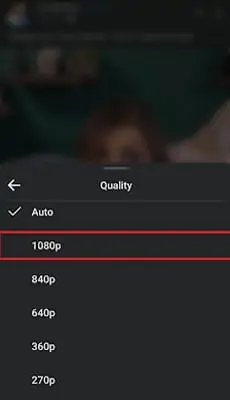
Try changing the quality of the video from “Auto” to the highest available quality (“720p/840p/1080p”) from the video menu.
For Phone/App Users
- Tap on the video, go to Settings > Quality > 1080p.

- Tap on Settings > Quality > Change “SD” to “HD”.
Depending on the device and version you are using, your options can either be “1080p/720p/640p” or “SD” and “HD”.
For Desktop/Website Users
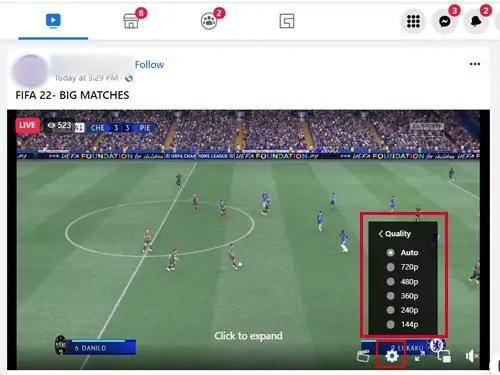
- Click on the Settings button.

- Click on Quality > 1080p.
- Click on Quality > HD.
Based on the quality of the uploaded video, the highest resolution can either be 1080p, or even 720p and lower. Just make sure your video isn’t in Auto mode.
Change the Video Settings
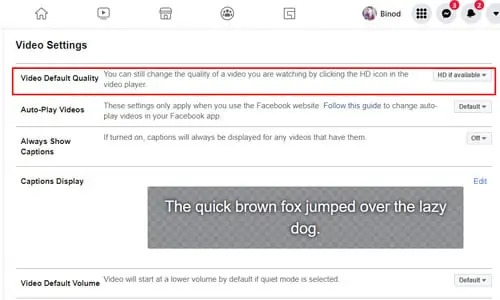
Changing the video quality manually every now and then can be really exhausting to some when the quality of the video differs from video to video. So, a permanent solution would be to set the video settings to the best quality possible!
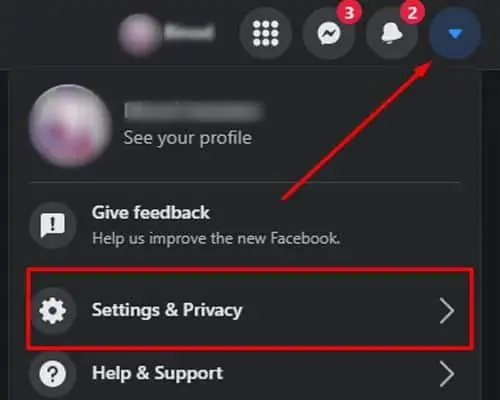
- Click on the inverted triangle next to the Search icon for a drop down menu.
- Select Settings & Privacy > Settings.

- Scroll down for “Videos”.
- On ‘Video Default Settings”, change “Default” to “HD if possible”.

Now, your videos should be of the highest quality uploaded.
Turn Off Data Savings Mode
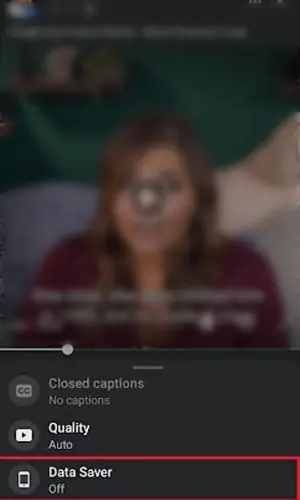
If you’re on data and you’re tired of blurry videos, turn off data-savings mode for the optimum video quality! You can do it right from the video menu. This version is, of course, only available for phone app users. So, on your phone:
- Tap on the video, click on Settings.

- Data Saver (off).
Insufficient Space on Device
Excess files like caches can slow down your apps and web experience. Try clearing them or use the good old method of installing and uninstalling.
For Phone/App Users
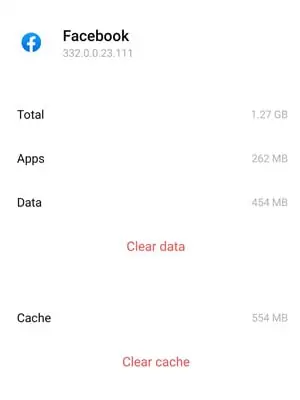
- Go to Settings > Apps.
- Tap on Facebook > Clear cache/Clear data.

Now all your excess and non-useful data will be removed and save you space. Selecting “Clear data” will also log you out of Facebook and make room to start afresh with more space. You can skip this step and choose only “Clear Cache”.
For Chrome/Website Users
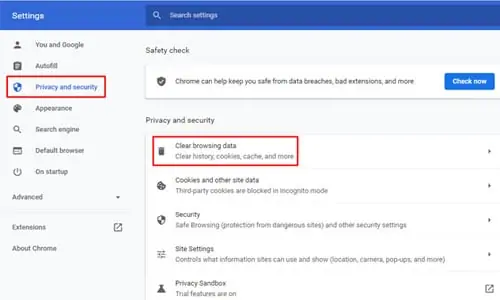
- Click on “⋮” for the menu.
- Go to Settings > Privacy and Security

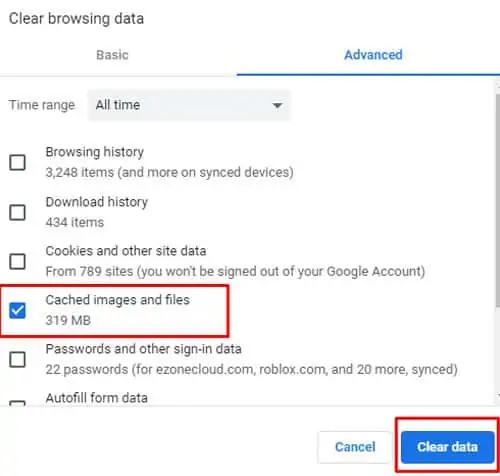
- Clear browsing data > Cached images and files.

Now, your video quality should be a lot better.
How Do I Post High Quality Videos on Facebook?
Use High Speed Internet to Upload
Facebook has not only undergone a brand name change(Meta) but also a change in its settings and features. Instead of manual settings, your Facebook experience mostly relies on high-speed internet. So, try waiting for a stronger internet connection to post photos and videos.
Upload HD Sized Videos
HD sized videos refer to the 1080p (1920×1080) or 720p (1280×720) sizes as their ratios are 16:9. This helps avoid any video compression that will decrease your video quality to fit Facebook’s standards.
Upload on Youtube and Share the Link to Facebook
Another method that Facebook users often use is link sharing from YouTube. YouTube is another excellent social media platform to gain, grow and entertain audiences. So, content creators often post on YouTube and share the link to Facebook without the problem of video quality degradation.
Why Is My Facebook Live Video Quality Poor?
Whether you’re viewing live or streaming live, an internet connection makes a major difference. If your internet is unstable, the live might freeze, end or lag. Before you go live, check that your WiFi is working well and if you’re viewing someone’s live with bad WiFi, bookmark it. Or wait for the person/page to post it after the live has ended.
For Facebook live hosting
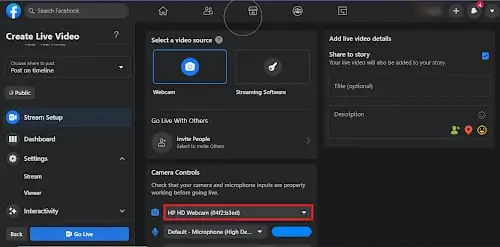
- Make sure that you’re using the right camera. You can check at the “camera controls” if you are connected to your phone camera or external camera (if using).

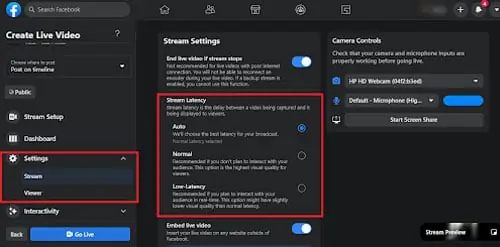
- Facebook also offers “Normal latency” and “Low latency”. Latency, or lag, creates a delay in the live between you and your audience. In low latency, you will see your audience’s comments a lot later than they’re sent so you can interact with them better with low quality video. But in normal latency, there wont be a delay in the response time between you and your audience. Facebook recommends normal latency for live hosts who don’t plan on interacting with the audience. (For example, reading all their comments for answers, etc.)

Why Are My Facebook Videos Black and Pixelated?
The problem for most Facebook videos seems to be poor network connection. But sometimes, your device may be causing problems too. To fix this here are a few methods:
Disable Hardware Acceleration
Go to Chrome on your computer, Settings > Advanced > Disable “use hardware acceleration when available”. Refresh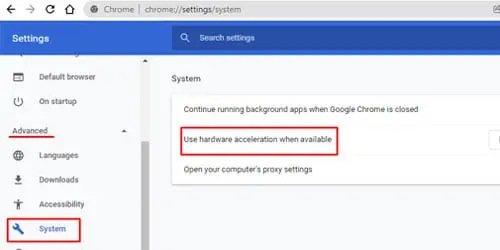
Clear Cache
On your phone, Click on Settings > Apps > Facebook > Clear Cache.
Re-install Facebook
Un-install and re-install Facebook to start afresh.
Why Are My Facebook Videos Blurry but Then Its Good?
If your videos are blurry initially, chances are that Facebook is adjusting to your internet. Make sure you have stable internet. And change your settings to the highest available resolution.
Or, choose “HD when available” as instructed in “How to fix blurry videos on Facebook > Change video settings” above.
How Do I Fix Blurry Videos on Messenger?
Facebook Messenger has a size limit on how much you can send. So if your video is closer to 25MB, then the quality will be much worse. Try sending a video that doesn’t have a large size.
Videos sent on Facebook are bound to be compressed. So if you want to send a video without losing its HD quality, try uploading them on your google drive and sharing the link instead!
Why are my Facebook stories so blurry?
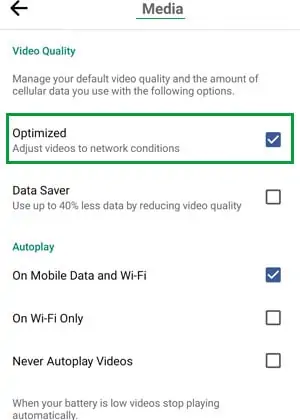
If your Facebook stories are blurry, make sure your Data Savers is turned off. Facebook reduces the quality of your video when you post it to story to save data.
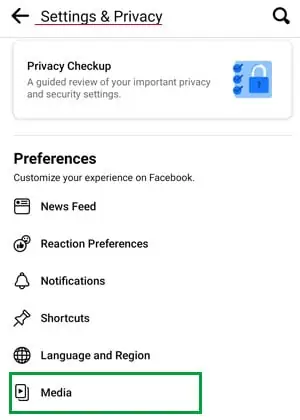
- Click on ≡ for Menu. Scroll down for Settings & Privacy > Settings > Preference > Media

- Select “Optimized”.

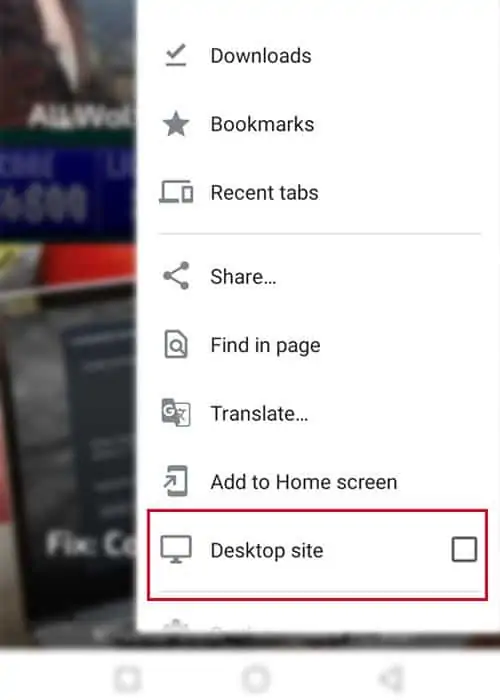
- Another method Facebook users opt to post HD videos is using the website or desktop version on phone.
- On your phone, Tap on Chrome > Menu > Desktop site.

- Click on stories and start posting!
- On your phone, Tap on Chrome > Menu > Desktop site.
And you’re done!
Conclusion
Seems like most Facebook video problems are dependent on your internet connection. If you’re on data, make sure to turn off data saver. And if you’re worried about losing too much data, wait till you can find better Wi-Fi. Make sure to clear cache every so often as well. And enjoy!

