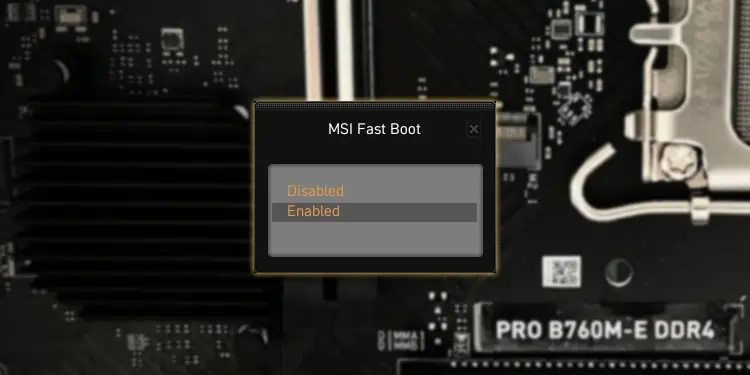
MSI boards vary a lot in terms of Fast Boot support. Some boards don’t support it at all, others let you use the standard Fast Boot option, while some provide the proprietary MSI Fast Boot level that’s basically extra-fast.
On the systems that do support it, you can enable or disable MSI Fast Boot from the Boot tab in the BIOS. You can also configure it with alternative methods like the MSI Center if the BIOS is inaccessible.
I’ve had to do this before on my own B760 board after MSI Fast Boot made the BIOS key useless. You can learn all the important points about MSI Fast Boot from this guide to ensure you don’t face any such hassles yourself.
Should You Enable or Disable MSI Fast Boot
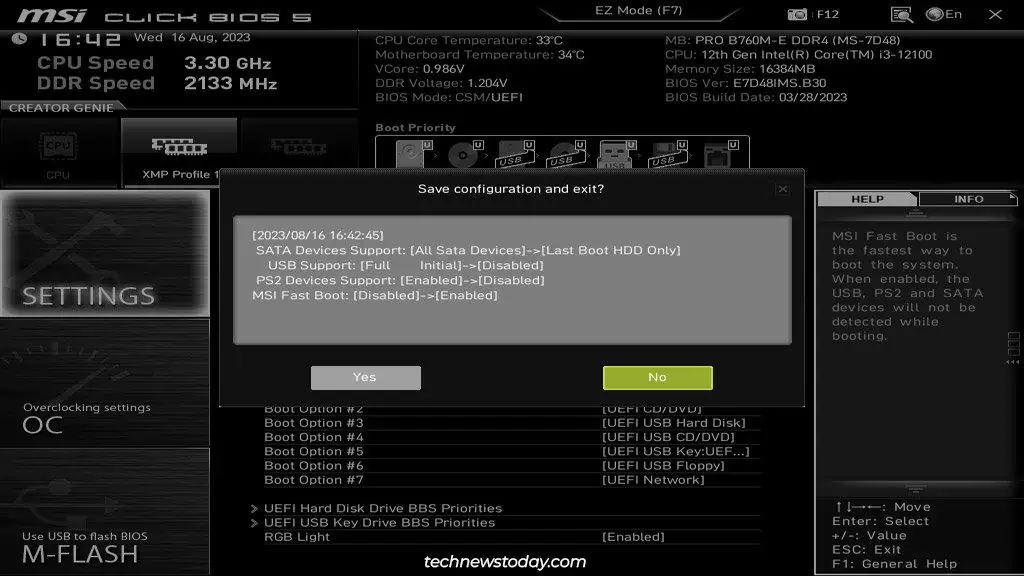
On supported boards, you’ll usually find two levels of this feature. The basic Fast Boot skips certain hardware checks during POST to speed up the boot time. MSI Fast Boot additionally disables USB, PS2, and SATA devices at boot to further improve the boot time.
I tested each config multiple times on my PRO B760M-E DDR4 board. Here are the results from my cold boot test:
| Config | Average Boot Time |
| Fast Boot Off | 14 seconds |
| Fast Boot On | 11 seconds |
| MSI Fast Boot On | 13 seconds |
MSI Fast Boot is supposed to provide the fastest boot time at the expense of certain devices at boot. In my case, this was partly true.
My system skipped the POST screen entirely and I wasn’t able to access the BIOS using the BIOS key. However, it took longer to boot compared to when I used standard Fast Boot, meaning I didn’t see any benefits.
I encourage you to test the boot times if you plan to enable Fast Boot on your own system. Some people reduce their boot time by a substantial amount with this feature, while others barely see any improvements.
Depending on your own results, you can decide whether MSI Fast Boot is worth enabling or you’d prefer to disable it.
Configure Fast Boot in MSI BIOS
After you decide how you’ll configure Fast Boot, the actual steps are very simple.
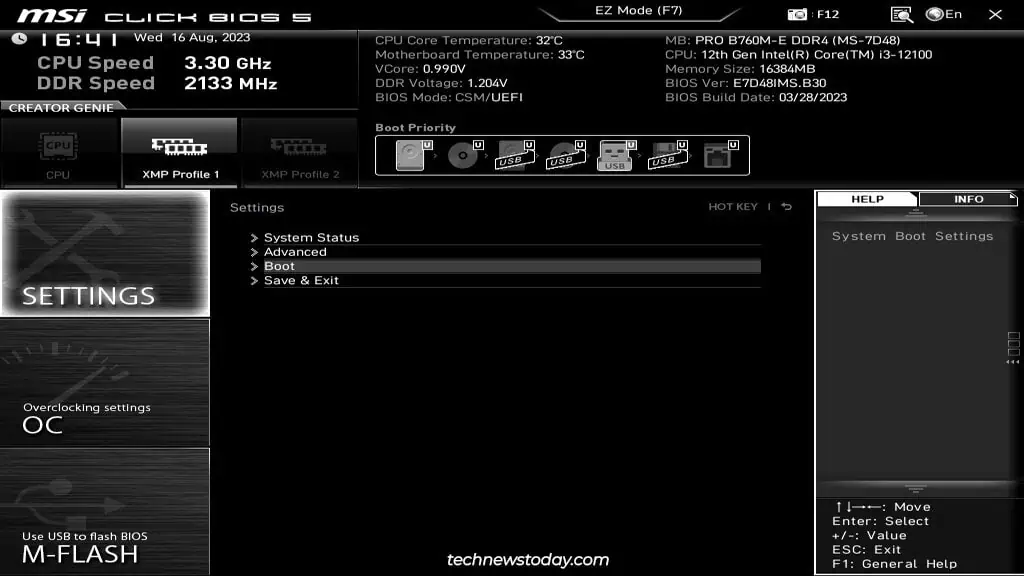
- Power on your PC and continuously press Del/F2 to enter the MSI BIOS. If the BIOS key doesn’t work, check the last section.
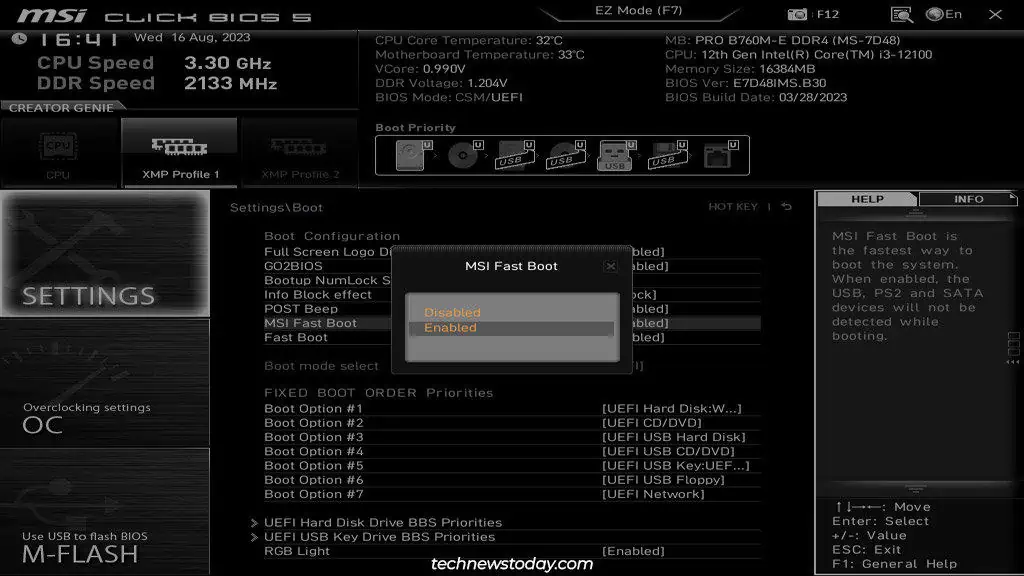
- Press F7 to switch to Advanced Mode (if required). Then, select Settings > Boot. On some boards, the Fast Boot setting may be located in the Advanced > Windows OS tab instead.

- Select the Fast Boot or MSI Fast Boot option and enable or disable it as you’ve decided.

- Press F10 and select Yes to save the changes. After that exit the BIOS.

Use MSI Center
The MSI Center method is a bit hit-or-miss as some versions let you toggle the Fast Boot setting while others don’t. If you use this app, you can check if it’ll let you configure Fast Boot with the following steps:
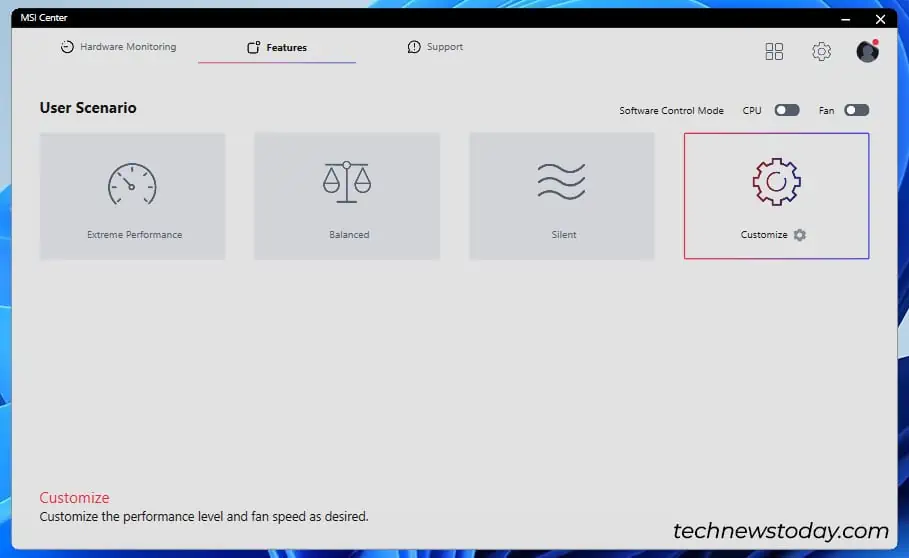
- Launch the MSI Center app and select Features > User Scenario > Customize.

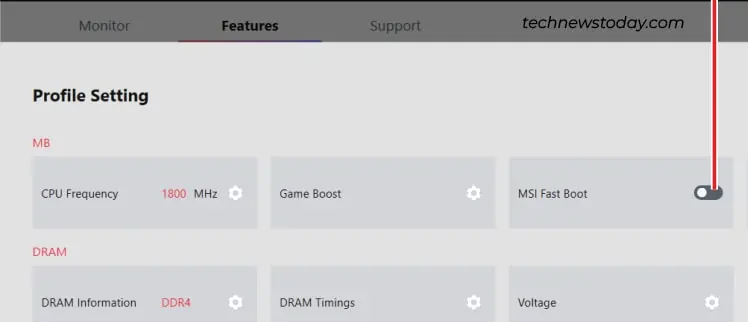
- In the Motherboard section, toggle the MSI Fast Boot option on or off.

- Press the Apply button to save the changes.
Can’t Enter the BIOS Due To Fast Boot
The main problem people face after enabling MSI Fast Boot is that the USB keyboard doesn’t work at boot, so they can’t use the BIOS key to access the BIOS. In such cases, you have three options.
- You can use the MSI Center method to disable Fast Boot.
- Press the restart button to restart your PC 3 times in a row. Your system will boot into the recovery environment. There, select See advanced repair options > Troubleshoot > Advanced Options > UEFI Firmware Settings to access the BIOS.
- If neither of these works, you can remove the CMOS battery to reset the BIOS to factory defaults (meaning MSI Fast Boot will be disabled).

