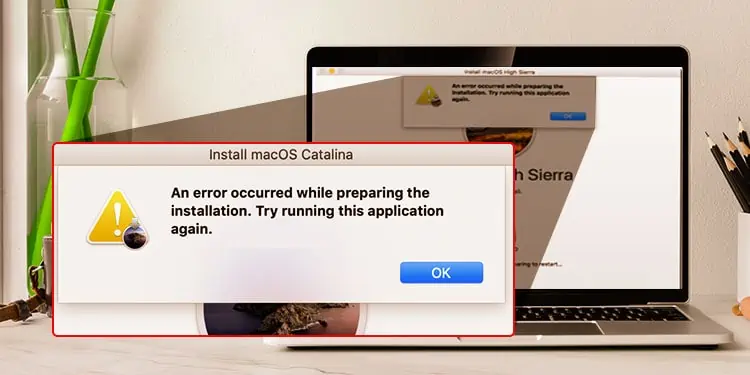
Installing/updating macOS is a pretty straightforward process. But sometimes, you can encounter an “An error occurred while preparing the installation” error message right before the installation begins. The update process then fails to start, and you have to resort to some other methods to continue the setup.
Incorrect date & time settings and incompatible installer build are the two most common factors that can influence your system to return this error message. But, corrupted NVRAM data and installation bugs and glitches can also lead to this error.
No matter what the causes are, there are several proven fixes, all of which we will discuss below.
How to Fix “An Error Occurred While Preparing the Installation” on Mac?
The very first thing you can do to work to against this error is to restart your computer. This deallocates all the system resources, and the session starts anew. Moreover, go ahead and retry the installation process after restarting your computer. It might solve your problem quickly.
However, if this doesn’t do anything in particular, follow all the fixes shown below.
Ensure Your System and the Installer Are Compatible With Each Other
Before you begin diving into technical fixes, make sure that the installer is compatible with your macOS. An incompatible setup file cannot update your operating system, and hence, this step is a must.
However, there’s a simple way to verify the compatibility of your OS and the setup file. You can visit the App Store to do so.
- Open App Store.
- On the search bar, search for the macOS version(macOS Monterey, macOS Big Sur, etc.) you want to install.
- Select the relevant search result.
- Scroll down to the Information section and hover towards Compatibility.
- Here, if you see that this particular version Works on this Mac, the installer is compatible with your system.

But if not, then you have to re-download the right installer file.
Fix Your Date and Time
If your system date/time is not as same as the one in your actual timezone, you cannot continue the installation process. Every macOS installation file is known to check your system date/time and verify it with your timezone.
But if it cannot complete the verification, the installation process fails to begin. Therefore, you can change your date and time to fix this issue. However, there are two ways to do so. One method involves changing the date and time through the System Preferences, while another is done through the Terminal.
Through System Preferences
For users who are able to log in to their Mac, follow these steps:
- Open Finder.
- Select Apple > System Preferences from the menu bar.
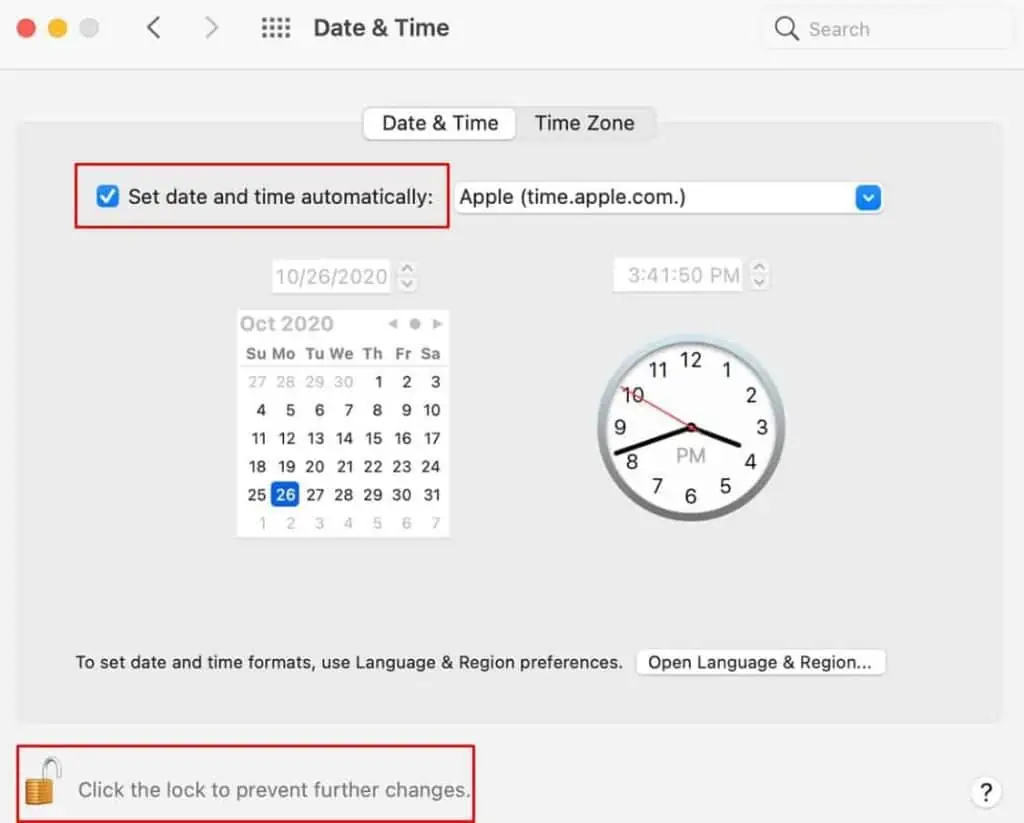
- Choose the Date & Time option.
- Click the padlock to allow system changes.
- Then, Set date and time automatically.

- Lock the padlock to save your changes.
- Restart your Mac.
- Retry the setup process.
Through Terminal
For users who are unable to start up their operating system and are not able to login to the desktop screen, follow these steps:
- Shut down.
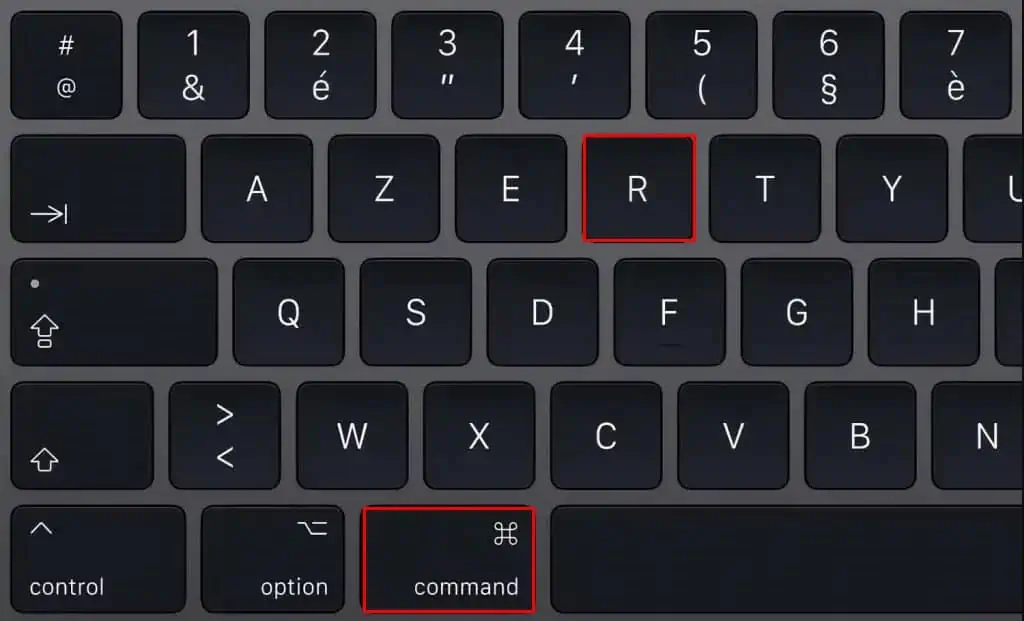
- Press Power to startup and immediately hold Command + R after that.
- Hold these keys until the screen lights up the Apple icon.
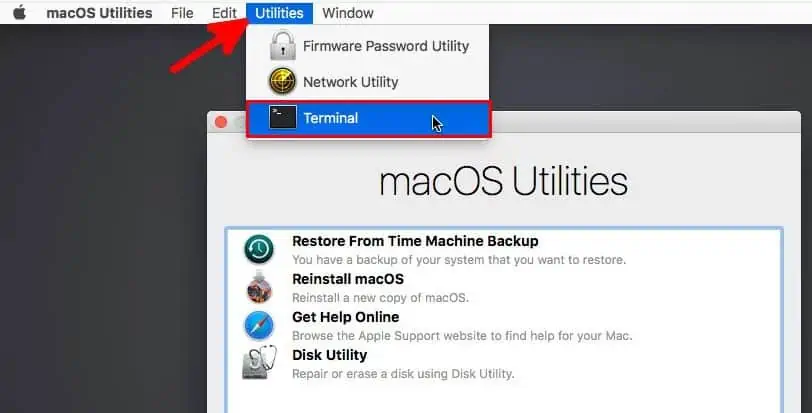
You’ll now enter the recovery window. - Click on the recovery window menu bar and select Utilities > Terminal.

- Now, if you’re connected to the internet, type this command to automatically set your date and time:
ntpdate -u time.apple.com - But, if you’re not connected to the internet, type this command:
date *mm**dd**hr**min**yyyy*
Be sure to replace *mm**dd**hr**min**yyyy* with months, days, hours, minutes, and years, respectively, without any spaces in between.
For e.g.,date 0923145522 - Type
exitto exit the terminal. - Retry the installation.
Reset NVRAM
A proper NVRAM operation is required for your system to perform efficiently. That’s because NVRAM controls the workflow of the interfaces installed on your computer. Furthermore, the information stored in this memory unit does not disappear even if there’s no power supplied.
So, if you’re having installation issues on your system, you can reset the NVRAM and retry the installation after that. For M1 Mac users, NVRAM is reset automatically after each system restart. But Intel-based Mac users follow these steps:
- Shut down.
- Press Power button once.
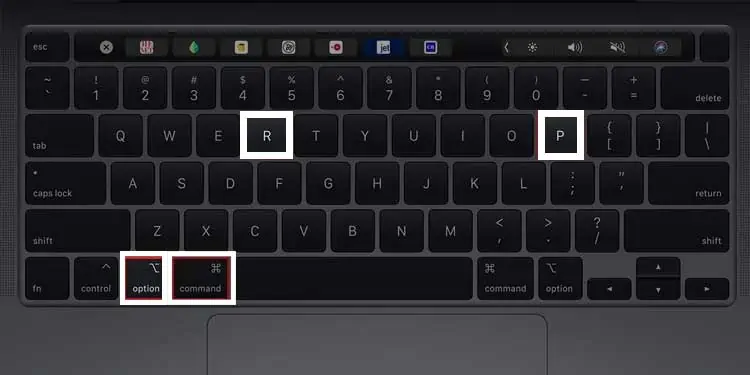
- As soon as the system starts up, hold Command + Option + P+ R.

- Leave these keys only after the system completely boots up.
Install via Safe Mode
To rule out the error caused by third-party extensions, you can install macOS after a safe startup. That means the safe mode feature boots up your computer with only essential software interfaces and device drivers. This prevents the system from allocating resources to third-party applications; here’s how you do so:
On Intel-Based Macs
- Shut down.
- Press Power button once.
- As soon as the system starts up, hold Shift.
- Release the key after you reach the login menu.
- Try to reinstall.
On Apple Silicon Macs
- Shut down.
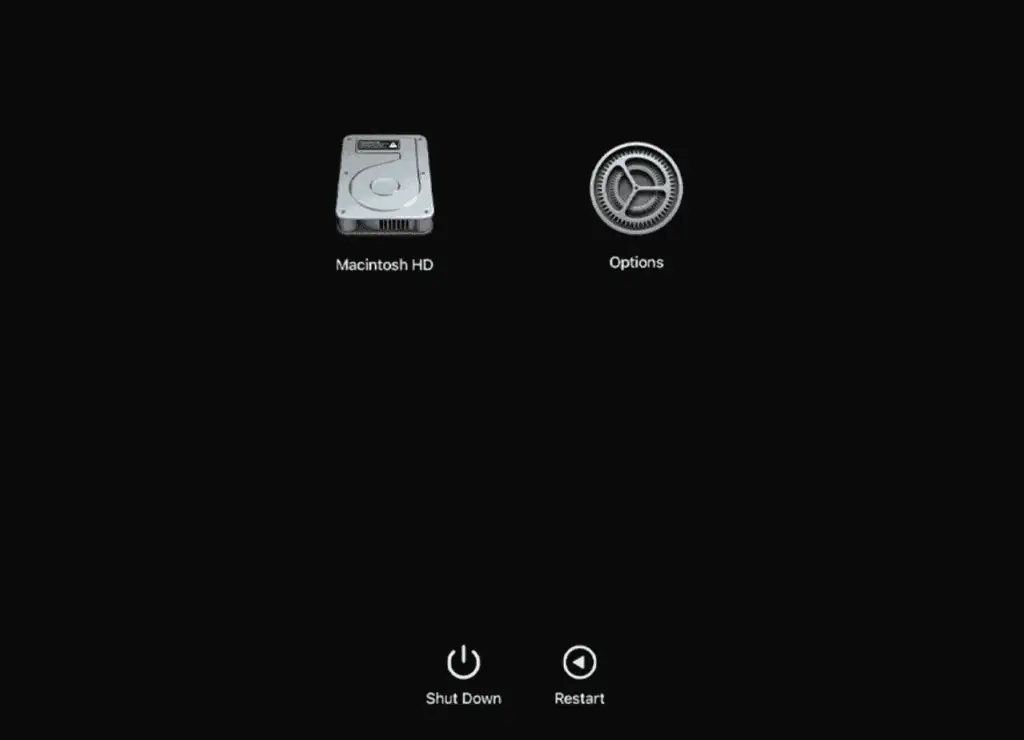
- Hold Power until you see Options.

- Choose a drive to boot from.
- Then, hold Shift and Continue in Safe Mode.
- Try to reinstall.
Reinstall From the Recovery Window
The recovery mode is like your Mac’s ace in the hole. That means whenever you run into system errors, including a failed startup and installation process, you can resort to the recovery mode to fix your problem.
However, the steps to reach the recovery mode vary depending on whether you’re using an Intel-based Mac or an Apple Silicon Mac. Furthermore, there are two ways to install macOS; one without erasing the disk and one after erasing your disk. All these methods are shown below.
Without Erasing Disk
Reinstalling macOS without formatting your disk drive will not cause any data loss because the new operating system will be installed on top of the previous one. So, here’s how you reach the recovery window:
On Apple Silicon Macs
- Get online either via Wi-Fi or by using a LAN.
- Shut down.
- Hold Power until you see Options.
- Then, click on Options.

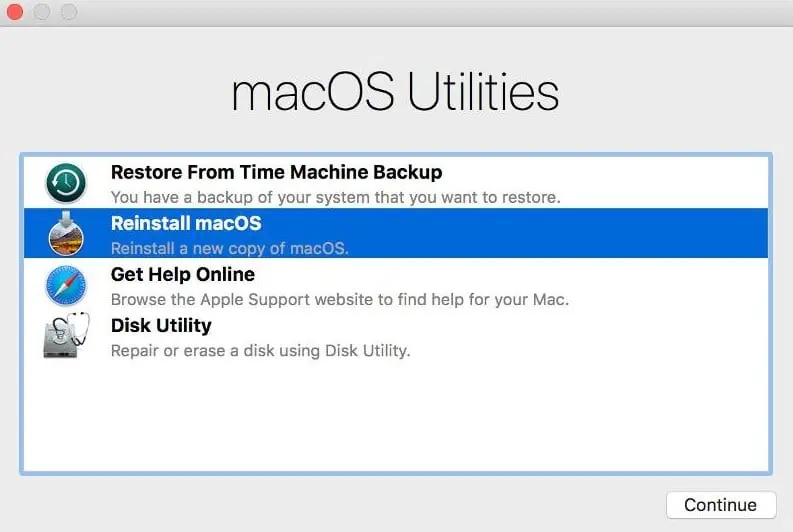
You’ll now see the recovery window. - Then, Reinstall macOS.

- Follow the onscreen procedure.
- If you’re given the option, choose Macintosh HD instead of Macintosh HD – Data before the installation begins.
On Intel Macs
- Get online either via Wi-Fi or by using a LAN.
- Shut down.
- Press Power button once.
- As soon as the system starts up, hold Command + R until your system flashes the Apple icon.

You’ll now see the recovery window. - Then, Reinstall macOS.
- Follow the onscreen procedure.
- Again, if you’re given the option, choose Macintosh HD instead of Macintosh HD – Data before the installation begins.
By Erasing Disk
Another verified method to fix the error you’re facing is by reinstalling macOS after erasing your disk drive. However, this method will completely format the selected drive, and all your data will be erased. So, it’s better if you back up your data before going down this path.
Considering this, follow the steps shown below:
On Apple Silicon Macs
- Get online either via Wi-Fi or by using a LAN.
- Shut down.
- Hold Power until you see Options.
- Then, click on Options.
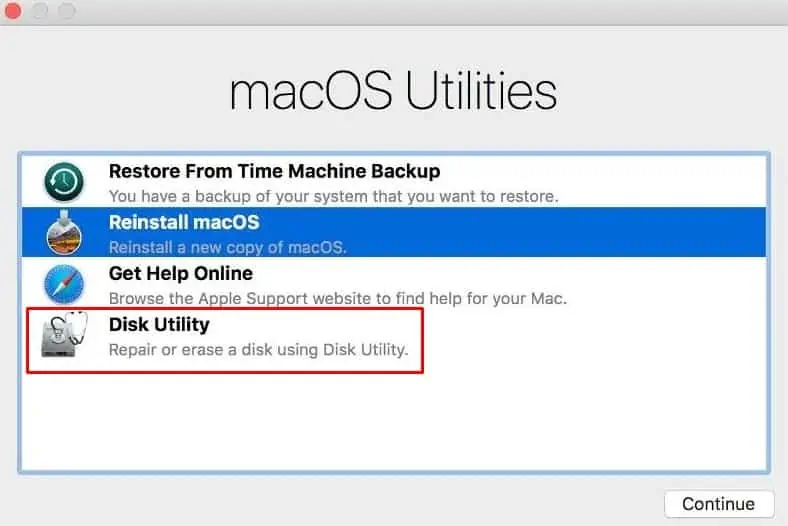
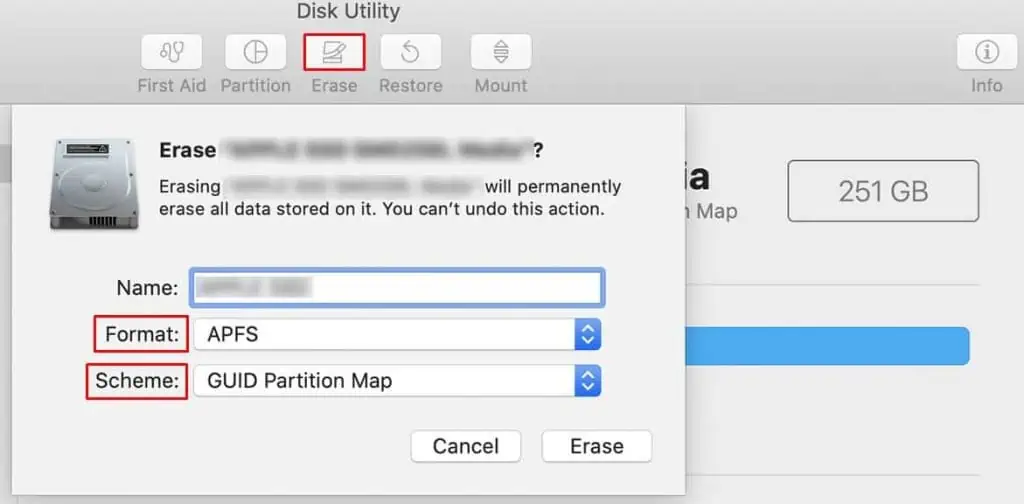
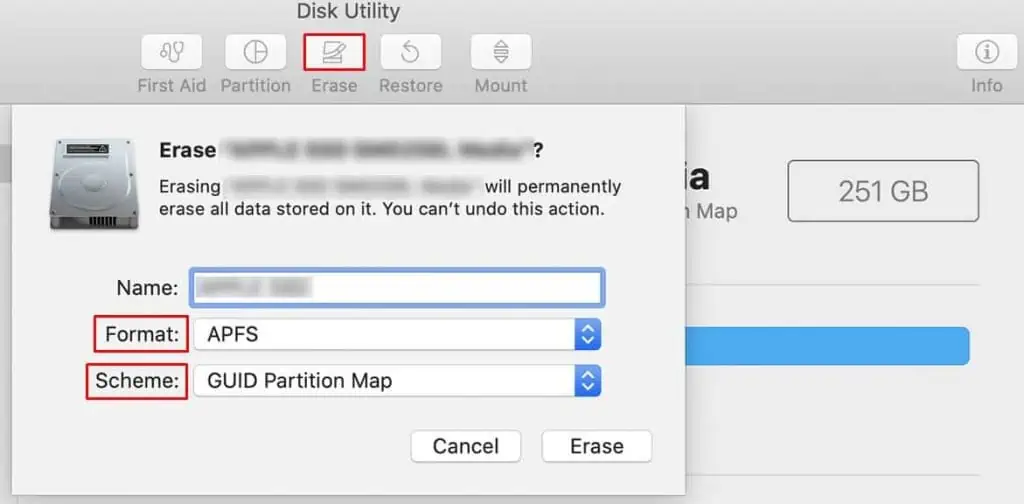
You’ll now see the recovery window. - Then, go to Disk Utility.

- From the sidebar, select the drive where you plan to install the OS.
- Choose to Erase your drive.
- On the pop-up box, set a GUID partition type and Mac OS Extended (Journaled) format

- Hit Erase.
- Close Disk Utility.
- Now, on the recovery window, Reinstall macOS.
- Follow the onscreen procedure.
On Intel Macs
- Get online either via Wi-Fi or by using a LAN.
- Shut down.
- Press Power button once.
- As soon as the system starts up, hold Command + R until your system flashes the Apple icon.

You’ll now see the recovery window. - Then, go to Disk Utility.
- From the sidebar, select the drive where you plan to install the OS.
- Choose to Erase your drive.
- On the pop-up box, set a GUID partition type and Mac OS Extended (Journaled) format.

- Hit Erase.
- Close Disk Utility.
- Now, on the recovery window, Reinstall macOS.
- Follow the onscreen procedure.
Redownload Installer and Retry
If no methods work, you have to re-download the installation file, as it could simply be corrupted. Trying to fix the installer would be much more difficult, and hence the better option would be to redownload the file completely.
For this, you can visit the App Store and search for the macOS version you’d like to set up. Either that, or you can do so via Apple’s official webpage. No matter which method you opt to follow, make sure that you delete the corrupted setup file beforehand.

