At times, your ASUS laptop could be facing keyboard backlight problems. For some users, their keyboard doesn’t illuminate light while others are unable to control its configuration (brightness, color, and more).
After a thorough investigation, I can confirm that the issues lie with the ATK drivers. They are responsible for supporting function keys and when not installed, the keyboard stays in its default state.
Apart from that, you could be facing this problem due to corrupted keyboard drivers, outdated software, or damaged backlight LEDs. Whatever might be the issue, the following troubleshooting tips should help you fix it.
Check Dedicated Hotkeys
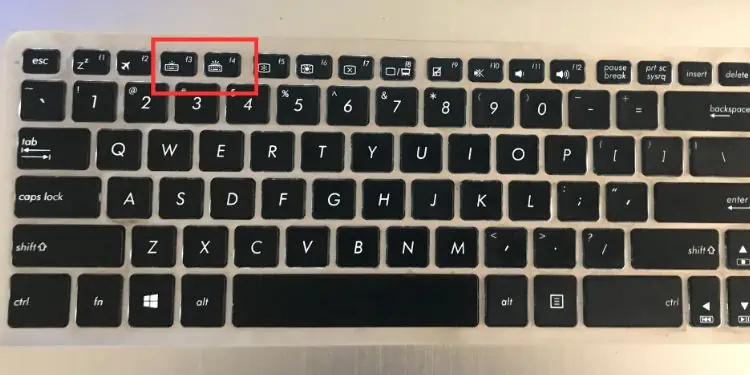
Most beginners are unaware of the hotkeys that help control the backlight settings on their ASUS laptops. In case someone decreased the brightness or it happened accidentally, you might feel that the backlit keyboard could be malfunctioning.
If you believe you’re facing a similar issue, find out the dedicated hotkeys that work for your ASUS model from the user manual. For most notebook series, it’s the F7 key while for others it could be F3 (to decrease brightness) and F4 (to increase brightness).
In case the hotkeys are not working, try it as a combination with the Fn key (Fn + F7, Fn + F3, and Fn + F4). But if you have a gaming model, use Fn with the up and down arrow keys. Check the keyboard light icon to identify yours.
Some ASUS laptops even allow locking the function keys using the Fn + Esc hotkey. In case you’ve mistakenly locked it, you might be unable to control the keyboard color and other behaviors. So, first use this combination followed by the dedicated backlight hotkey to make it work.
Install the Latest ATK Driver
The AsusTek Keyboard (ATK) utility is a program that provides ATKACPI and hotkey-related drivers. Without it, your ASUS laptop might lack the proper support for special functions and hotkeys.
It seems the driver doesn’t come pre-built in most ASUS notebooks. So, you’ll need to download this for your respective model.
But before moving forward, I recommend looking for the hcontrol.exe file in your Windows boot drive. Most users were able to locate this in C:\Program Files (x86)\ASUS\ATK Package\ATK Hotkey. However, this might be different in your system.
Basically, the hcontrol.exe file activates the ATK Hotkey utility which could be turned off on your ASUS laptop. After executing it, the function keys should start working normally and you should now be able to control the keyboard lights.
In case you couldn’t find it, you may download and install the latest ATK driver for your model. Personally, I was able to fix my backlight problem on the X580VD model after installing the missing ATK driver. Here’s a quick demonstration of how to solve it:
Note: Uninstall your previous ATK package if you have an older version installed on your ASUS laptop.
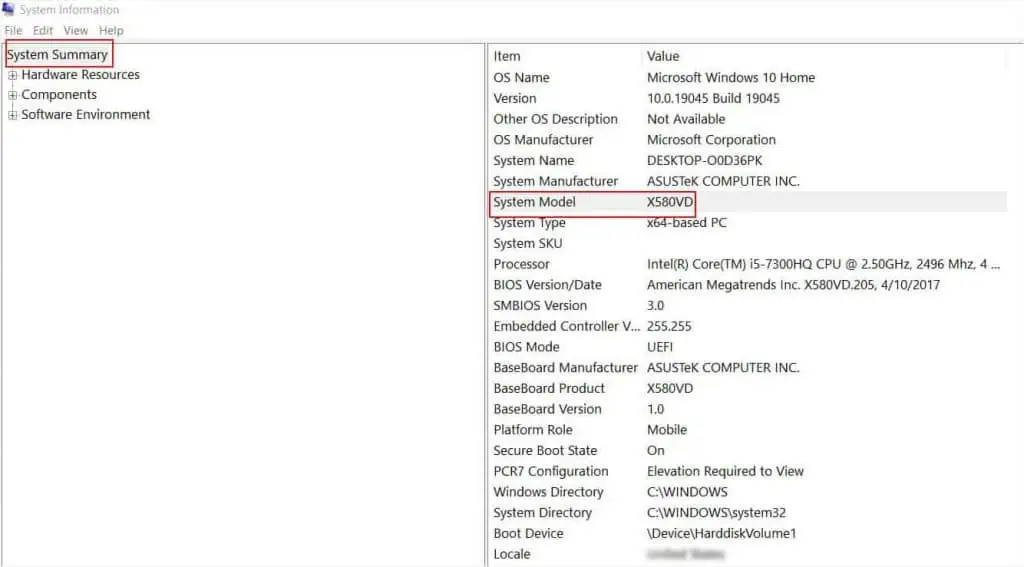
- If you’re unsure about your ASUS model, first open Start Menu and find System Information.
- Launch the utility and check the System Model field in the System summary. Use Ctrl + C to copy it.

You can even find your model directly from your laptop sticker. - Then, launch a preferred web browser and navigate to ASUS global website.
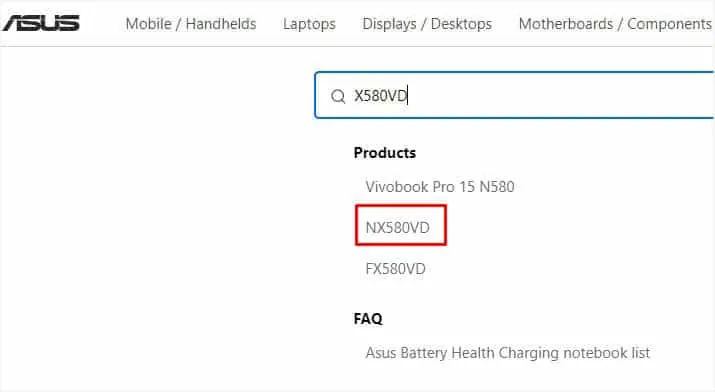
- Click on the Search icon. In the search field, paste your model and select your laptop.

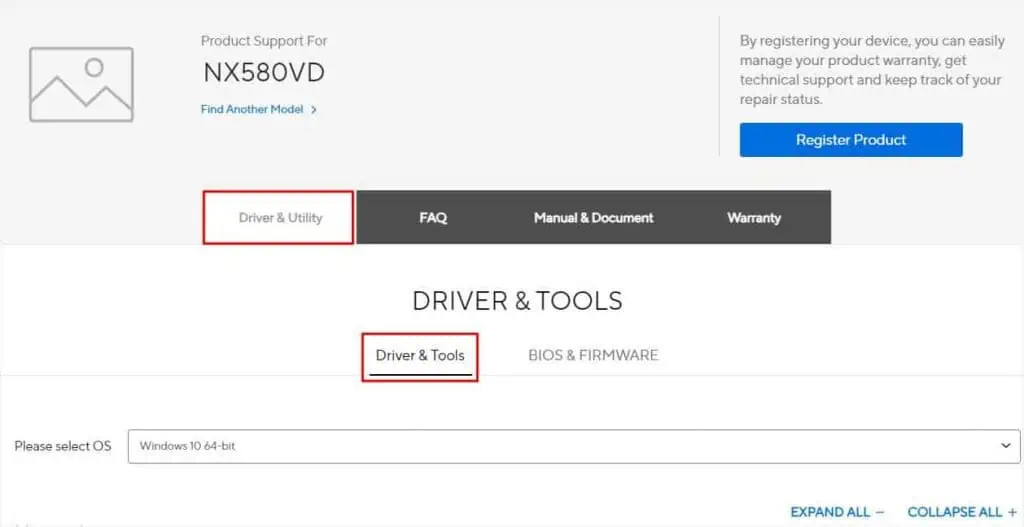
- Get to Driver & Tools from the Driver & Utility tab.

- Select your operating system and look for the ATK field.
- Then, download the latest ATK package.

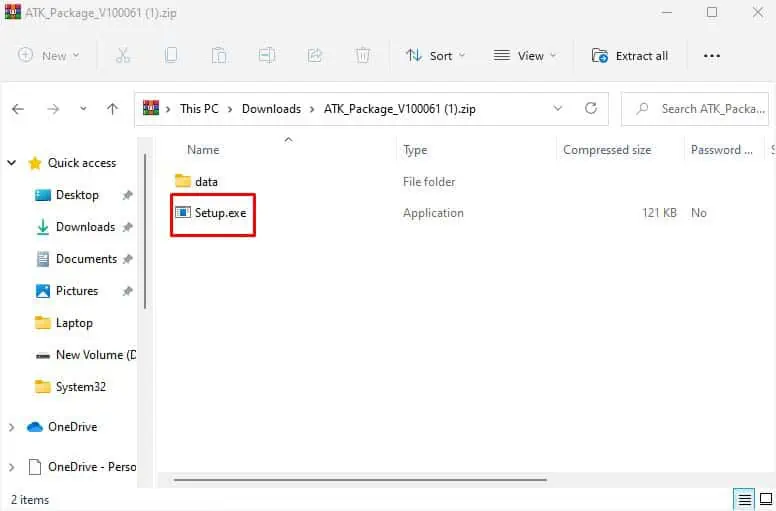
- Unzip the downloaded file and run the setup file.

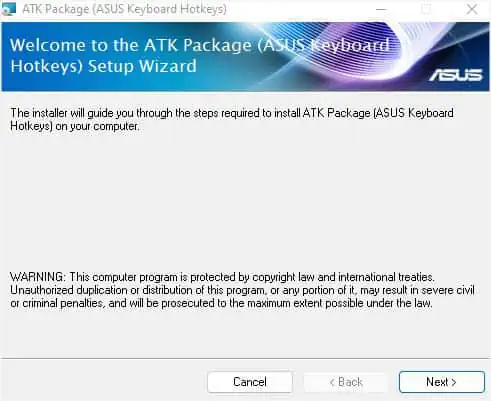
- Follow the on-screen instructions in the setup wizard to install the keyboard hotkeys.

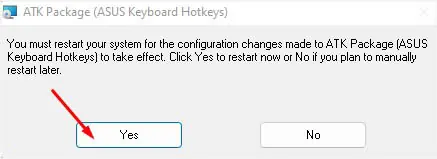
- Hit Yes on the final screen to restart your ASUS laptop and complete the installation.

- Try tweaking the keyboard backlight using the dedicated keys and this time, it should work.
Additional Tip: For some users, installing the latest Smart Gesture drivers has fixed the keyboard light issues. Also, I recommend checking for possible hotfixes on the ASUS website if neither of these packages solved your problem.
Perform EC Reset
If you have already installed the latest ATK drivers but the issues persist, I recommend resetting the Embedded Controller (EC). This involves hard resetting your ASUS laptop which should resolve any sort of temporary malfunctions with the keyboard light.
When doing so, you’re basically restoring your hardware to its default configuration. This will reset the EC firmware that stores information on various hardware functionalities, including keyboard backlights.
- First of all, close all the running programs and shut down your ASUS laptop.
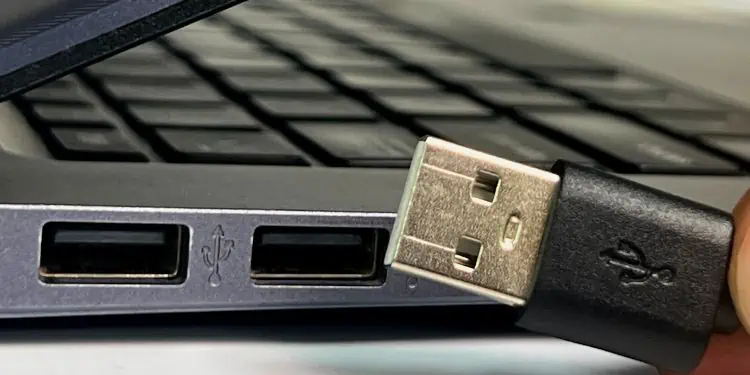
- Now, disconnect all the external devices.

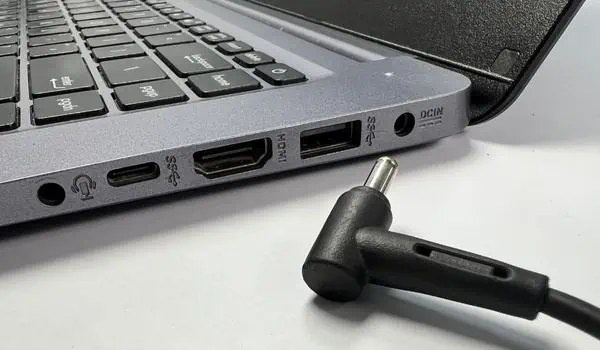
- Also, detach the power adapter (except for the TP420IA and UX425IA models).

- If your ASUS laptop has a removable (external) battery, remove it from its dedicated slot.

- Then, press and hold the power button for 30 to 40 seconds to perform an EC reset.

- Now, reinsert the external battery and plug back the power adapter.
- Finally, start your ASUS laptop and check whether the keyboard light is now working.
Run Dedicated Troubleshooters
Windows offers two different troubleshooters that can help resolve keyboard backlight issues. First is the dedicated Keyboard Troubleshooter, which you can run to fix common problems related to drivers and settings.
If the Keyboard Troubleshooter didn’t work, you may run the Hardware and Devices Troubleshooter. This utility doesn’t just check keyboard-related problems but the entire hardware components that could be facing troubles.
Follow the below instructions on how you can use both of these troubleshooters, which can potentially make the keyboard lights function again:
- Use the Windows + I hotkey to open Settings.
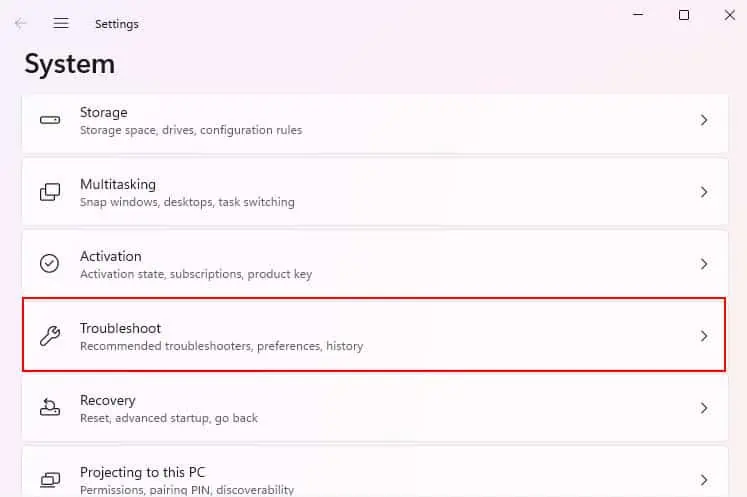
- From the System section, choose Troubleshoot.

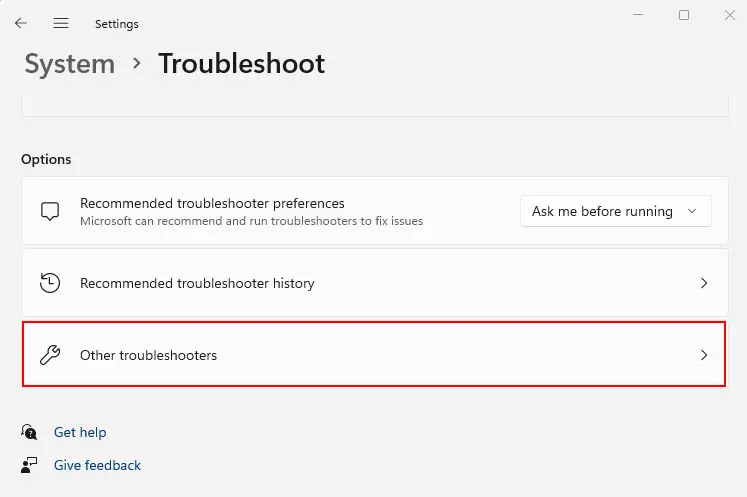
- Go to Other Troubleshooters.

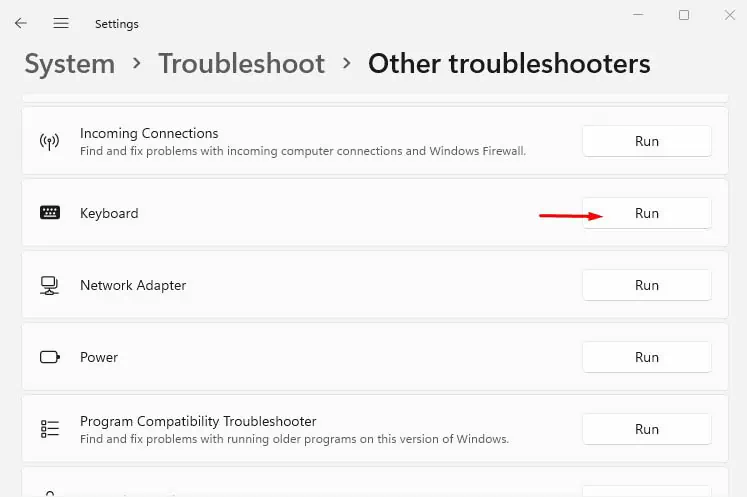
- Next, click on the Run button next to the Keyboard. This will start the dedicated troubleshooter.

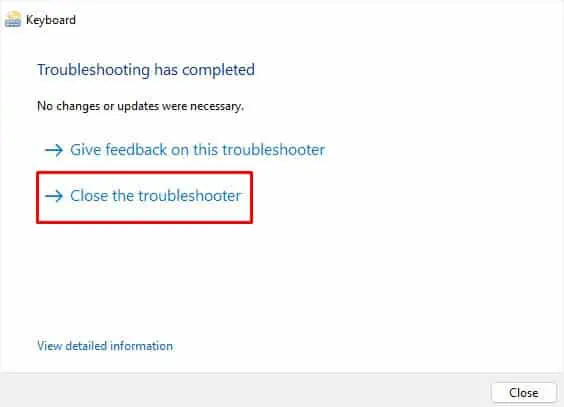
- Wait for the troubleshooter to diagnose the possible issues with your keyboard.

- If no changes or updates were necessary, close this troubleshooter.

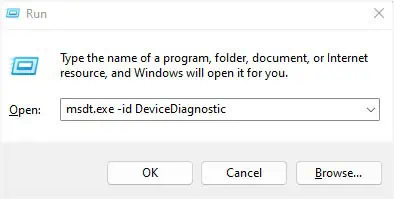
- Now, use Windows + R to open the Run utility. Here, execute the
msdt.exe -id DeviceDiagnosticcommand to launch the Hardware and Devices troubleshooter.
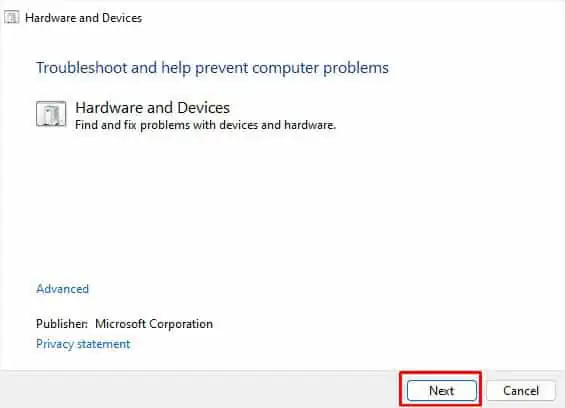
- Hit Next to start the diagnosis.

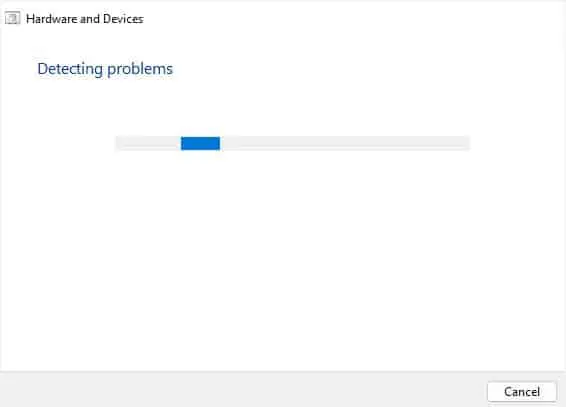
- You’ll likely get a screen to choose the problematic device that could be tinkering with your keyboard lights. Select it and wait for the troubleshooter to fix the issue.

Update or Reinstall Troublesome Drivers
In case the troubleshooter couldn’t identify the problem, it’s time that you update or reinstall the keyboard drivers manually. This is to fix the corrupted or outdated drivers that could cause malfunctions with the proper communication between the operating system and backlight control.
Along with keyboard drivers, most ASUS users are facing the same issue due to a problematic system control interface driver. As the name suggests, it is responsible for controlling the system behavior, like function keys, backlight control, and more.
Reinstalling or simply updating the driver can possibly fix the related bugs that could be causing problems with the keyboard light.
Below is the step-by-step guide on how to update and reinstall the troublesome drivers on Windows 11:
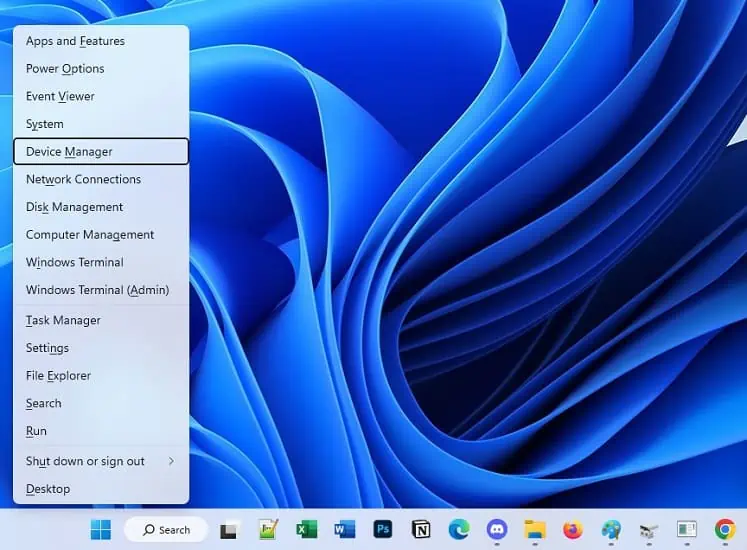
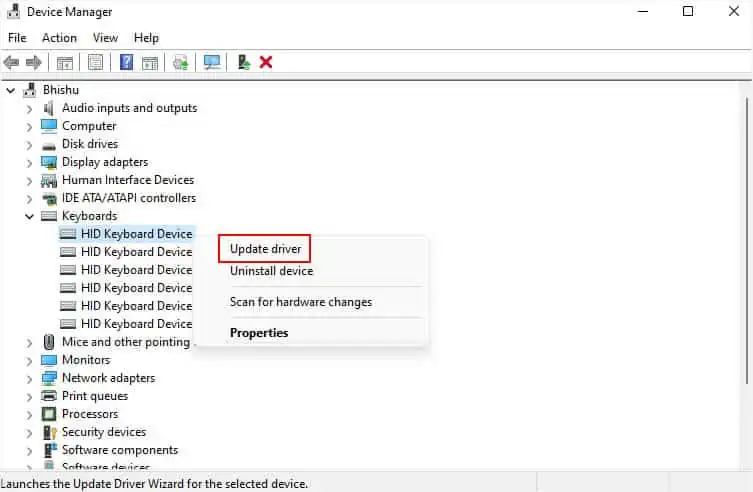
- Use Windows + X to open the Quick Link menu and choose Device Manager.

- Expand the Keyboards option and right-click on your keyboard driver.
- Pick Update driver.

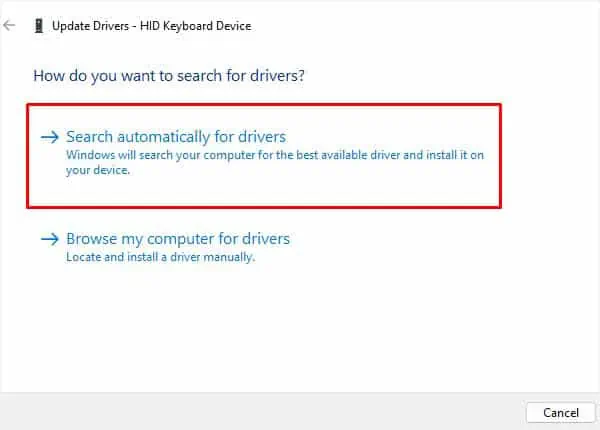
- In the Update Drivers pop-up, choose Search automatically for drivers.

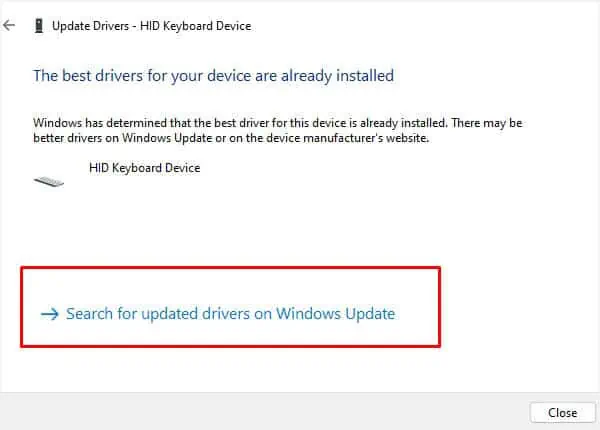
- If this didn’t solve the problem, check if there’s an update available in the Windows Update settings.

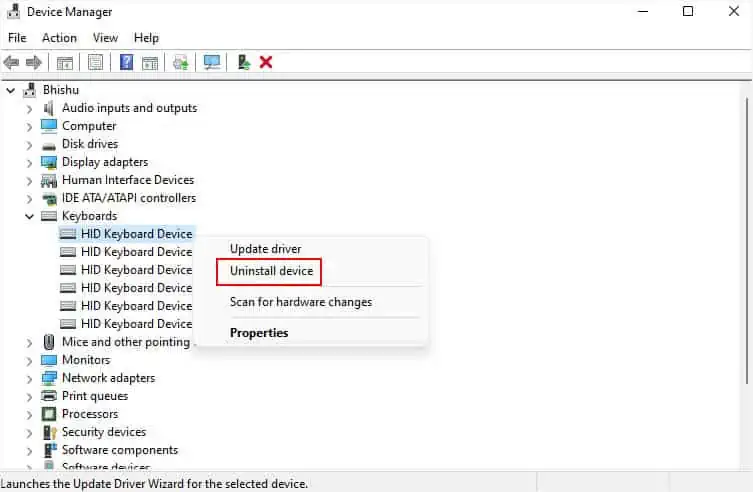
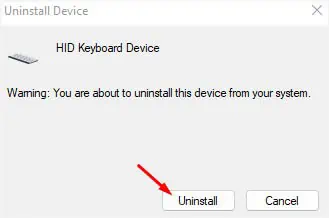
- Even if that doesn’t help, right-click on your keyboard driver again and pick Uninstall device.

- Hit the Uninstall button and reboot your ASUS laptop. This should install the necessary drivers and possibly fix the backlight problem.

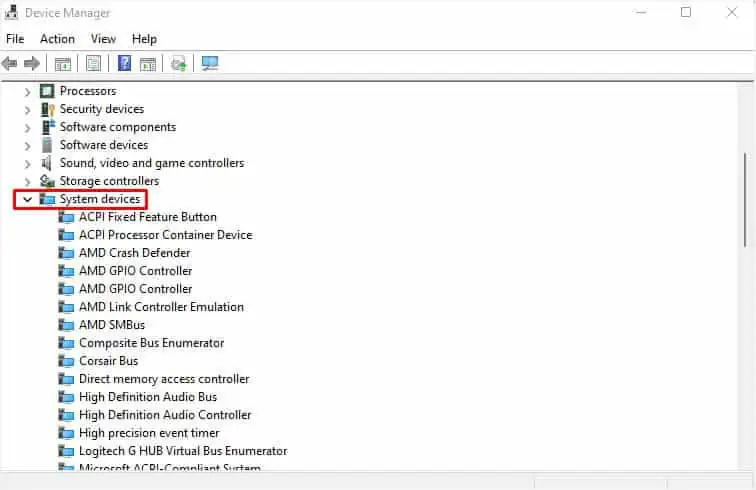
- Updating/reinstalling keyboard drivers won’t always help. Sometimes, ASUS system control interface drivers could also be responsible. In that case, open Device Manager again and expand System devices.

- Look for ASUS System Control Interface and update/reinstall it.
Additional Tip: If updating the drivers locally didn’t help, I advise downloading the latest ones from ASUS’s official website. Make sure you double-check your model before doing so, otherwise, it won’t work or can cause further implications.
Check Issues with Armoury Crate
If you own a ROG or TUF gaming laptop, it usually comes with the Armoury Crate utility. While this is quite a handy program that can help customize the keyboard lights and behavior, it has come out to be troublesome for some users.
In case the software is buggy or the related settings got changed, you might want to revert these configurations. I recommend updating the application or restoring the related settings.
Also, someone you know might have made certain changes or turned the feature off, which you might be unaware of. In that case, consult your companion and change back the related settings.
The same can happen if the Armoury Crate application is infected with malware. While running a quick scan can sometimes help, I would rather recommend uninstalling it (if you’re not going to use it anyway).
In case the keyboard light works, know that this software was the culprit. You may now download the latest one (compatible with your ASUS model) from the official website if required.
Clean Boot to Find Issues
Apart from the corrupted Armoury Crate, some other third-party applications and services can also lead to keyboard light issues. Fortunately, Windows lets you start your system with limited sets of drivers and startup programs to help point out the possible cause.
If you get the error on clean boot mode, it’s possibly an operating system or hardware fault. However, if the keyboard light starts working, know that there’s a third-party software conflict.
Here’s how you can troubleshoot using the clean boot feature:
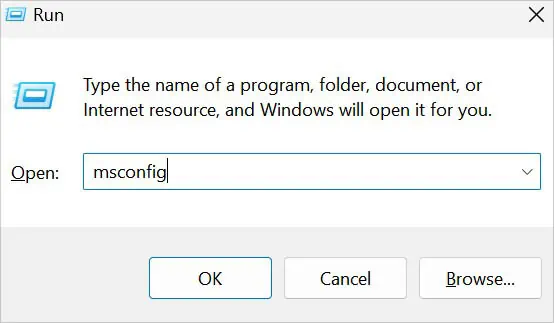
- Open Run and execute the
msconfigcommand to launch the System Configuration utility.
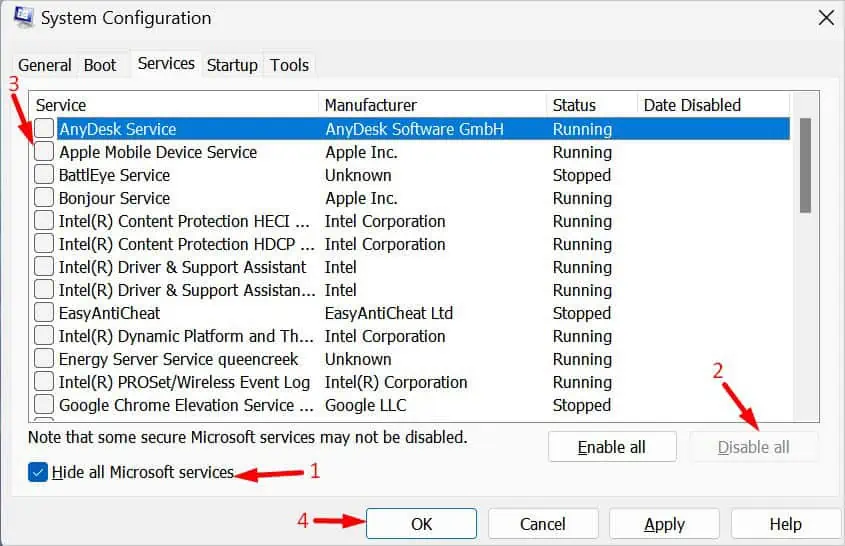
- From the Services tab, check the Hide all Microsoft services option.
- Next, press Disable all. This should uncheck all the services from the list.
- Press Ok to save the changes.

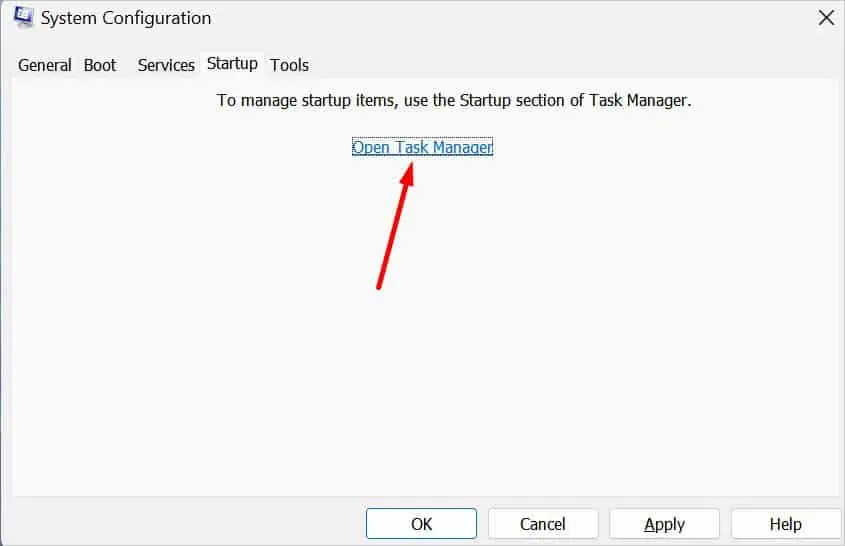
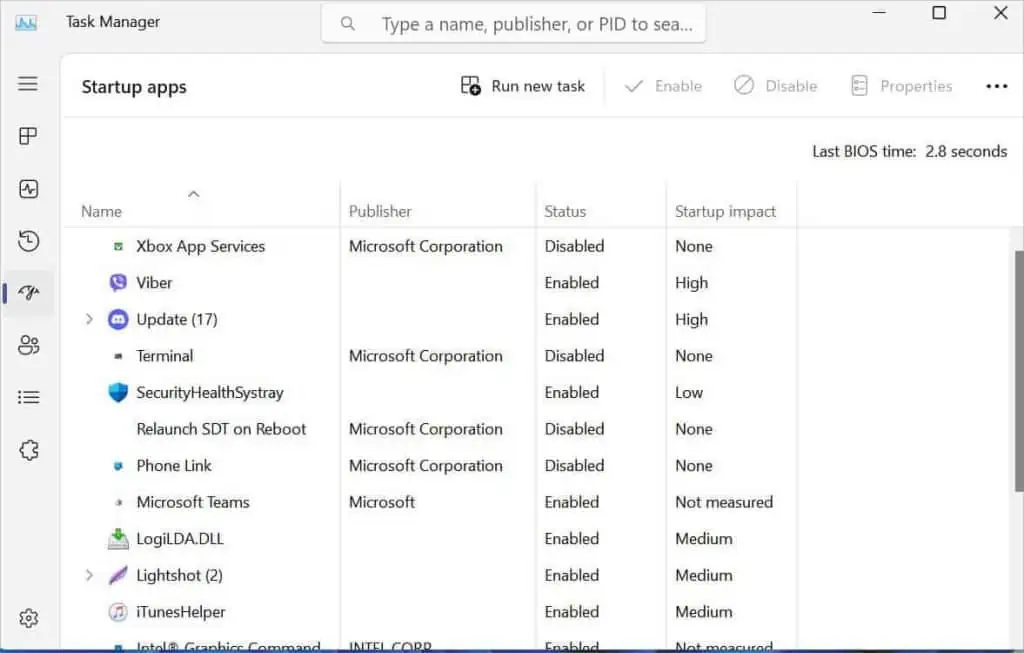
- After disabling the third-party services, move to the Startup tab and click on Open Task Manager.

- Disable all the enabled apps to prevent them from running during startup.

- Restart your ASUS laptop and examine the keyboard lights. If the problem is fixed, know that one of the disabled services or startups is the culprit.
- Now, you need to enable each program one by one to find what could be triggering this issue.
- Once you identify the troublesome app or service, keep it disabled or remove it completely from your ASUS laptop.
Reset Your ASUS BIOS
Users who have misconfigured BIOS settings (with or without knowledge) can also lead to potential keyboard backlight problems. This mainly includes power management and related hotkey or backlight settings.
While I did not find an option related to keyboard light on my ASUS X580VD BIOS, yours might have one. If you find it, make sure it’s enabled. Also, if you remember making any vital changes, try reverting it.
If nothing helps, find the related settings as instructed below to restore your laptop to factory settings:
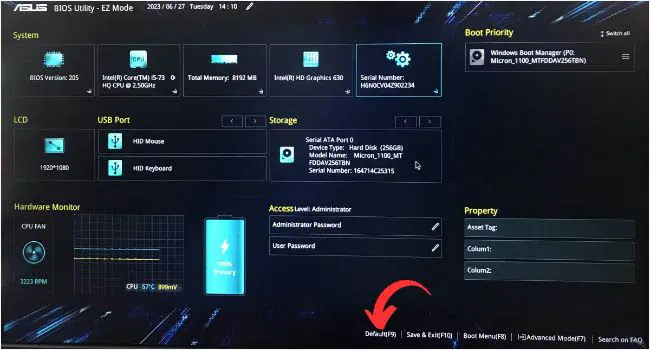
- Reboot your ASUS laptop and as soon as you see the logo, hit the dedicated BIOS key. Usually, this is F2 but might be different on your model.
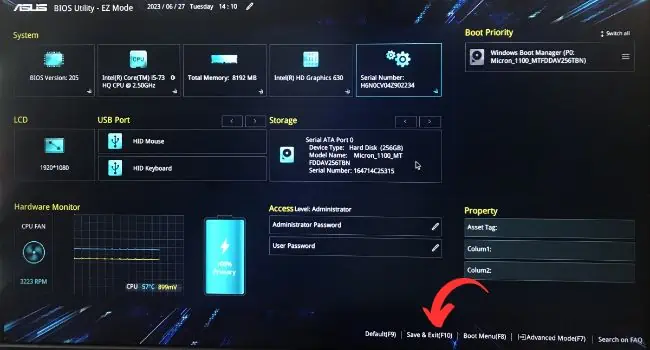
- Once you’re in the UEFI interface, hit the F9 key or click on Default from the bottom section.

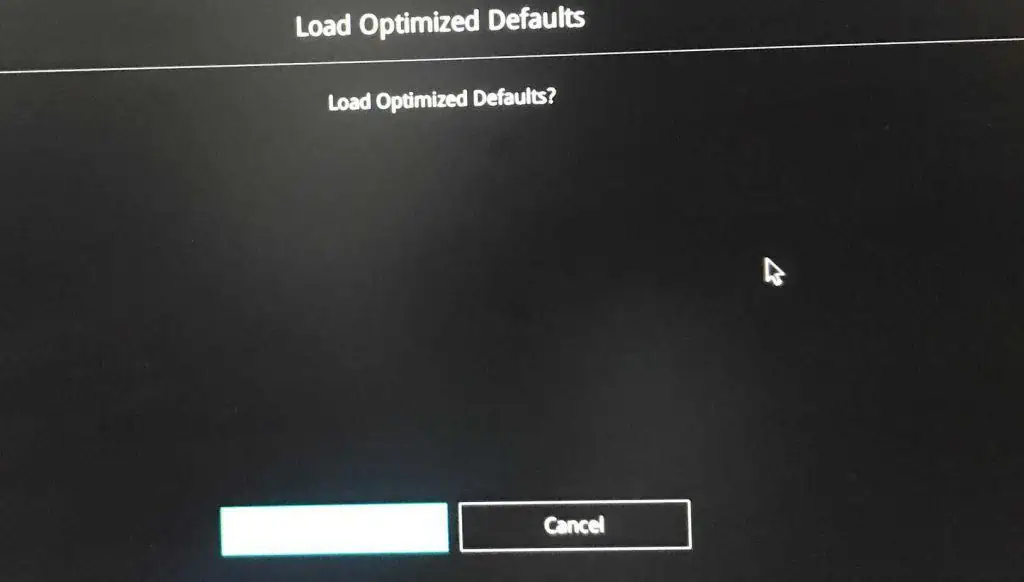
If you have Legacy BIOS, you’ll find the Optimized Defaults option. - In the Load Optimized Defaults dialogue box, press Ok.

- Now, hit the F10 key to save and exit from ASUS BIOS Utility.

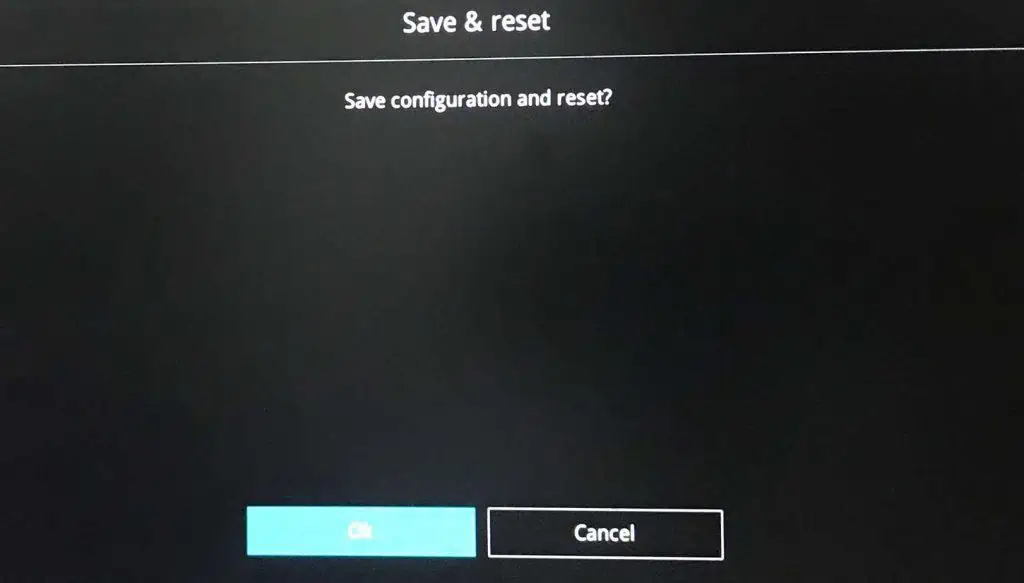
- Press Ok to confirm your action and the laptop should restart.

Update ASUS BIOS
Even though it’s not recommended to update your BIOS, you can certainly do it if it’s a compatibility or bug issue. But before moving ahead with the below instructions, make sure you create a backup of your current settings and important data.
You might have to reflash your BIOS if anything goes wrong. Also, keep the power adapter connected during the update and ensure no power failure occurs in the process.
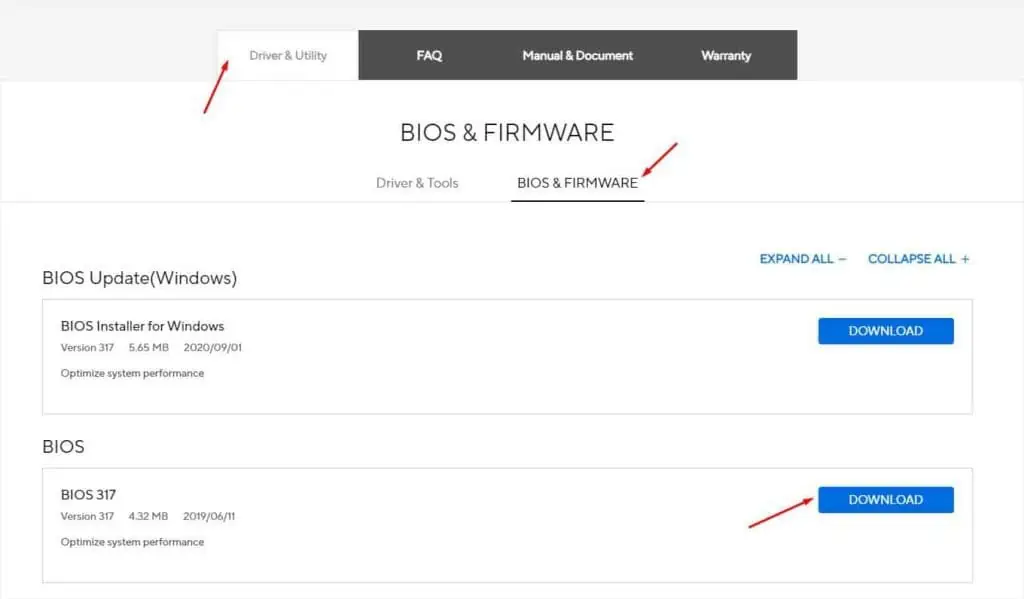
- First, get to the official ASUS website and search for your model.
- Get to BIOS & FIRMWARE under the Driver & Utility section.
- Now, download the latest BIOS file.

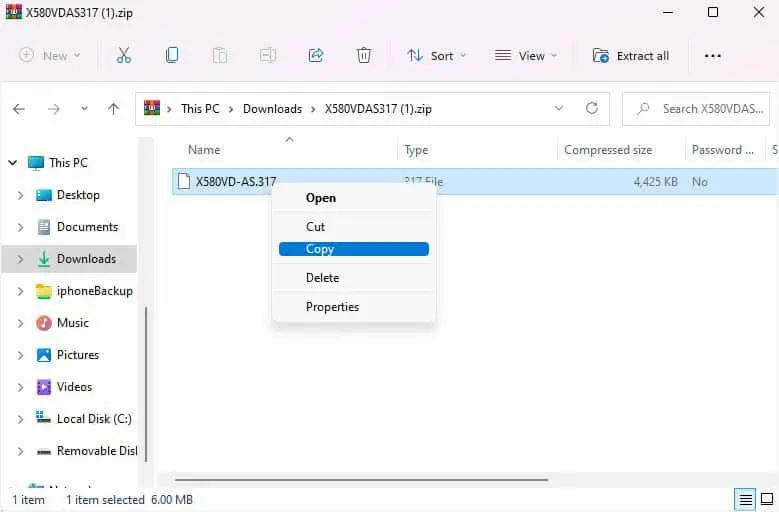
- Unzip the folder and copy the update file to a FAT32-formatted flash drive.

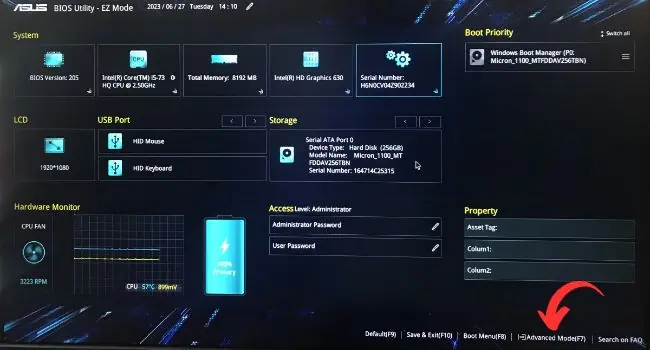
- Next, reboot your ASUS laptop and use the dedicated key to enter BIOS Utility – EZ Mode.
- Switch to Advanced Mode by pressing F7.

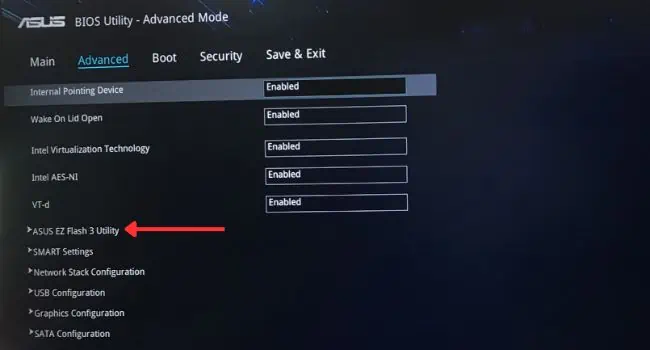
- Get to the Advanced tab and scroll down to select ASUS EZ Flash Utility.

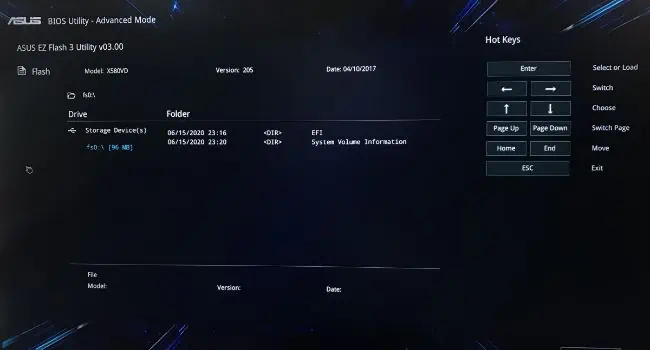
- Insert the flash drive containing the BIOS file and you should see it on your screen.

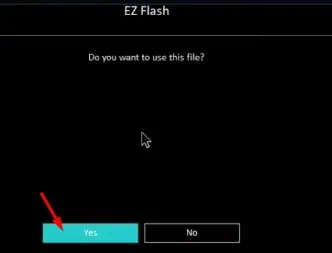
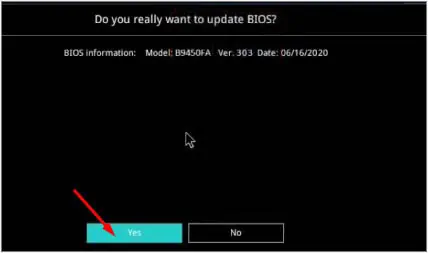
- Select it and hit the Yes button to use this file to start your ASUS laptop BIOS.

- For final confirmation, a popup should appear. Press the Yes button to move forward.

- Wait for the BIOS update to complete. This may take 5 to 10 minutes.

- Your ASUS laptop should reboot itself and take you to the login screen after the BIOS update is successful. Check whether the keyboard lights are now working.
Final Option: Even if restoring or updating BIOS didn’t help, the last sort option is to reset your ASUS laptop. But if you have made certain changes to Windows before, I recommend restoring your system to its previous configuration. This should take your notebook computer to the state when its keyboard light was functioning correctly.
Service Your ASUS Laptop
If the keyboard light issue prevails even after trying out every possible solution, it’s possibly a hardware issue.
According to a forum user, he had to replace his laptop battery to make the keyboard light up again. Probably, it was a power issue that was acknowledged by ASUS themselves.
Another user fixed the keyboard light periodically not working on the ROG-GL752v model problem by covering the light sensor (located near the webcam). This could indicate a malfunctioning sensor, which requires further hardware knowledge to fix.
Apart from that, the backlight LEDs could have gone damaged or there could be other serious hardware-related problems. Hence, the best solution is to contact the nearest ASUS service center.


