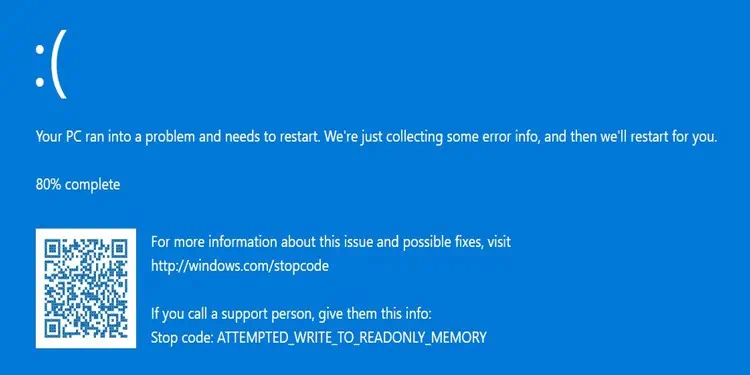
The Attempted_Write_to_Readonly_Memory Blue screen error or the error code 0x000000BE is not quite common. It occurs when some drivers or programs tend to write on a restricted memory section.
When you see this error on your PC, it is usually due to hardware issues, especially the memory. However, the unsigned, incompatible, corrupted, or outdated drivers can equally be the culprit here.
Thus, we have compiled a list of workable fixes that will eliminate this problem from your PC.
How to Fix Attempted_Write_to_Readonly_Memory BSOD Error
You will have to boot into the safe mode if your PC does not boot after the BSOD. Here is the way to do it.
- Power off your system by pressing the power button for around 10 seconds. Doing this 3 times will boot your system into the recovery environment.
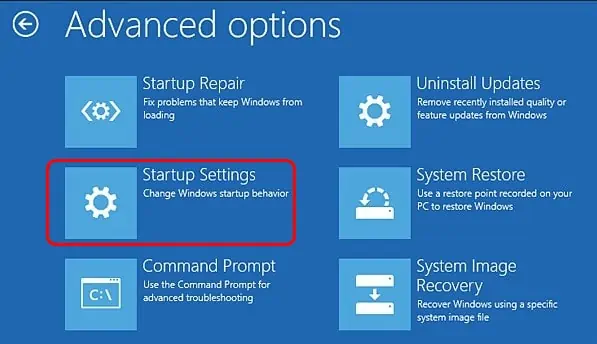
- Go to Troubleshoot and click Advanced Settings.
- Select Startup Settings and click Restart.

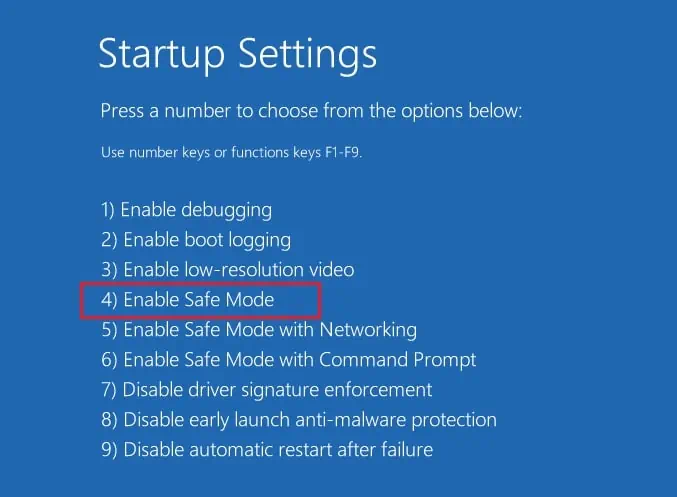
- Upon restart, press 4 or F4 to boot your PC to Safe mode.

Let’s look at the fixes to solve the issue now.
Find the Particular Cause
Despite the same error code, the Attempted Write to Readonly Memory BSOD can occur due to errors in different files and processes. Ntfs.sys, iusb3hub.sys, usb80236.sys, etc., are a few of them.
So, pinpointing the particular cause can help solve the problem much more easily. Let’s see how you can do it.
Look into the Minidump Files
Windows collects the error details during the bug check and stores them in dump files. You can go through the dump files to find the file name that failed, interfered, or was corrupted.
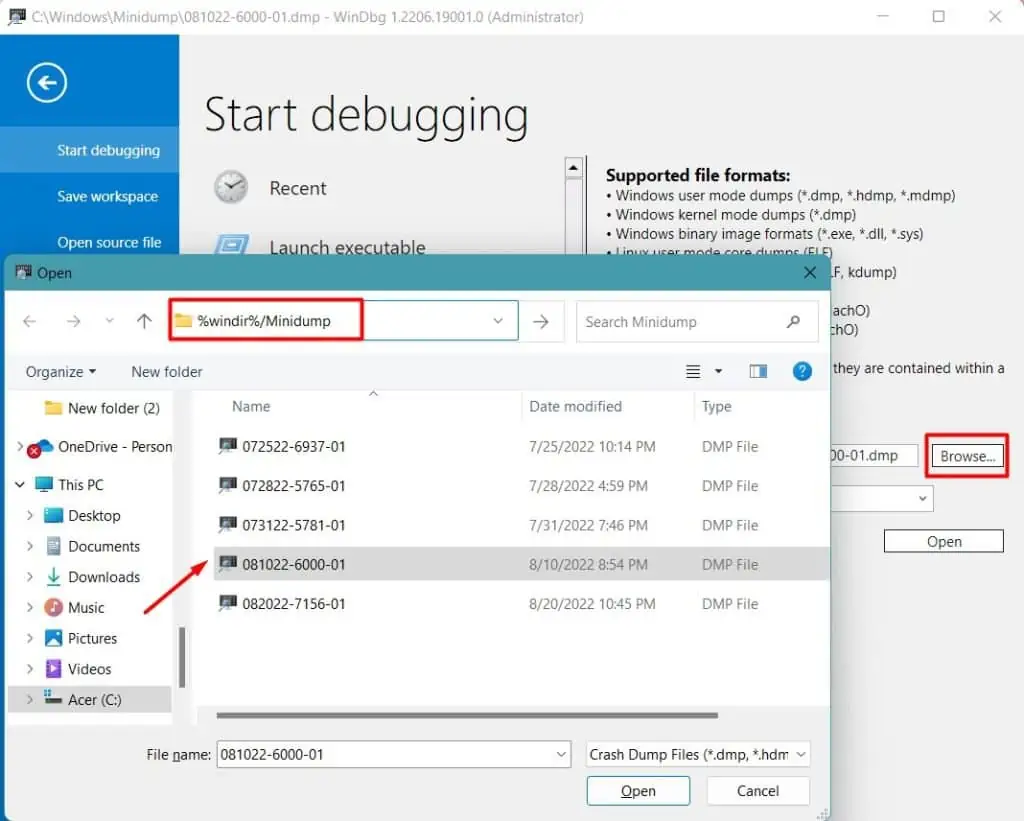
You will need a separate program called WinDbg by Microsoft to open the minidump file. Let’s see the way to do it.
- Download and Install WinDbg from Microsoft Store.
- Search WinDbg on the Windows search bar and right-click on WinDbg Preview to select Run as Administrator.
- Press Ctrl + ‘D’ and enter
%windir%\Minidumpin the address bar to get to the Minidump Folder.
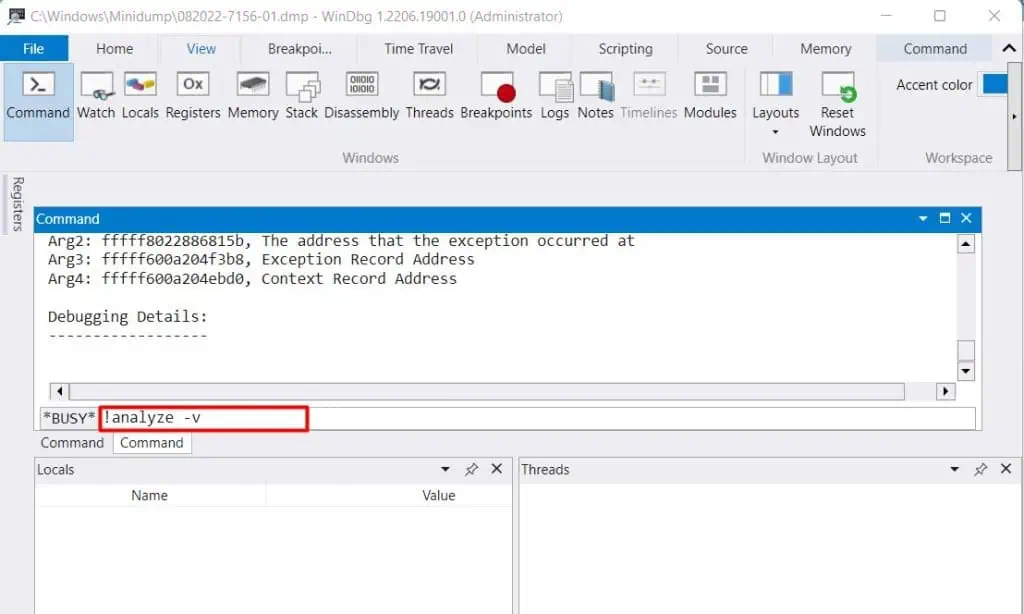
- Click on the View menu and choose Command to open a terminal.
- Type
!analyze -vin the terminal and let the analysis complete.
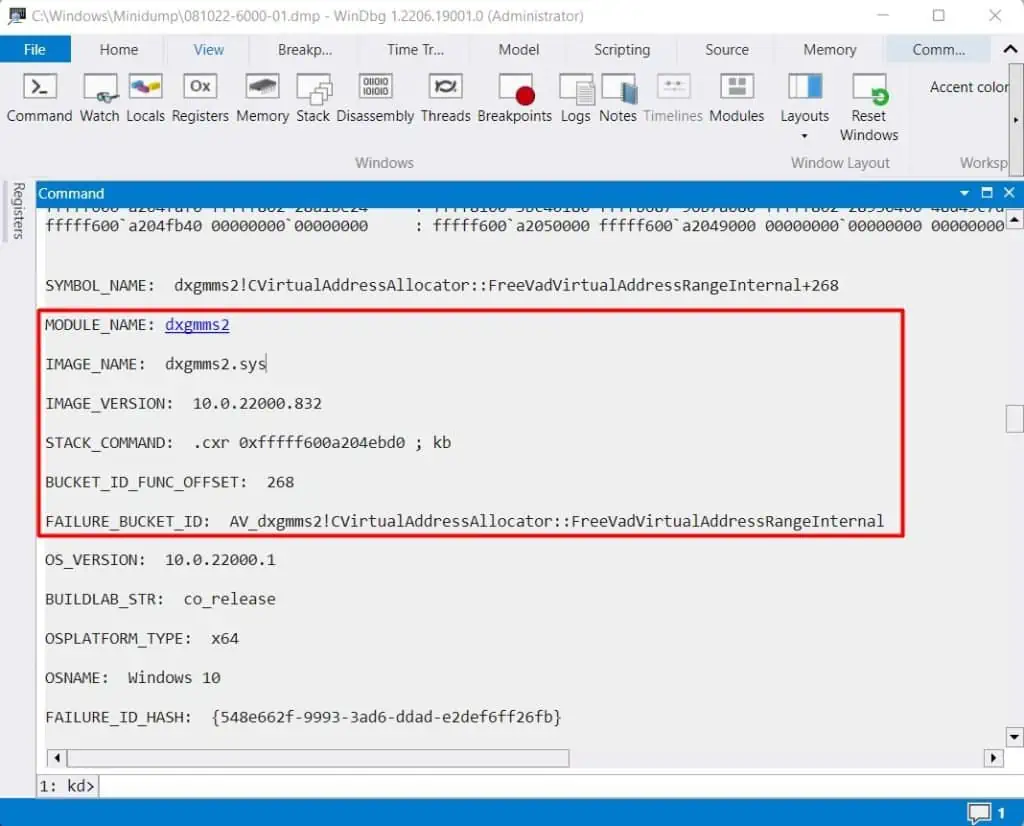
- After the process completes, scroll through the file to find the Module Name and other details.

- If the file seems to be unclear, search it on the internet.
After you find the cause and learn about its details, you can proceed by repairing, removing the file, or stopping the tasks and processes. See if the BSOD is fixed then.
Run Driver Verifier
If the minidump file did not direct towards the particular issue, you could run the driver verifier to find the culprit. Most of the time, the BSOD is caused by improperly programmed, corrupted, or incompatible drivers.
Driver verifier causes the drivers to stress out till they fail by running several tests and displays the error Driver_Verifier_Violation_Detected. Then, you can look into the dump file and rectify the issue.
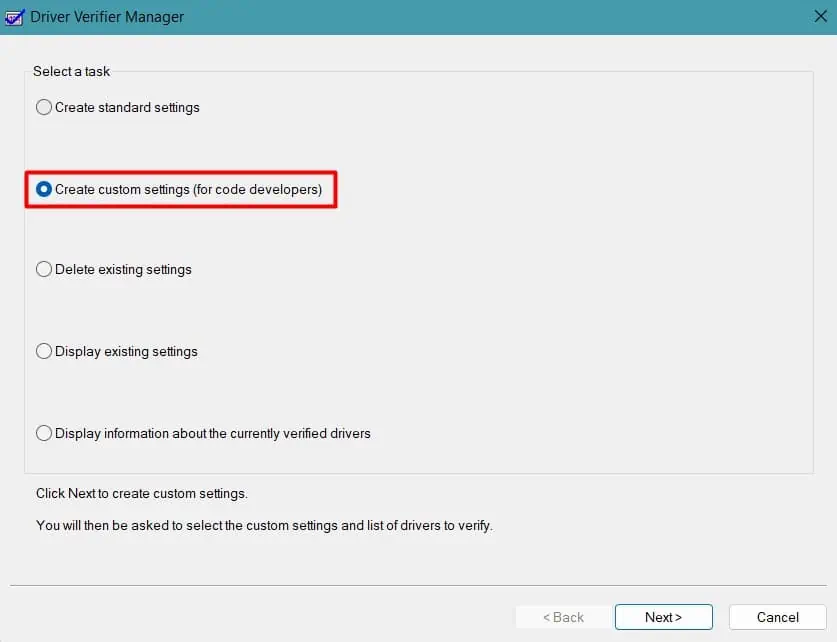
- Press Windows + ‘R’ and type
verifierin the Run dialog box. The Driver Verifier Manager will open. - Choose Create custom settings (for code developers) from the options and click Next.

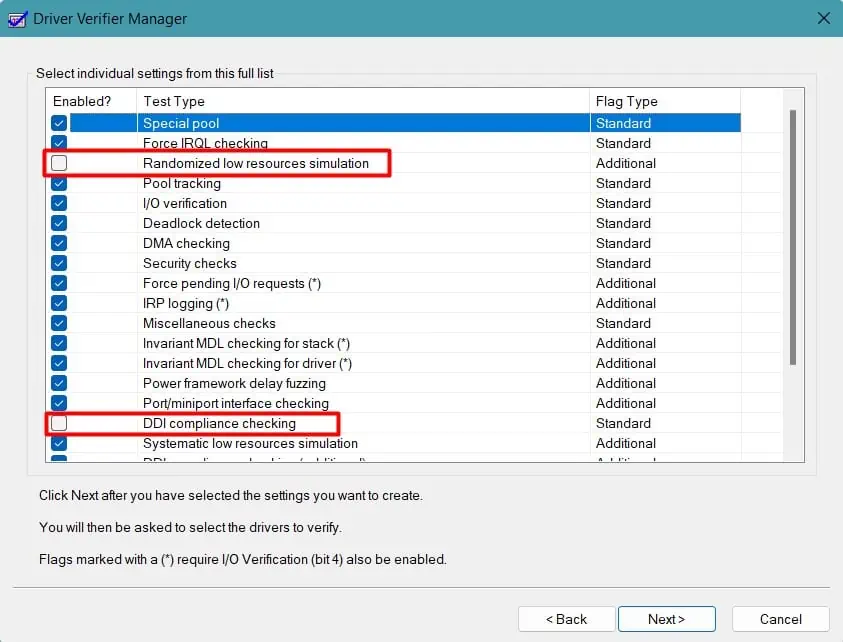
- Select all from the list except Randomized low resources simulation and DDI compliance checking. These two settings may cause other issues to the system and might not show the error we are looking for.

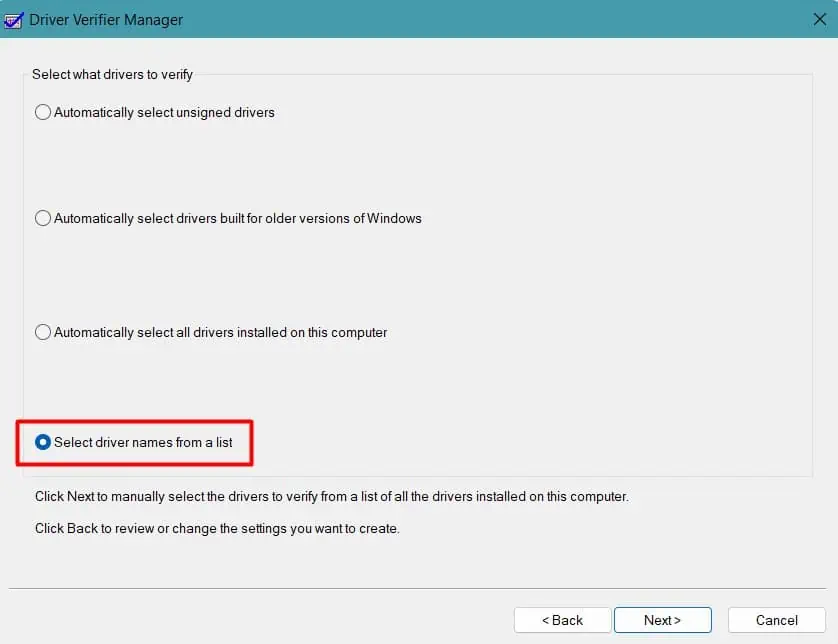
- Check the Select driver names from a list box and choose only the non-Microsoft drivers.

- Click Finish. The verifier will start running.
- To ensure that the driver verifier is working in the background, type
verifier /querysettingsin the Command Prompt. - After it shows the error, enter
verifier /resetin the command prompt to stop the driver verifier.
Go through the dump files by following the steps in the earlier section. You can then proceed to solve the error with the particular driver.
If the Driver verifier causes your PC to reboot in a BSOD loop, you can resolve the Driver_Verifier_Detected_Violation error from our detailed guide.
Perform a Clean Boot
Sometimes the problem may not be the driver and just the third-party applications and services. So, you need to figure out which one of them is causing the issue by performing a clean boot and running each one at a time.
Let’s go through the process.
- Press Windows + ‘R’ and enter
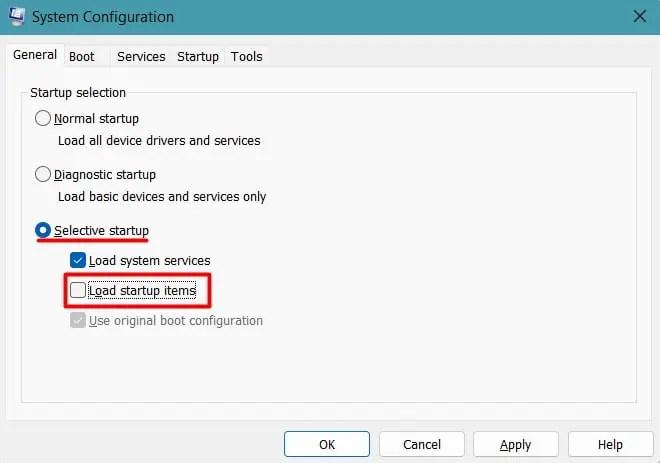
msconfigto open System Configuration. - Unselect the Load startup items box under the Selective startup section.

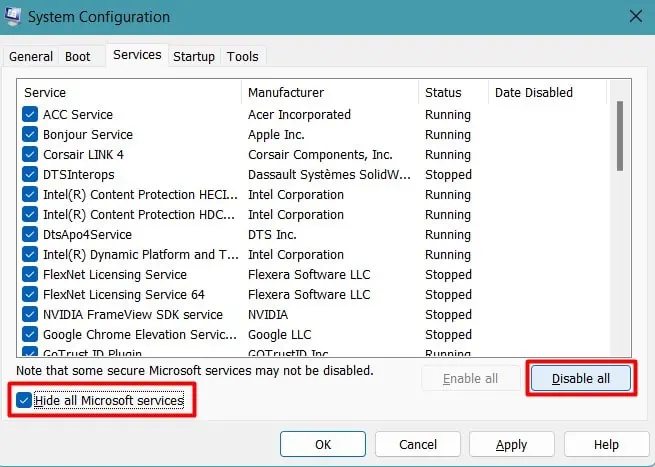
- Find the Services tab, select the Hide all Microsoft services option, and click Disable all.

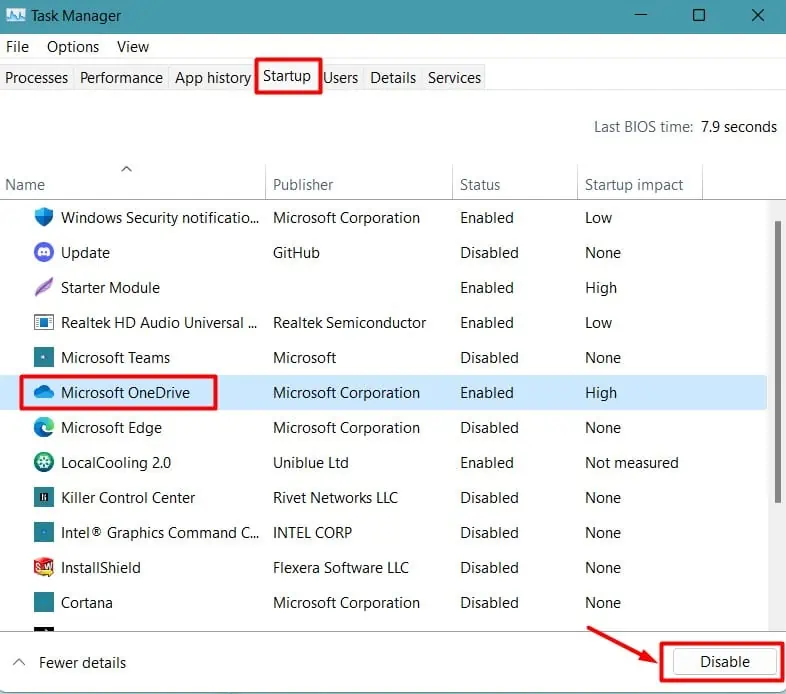
- Now, go to the Startup tab and click Open Task Manager.
- Select the startup programs individually and click Disable.

- Click Apply on System Configuration and reboot your PC.
If the Blue screen error does not appear for a while, then those programs may have caused the issue earlier. Press Ctrl + Shift + Enter to open Task manager and run those programs one by one. Find the one that causes the BSOD again and uninstall it.
Update Drivers
As we mentioned earlier, the drivers, especially the graphics, network, and USB drivers, are the culprit most of the time. So, you should update all the drivers in your system. If the driver verifier found the particular one, you can update that driver and see if it solves the issue.
Let’s see how you can do it.
- Press Windows + ‘R’ and type
devmgmt.mscto open Device Manager. - Find the device and double-click on it to expand.
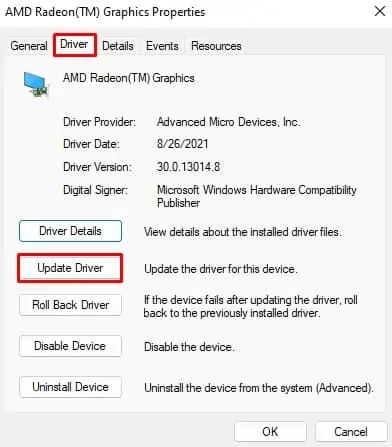
- Double-click on the driver and go to the Drivers tab.
- Click Update Driver and choose Search Automatically for the drivers.

- You can also download the latest one from the manufacturer’s website and install it accordingly.
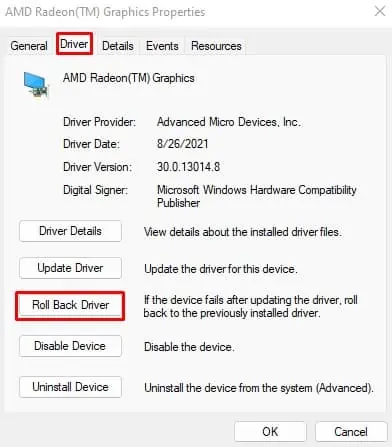
- If the problem started after you updated the driver, click Roll Back Driver to go to the earlier version.

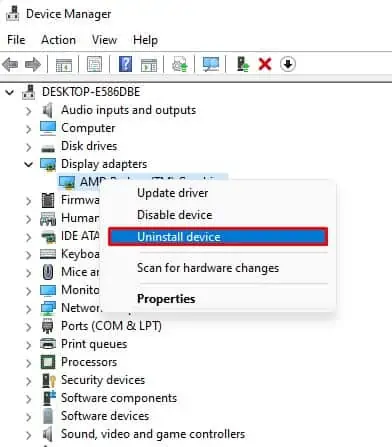
Sometimes, updating it may not always solve the problem. In such cases, you can uninstall the driver.
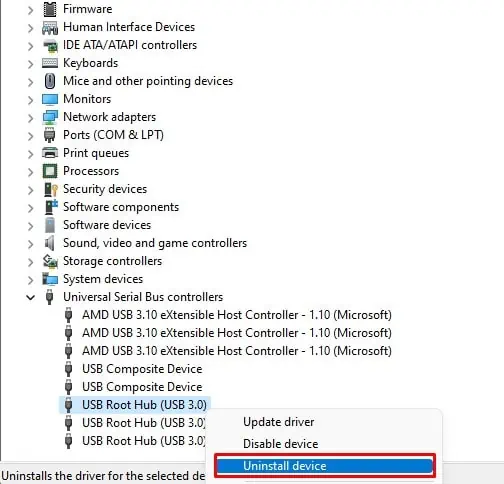
- Right-click on the driver in Device Manager.
- Click Uninstall Device.

See if the BSOD still appears.
Turn off XMP Profile and Overclocking
XMP or Extreme Memory Profile helps run your memory at its fastest speed to improve the system’s performance. It is similar to overclocking your CPU and GPU, i,e, running them at a speed higher than the designated value.
Overclocking the CPU and GPU and enabling the XMP do improve the performance but apply a significant load on the hardware as well. The power management on these components can be abnormal, causing them to malfunction.
You should disable these features to solve the issue. Let’s see how you can do it.
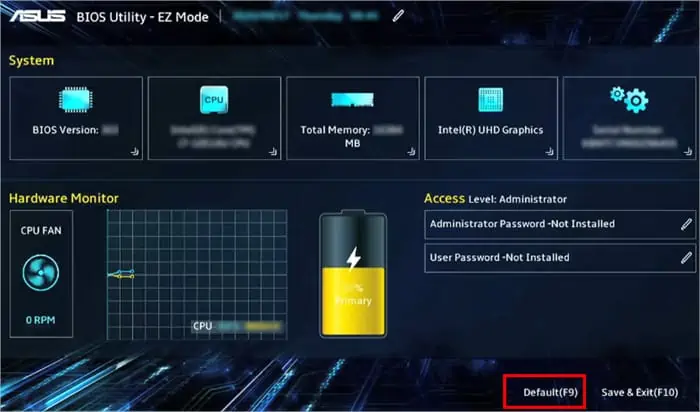
- Restart your system and press F2, F12, or the associated button to get into the BIOS page.
- Press the respective key to load the default settings. Usually, it is the F9 key.

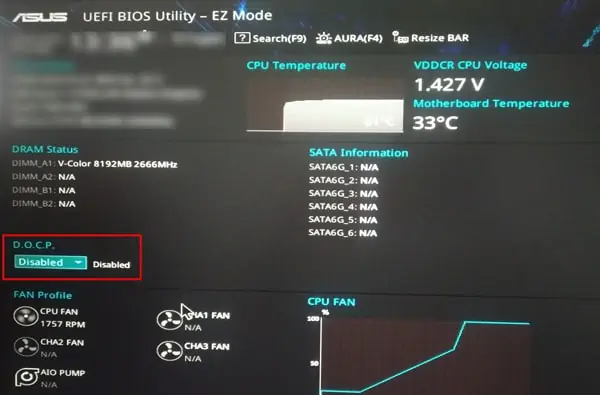
- Find the XMP option under Extreme Tweaker or a similar menu. For AMD, the name could be A-XMP or DOCP instead of XMP.

- Change it to Disable mode.
- Save the settings and restart your PC.
If you used some applications to overclock your hardware, you could uninstall that particular program to revert the settings. See if the BSOD appears again.
Update or Remove Third-Party Antiviruses
Most Antiviruses work at the kernel level to prevent malware infection. But, sometimes, the system prevents writing at the kernel level when the antivirus attempts to do it. As a result, your system will start the bug check and display BSOD. In addition to this, antiviruses can block some system services and programs.
You can update the antivirus program and see if it solves the issues. If it does, then you will have to remove the antivirus. The method to remove antiviruses is program-specific. You can remove most of them by uninstalling them from their own interface.
See whether the BSOD is still there after removing the antivirus.
Run Memory Test
If your system’s memory has some error, then the PC may attempt to write to a read-only segment. You should perform a detailed inspection of your RAM. Let’s see the ways to do it.
Using Windows Memory Diagnostic Tool
Windows have a built-in tool called Windows Memory Diagnostic Tool that checks for any issues in your physical memory.
Please follow the instruction to run the test.
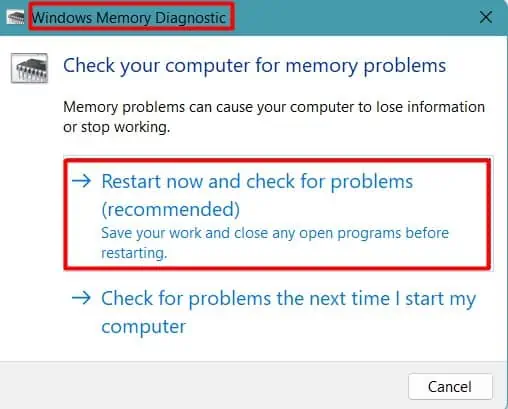
- Press Windows + ‘R’ and type
mdschedto open Memory Diagnostic Tool. - Click Restart now and check for problems (recommended).

- After the system reboots, follow the instruction to complete the test.
See if there are any errors in the memory and move on to the next section to rectify them.
Manual Testing
If there seem to be issues with the RAM, then you may have to replace it. But, before that, let’s perform some doable fixes.
- Turn off your system and remove all the power cables.
- Unscrew the side panel and get to the motherboard. If you are using a laptop, then remove the back panel or the RAM compartment.
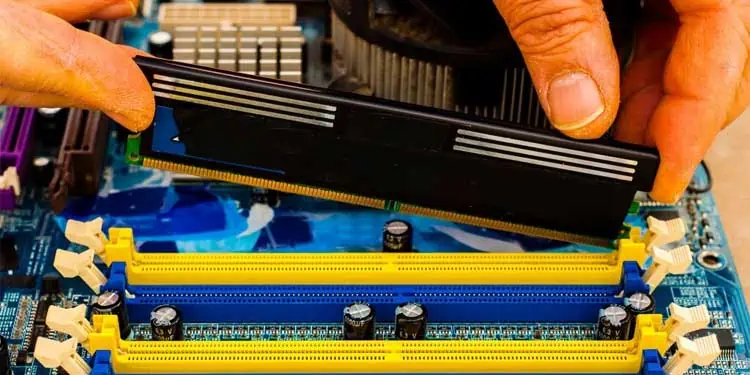
- Press the lock to remove the RAM from the slot.

- Clean the RAM slot and the memory carefully.
- Try using a single RAM by changing the slot each time to ensure the RAM or slots are not damaged. Run the system without assembling the panel during this process.
- You can also use a spare RAM to see if the BSOD disappears.
Re-assemble the system after the issue is solved.
Perform System Scan
Sometimes, the system services and files may be corrupted by a virus infection, incompatible programs, or improper shutdown. This may cause the PC to function abnormally, causing the BSOD.
Let’s perform some scans to repair the system files.
- Press Windows + ‘R’ and type
cmd. Press Ctrl + Shift + Enter to open the Command prompt in administrative privilege. - Run DISM Scan by typing
DISM online /cleanup-image /restorehealth. This will repair the DLL cache files by downloading healthy ones from the Windows update.
- Run SFC scan using
sfc /scannowto restore the corrupted files.
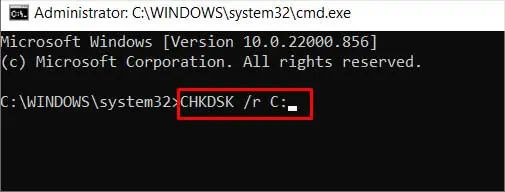
- Finally, restart the system and run a CHKDSK scan using
chkdsk /r /xto perform disk error repair.
Restart your system to see whether the BSOD has gone away. You can also run these scans by navigating to Troubleshoot>Advanced Options>Command Prompt in the recovery environment.
Disable USB port
If you are experiencing the Attempted Write to Readonly Memory bug check accompanied by the error name usb80236.sys, it may be due to an error in the USB port, driver, or device.
You need to disable the device from the Device manager.
- Press Windows + ‘R’ and type
devmgmt.mscto open Device manager. - Find Universal Serial Bus controllers.
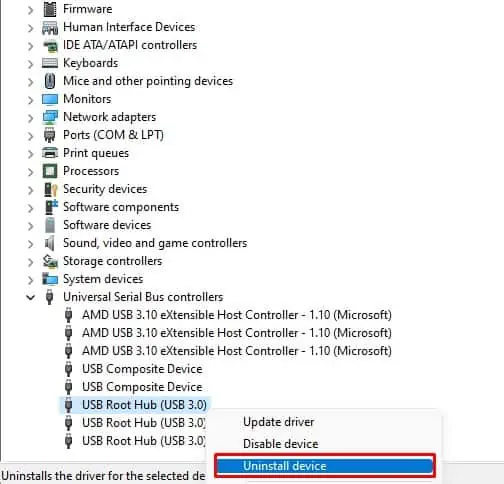
- Right-click on USB Root Hub (USB 3.0) and click Disable device.

- Do this for other drivers on the list as well.
- You can also click Uninstall device if it does not work out.

See if the problem is solved now.
Perform System Restore
You may be experiencing the BSOD after installing new programs or drivers. Those applications may have corrupted the system files resulting in the Blue screen error.
You can repair the damage to your system by restoring it to an earlier healthy point. Windows creates a restore point automatically every week or when you install some drivers or programs. Let’s perform the system restore to fix your PC.
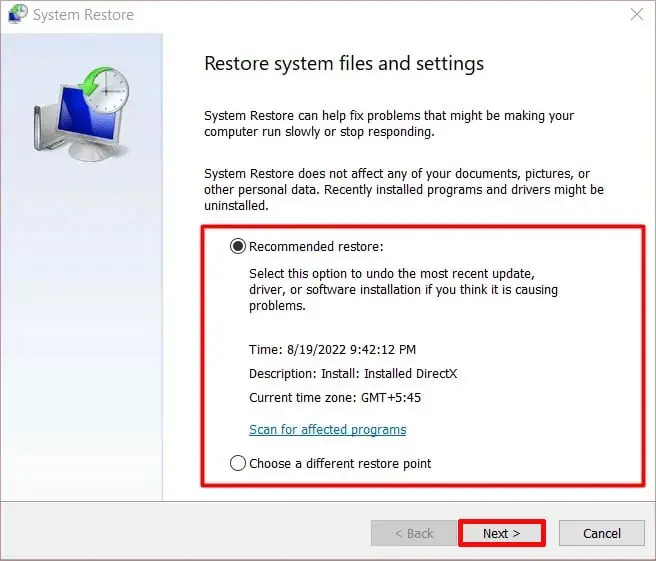
- Press Windows + ‘R’ and type
rstrui.exeto open System Restore. - Select either the recommended restore point or the custom one if present.

- Click Finish to start the restore.
See if the BSOD is still there. If your system does not boot till the desktop, you can boot into the recovery environment and navigate to Troubleshoot>Advanced>System Restore to restore your PC.
Reset Windows
If the above fixes do not work out for you, the problem may be with your Operating system. You can first perform a Windows reset to resolve the issue.
- Boot your system in recovery mode by following the process mentioned in the earlier section.
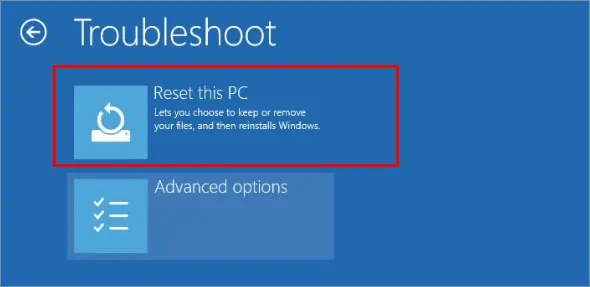
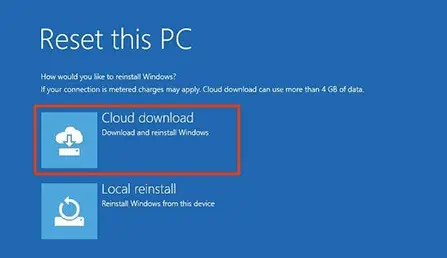
- Go to Troubleshoot and click Reset this PC.

- Follow the instructions and choose Cloud download to reset Windows using a fresh OS from Microsoft.

If the problem is not solved yet, you may have to perform a clean installation of Windows.

