The backspace key on your laptop or external keyboard can stop working due to both software and hardware issues. If only the Backspace key is not working, it points to a hardware fault. But it is also possible that some software component is preventing just this key alone from functioning properly.
Attach Another Keyboard
Before you begin with the solutions below, you should try to narrow down the possible cause. You can start by attaching another keyboard to your computer and check if its Backspace button works.
If yes, the key on your original keyboard is likely damaged or has some issues that prevent the computer from detecting the keystrokes. If it’s a laptop keyboard, it may also be because of bugs in drivers or some update issue.
But if the key on the other keyboard doesn’t work as well, conflicts due to other applications (mainly apps that can remap key functions or add shortcuts) or update issues are more probable.
Replace Batteries in Wireless keyboard
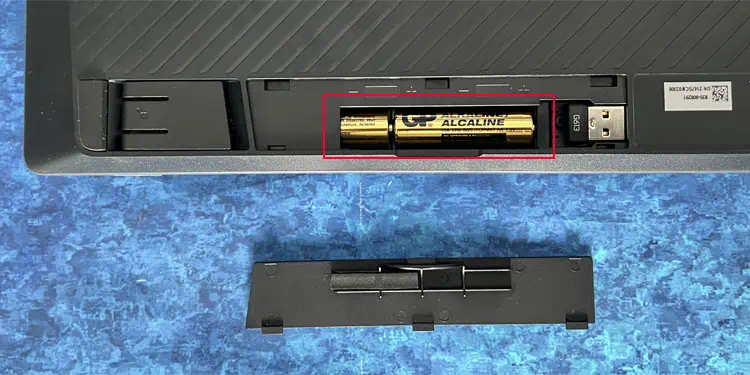
If you are using a Wireless or Bluetooth keyboard and your Backspace along with some other keys are not working, it is possible that the batteries are almost fully drained. So, you should replace the batteries with new ones and check if the keyboard starts working.
Run Keyboard Troubleshooter
You can also try running the Keyboard Troubleshooter if the key is not working. It will automatically detect inconsistencies with the system components required to operate the keyboard.
- Open Run by pressing Win + R.
- Enter
ms-settings:troubleshootand click OK. - Go to Other or Additional troubleshooters.
- Select Run next to Keyboard.

Reinstall Keyboard Drivers
Another possible reason for this issue includes corrupt keyboard drivers. In such cases, some other keys, like Space and Enter, will also show similar issues. Here, you need to reinstall the drivers to resolve any bugs in their software.
- Launch Run.
- Enter
devmgmt.mscto open the Device Manager. - Select View > Show hidden devices from the menu bar.

- Expand Keyboards.
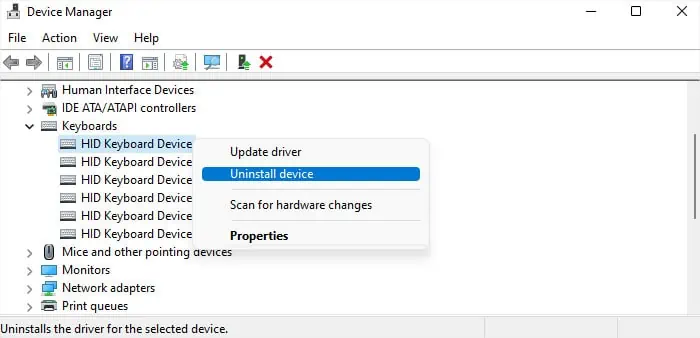
- Right-click on all the devices inside this category and select Uninstall device > Uninstall.

- After that, click on Action and select Scan for hardware changes.
Check Keyboard Accessibility Settings
In some previous Windows versions, enabling some Accessibility settings like Sticky keys and Filter keys was responsible for particular keys not working. So you can try disabling this setting.
- Open Windows Settings.
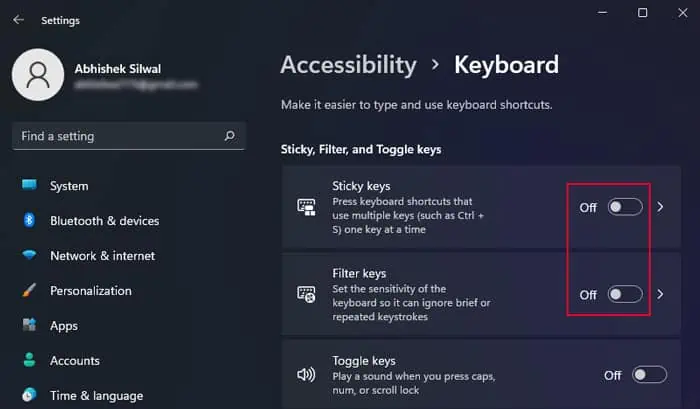
- Go to Accessibility > Keyboard or Ease of Access > Keyboard.
- Disable Sticky keys and Filter keys.

Perform Clean Boot
Some applications can specify alternate shortcut combinations in the Windows shell, not just while running the app. And if you use such apps and they set Backspace as some shortcut key, you won’t be able to use its default function.
If you know which application it is, you can change its settings accordingly. If not, you need to clean boot your Windows so you can find out the app.
- Launch Run.
- Type
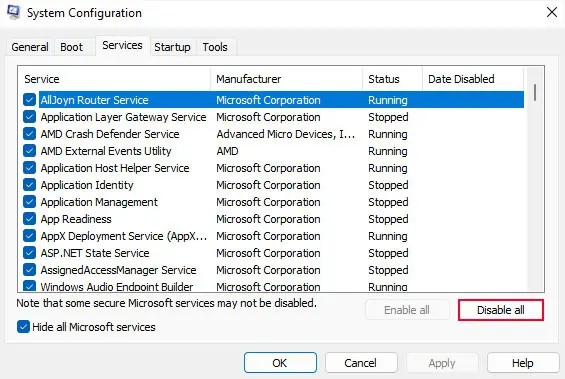
msconfigand press Enter. It will load the System Configuration tool. - Go to the Services tab, and check Hide all Microsoft Services.
- Hit Disable all and then Apply.

- Then, head over to the Startup tab.
- Select Open Task Manager.
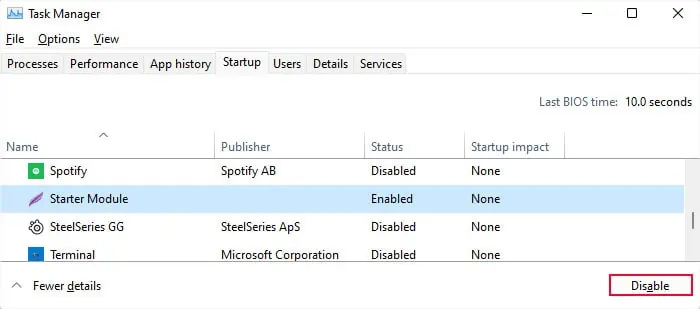
- Here, disable all apps by clicking on them and selecting Disable.

Restart your computer and check if the Backspace key works now. If not, some other causes should be responsible. So, revert these configurations to how they were and move on.
Otherwise, you should start looking for the conflicting application. To do so,
- Enable half of the services and apps you disabled earlier and restart again.
- If the key works, the responsible process is in the other half, so enable half of them. If not, the process is in the enabled half, so disable half of them instead.
- Perform this process while halving each time to determine the app or the service causing the issue. Then, you can easily figure out the relevant program or software corresponding to these processes.
After narrowing down the culprit, you can change its settings or disable it depending on your situation to resolve your issue.
Update or Rollback Windows
If you started encountering this issue after updating your system, chances are that the update itself carried some errors. Microsoft will soon patch such issues, so you only need to wait for further updates. After they are available, you can manually install them through the Update Settings.
- Open Run.
- Enter
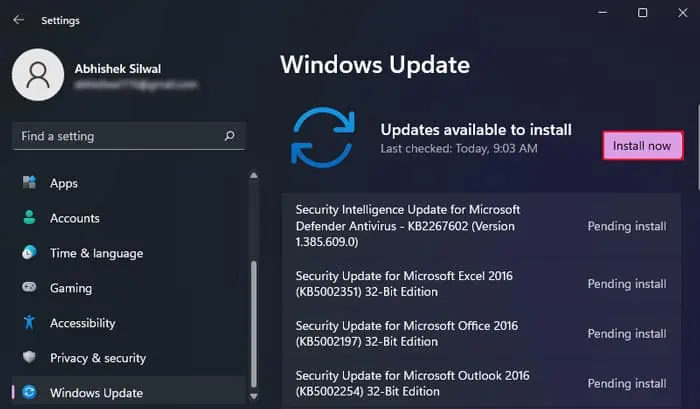
ms-settings:windowsupdateto open Windows Update Settings. - Click on Install now if further updates are available. Else click Check for updates.

If further updates are not available yet, you can uninstall the bad update and roll back your system for the time being.
- Open Run and enter
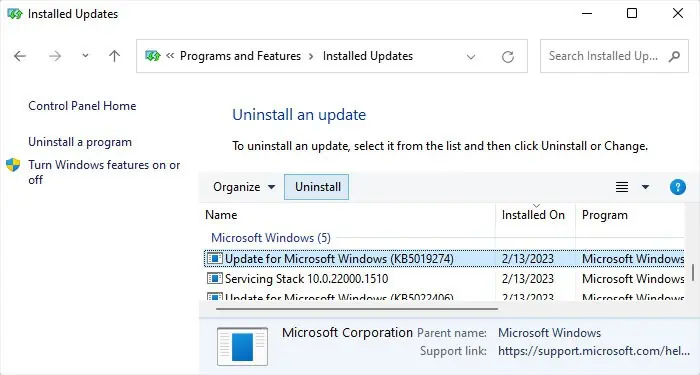
appwiz.cplto launch Programs and Features. - Click on View installed updates and scroll down to Microsoft Windows.
- Select the latest update after checking the date and click Uninstall > Yes.

Check Key Hardware
Hardware faults can also be responsible for some keys not working. It may be blockage due to dust build-up or damage to the key’s internal components. Or the Backspace key may be shorted with other keys on the keyboard.
You can also try running a hardware diagnostic test that the motherboard or keyboard manufacturer provides to get more information on hardware faults. If it shows no errors, the problem is likely with the key only, not the keyboard.
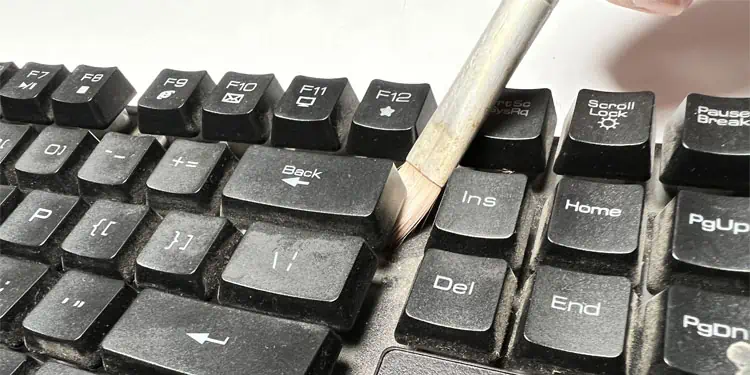
You can try cleaning the keyboard using compressed air and a soft-bristle brush in such cases. If the key still shows some errors, we recommend taking the laptop or the keyboard to the service center for repairs or replacement.
