Bitlocker is a data encryption tool in Windows that’s used to encrypt drives. Encrypted drives can only be accessed with the correct key, which is released by the Trusted Platform Module (TPM) while booting.
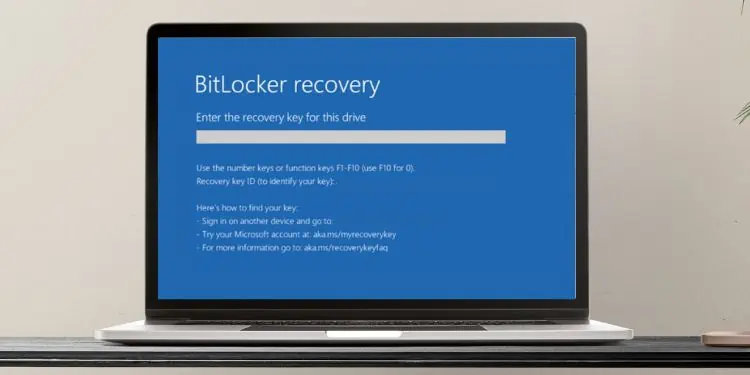
The TPM only releases this key if the hardware and software profiles match the initial setup. If the profiles do not match, you are shown the Bitlocker recovery console, which asks for the recovery key. As long as the initial and current profiles don’t match, Bitlocker keeps asking for the recovery key.
Aside from this, changes in boot drive preferences, buggy BIOS, or incorrect configuration of the decryption key and Platform Configuration Register (PCR) settings are other possible reasons for this problem.
How to Fix Bitlocker Asking Recovery Key on Each Boot?
Suspending and Resuming Bitlocker before attempting to make hardware or firmware changes on the system will save you from the prompt asks for the recovery key.
If you’re unaware of the recovery key, you may get stuck within the Bitlocker recovery setup. To get past the setup in such a scenario, you can find your recovery key within your Microsoft account using any other computer to log in.
Update BIOS
The discussed problem was confirmed to be occurring due to buggy BIOS. In some cases, older versions of BIOS were found incompatible with the TPM hardware module. Motherboard manufacturers tend to resolve such bugs and incompatibilities with updates.
Therefore, you can try updating BIOS in order to fix the issue.
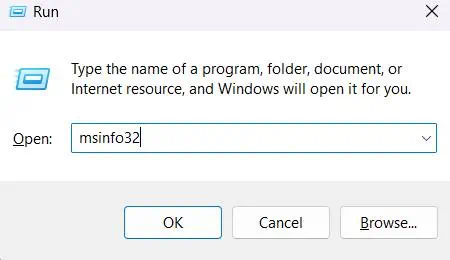
- Press Windows + R key to open Run.
- Type
msinfo32to open System Information.
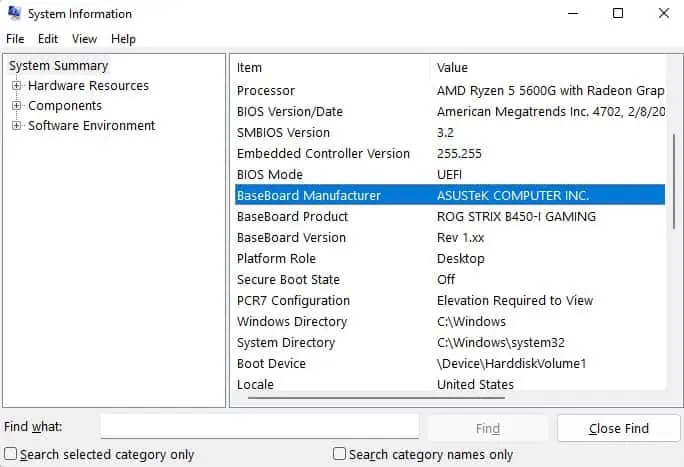
- Check values corresponding to Baseboard Manufacturers and Baseboard products. Note them as well.

- Now, go to your manufacturer’s official site and search for BIOS/firmware.
- Download, install and follow the onscreen instructions to update BIOS.
On many systems, specific OEM tools can be downloaded and used to ease this firmware updating process. Acer care center, Dell Support Assist, etc are some examples of OEM applications for the purpose.
Change BIOS Configuration
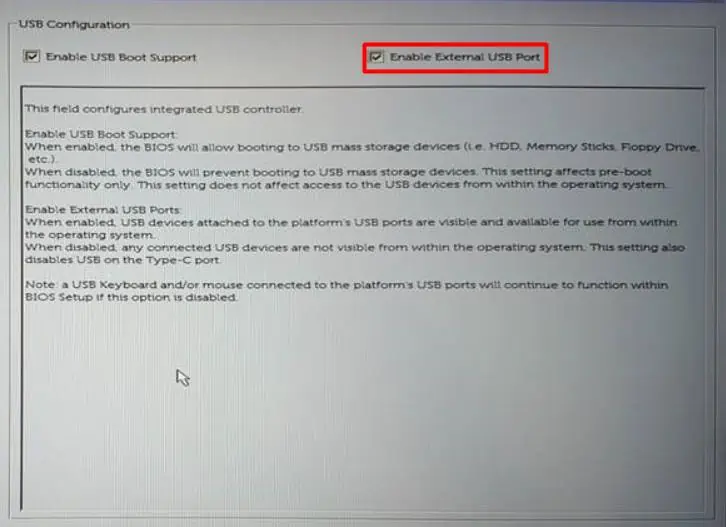
The USB Type-C and Thunderbolt cable connection have default boot support on BIOS. So, if you have connected any I/O device on your system using those cables, the BIOS is going to list it in the boot priority list and consider it as a change in system.
Bitlocker will automatically ask for the recovery key in order to log in. To fix it, Boot support for USB type-C and TBT cable can be disabled from BIOS unless really needed.
- Boot up your computer and press the BIOS key(Function keys like F2, F8, etc., usually) constantly before it starts.
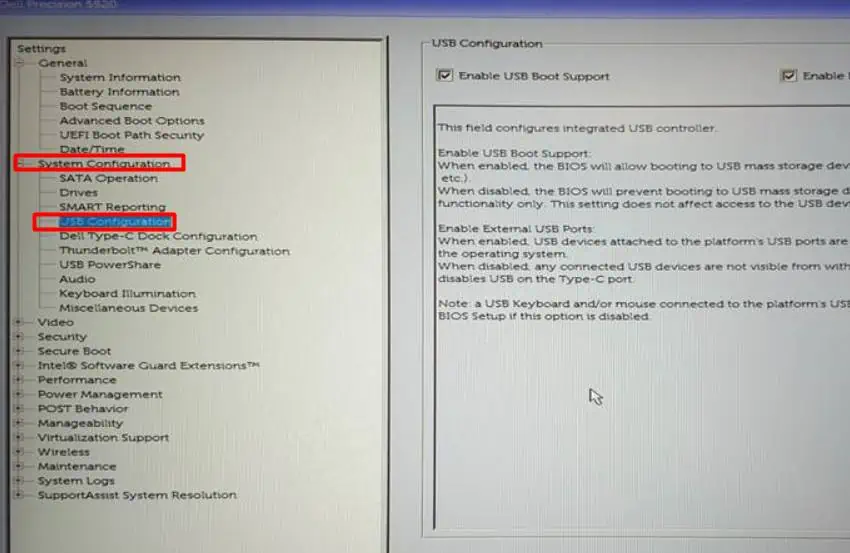
- Head towards System Configuration > USB Configuration using arrow keys.

- Choose Disable for Type-C/Thunderbolt Boot as well as Pre-boot supports.

- Disable UEFI Network Stack .
- Enable Fast Boot.
Re-enable Bitlocker
Sometimes, the saved hardware/software profile won’t get updated within the PCR of TPM. So, each boot would be flagged as change in hardware profile, requiring the recovery key to gain access.
Decrypting and then, encrypting the drive afterward fixes the temporary glitch. Normally, running the manage-bde –protectors –disable C: and manage-bde –protectors –enable C: commands in admin-privileged Command Prompt would resolve the issue.
However, you can try changing BitLocker settings from the Group Policy Editor to ensure further resolution of the issue.
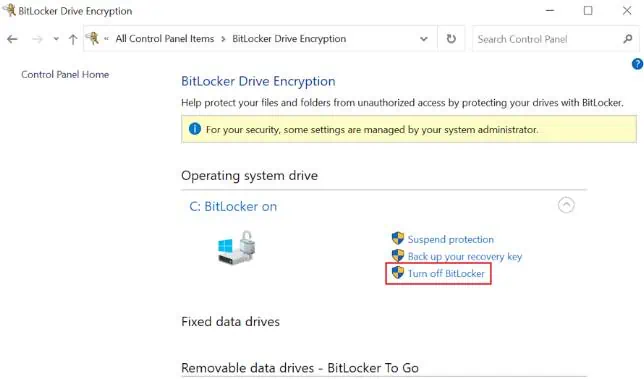
Step 1: Turn off Bitlocker
- Press Windows key and type Manage Bitlocker.
- Click on Turn off Bitlocker.

- Hit the Turn off Bitlocker button to confirm.
Step 2: Configure Group Policy
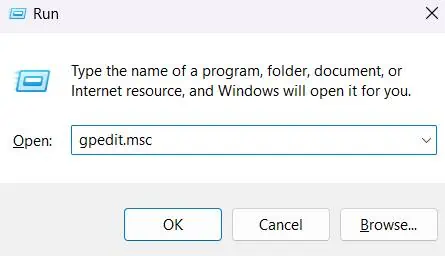
- Press Windows + R to open Run.
- Type
gpedit.mscand hit Enter key.
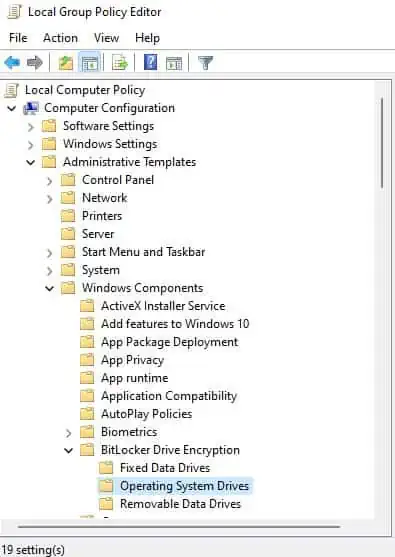
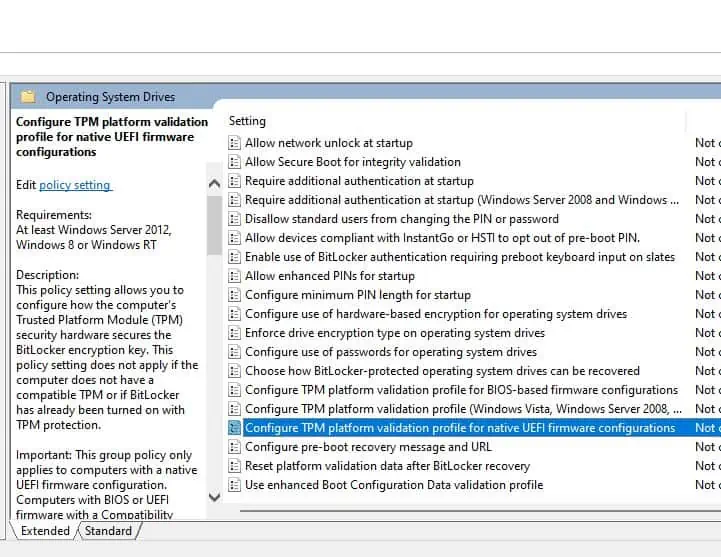
- Expand Computer Configuration >Administrative Template>Windows Components, and then, Bitlocker Drive Encryption.
- Now, click on Operating System Drives.

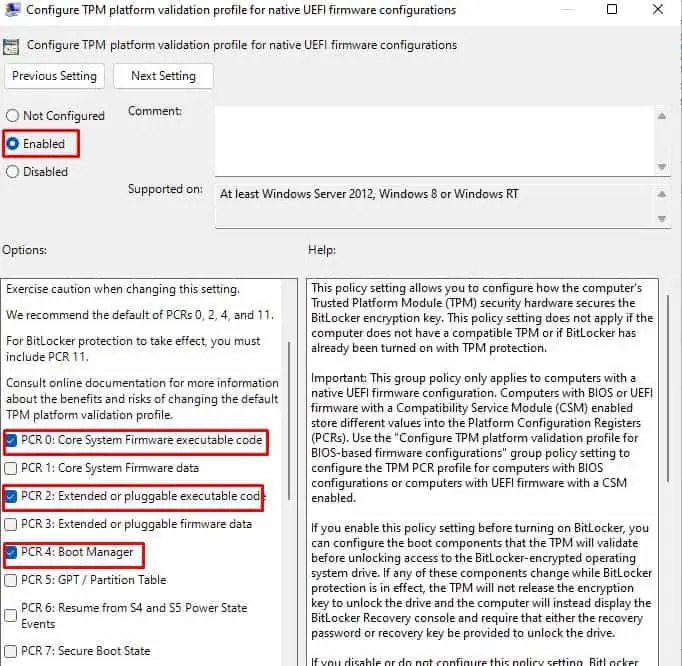
- On the right side section, click on Configure TPM platform validation profile for native UEFI firmware configurations

- Select Enabled radio button and untick all the options except these:
PCR 0
PCR 2
PCR 4
PCR 11
- For slightly older systems with firmware including CSM, click Configure TPM platform validation profile for BIOS-based firmware configurations > Enabled and then proceed by unchecking other options than the PCR 0, 2, 4, 8, 9, 10, 11.
- Confirm with Apply and then, OK.
Now, you can turn on Bitlocker and expect to fix the issue.
Use Legacy BIOS
Many manufacturers have been pushing forwards UEFI BIOS mode on their products regardless of the TPM model. Though UEFI works well with both TPM 1.2 and TPM 2.0, sometimes the prior version shows compatibility issues with the latest UEFI mode. So, if that’s your case, you can switch to Legacy BIOS mode to check whether it solves the problem.
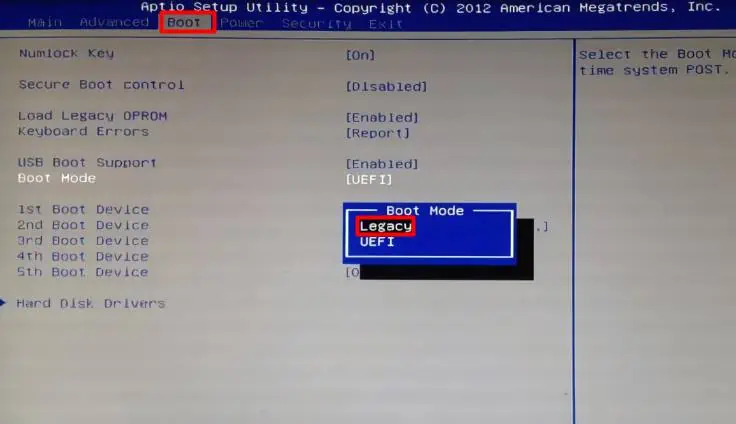
- Enter the BIOS setup menu and go to the Boot tab.
- Select Legacy from the Boot Mode.

- Press F10 or any onscreen to save the changes and exit.
Disable Secure Boot
The Secure Boot feature is by default enabled by manufacturers to protect the device from booting up using any unauthorized hardware or software components. So, if it’s enabled, only components trusted by the system manufacturer will be given access.
The feature shows issues when many linux operating systems and not-so-popular GPUs are tried to run. To avoid problems with it, you can try to disable the secure boot feature from BIOS.
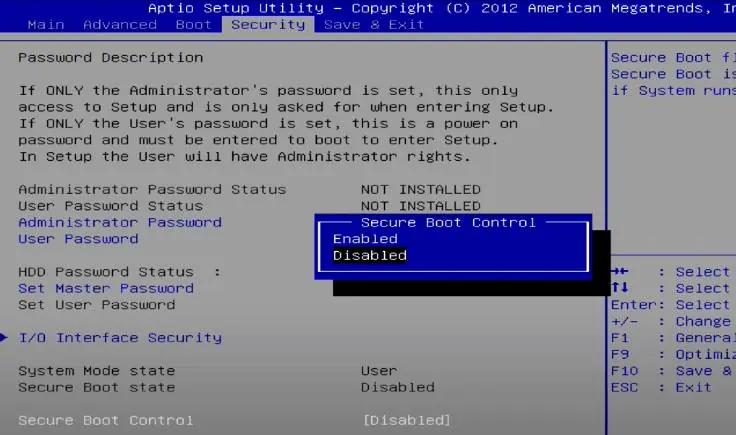
- Enter the BIOS menu and go to the Boot tab or Security.
- Search for Secure Boot and change its state to Disabled.

Scan for Malwares
Malwares are capable of affecting kernel level process in a system. They can manipulate default behavior of your computer, which counts as a system profile change under TPM scan. If such profile change occurs on every active session, the recovery key is required following each reboot.
You should routinely check for threats on your system to be secure from the discussed issue and other security risks.
- Open Settings with Windows + I keys.
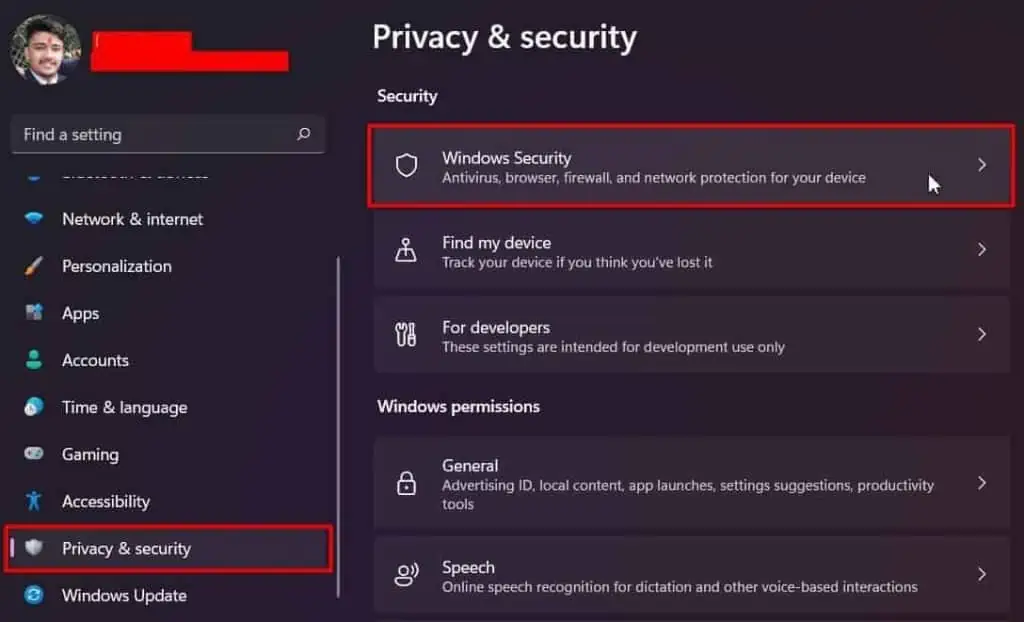
- Go to Privacy & security > Windows Security

- Click on Virus & threat protection

- Then, click on Scan options.

- Select Microsoft Defender Antivirus (offline scan) and press the Scan now button.

It will reboot your computer and take a while to perform a full scan followed by threat treatments.
Windows Update
Updating Windows would fix bugs and also solve TPM/Bitlocker compatibility issues of the current version. Sometimes, BIOS and other driver updates are also bundled along with the Windows update, which fixes various issues including the discussed one.
- Press Windows + I keys to open Settings.
- Go to Windows Update and hit the Check for updates button.

- Click on the Download & Install button and follow the onscreen instructions to complete updating.
Consider resetting Windows Update Components, if you face any issues while updating.
If the problem occurred after installing an Windows update, you can uninstall the update to roll back your computer to the last known stable point.
- Go to Windows Update > Update History in Settings.

- Scroll to and click on Uninstall updates.

- Click on Uninstall within the last update of the shown list, which is the latest one.

- Press the Uninstall button to confirm.
Solve TPM Problems
Regardless of the causes, the problem sums up as ‘TPM not releasing the decryption key’ during boot. The issue can also reside within the TPM itself and not all the above-mentioned ones. Outdated saved decryption keys, corrupt drivers, or defective modules are possible causes.
Clear TPM Key
If the saved keys within TPM are the wrong ones the device will show the discussed issue on every reboot. Clearing TPM will remove the keys and also re-initialize Bitlocker from its default state to fix the problem.
- Press Windows + R to open Run.
- Type
tpm.mscand hit Enter.
- Click on Clear TPM…

- Hit the Restart button.
Reinstall TPM Driver
Corrupt TPM drivers can also cause problems in the overall function of TPM. You can try reinstalling the driver to fix it.
- Type
devmgmt.mscon Run to open Device Manager.
- Double-click to expand the Security devices category.

- Right-click on the Trusted Platform Module and choose Uninstall device.

- Confirm with the Uninstall button.
- Now, click on the Action menu and select Scan for hardware changes.

The driver should reinstall shortly.
Replace TPM
If nothing Fixes this problem for you, odds are the TPM module hardware itself is faulty. In such a case, consider contacting support from manufacturers for TPM replacement.

