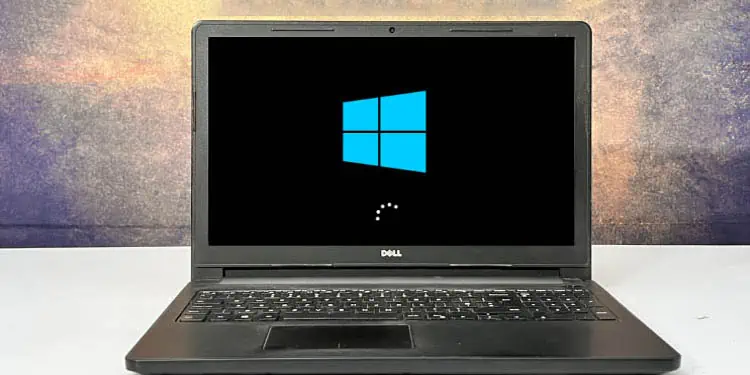
After a successful POST operation, the Windows Boot Manager loads the system loader which further starts the kernel for your OS to boot up. However, if your computer doesn’t start due to issues in any of these stages, you might end up in an infinite restart process called the boot loop.
Corrupted OS/drivers, registry, MBR (Master Boot Record), system files, or malicious programs can lead to this situation. If you’re experiencing a similar problem after updating or factory resetting Windows, you’re at the right place!
But before moving on, try rebooting your computer first. If that doesn’t help, we advise removing all the external peripherals and power cycling your device. In case the problem persists, let’s begin the troubleshooting with Startup Repair.
Perform Startup Repair
Startup or Automatic Repair scans the computer to fix possible system corruptions that could be causing startup and booting issues. You can do this from a bootable flash drive or even manually, and here’s how:
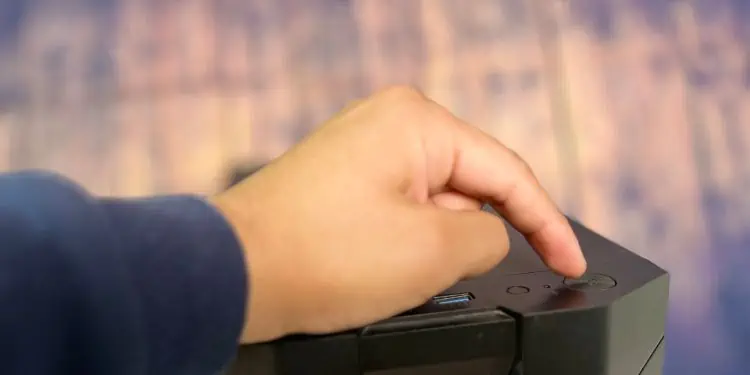
- Press and hold the power button until it shuts down.

- Then, start your PC/laptop.

- Again, press and hold the power button to turn it off.
- Repeat the above steps three or more times until the Startup Repair screen pops up.
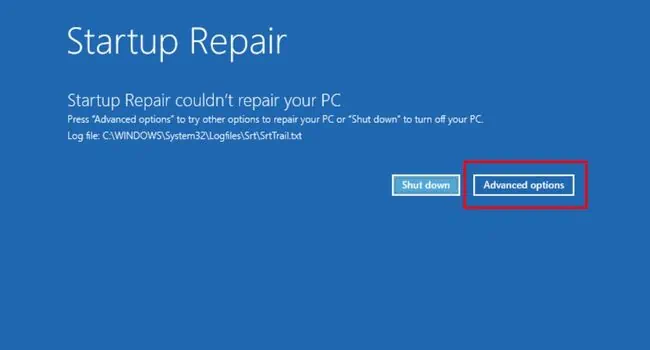
- Sometimes, the repair will automatically fix the issue and let you boot into Windows. But in case you get the message, “Startup repair couldn’t repair your PC”, press the Advanced options button.

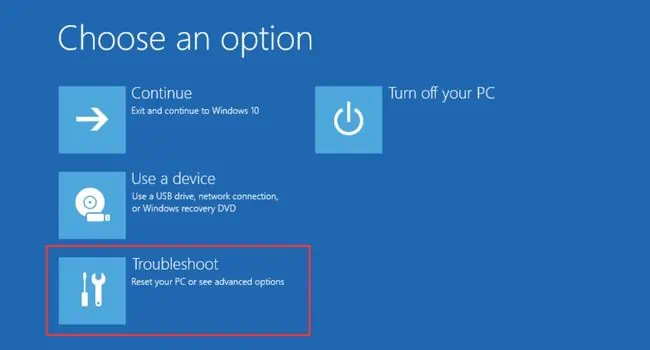
- Now, you should get into the Windows Advanced Startup screen.
- Here, pick the Continue option and see if it boots into Windows.

Additional Tip: You can also perform startup repair using a Windows Installation Media. All you have to do is boot using the media first and from the setup screen, click on Repair your computer to enter the Windows RE.
Repair Boot Sector
One of the primary causes for the boot loop is a corrupted MBR or the EFI bootloader (in GPT hard drives). A quick workaround to this problem is to repair the boot sector using dedicated commands.
- First, get into the Advanced Startup/Recovery Environment screen, as discussed earlier.
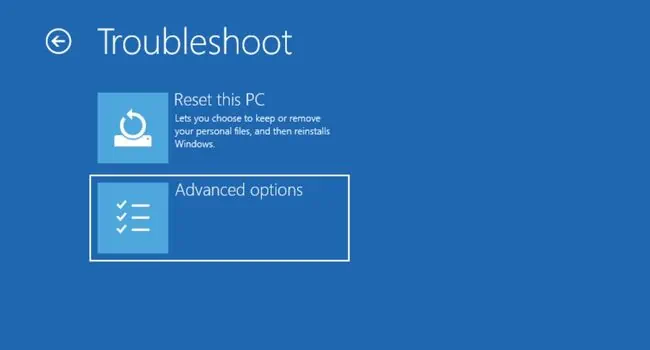
- Then, go to Troubleshoot.

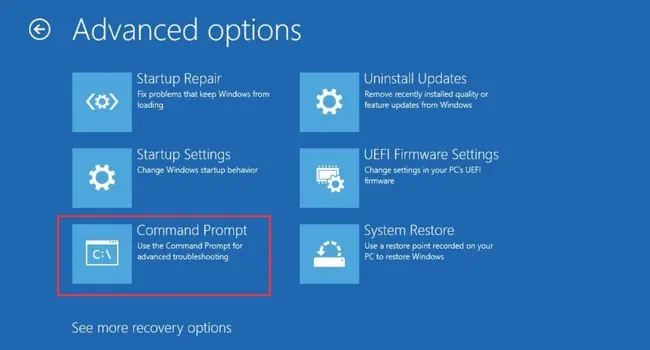
- Next, pick Advanced options.

- Select Command Prompt.

- Then, choose your account and input your credentials in the next screen. This should open the utility with administrative access.

- Now, start executing the below commands.
If you have an MBR drive, you need to rebuild it and if you have a GPT hard drive, you can try repairing the EFI bootloader. Follow the dedicated commands in succession from below based on your HDD/SSD drive partition style.
Rebuild MBR
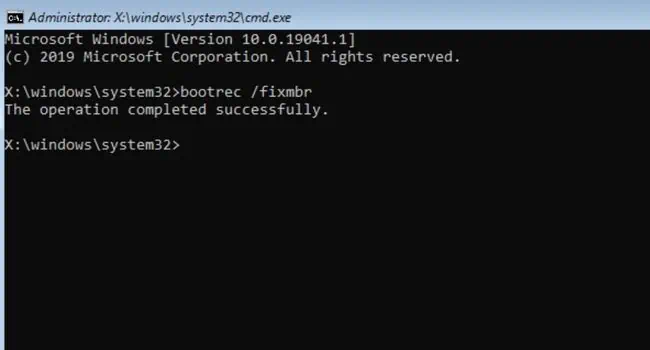
To repair and rebuild MBR, enter the following commands and press Enter after each command.
bootrec /fixmbr
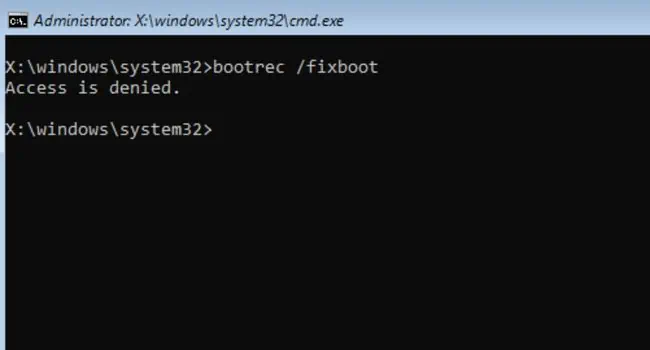
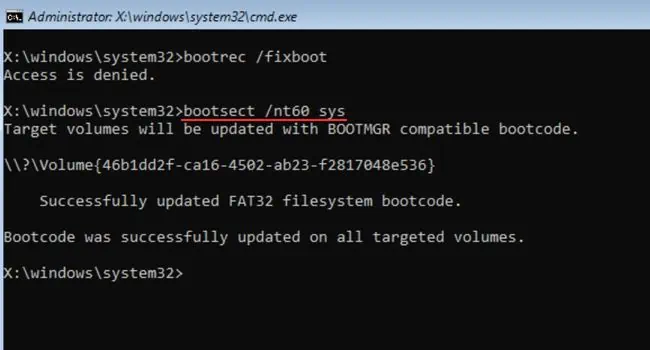
bootrec /fixboot
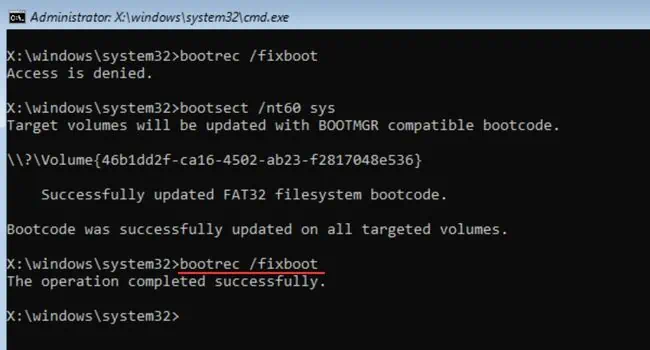
bootsect /nt60 sys(try this if you get the Access is Denied error when running the earlier command)
bootrec /fixboot
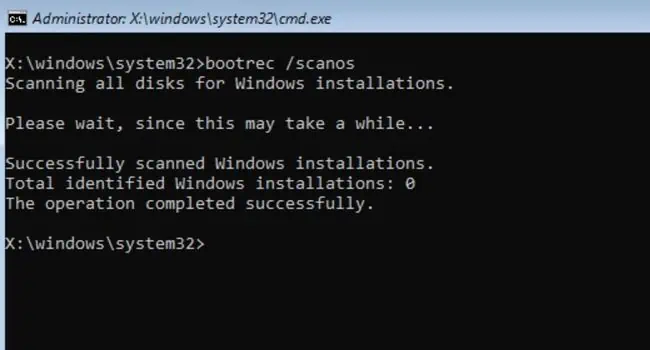
bootrec /scanos
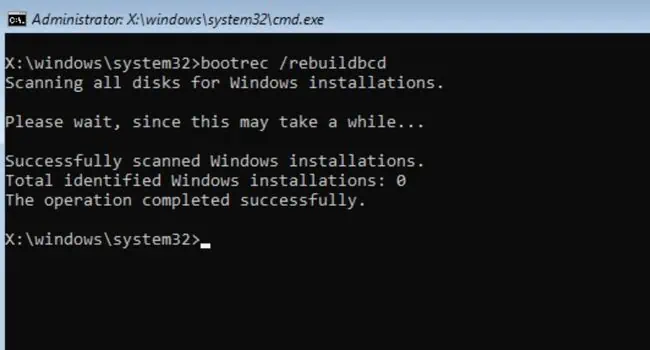
bootrec /rebuildbcd
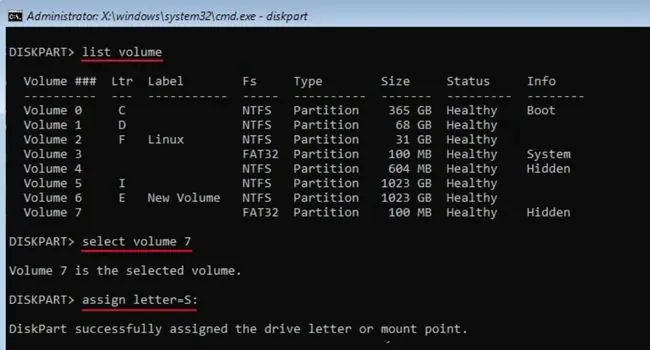
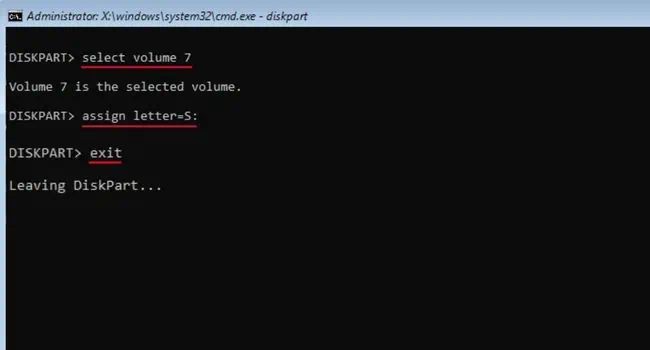
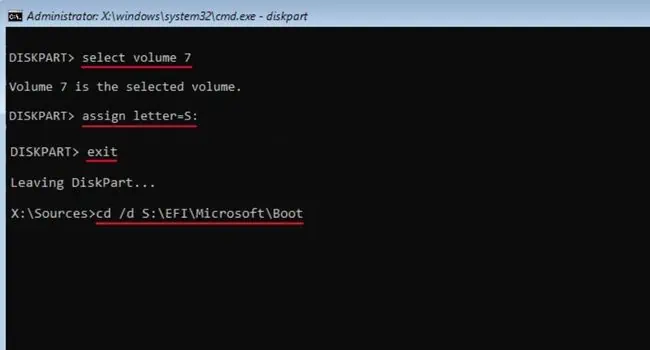
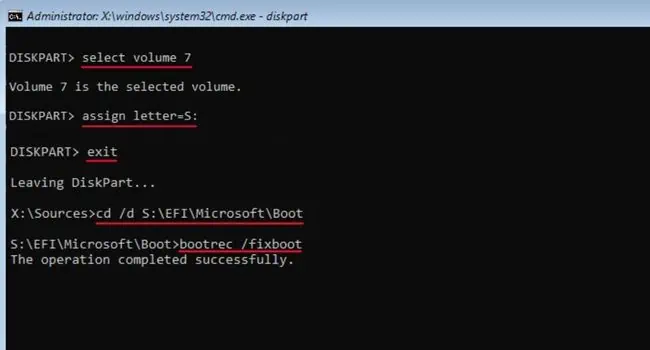
Repair EFI Bootloader
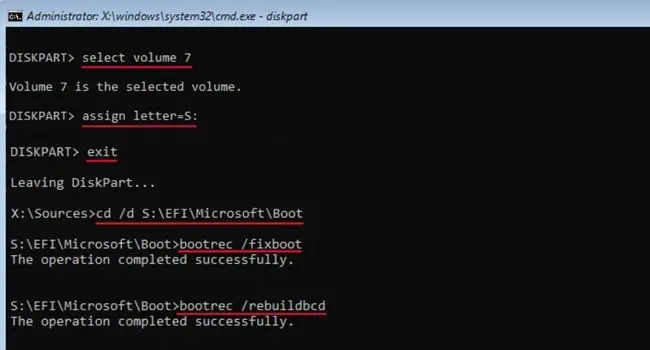
To repair EFI Bootloader, enter the following commands and press Enter after each command.
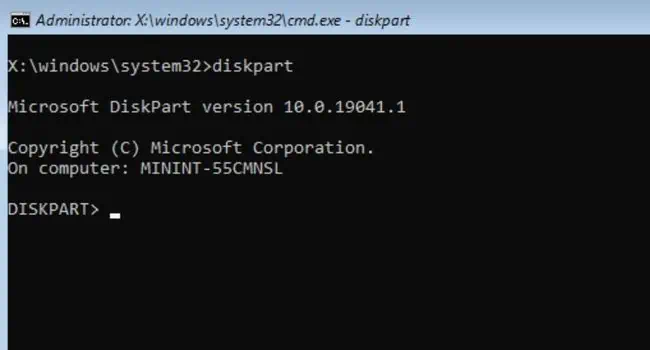
diskpart
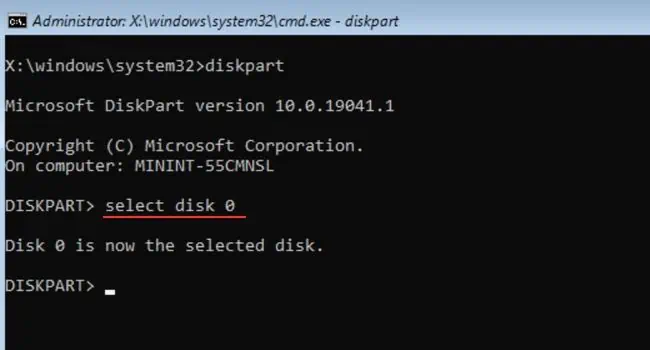
select disk [diskNo]
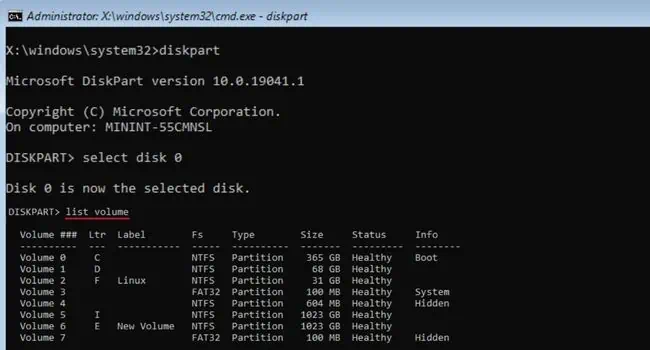
list volume
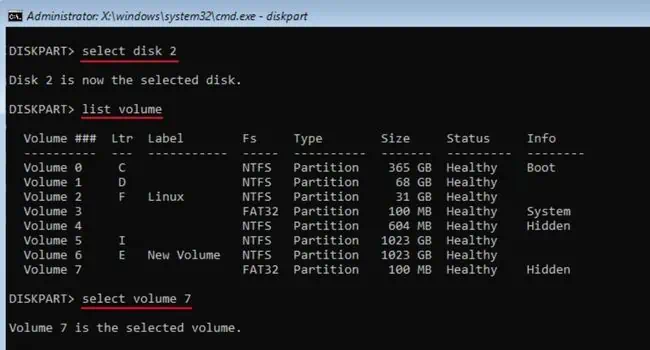
select volume [volumeNo]
assign letter = [driveLetter]
exit
cd /d [driveLetter]:\EFI\Microsoft\Boot\
bootrec /fixboot
bootrec /rebuildbcd
Note: If you get the “Access denied error” when running the bootrec /fixboot command, you need to repair your computer using an appropriate installation media first.
Get Into Safe Mode
If repairing the bootloader or rebuilding MBR didn’t fix the problem, check whether your computer boots into safe mode. In case the PC doesn’t boot, the problem is probably caused due to corrupted Windows files. But if the computer starts, know that the basic drivers and settings aren’t responsible.
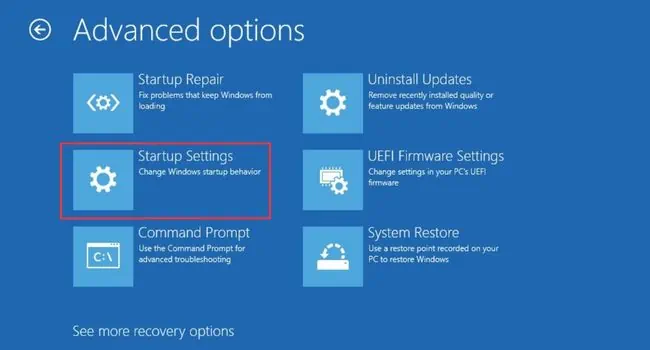
- In the Windows RE, navigate to Troubleshoot > Advanced options > Startup Settings.

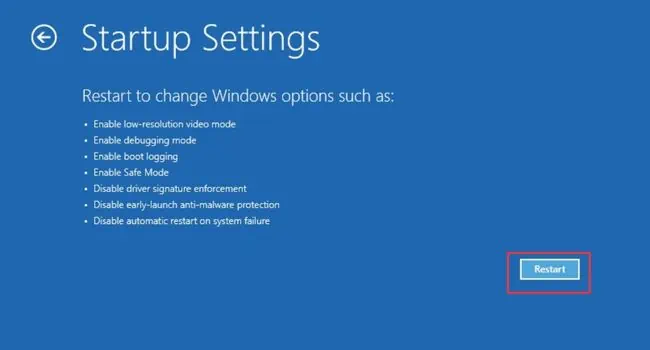
- Next, hit the Restart button.

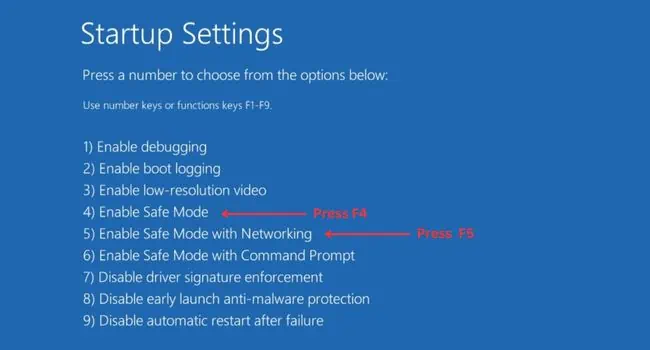
- Once you’re in the Startup Settings screen, press F4 to enable safe mode or F5 to enable safe mode with networking.

- Now, wait until the system boots up.
Note: The three solutions below (running SFC, DISM, CHKDSK commands, disabling Auto Reboot, and updating/rolling back drivers) will only be applicable if you’re able to boot into Safe Mode. Otherwise, you may move on to the next troubleshooting methods.
Run SFC, DISM, and CHKDSK Commands
The system files and images can get corrupted when certain sections of your hard drive are damaged, there’s a failed Windows update, failed transfer of system files, or a malware attack. A simple solution to this problem is to run SFC, DISM, and CHKDSK commands:
- First of all, start your computer in safe mode with networking.
- Then, open Command Prompt as an administrator from the Start Menu.
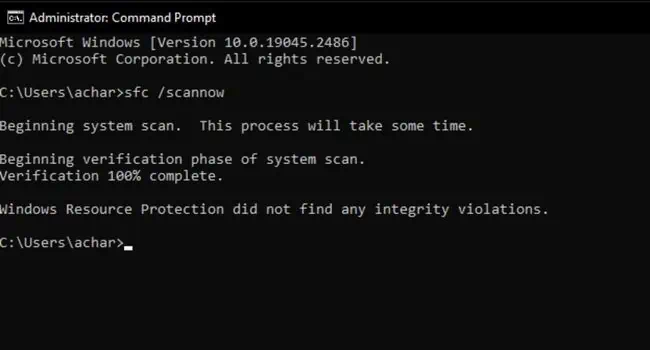
- Now, execute the following command to scan for protected system files:
sfc /scannow
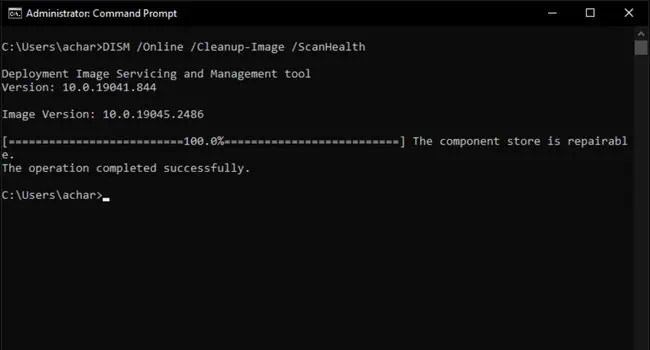
- If Windows Resource Protection couldn’t find any integrity violations, run the DISM command to fix the corruption issues with your Windows image:
DISM /Online /Cleanup-Image /ScanHealth
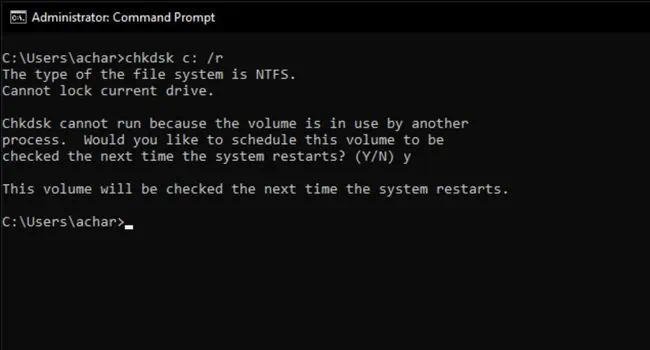
- After this operation is successfully completed, try running the following command to fix logical and physical errors within your storage drive:
Chkdsk [DriveLetter]: /r - In case the volume is used by another storage drive, you should get a message. Simply type
yand hit enter to continue.
- Now, restart your PC in normal mode for the volume to be checked and repaired. If everything turns out well, the boot loop should be fixed.
Disable Auto Reboot in Registry Editor
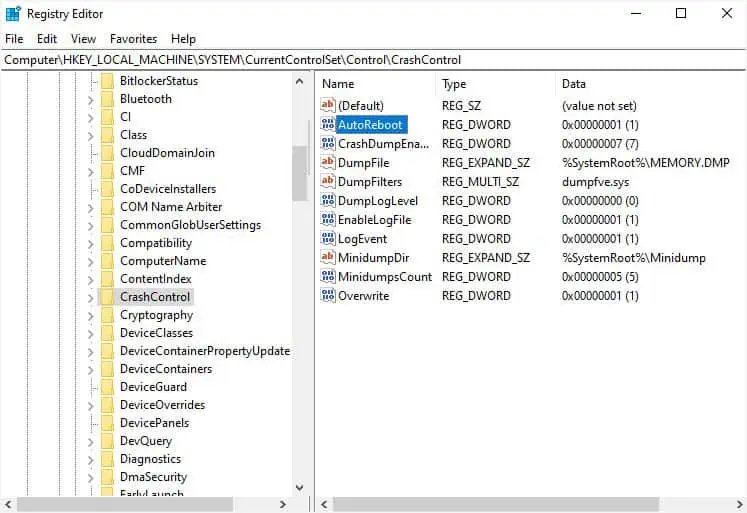
A manual way to stop the boot loop is to disable the Auto Reboot feature from Registry Editor. While sometimes this fixes the problem, in most cases you’ll encounter a BSOD. If that happens, you can check the Stop Code and troubleshoot accordingly. Fortunately, we have already covered a detailed guide on what you can do after getting a BSOD error on Windows 11.
- First of all, boot Windows in safe mode.
- Next, open the Registry Editor utility from the Start Menu.
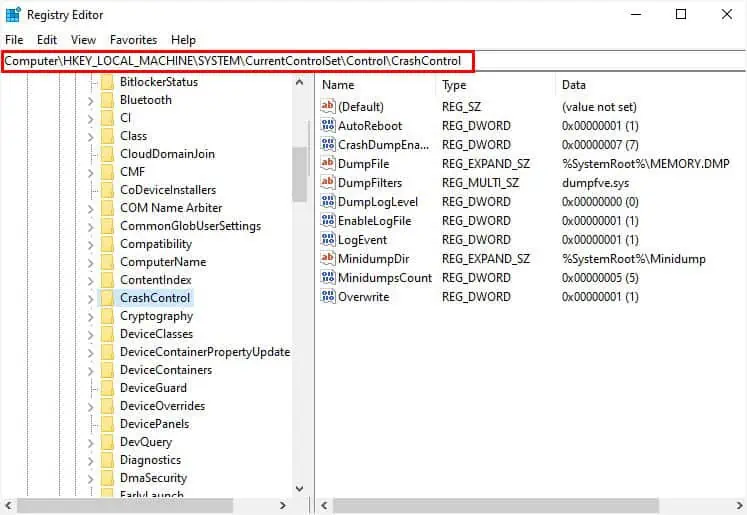
- Then, navigate to Computer > HKEY_LOCAL_MACHINE > SYSTEM > CurrentControlSet > Control > Crash Control from the left side of the window.

- Move to the right and double-click on AutoReboot.

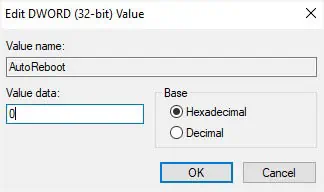
- In the Edit Value dialogue box, set the Value data field to
0and hit Ok.
- Now, reboot your computer in normal mode and see if the problem is now resolved.
- If you’re able to boot into Windows, try uninstalling the conflicting apps first. These may include recently downloaded programs or even third-party Antivirus applications. Also, we recommend uninstalling the driver or Windows update, which we shall discuss further.
Update or Rollback Device Drivers
Some netizens also claim to encounter the boot loop problem after a corrupt or failed driver update. While this mainly happens due to HDD/SSD and chipset drivers, you should consider checking issues within other device drivers as well.
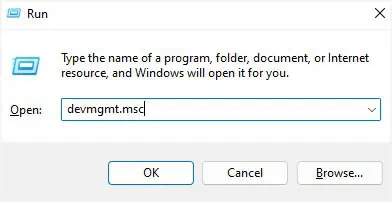
- Launch the Run utility and execute the below command to open Device Manager:
devmgmt.msc
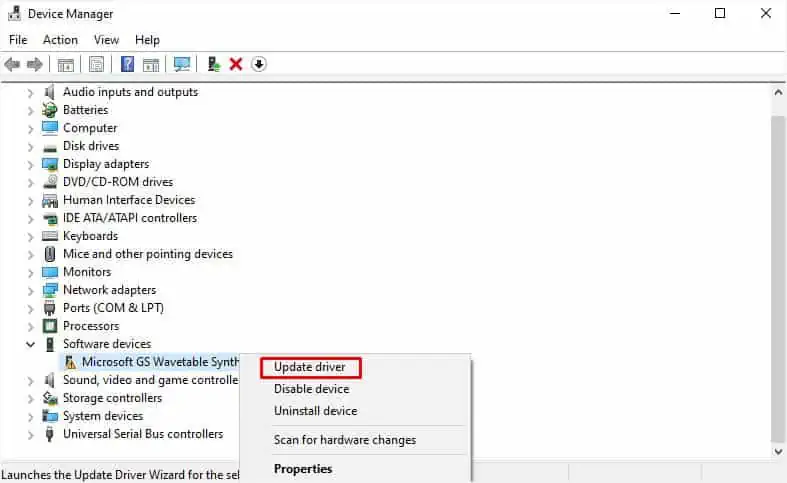
- Now, look for an exclamation sign in all the drivers to find the corrupted ones.
- Right-click on each of them in succession and hit Update driver.

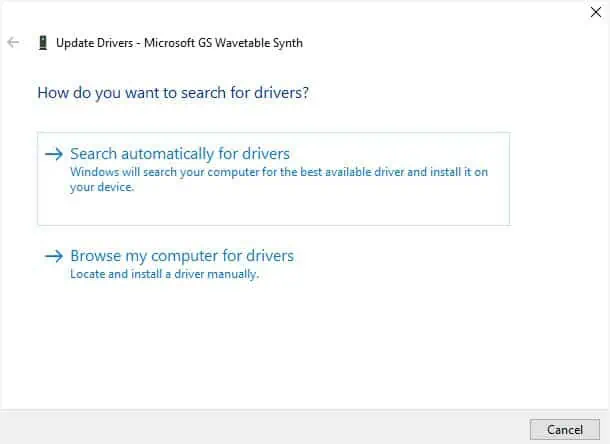
- In the Update driver dialogue box, select Search automatically for drivers.

- In case updating corrupted drivers didn’t fix the boot loop issue, get back to Device Manager, and double-click on the troublesome one.
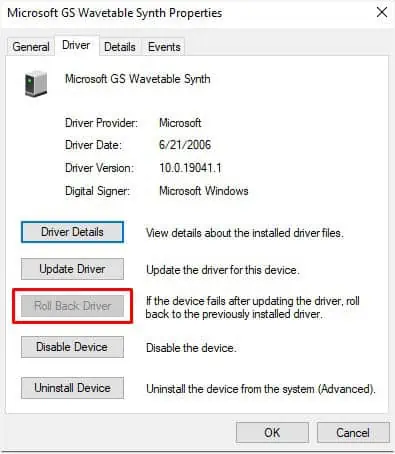
- Navigate to the Driver tab and hit the Roll Back Driver option.

- In the new pop-up window, select a reason to roll back the driver and click Yes.
- Now, restart your computer in normal mode and check if your problem is now fixed.
Uninstall Latest Windows Update
As mentioned earlier, a corrupt or failed Windows update is also responsible for a continuous reboot, not allowing your OS to boot up. When this happens, the system files get corrupted and can cause malfunctions in the booting operation. Fortunately, it’s possible to uninstall both the latest quality and feature updates that could have triggered this situation.
Latest Quality Update
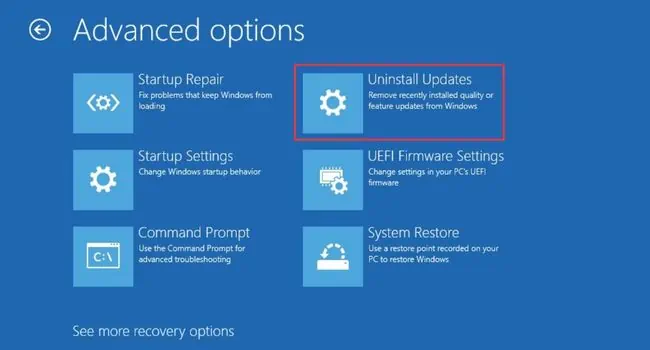
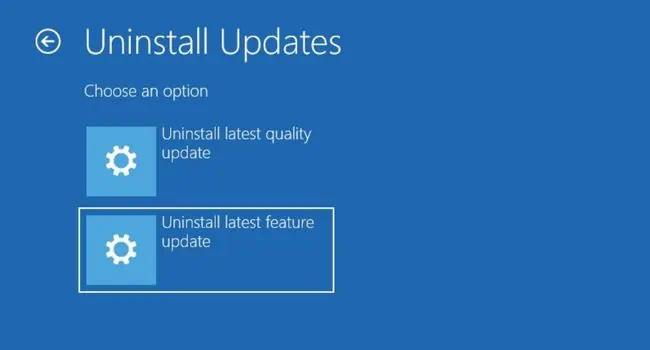
- Get to the Advanced Recovery Environment and select Troubleshoot > Advanced options > Uninstall Updates.

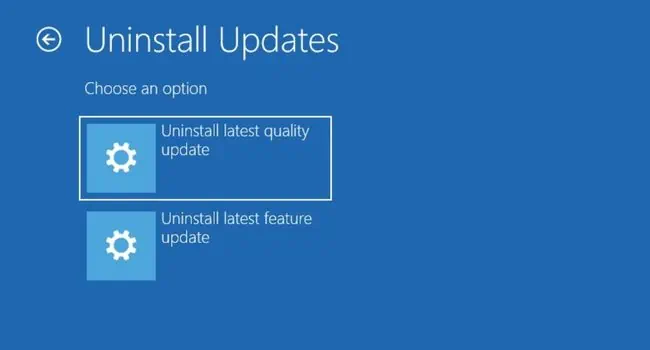
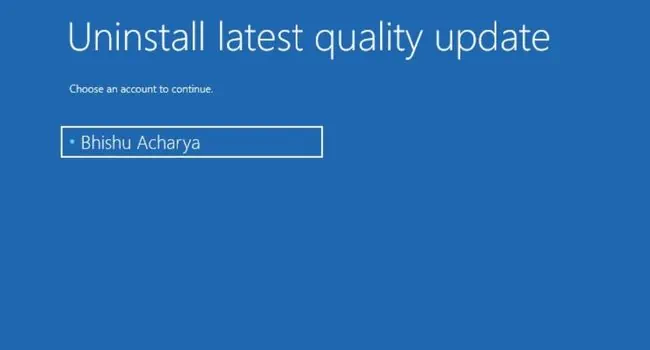
- In the next screen, pick Uninstall latest quality update.

- Then, choose your account.

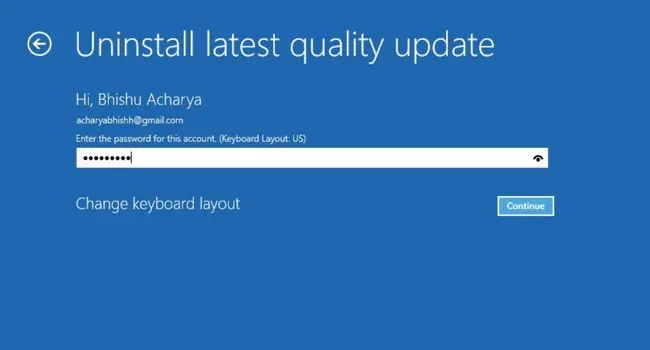
- Enter the correct credentials and hit Continue.

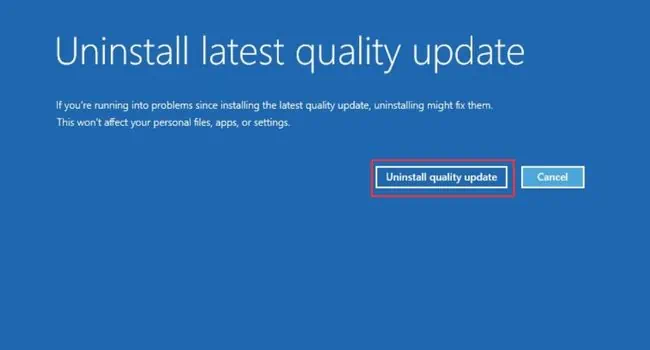
- Next, click on the Uninstall quality update button.

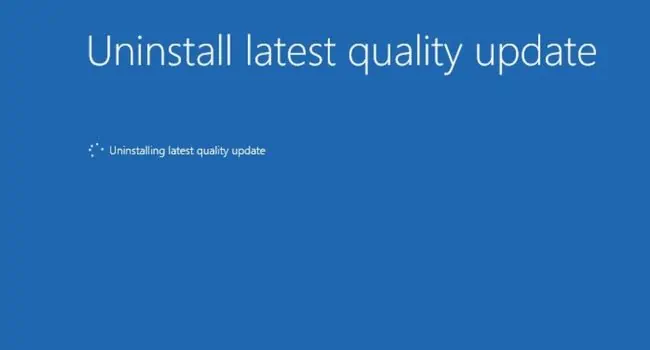
- Wait for several minutes until the update will be restored.

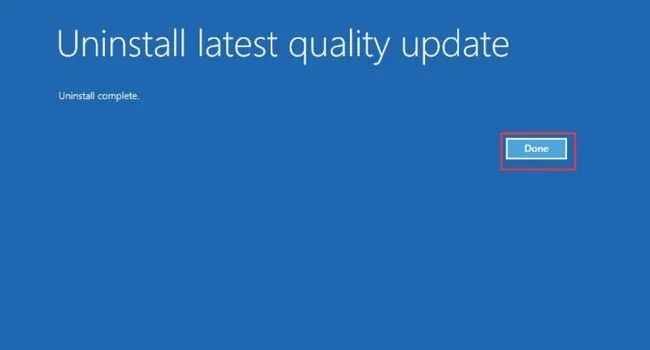
- Press the Done button once it’s completed.

- Now, you’ll be navigated to the Choose an option window. Here, select Continue and see if your operating system successfully boots up.
Latest Feature Update
Note: Mircosoft removes the feature updates after 10 days. So, you’ll only be able to rollback this update within the time limit.
- From the Uninstall Windows Update screen, pick Uninstall latest feature update.

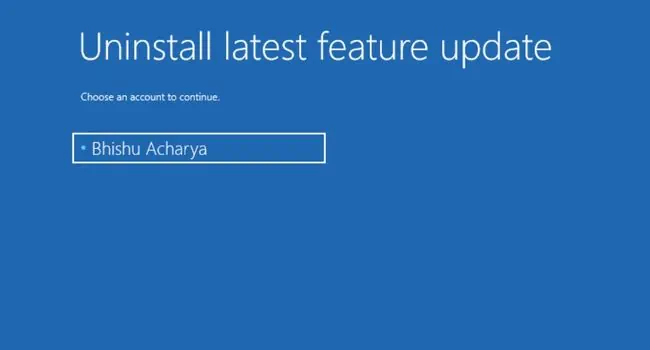
- Choose your account and enter credentials as done earlier.

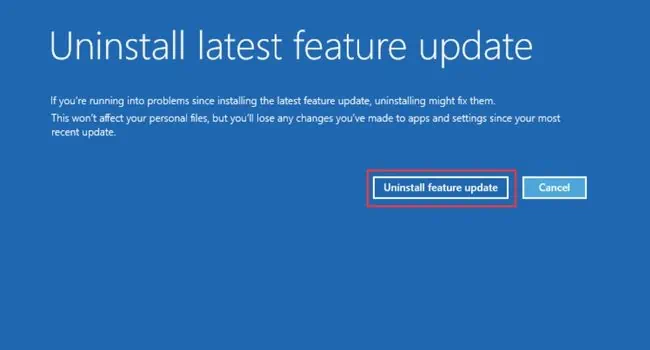
- Next, press the Uninstall feature update button to continue.

- Wait until the feature update is uninstalled.
- In case you encounter an error here, Windows recommends resetting your PC. But before that, we recommend trying out the other solutions below.
Perform System Restore
Another way to revert your computer from failed or corrupted updates is to use the Windows System Restore feature. Usually, an automatic restore point is created right before you run any type of upgrade on the system. So, you can revert your system to the state where you never experienced a boot loop.
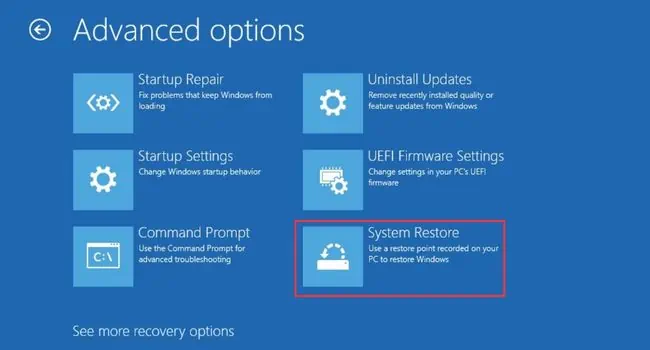
- In the Windows RE, go to Troubleshoot > Advanced options > System Restore.

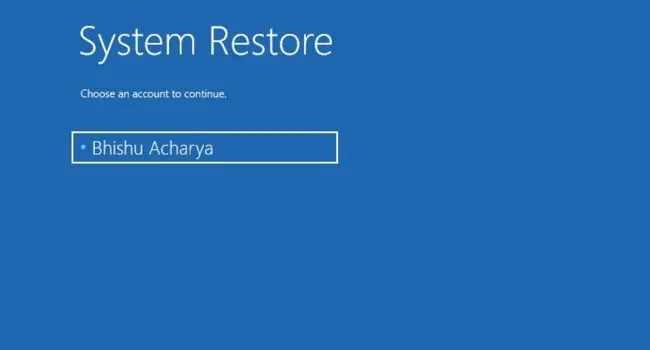
- Wait until you’re in the System Restore screen where you can select your account.

- Enter your password and hit Enter.
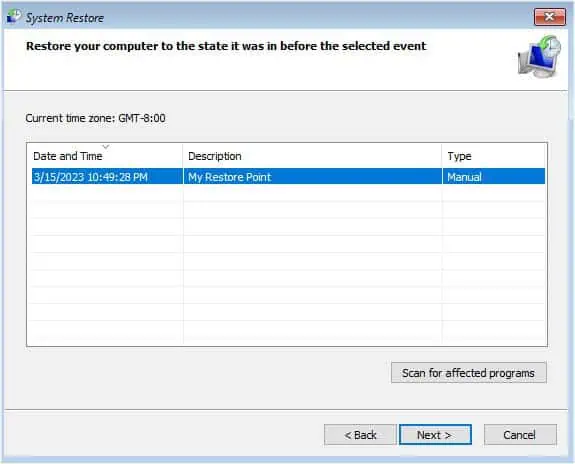
- Once the System Restore dialogue box pops up, press Next to continue.

- Then, select your restore point and click Next.

- In the end, hit the Finish button to confirm your restore point.
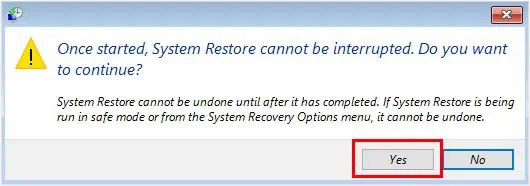
- Tap Yes in the confirmation prompt.

- Now, wait for the system to get restored. This may take a few minutes.

- Click on the Restart button and wait for Windows to boot up.

Additional Tip: After restoring Windows to its working condition or uninstalling the last update, we recommend turning off automatic updates. This prevents the corrupted update file to get installed on your computer and triggering the same problem. Instead, you may report the problem to Microsoft and wait for them to release a security update.
Change Boot Settings in BIOS
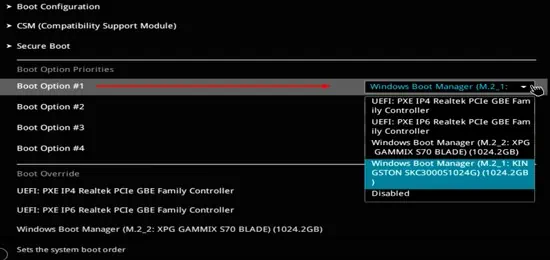
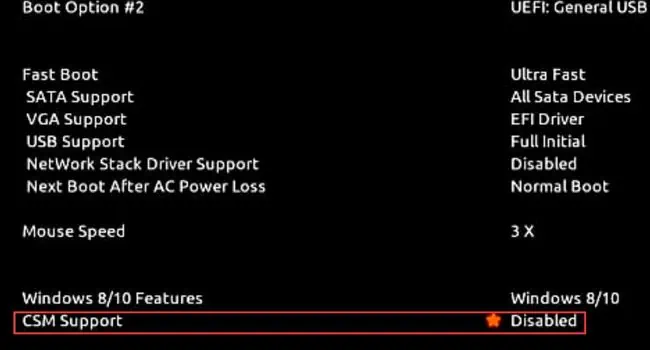
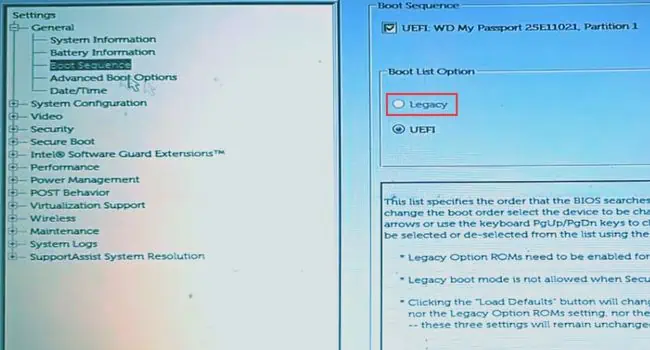
If your system doesn’t support UEFI, it’s a good idea to enable the CSM feature that adds compatibility. Likewise, some systems require manual configuration of boot priority after installing Windows. Otherwise, you won’t be able to boot at all. Here are some of the things you can try in BIOS to see if they can help fix the boot loop:
- First, force restart your computer and press the boot key multiple times to get into BIOS.
- Navigate to Boot Order settings.
- Then, ensure that Boot Option #1 is correctly configured. For example, if it’s the first time you’re booting after installing Windows from a media drive, select the Windows Boot Manager.

- Save and exit from BIOS and your computer should boot into Windows.
- In case you’re still experiencing the boot loop problem, get into the BIOS interface again. This time, try enabling CSM Support (if available) to add MBR compatibility to your system.

- Some users even fixed the issue by enabling the Legacy Boot option. If this is available on yours, do enable it and check for the result.

Reseat Components
While Windows registry and system file corruption are common causes of boot loops, hardware failures are also equally responsible. But before getting into replacing the components, it’s a good idea to reseat your RAM, hard drive, and graphics card.
On Desktop
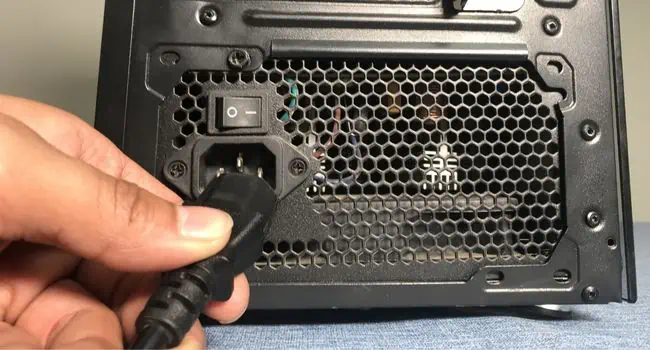
- Shut down your computer and turn off the PSU. We recommend removing the power adapter too.

- Then, press the power button for at least 10 seconds to discharge the remaining capacitors.

- Now, unscrew the PC casing and carefully remove it.

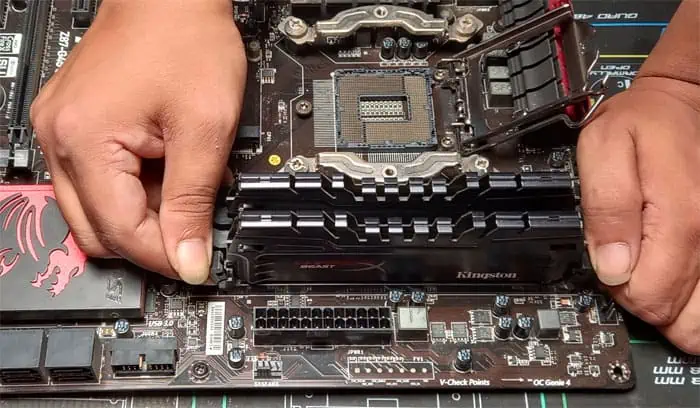
- Navigate to the RAM slot and slide both locks outwards.

- The RAM stick should pop out. Carefully pull it out of the PC.
- Repeat the process if you have multiple RAMs.
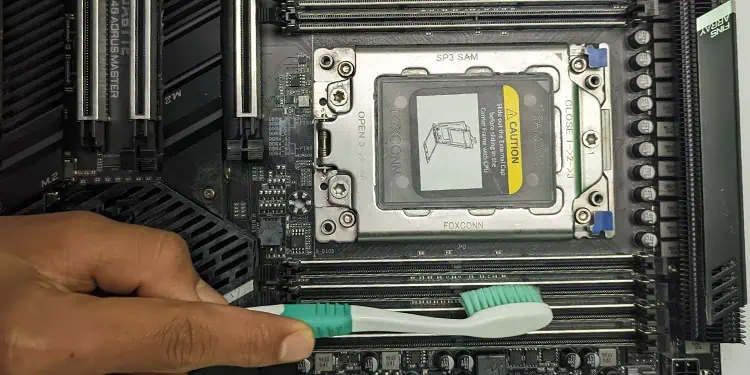
- Now, clean the slots and RAM stick(s) using a soft-bristle toothbrush (slightly dipped in Isopropyl Alcohol).

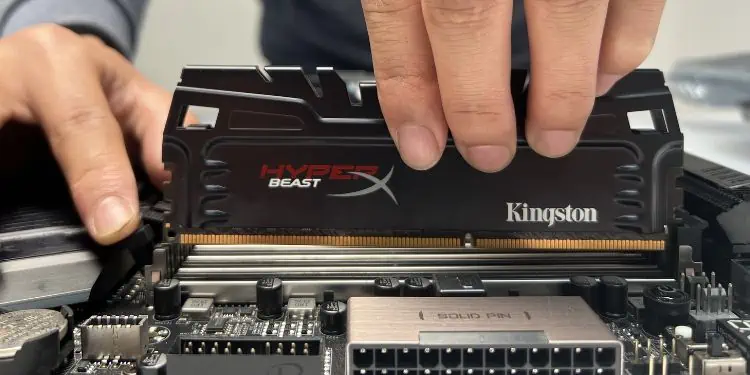
- Reseat the memory modules in the same slots as before. Note that you need to place them in alternate slots (if you have two RAM sticks). If you’re confused regarding this, check the motherboard manual.

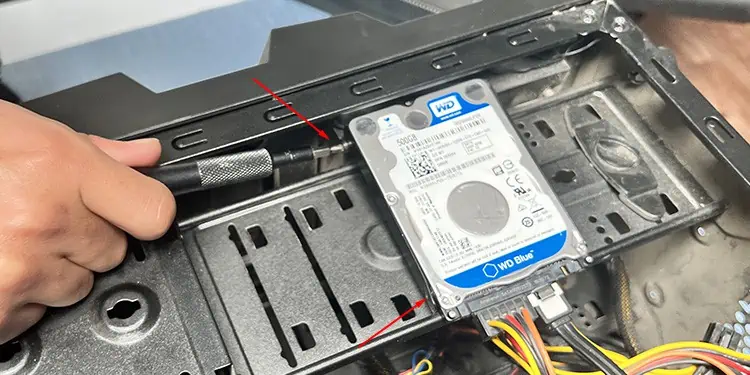
- While you’re at it, ensure the HDD or SSD is also properly inserted into its slot.
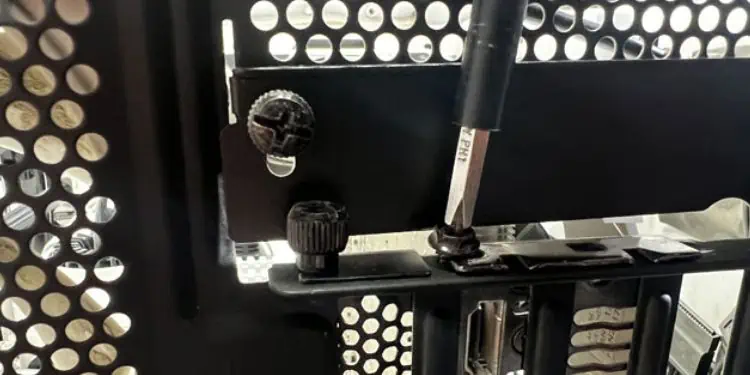
- You may untighten the screws that hold your storage drive in place and carefully remove it from its section.

- Next. clean the drive and the slots ensuring no debris is stuck inside.
- Then, reseat the component properly.
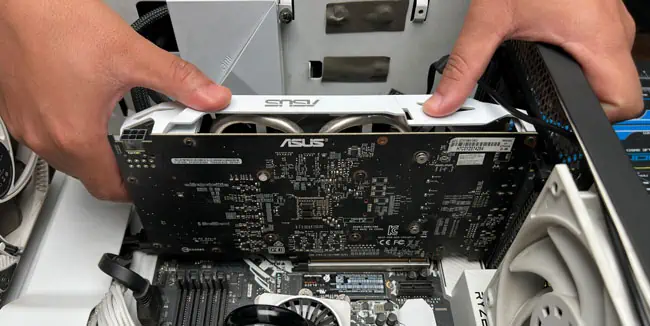
- Also, you can take the dedicated graphics card out of the PCIe slot. While you’re doing this, also unplug the cables attached to the PSU.

- Now, clean the GPU and the PCIe slot. Also, check for loose or broken connectors.
- Then, reseat the graphics card in its PCIe slot and also ensure the PSU cable(s) are securely inserted.

- Close the chassis and tighten all the screws.
- Finally, start your desktop computer and check if the boot loop issue is now resolved.
On Laptop
- First, properly shut down the notebook computer.
- Remove the external battery (if available).

- Then, discharge the remaining capacitors by pressing the power button for at least 10 seconds.
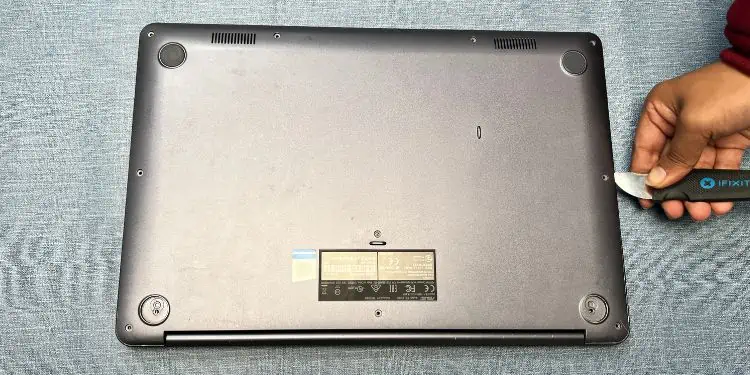
- Now, pry out the laptop’s bottom panel.

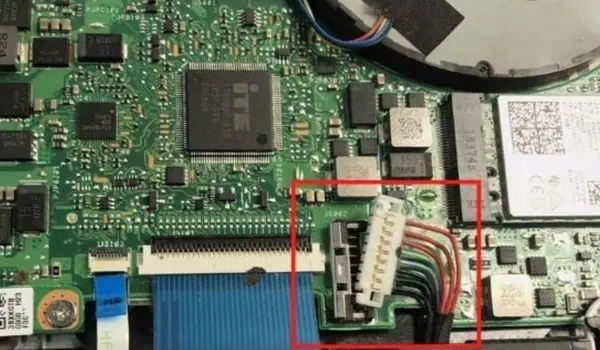
- Disconnect the internal battery connection (if available).

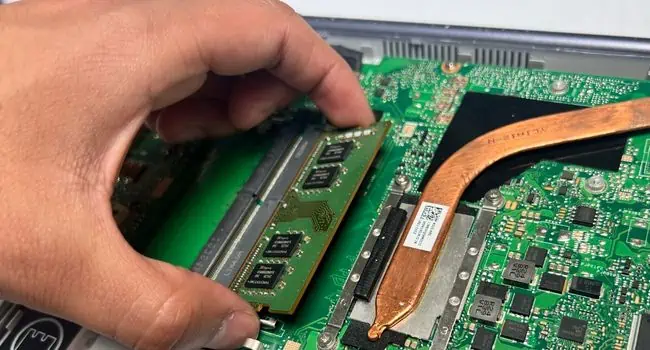
- Next, pull the two clips that hold the memory stick in place. This should pop it out of its slot. Pull it out carefully.

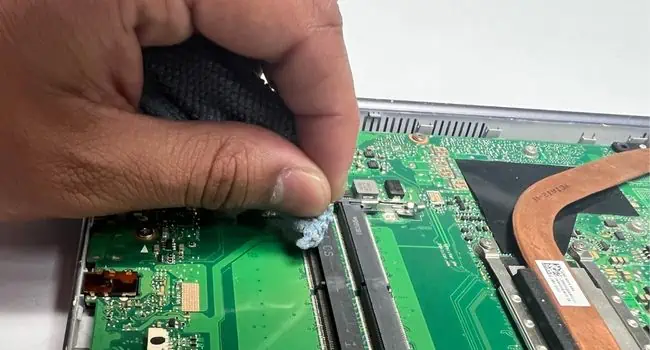
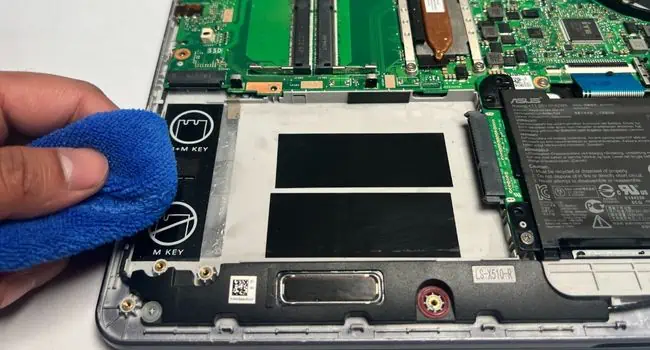
- Then, clean both the slot and the RAM stick(s). You make use of a soft-bristle brush or even a microfiber cloth, whichever is available.

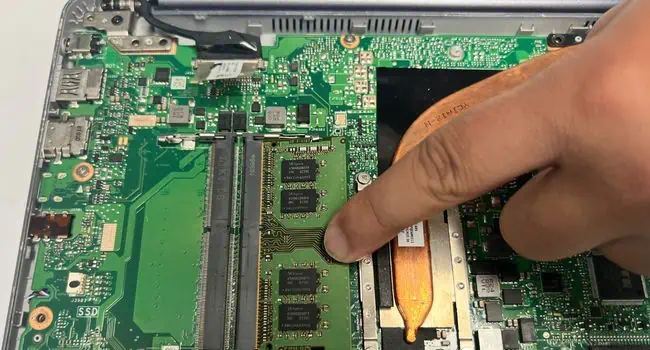
- Now, reseat the memory module and push it backward. You should hear a click sound confirming it has been seated properly.

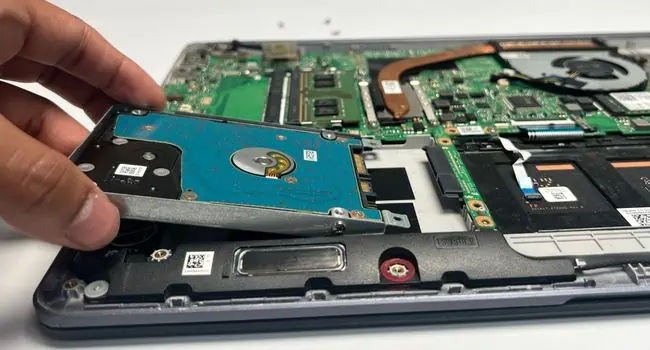
- Navigate to the HDD/SSD section and unscrew the areas to take the drive out.

- Clean the slot and the entire section before reinserting the storage drive.

- Lastly, close the bottom panel and start your laptop.
Reset and Update BIOS
Since your motherboard’s BIOS firmware is responsible for providing necessary information during the boot process, it can cause an infinite loop problem if the settings get corrupted.
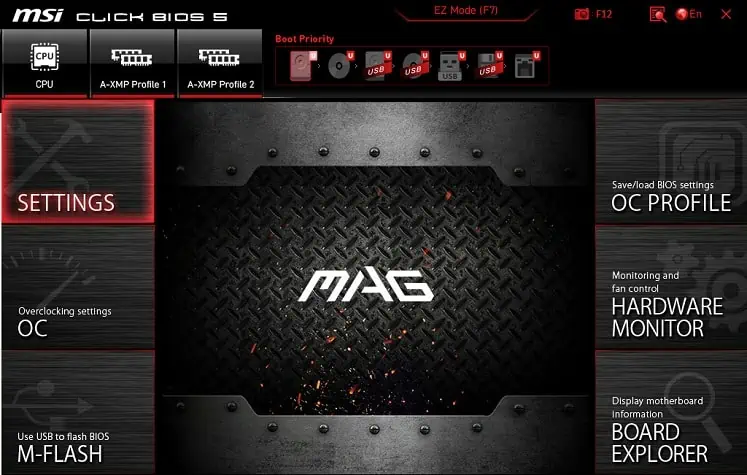
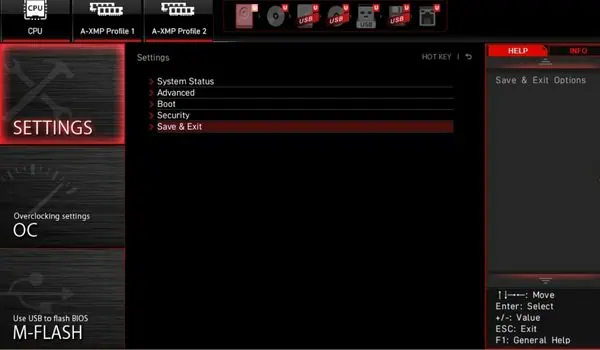
If none of the aforementioned solutions helped you, try resetting the BIOS to see if this can fix it. Here’s a quick demonstration of how to do it on an MSI motherboard:
- Open BIOS Interface as discussed above.
- Next, navigate to Settings.

- Here, pick Save and Exit.

- Then, choose Restore Defaults.

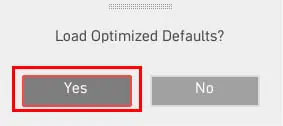
- In the confirmation prompt, click Yes to reset your BIOS.

Flashing a new BIOS keeps the operating system compatible with the hardware components. If you were facing the boot loop issue due to incompatibility, it’s a good idea to update the motherboard’s BIOS firmware:
- Open another PC or laptop and download the latest BIOS update file for your primary device.
- Unzip and transfer the content to a flash drive (with at least 8 GB free space and formatted in FAT32).
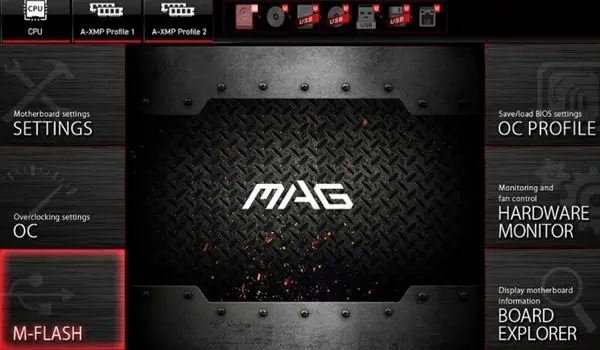
- In your primary computer, get into BIOS and open M-Flash.

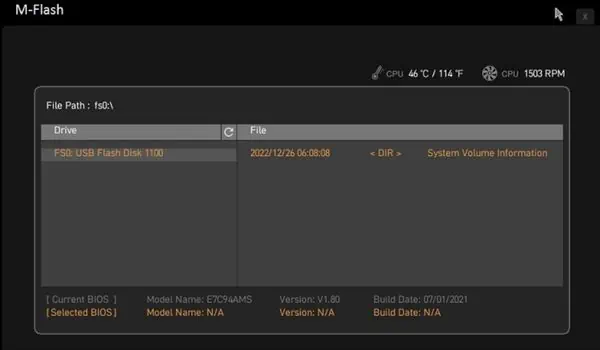
- Insert the flash drive and select the BIOS update file.

- Hit Yes to start the installation and wait until your BIOS gets updated. Once it’s completed, your operating should boot up.
Additional Tip: If your Windows is experiencing a boot loop after a BIOS upgrade, you need to consider flashing an older version.
Factory Reset Your Computer
If you’re still experiencing the same problem, it’s time to reset your PC to factory defaults. This will erase conflicting drivers and third-party applications which could be causing the boot loop.
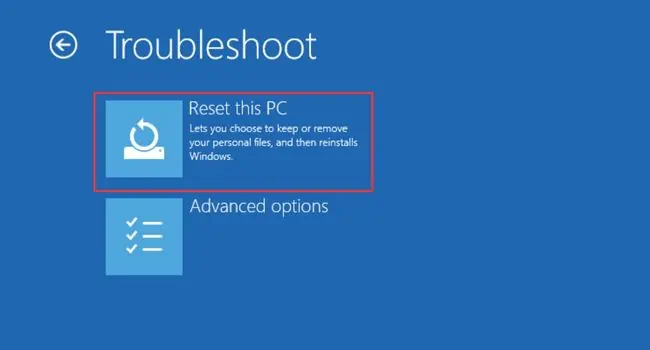
- Get to the Windows Recovery Environment and select Troubleshoot.
- In the next screen, pick Reset this PC.

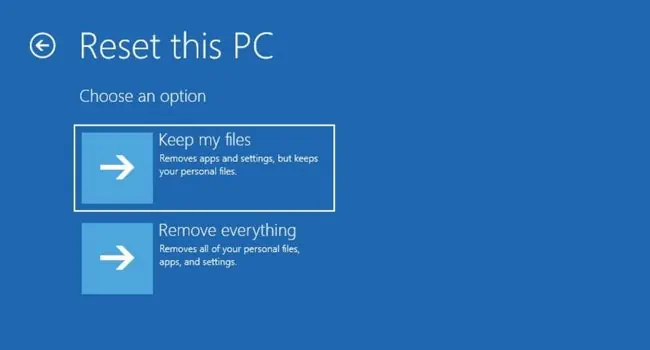
- Then, choose Keep my files. You may choose Remove Everything if you’re going to factory reset.

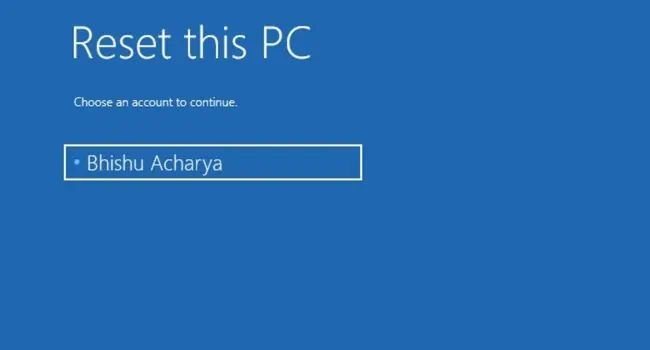
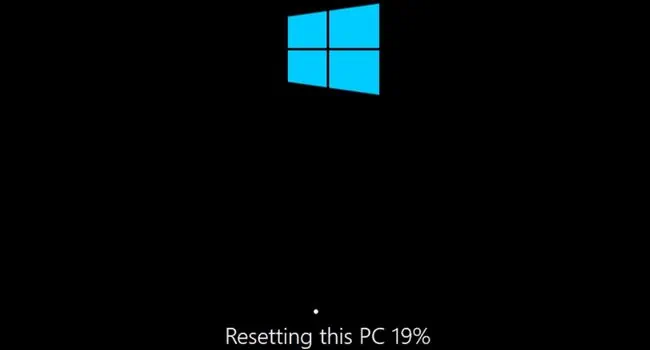
- Wait until Reset this PC screen pops up. Here, select your account and enter your credentials to continue.

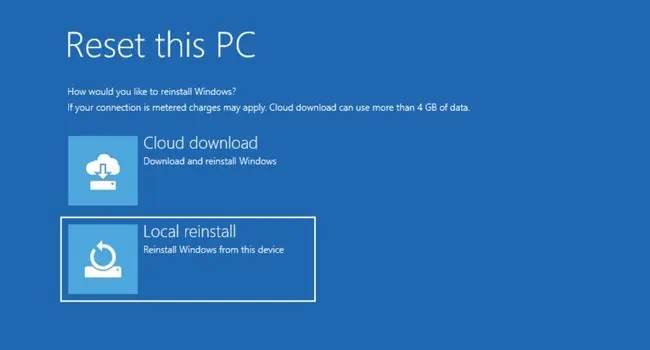
- Next, pick Local reinstall.

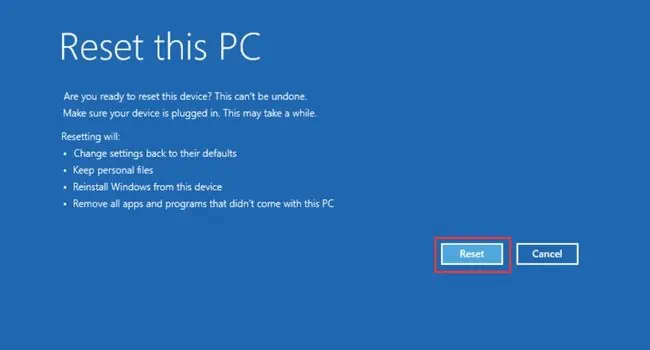
- Again, wait until things get ready, and on the new screen, tap the Reset button.

- Finally, wait until your PC gets reset.

Perform Clean Installation
Unlike factory resetting, clean installation will erase everything from the hard disk, reinstall the operating system, and start everything from scratch. Even if this solution doesn’t work, you can confirm that it’s a hardware fault.
Important: Before jumping into the steps below, ensure you have a bootable drive to install Windows. You can create one quite easily and if you’re having any issues regarding the same, here’s an article to create a bootable USB flash drive.
- Force restart your computer and hit the boot key to enter the BIOS interface.
- Change the boot priority to USB.
- Insert the Windows bootable USB flash drive and boot up.
- Once the Windows Setup screen pops up, select your language, time, currency format, and input method. Then, hit Next.

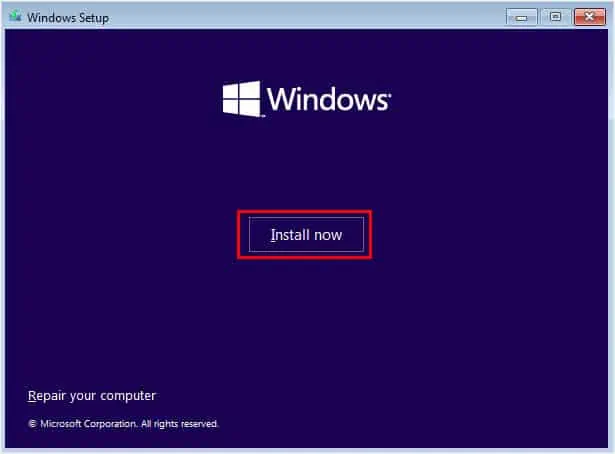
- Next, click the Install Now button.

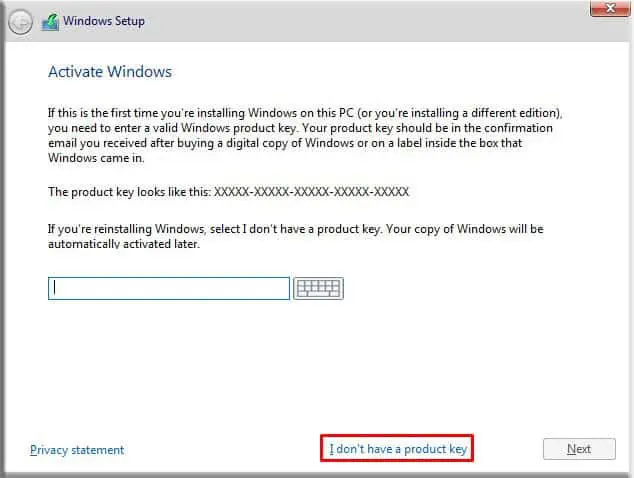
- In the next window, enter the product key. If you do not have one, pick I don’t have a product key from the bottom of the dialogue box.

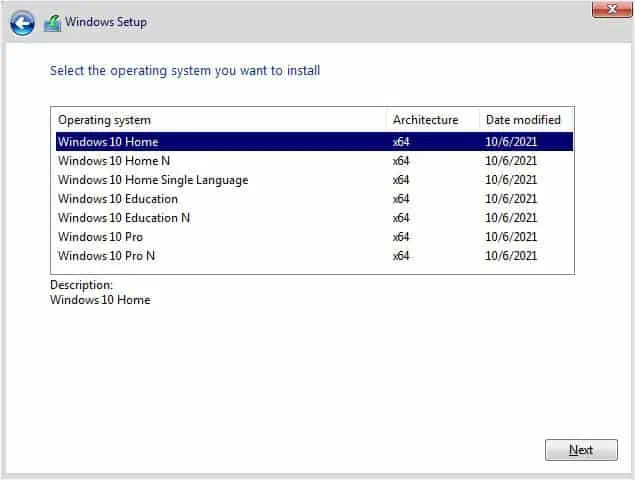
- Then, choose the Windows OS you’re going to install and hit Next.

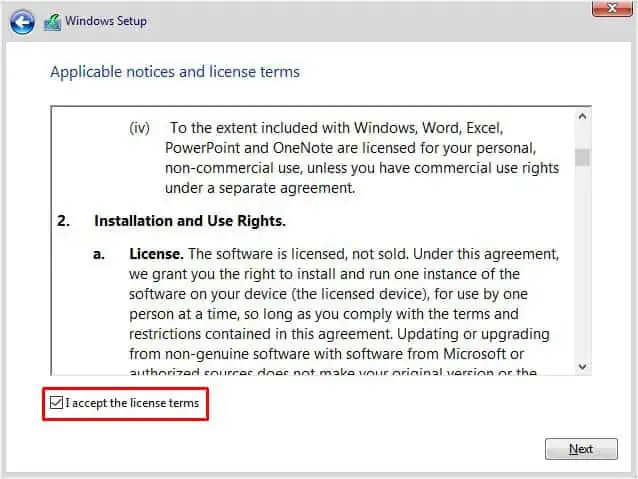
- Now, accept the license terms and press Next.

- Next, select Upgrade: Install Windows and keep files, settings, and applications if you simply wish to upgrade. Otherwise, you may proceed with custom installation, which is what we are going to pick here.

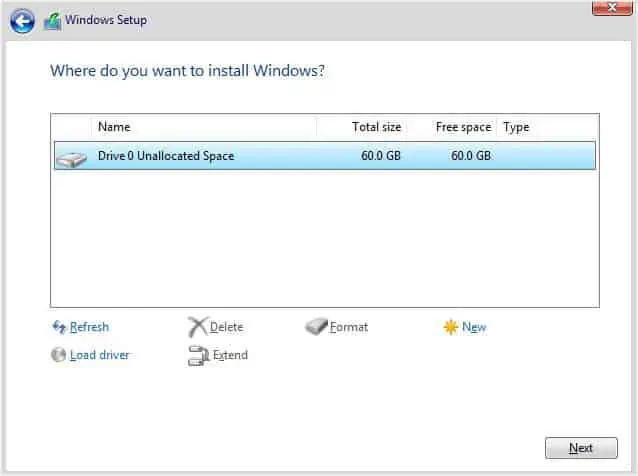
- Then, select the drive where you wish to install Windows and hit Next.

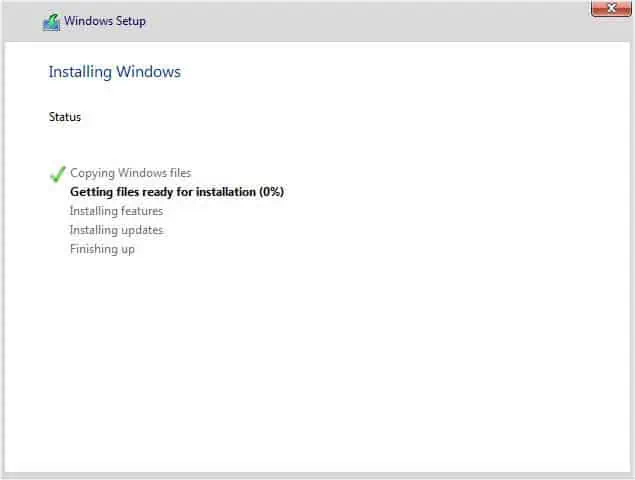
- Wait until Windows gets installed and follow the on-screen steps to finalize it.

Check and Replace Faulty Hardware
If you’re still experiencing the boot loop issue, it’s definitely a hardware component failure. Most users claim to have problems with their hard drives and memory.
Along with RAM and storage drive, some users have also fixed the boot loop issue by replacing graphics cards, power supplies, or motherboards. If nothing helped, try contacting the manufacturer or take your computer to the nearest service center.

