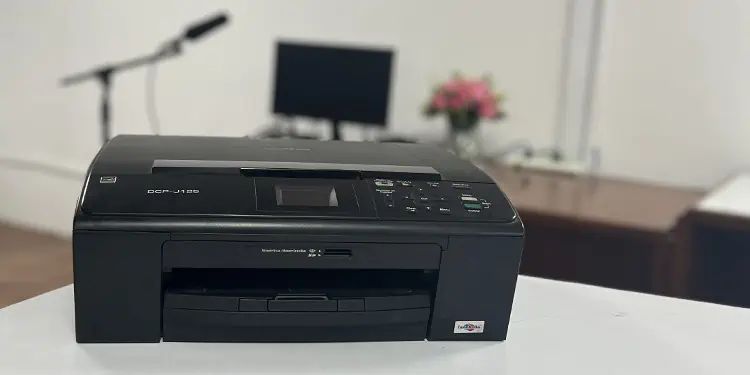
If your Brother printer is not printing, it is probably offline due to a connection issue. As a result, the printer can not communicate with your computer and eventually fails to print.
Similarly, your Brother printer can stop printing if the print queue is overloaded with print jobs. In such cases, you should wait till the pending jobs get completed before starting another print.
In addition, crashed spooler service or corrupted printer drivers may also prevent your printers from printing.
Check Printer Status
Whenever your Brother printer is not printing, you should first start by checking the printer’s connection status.
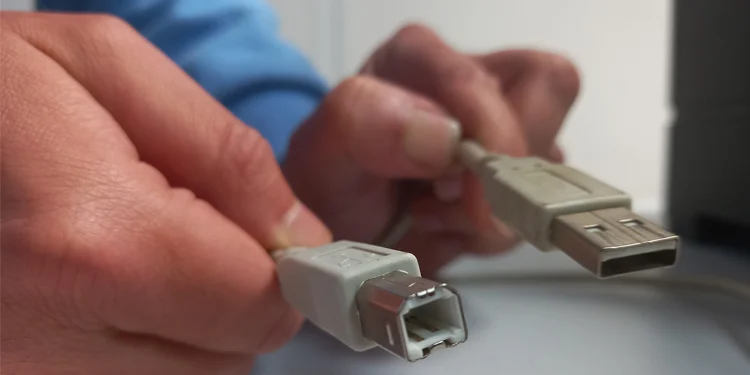
If you are using a USB or LAN cable to connect the printer, try changing the cables and ports. Be mindful not to use unnecessarily long cables. Brother recommends using cables less than 2 meters and creating a direct connection between the printer and computer rather than using USB hubs.
Similarly, reconnect your Brother printer to Wi-Fi if you are using it in wireless mode. Verify the signal strength of your Wi-Fi connection and make sure nothing is interrupting the signal reception.
If you are on a dual-band router, connect your device and printer to the 2.4GHz band for better signal reception and stability.
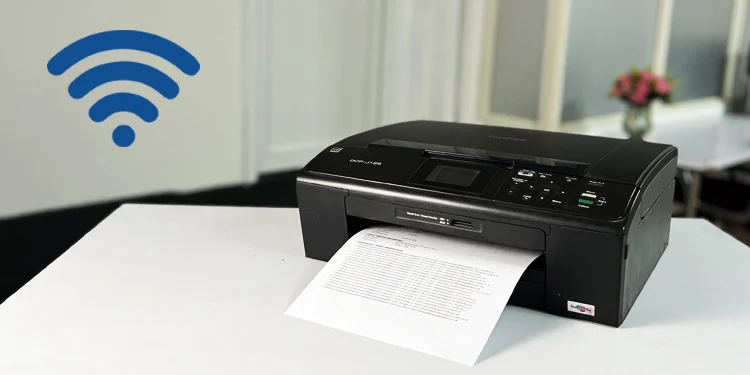
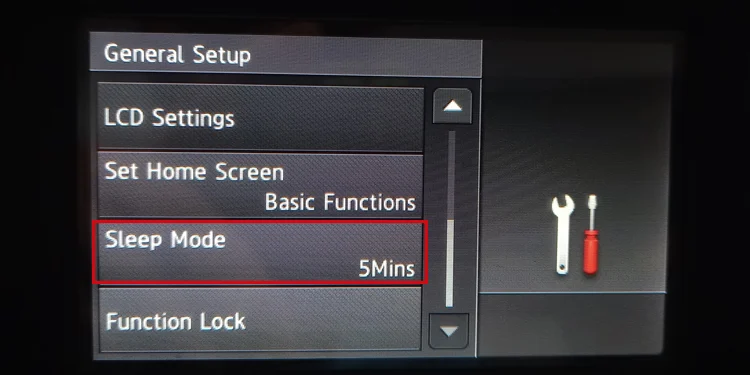
Moving further, check the printer’s status. Start by checking if the printer is in sleep mode. Press the power button on the printer to wake it from sleep mode.
If your printer frequently enters sleep mode and interrupts you from printing, you can go through this guide on how to turn off sleep mode on Brother printer.
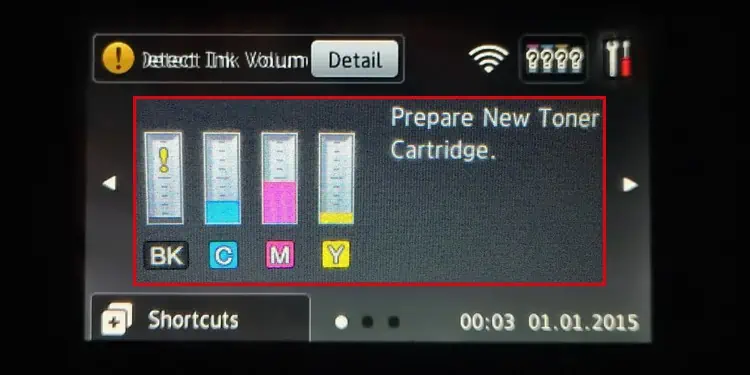
After that, check if any error messages are flashing on the printer’s screen. Printers normally throw an error if they are out of paper, encounter paper jam, or low on ink/toner levels. Make sure all these factors are not preventing you from printing.
Reset Printing Services
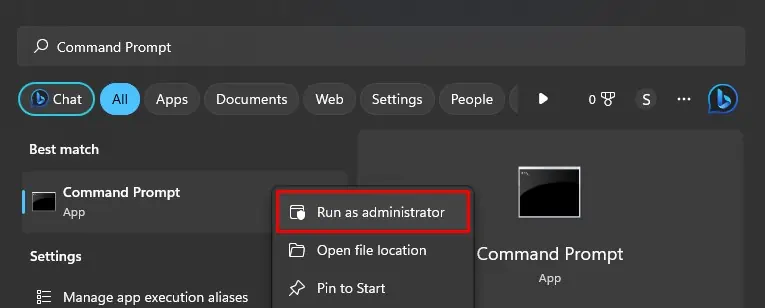
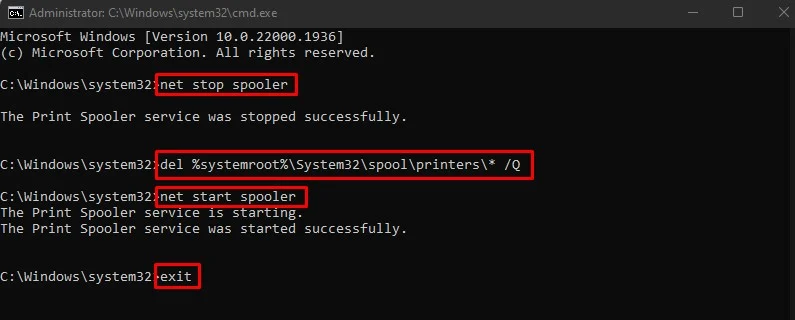
After you verify everything is fine with the printer status, I suggest you reset all the printing services on your Windows PC. It includes clearing the stuck print jobs in the queue and restarting the spooler service.
- Search Command Prompt on your computer, right-click it and tap Run as administrator.

- Click Yes.
- While you are at it, copy-paste these commands and hit Enter after each of them.
net stop spoolerdel %systemroot%\System32\spool\printers\* /Qnet start spoolerexit
Reinstall Drivers
Your Brother printer may fail to work if you are using an incompatible printer driver. So first, go to Brother’s official website and download drivers for your printer. Once you install the drivers, try printing again.
If you already have drivers installed on your PC, I recommend you reinstall it. Reinstalling will help fix the corrupted printer drivers. While you are at it you will also fix port mismatch issues.
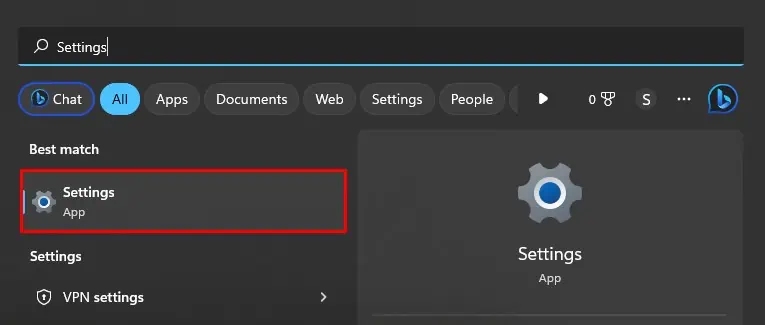
- Open Windows Settings.

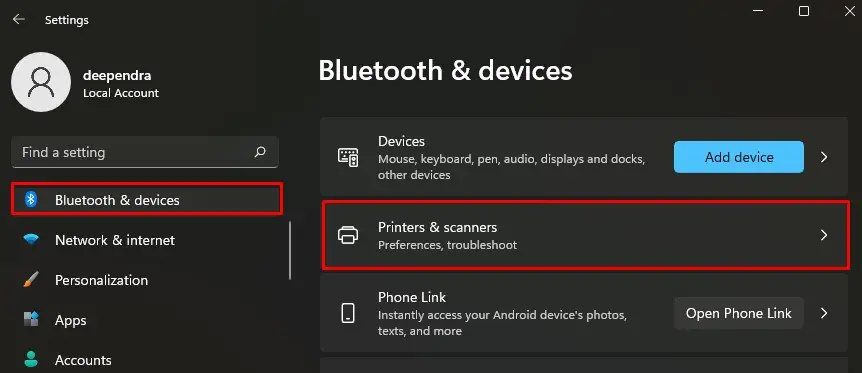
- Click the Bluetooth & devices menu first. Then click Printers & scanners.

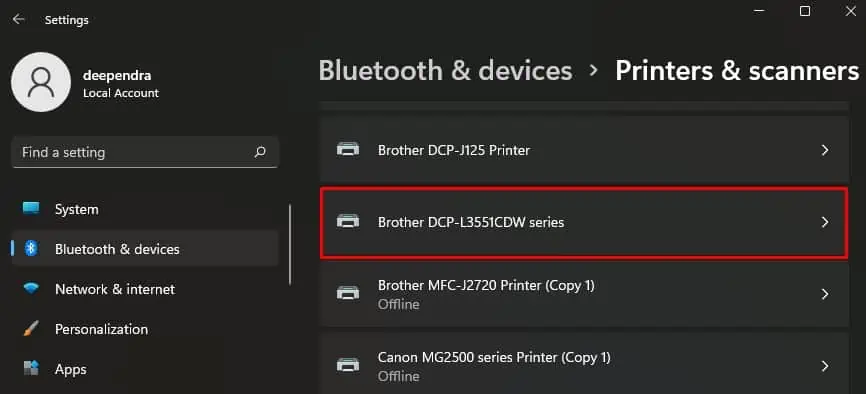
- Choose the problematic printer.

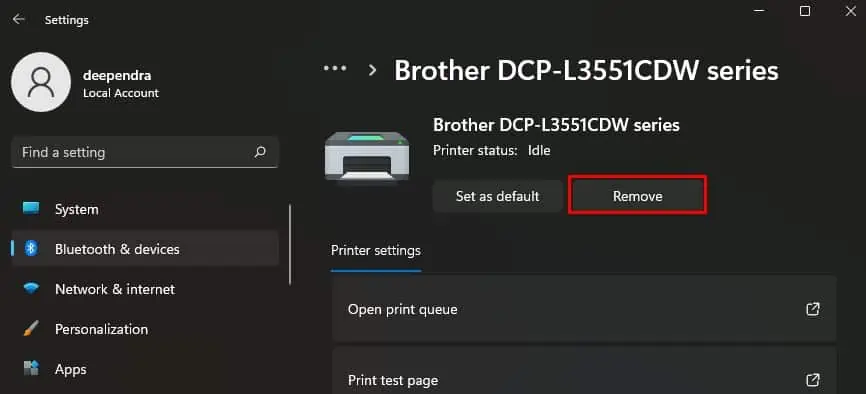
- Click Remove > Yes.

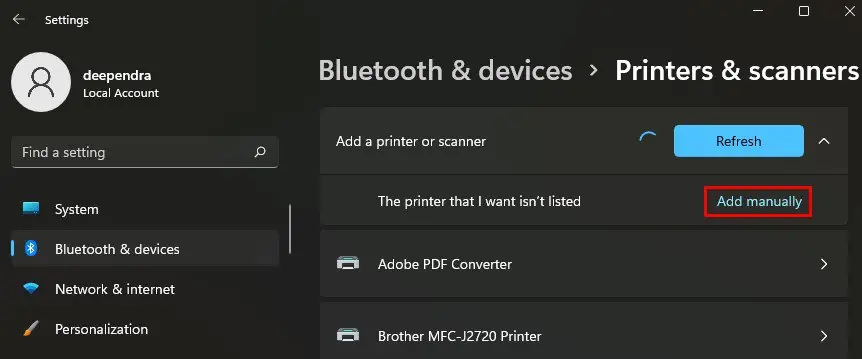
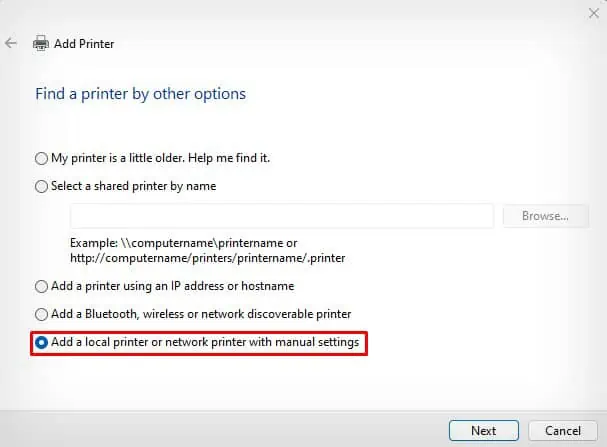
- Once the device is removed, click on the Add device button. Then tap Add manually.

- Check the box next to the highlighted option > click Next.

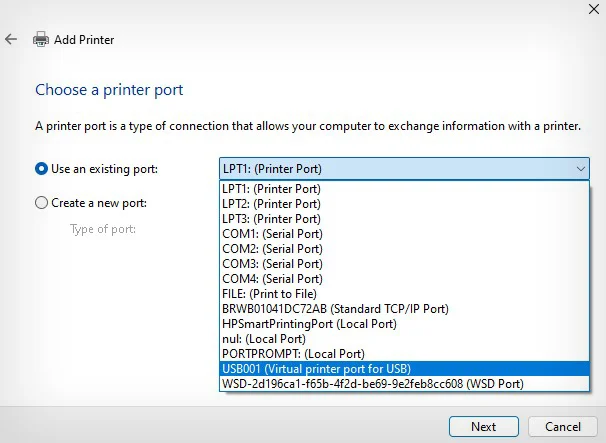
- Choose the correct port used by your printer. I have connected my Brother printer using USB. So, I will be selecting USB001.

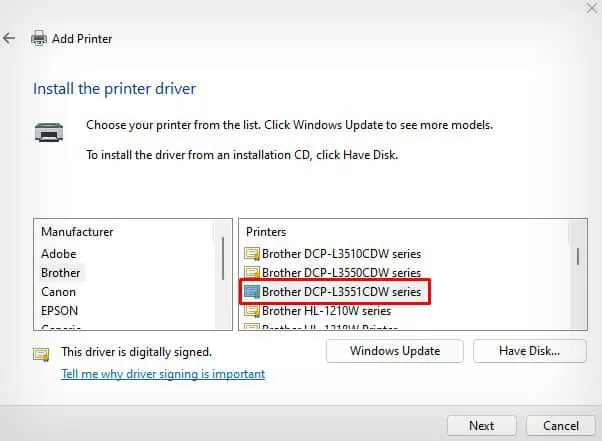
- Click over the printer driver file > Next.

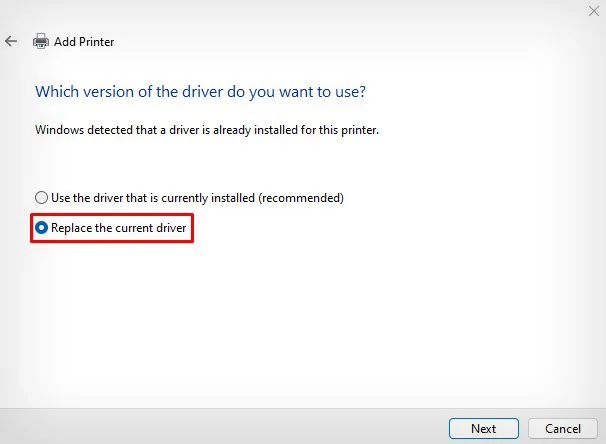
- Check this option > Next. It will reinstall the driver.

Use Static IP
By default, every device on a network uses DHCP IP to connect to the router. However, IP assigned by the DHCP server expires after a certain time period (lease time) and after the expiration, the router assigns a new DHCP IP to the printer.
As such, the computer can not find the printer at the IP used previously to add the printer to the computer.
In such cases, your Brother printer fails to receive the print command from the computer. So I recommend you to use static IP with the printer instead.
- First, connect your Brother printer to a Wi-Fi network.
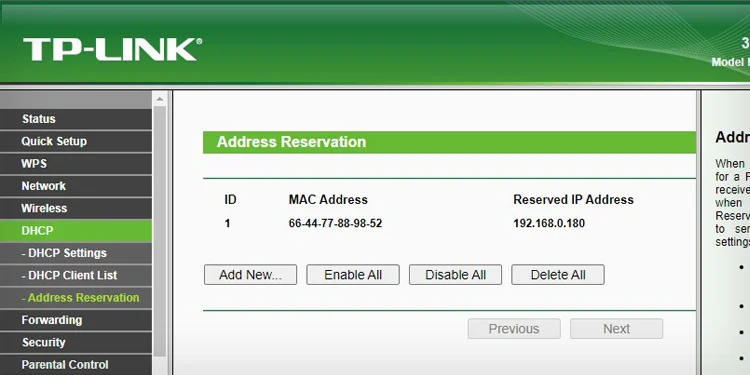
- Then open the router portal and search for a term that reads like DHCP Address Reservation and open it. The term may differ depending on your router manufacturer. Please consult the manufacturer’s website or the printer’s user manual to know more about it.

- Once you are at it, reserve an IP for your printer.
- Now open your computer’s Settings.

- Tap Bluetooth & devices > Printers & scanners.

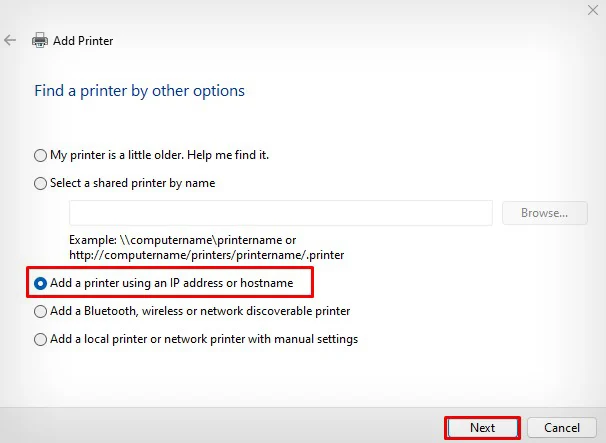
- Click on the Add device > Add manually button respectively.

- Check the highlighted option.

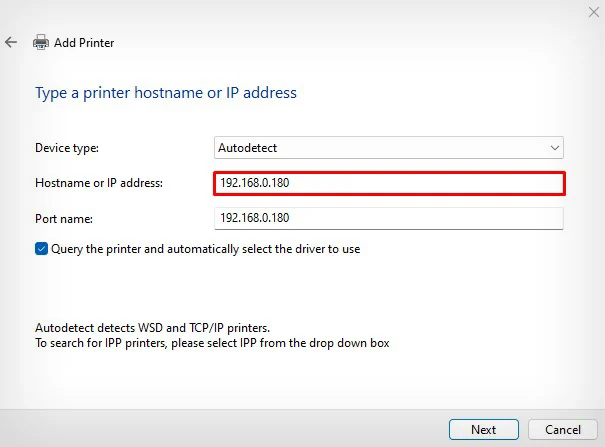
- Type the IP address > Next.

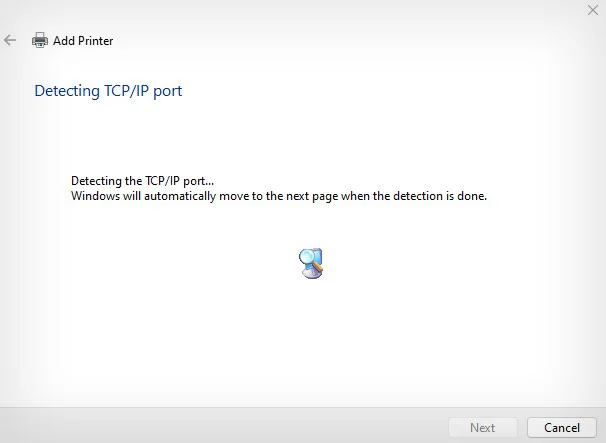
- Wait till the printer gets added to your PC.


