Deleting a file is one of the most basic tasks we perform on our computers. However, when a file refuses to delete, this simple task can become a chore. This is a common issue that occurs when the file is active in the system processes or is used by another program.
Generally, closing the file or its background processes solves the issue. If this does not resolve the problem, you have other options for removing the files.
Why Can’t I Delete File on Windows?
- The file is affected by viruses or malware
- Disk Corruption or failure
- Not enough privilege to delete the file
- File has a read-only attribute
How to Fix Files Not Deleting on Windows?
Usually, minor bugs in the operating system can prevent you from deleting a file. Such bugs can get fixed with a system restart. Also, before you begin with the other fixes for this problem, try to permanently delete the file by bypassing the recycle bin. To do this, simply select the file and press the Shift + Del key.
If the problem persists, try these fixes to delete the files.
End the Background Process
If the files are opened in the background, they resist getting deleted. These files remain in a locked state while they are in use. To resolve this issue, end the background processes related to the file and then try to delete it.
Another possibility is that the file that refuses to be deleted is being used by another program. While attempting to delete the file, users may receive an error message stating, “The action can’t be completed because the file is opened in another program”. Deleting the file is only possible after closing the program that is using it.
- Press Windows Key + R, type
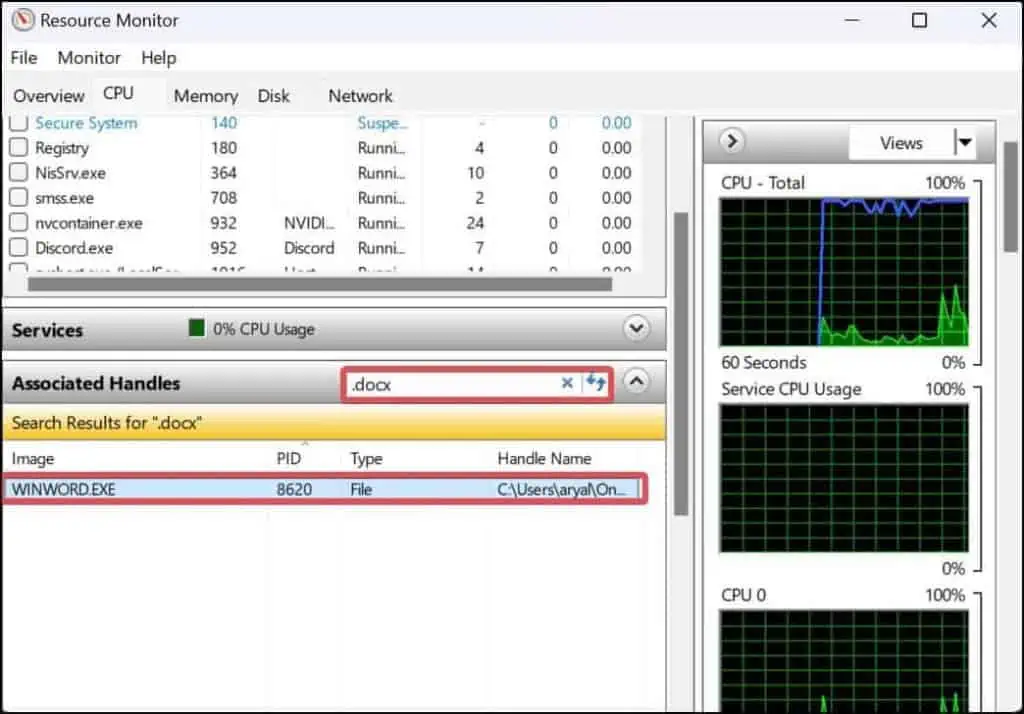
resmon, and hit enter to open Resource Monitor. - On the Associated Handles section, search for the extension of the file that you are willing to delete. This will give you the details of the program that is using the file.

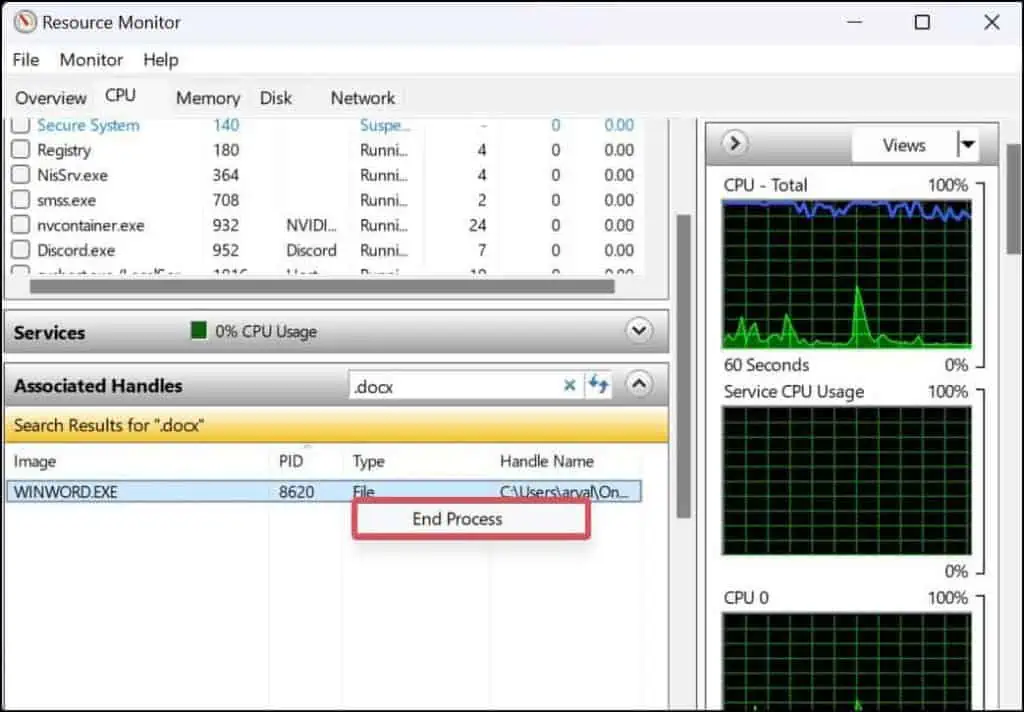
- You can terminate the file’s process by right-clicking it and then selecting End Process.

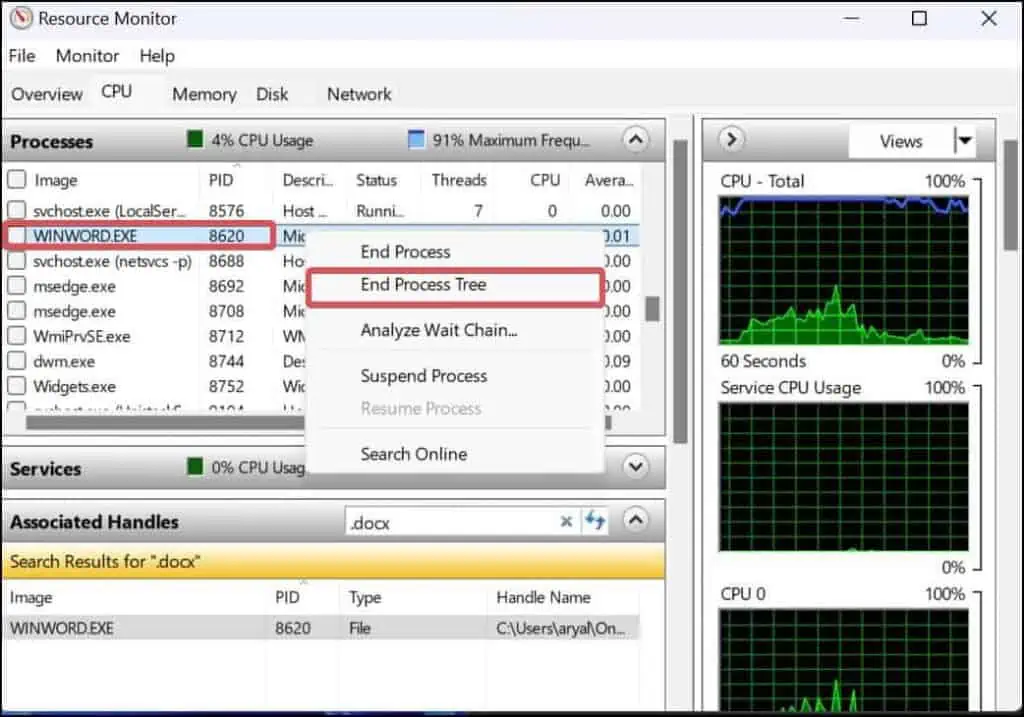
- Note the program’s process id (PID) and then search for its process in the Processes tab.
- If you find the program with the matching PID, right-click on its process and select End process tree.

The resource monitor terminates the application and its other processes using the file. Finally, you will be able to delete the file.
Change the File Attribute
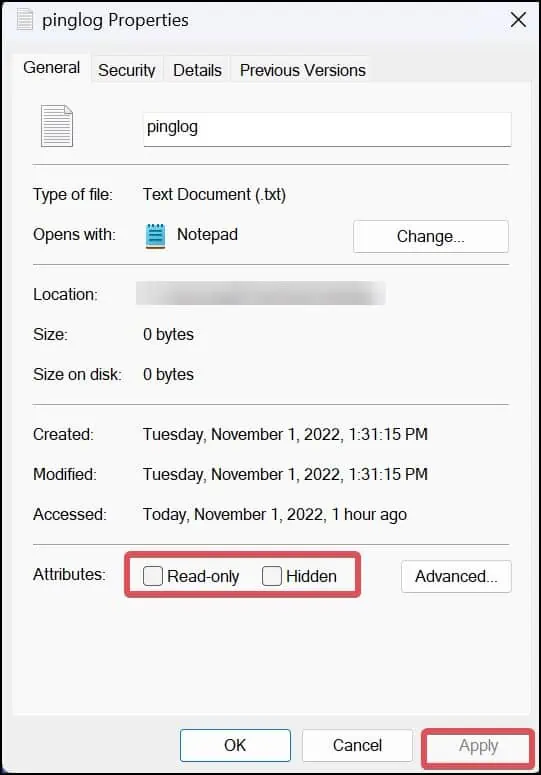
The files with Read-only attributes assigned to them will not grant you permission to edit, modify or delete it. You can revoke the read-only attribute assigned to the file and then delete it.
- Open File explorer and locate the file.
- Right-click on the file and select properties.

- On the Attributes section, if the Read-only option is enabled, click on it to uncheck it.

- Click on Apply to save the changes.
- Finally, try deleting the file.
Take Ownership of the File
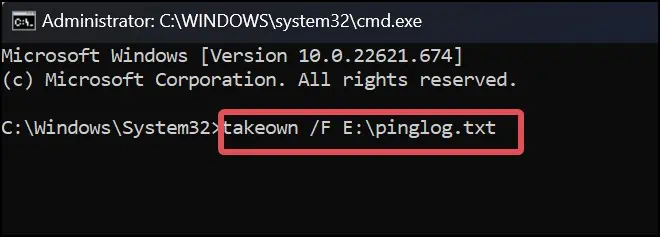
Having ownership over a file gives you the privilege of accessing and modifying the file. If you do not own the file, you will be unable to delete it. Using the takeown command, you can gain complete control of the file and easily delete it. Here’s how to put it to use.
- Press the Windows key + R to open up Run.
- Type
cmdand press Ctrl + Shift + Enter to open Elevated Command Prompt. - Now execute this command line with the directory of the desired file.
takeown /F <File Path of the Desired File>
For instance, here, we are trying to own the filepinglog.txtin the directoryE:\.takeown /F E:\pinglog.txt
- Now, try deleting the file. You can also do it from the Command prompt using this command line.
del /f <File Path of the Desired File>
Here’s how you can put this into use. We have tried deleting the filepinglog.txtin volumeE:\.del /f E:\pinglog.txt
Force Delete the File
Force deleting will put an end to the processes that are preventing you from deleting the file. You can use the del command to delete any file. Adding /f syntax to the command will order it to force delete the file.
- Press Windows Key + X and open the Terminal (Admin).
- Now, use this command line to delete the file.
del /f <File Path of the Desired File>
For instance, to delete a filepinglog.txtfrom the directoryE:\, we can use this command as below.del /f E:\pinglog.txt
Note: This command will permanently delete the file by bypassing the recycle bin. Recovering the file will be impossible after it is deleted.
There’s a similar command line in powershell which also can be used to force delete a file. This command can be used to delete the file with read-only attributes or hidden ones.
- Press Windows Key + R, type
powershell, and hit enter. - Now, execute this command.
Remove-Item <File Path of the Desired File>
Here is the use case of this command, where we are trying to delete a text file namedpinglog.txtwhich is located at theE:drive.Remove-Item E:\pinglog.txt -Force
Run CHKDSK Command
Files located in the bad sectors can be inaccessible or difficult to delete. Users can get a message with an error code 0x80070570 while attempting to delete such files. This error code indicates that the directory or file is corrupted. The chkdsk command is a great command-line utility that can diagnose and troubleshoot such logical errors in the drive.
- Press Windows Key + R to launch Run.
- Type
cmdand then press Ctrl + Shift + Enter to open the command prompt with administrative privileges. - Now, enter this command to run the check disk utility. Change the drive letter
C:to the respective volume where the file is located.CHKDSK C: /R
- This diagnostic tool will scan the drive after a system restart.
Perform Malware Scan
Malware or virus-affected files can be difficult to delete. Also, Malware can sometimes mimic a file or system process and give you a hard time getting rid of it. Therefore, preventing malware infection beforehand becomes crucial. For this purpose, you can use Windows Defender or any other Antivirus software and safeguard the system.
Manual scans with antivirus software are effective in protecting your files from these threats. Here’s how you can run manual scans using Windows Defender.
- Press Windows Key + R, type
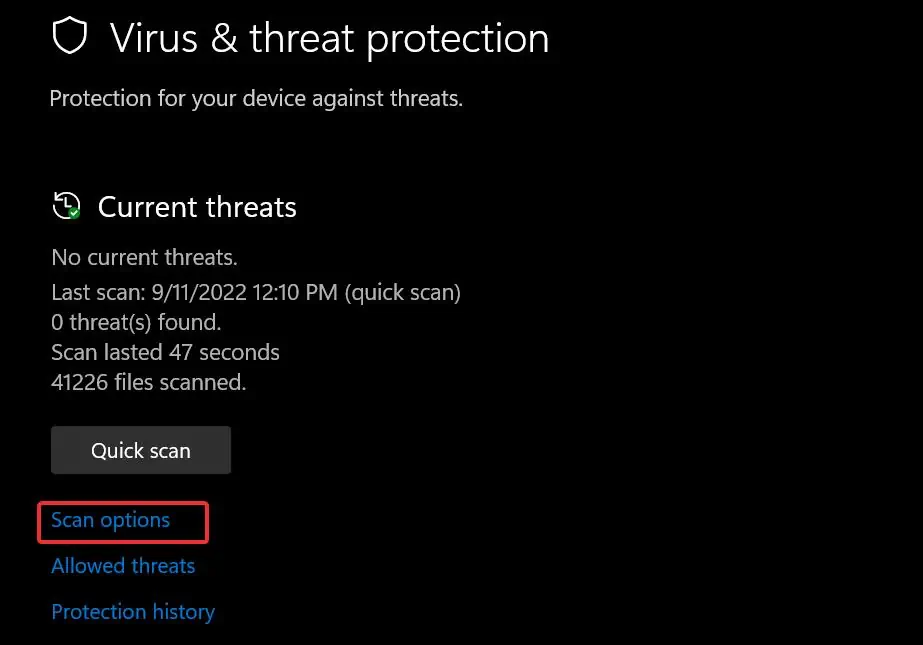
windowsdefender://threat/, and hit enter. - Go to Scan options.

- Choose the Full scan options and click on Scan now button. You can also choose to Custom scan files or folder directories.


